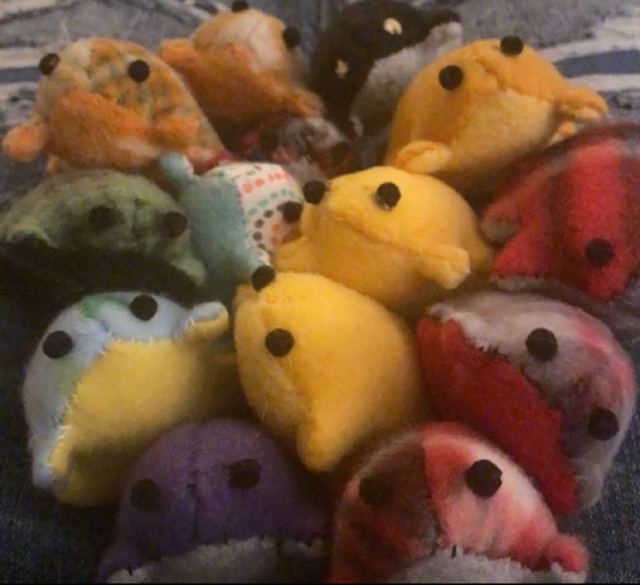
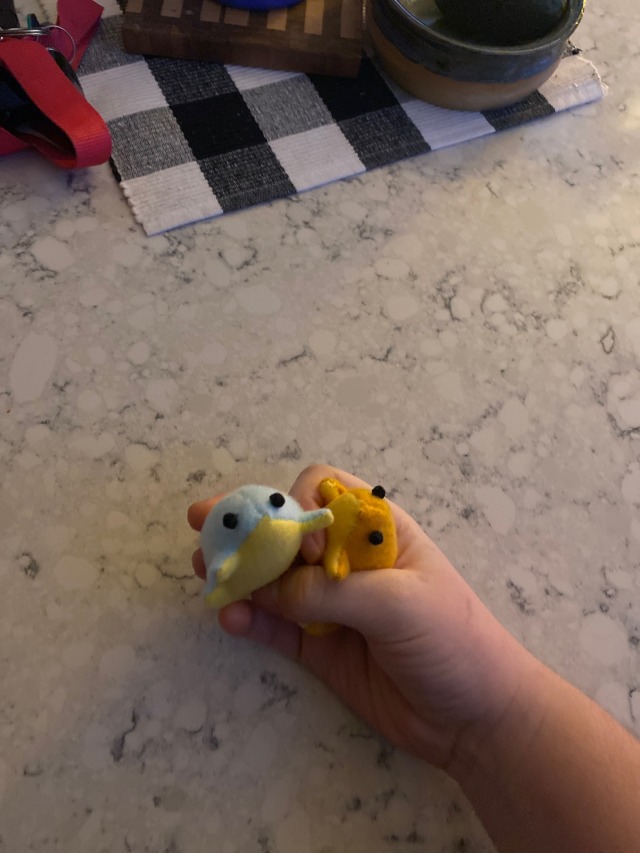
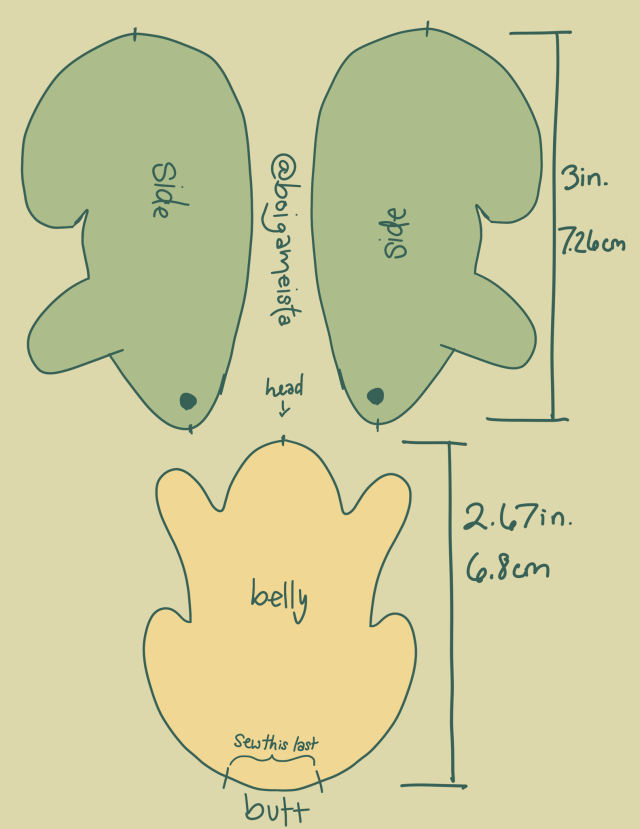
i dont think i posted these but here i made a little frog pattern to make tiny frog toys with my grandma
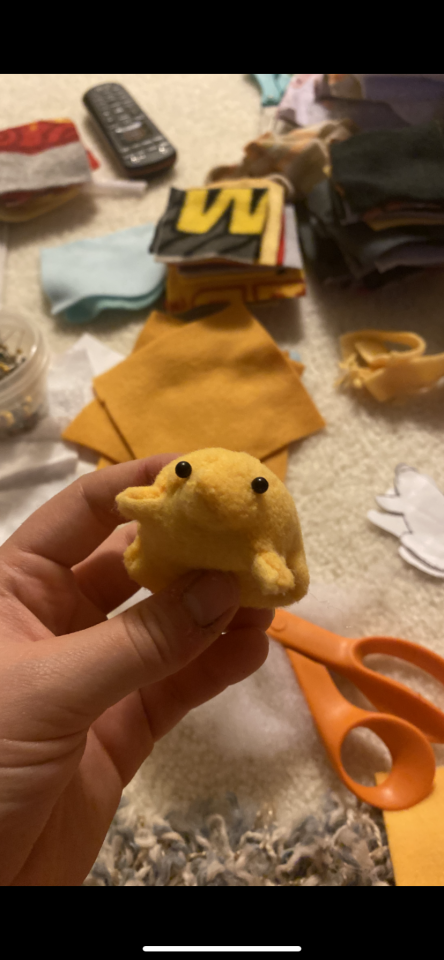
this is the first lil guy I made while still learning how i should sew it
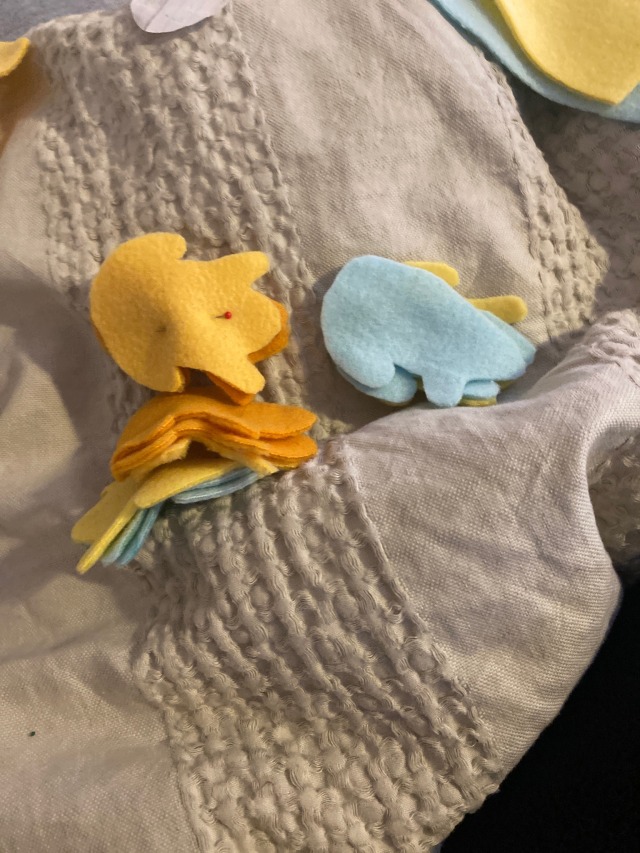
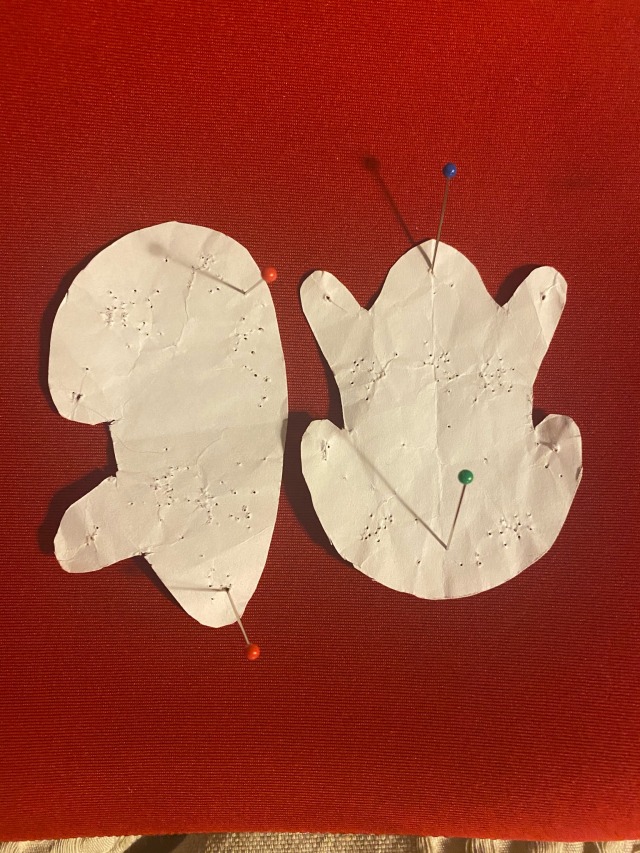
AAA ok so a lot of people have been asking for the pattern to this, tho I’ve been using just these two little papers to do the cut outs lol
i tried my best to translate it into digital so that people get a bit more accurate look at them. Tho bear with me I’ve never done an actual pattern design sheet before!
so basically my hope is that anyone could print these out to any size of their choosing and get the same result, but ive never tried anything larger than approx. 3 inches with these sooo idk if you try it tag me!
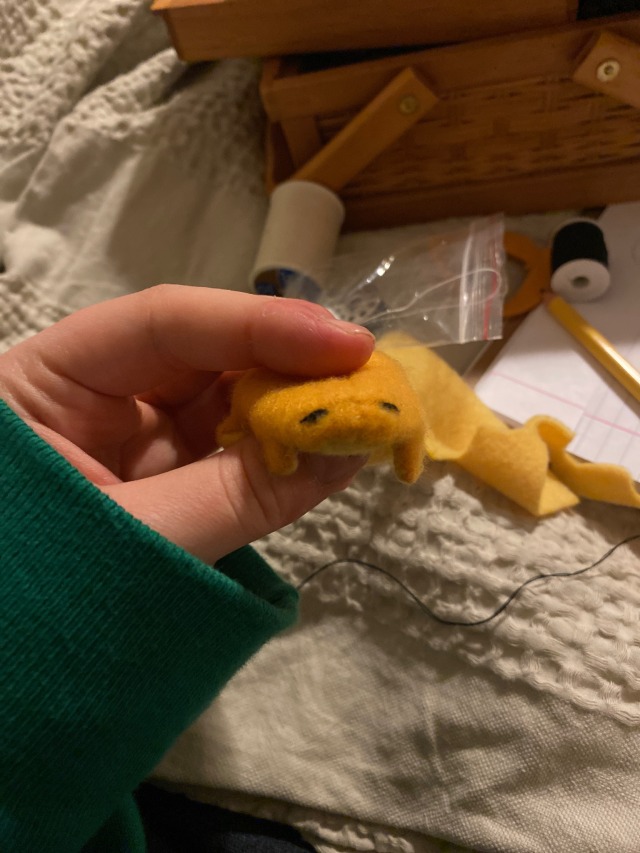
the goal is to sew the backs together to the lines at the tip of the head to the middle of the butt. then leaving a space along the belly piece near the butt end and sewing from one side of the butt including all the legs and the “mouth” to the other side with its legs to get back to the butt. if that makes sense
i usually pause sewing up the body once the head is fully sewn together,, usually after ive sewn both arms and ill yank it inside out where ill start sewing on the little poofball eyes so i know theyre in a good place, then resuming the body, and then pulling the whole thing inside out and pushing out the tips of the limbs with a skinny blunt object like a dull pencil until i can see the stitches. if you attempt this piece definitely make sure you stitch up the arm and leg crevices very well!!!!
then just stuff the lad and sew up his back end and its done :)
one suggestion for fabric is always try to use a stretchy soft fleecy fabric with these because its much easier if mistakes are made during sewing and to hold the ROUND shape better
Overall its a very good use of scraps if you’ve accumulated a lot and don’t know what to do with them
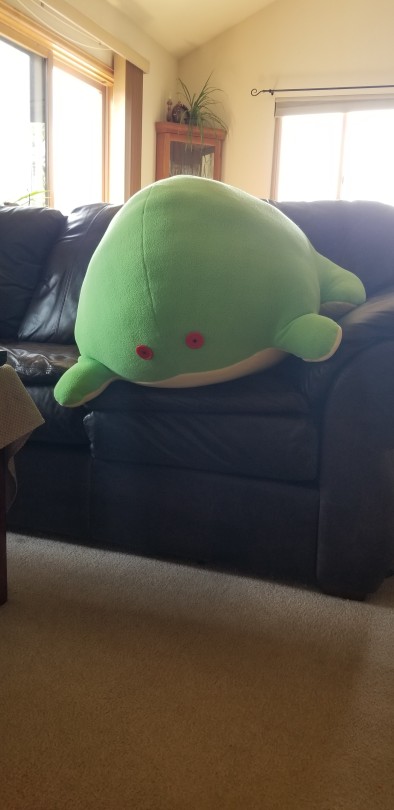
So I made a frog (huge)
I literally can’t I’m losing my mind over the sheer girth of this frog.
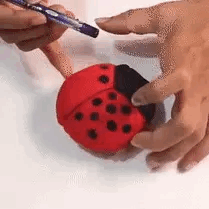
꒱ could we have a stimboard for a ladybug/marinette (miraculous) fictive with bugs, sewing, and the color red? tysm!!
꒱ Singlets can reblog but do not clown
꒱ DNI if you’re a pedophile/variants, proshippers, lgbt+phone, n*zi, trump supporter, ableist, racist, people who ship incest or pedophilic ships, or others in our dni
(Image source) [ID: four black and white photo’s of a person demonstrating how to wear a simple wrap top made out of a rectangle with a neckhole and straps at the sides.]
Easy vintage wrap top
This vintage wrap top design is an easy beginners project: you don’t need a pattern, you can customise it to your own size, and despite lacking stretch it doesn’t require any zippers or buttons.
The top is made out of woven fabric and consists of a rectanglein which a holefor the head is cut. Strapsare added to the short sides of the rectangle to tie the top around your body.
AssunDIYonYoutubealso has tutorials for two variations on this top: a rectangle shirt version and a butterfly shirtversion.
Given the simplicityof this top, it’s a neat way to use up old bed sheets and such.
Some examples:
(Image source 1) [ID: a person standing in a kitchen while wearing a gray wrap top with t-shirt-like sleeves and a round neckline.]
(Image source 2) [ID: a gray wrap top lying on a wooden floor. The top consists of a rectangle with a hole cut in the middle for the head. Two sets of straps, one thin and one thick, have been sewn to the sides of the rectangle.]
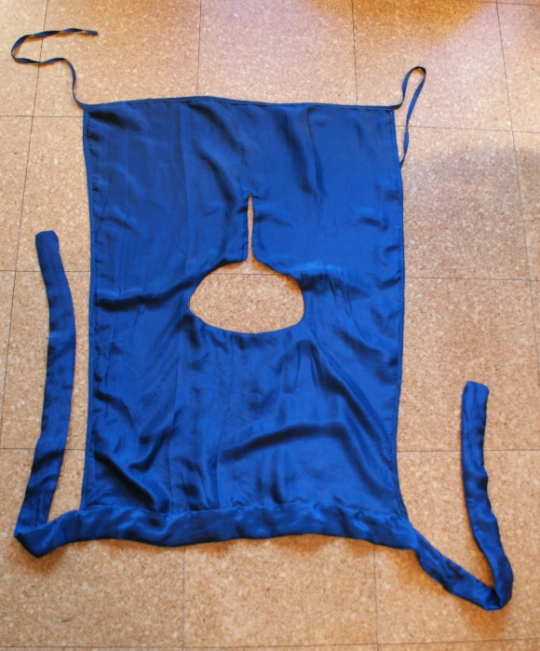
(Image source 1) [ID: a person modelling a royal blue wrap top with large sleeves and a slot neckline.]
(Image source 2) [ID: a royal blue wrap top lying on a tiled floor. The top consists of a rectangle with a hole and a slit for the head, and thin straps at one end of the rectangle and thick straps at the other end.]
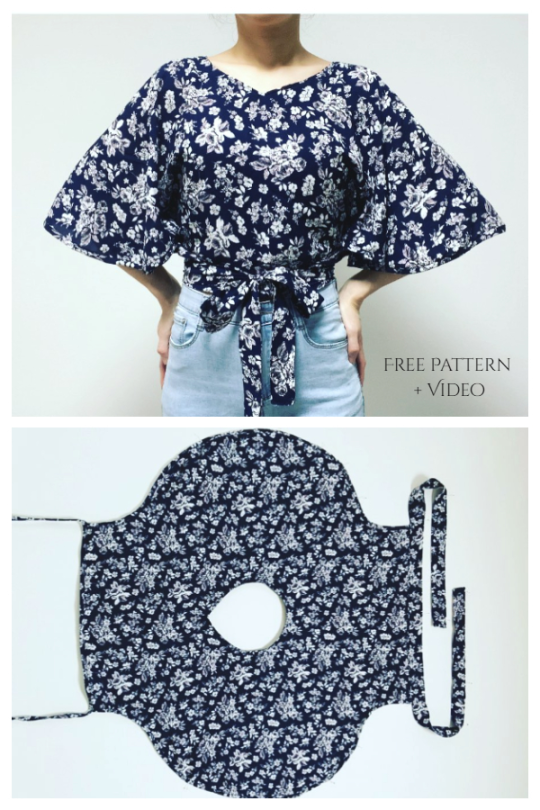
(Image source) [ID: two photo’s. Photo one shows a person wearing a wrap top made from a dark blue fabric with white flowers. The top has very wide sleeves. Text: “Free pattern + video”. Photo two shows the same top lying on a white background. It has a drop-shaped neckhole, two sets of straps (one thin and one thick), and round bulging sleeves.]
I made one of these on a whim out of scrap fabric the other day. So comfy! So fast to sew! Definitely recommend as a casual project.
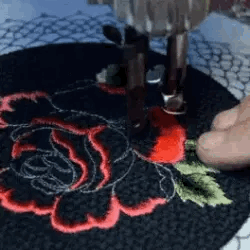
Michele Carragher, the head embroider on Game of Thrones, made this awesome tutorial to show how she created the dragonscale fabric that appears on several of Daenarys’ costumes in S3 and S4.
Ms. Carragher says that the dragonscale fabric was created because “In season 3 the Costume Designer Michele Clapton wanted a Dragonscale like textured embroidery that starts to emerge on three of Daenery’s costumes, which becomes heavier and more pronounced, growing and evolving as the season progresses” (Carragher).
In stages 9-11 of the tutorial we see how the textile evolves from lightly to heavily embellished. This progression is meant to illustrate Daenarys’ personal growth and the growth of her dragons (source).
Do you want to do perfect, even pleats, without pinning or measuring?
Grab a fork.
(My camera decided to be SUPER DRAMATIC with the exposure. Apologies)
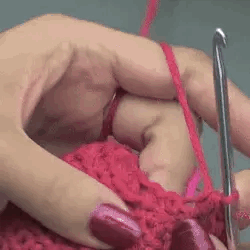
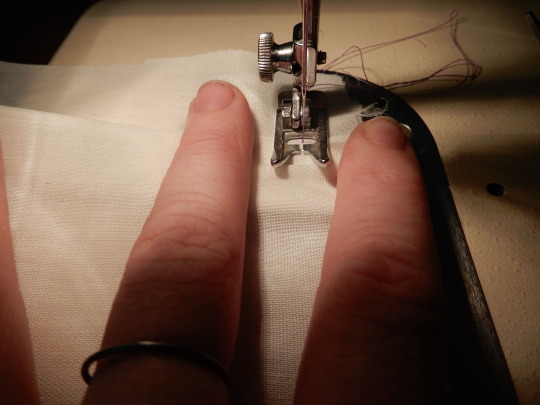
So, start by putting the edge of the fabric to be pleated under your presser foot. Sew a couple of stitch and back-tack to lock your stitches in place.
Put your fork, curve-side up, into the fabric. For this first pleat, you want the two tines closest to you to be under the fabric, and the two tines away from you over the fabric.
You can do this with a 3-tine fork, too, but you’ll have a harder time positioning the pleats.
Now turn the fork over, away from you.
You now have some wiggle room. You can slide the pleat up and down about a quarter inch, so you can use the handle of the fork to position the pleat right next to the presser foot.
You also want the tines to be as deep into that pleat as you can without wrinkling the fabric. You’re using the tines to make sure that pleat stays straight and doesn’t slant to one side.
If your pleat does start turning to one side, use the fork to straighten it out.
Put your fingers down on the bottom of your pleat, and carefully slide your fork out.
Now you can use two fingers to hold down the pleat. You can also do this with two hands, which most people prefer, but I can’t take a picture of both my hands at the same time, so here I’m showing the two-finger style.
Sew onto your pleat. Stop sewing when you’re halfway through.
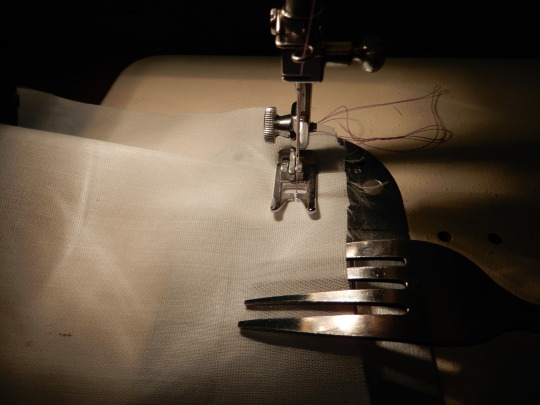
To make knife pleats like the top image, put the fork in like you did on the first pleat. We’re doing box pleats, so for the second pleat, put the fork in like this.
The tines closest to you should be above the fabric, and the ones away from you should be under the fabric.
Turn the fork towards you. This will make a pleat that goes in the opposite direction of your first pleat.
Slide it to where you want it, position it so it’s straight, put your finger on the pleat to hold it down, and slide the fork out, like you did with the first one.
Sew until you’re about halfway through the pleat. Stopping mid-pleat will hold your pleat down, but give you more room to maneuver the fork and get the next pleat in place.
Go until you run out of fabric, and then backstitch.
If you’re not going to apply the pleats onto something circular (so, for most applications), sew an addition line of stitching 1/4″ away from the first one. This will keep them lined up, and won’t let them spread as much as this picture shows.
Press however much of your pleat you feel like. Sometimes that’s just the top, and sometimes it’s all the way down.
Limitations of this technique:
This sounds like the coolest thing ever, but you unfortunately can’t use it for everything.
Unless you want to create a hoard of forks in your sewing box (2-tine meat serving forks can make good small pleats, btw), you’re going to be limited to the width of your fork being the width of your pleat.
Stacking pleats, like you do with tutus or some petticoats, is now a 2-step process. You have to make side-by-side knife pleats on your first pass through the sewing machine, and then stack the pleats by hand on your second pass through.
When you don’t measure and press before, you have a higher margin for error. With pleats, mistakes multiply, big time. Having 1/8″ space between each pleat will make your final piece several inches too big. The easiest way to deal with this in a skirt is to be ready to put in a quarter of the back with some elastic.
A couple of important things to keep in mind:
Regardless of the size of the pleats or kind of pleats, if you line up your pleats so they are right next to each other, with no space between, your pleated fabric will always be 1/3rd the length of the original piece. (see #4 above about error in this)
Pleats lie flatter than gathers, which makes them great for some applications like a-line skirts. It also makes them worse for some things where you need poof, like in cupcake style petticoats where you want a lot of poof on the first layer. Use your best judgement.
So, there you go. Go pleat, and do it quickly and without pinning!
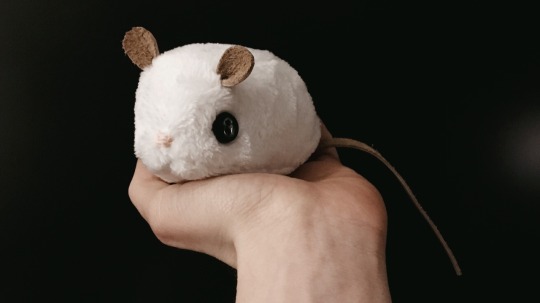
I was having writers block and so I took a break and soon enough it was 3 in the morning and I had impulsively sewn together a tiny mouse you’re welcome
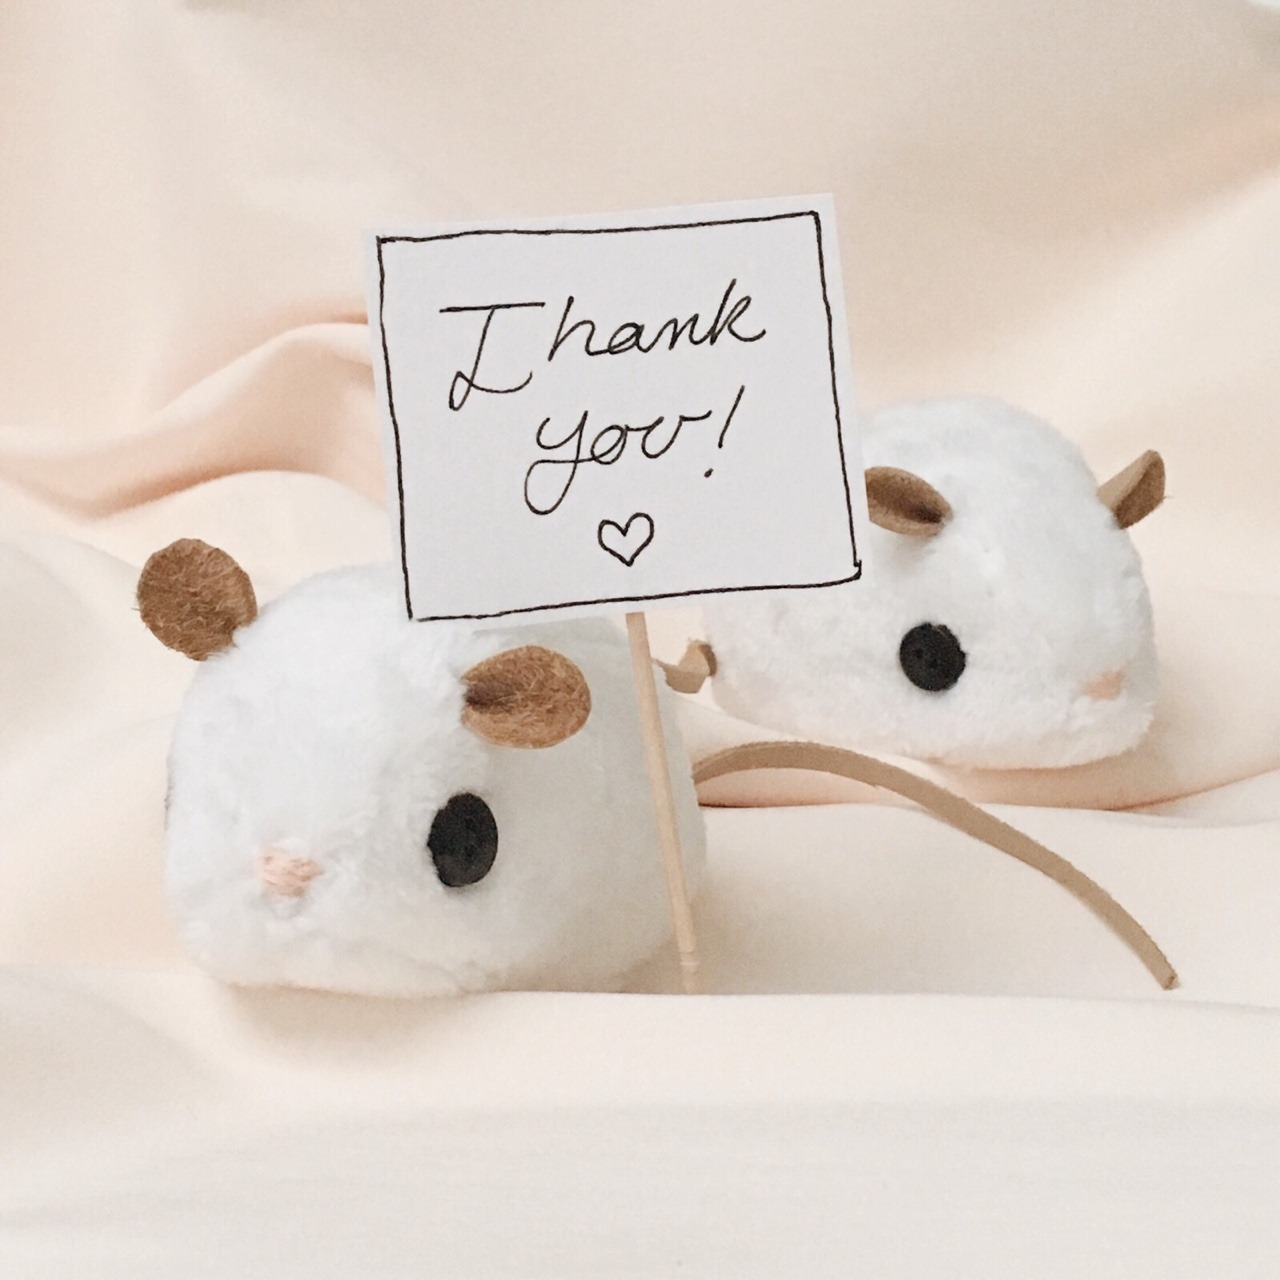
I see people reblogging this with “to buy” but this pattern is free??? Someone even asked me “why don’t you charge money for it, it took you forever to put the document together” and I said “Not a lot of people have money and if they have some fabric scraps and a couple of buttons lying around they can make themselves a little mouse friend for free and that might make them happy and that makes me happier than receiving money???” Make yourself a liddol creacher! Heals the Soul!
Peaches wants to let you all know he has seen all your mouse creations and he’s very happy you’ve used his pattern to make such lovely friends!
A lot of people have been asking for my PayPalandKo-fi, so I’ve put them here for those who asked, but please don’t feel pressured to give to them!
More chickens! This one’s a housewarming gift for a friend. No nesting chickens this time, just walking chickens. Which is your favorite? I like the upper right “red”, but they all look good. :)
what skills do yall have that make you annoying abt seeing people do it in media. i’ll go first i ran track for 6 years (first distance then sprinting) and i am physically incapable of not commenting on people’s running form
Happy arospec awareness week!!! Here’s this little aro themed bat pin I sewed. It’s the first one I finished so there are parts I’ll definitely change and fix in further renditions, but I still think it’s pretty cute and figured I should share something of my own since I haven’t gotten any other art done for this week.