Since the zine is going to be printed, we have to follow some specific setup requirements. So we’ve made an image template to help our artists get their work print ready. We’ve even thrown together a quick tutorial on how to use the template so y’all can be sure you’re doing it right. Just follow these easy steps.
Use the links above to download whichever template works best for you. Do NOT use the image above the links, it’s the wrong size. Both templates are just a black border on a transparent background to give you the aspect ratio and show you where the bleeds will be. There’s some text in the middle but that should be removed and replaced with your image. The Photoshop file is in the correct color profile with layers already set up for your image to be placed under the border but the PNG works just as well. We might do a color tutorial later to help y’all with converting RGB to CYMK.
Step 2: Check Your Size
The templates should be 13 by 19 inches at 300 dpi with a half inch black border (bleed) around the edge. It’s possible the PNG may save at a lower dpi so go to your image properties and be sure you’ve got all the right numbers. It should be 3900x5700 pixels which will print 13x19 inches at 300 pixels/inch resolution. If your computer has trouble with that size you can shrink it down to 1950x2850 (6.5x9.5 at 300dpi) but that is the minimum print size so don’t go any smaller.
Step 3: Drop in Your Art
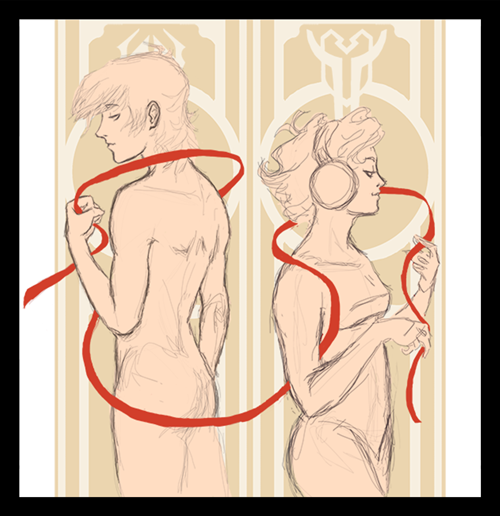
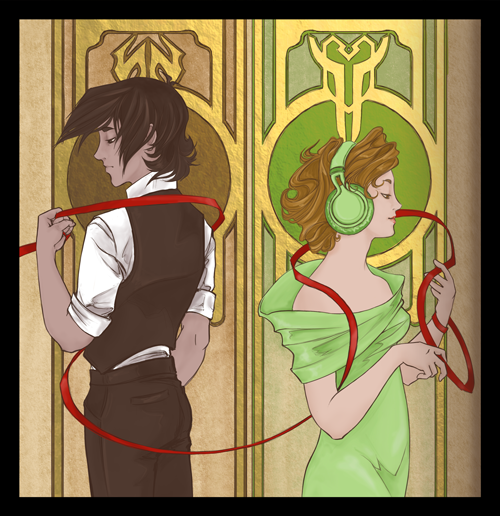
This is best done at the sketch stage but you can drop in more finished work too, you may just have to make some adjustments for the bleed. Your image should go on a layer below the black border which should always be the very top layer. That border is the bleed - a 3 to 6mm border of unimportant but still complete extension of your finished image. Your work should look its best with that border turned on (covering the bleed) but still look ok with the border off (showing the bleed). If your composition looks better with the border turned off then you need to shrink your image so that it fits inside the border (see gif at end of post).
Why do we do this? Because most printers leave a white border around the edge of the paper, so most print shops will print an image on a larger sheet and cut it down to the desired size to create the effect of a ‘full bleed’ where the image goes all the way to the edge of the page. The bleed is the part of the image that gets cut off but printers and cutters aren’t perfect. They’re often a bit crooked so if your image doesn’t extend into the bleed you run the risk of little white edges where the cutter wasn’t properly aligned.
Step 4: Paint the Whole Canvas
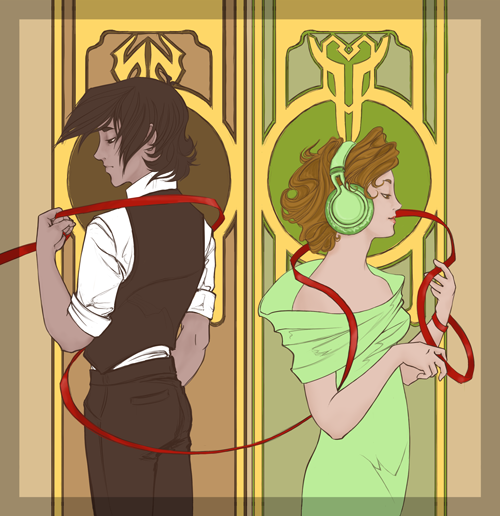
Extend your image all the way to the canvas edge and finish your sketch. I usually turn the bleed layer to a low opacity while I’m doing line work then hide it completely when I color, occasionally turning it back on to be sure my piece still looks best with the border on. If your piece is already finished you may have to do some extra work to paint the bleed. The edge underneath the border is getting cut off so you don’t have to be perfect with it. You can be downright sloppy with your bleeds if you want. It’s going to get cut off. Don’t waste time putting detail in the bleed. It will confuse your printer (me) and make them think your piece doesn’t have proper bleeds. I will pester you about bleeds if you have detail on your edges.
Step 5: Hide the Bleed and Save
If you leave that black border there you’ll run the risk of having black edges instead of white ones. Hide the bleed layer and save your file. It’ll look a little strange with the border turned off but that’s ok so long as it looks the best with the border on. If you have Photoshop you can just send us the PSD file. If you don’t then you’ll need to save the file in a format we can use. PNG is a pretty reliable format but it will convert your image to RGB color which is bad if you were working in CYMK. PNGs can also be tricky about their dpi so make sure your pixel sizes are right if you use this format. TIFFs are the old reliable of print media but they are huuuge files. They are the best quality though so save as TIFF if your computer and file transfer method can handle it. Google Drive is a great file transfer method. Do NOT save as JPG - these are for web use only. Do NOT save as PDF unless you know how to prevent it from converting your images to JPGs. We might do a tutorial on that later.
Special Consideration: Books Add Curve
If you’re preparing your image to be printed in a book (which you are) then you’ve also got the special consideration of the curve. Open any book with a spine. See how the inside edge of the page is curved and a bit shadowed? Open a bigger book and see how that makes the effect worse. If your image is going to be in a book you need to be sure to account for this and not put anything super important on the inside edge. You may not know which edge that is so it’s best to just not put anything on either side. You can request a specific side if you really want something to be right on the outer edge but there’s only so many of each side so ask first.
Special Consideration: Finished Image
Some of y’all have already (or nearly) finished your images. Hopefully you’ve accounted for bleed but it’s ok if you didn’t. You’ve got plenty of time to fix it. Just drop your image into the template and resize until it fits inside the black border. Once you’ve got it to the right size all you need to do is lay down color that approximately extends your image. You do not need to be nit picky about this. Just get it close enough to blend into the finished image. Don’t put anything new on the edge because it will get cut off. If you need help I can teach you some tricks to easily add bleed (clone tool is amazing), just find me (umbraja) on Discord.
Umbraja is a genius, trust me! Also, look at that beautiful art! ♥️ Stay alert for more updates on the zine n.n ~ Mod Ina ✨


