#beadsprites
Perler Necklaces
I’ve been making a lot of Perler stuff lately, which is why I’m posting stuff relating to beadsprites a lot. I think I’m gonna go make a mask tutorial next, though, so look forward to that if you’d like.
You ever want to make a gigantic (usually) hunk of plastic and shove it on a string? I do.
The beadsprites/Perler creations/whatever-you-call-them you use for necklaces aren’t usually that small, probably two pegboards at the minimum. Though, if you’re limited or simply like something a bit more low-key, using smaller Perler creations with necklaces is absolutely possible.
Necklaces are a bit more limited than cuffs, given why this is a seperate post from ‘How do I use Perlers in my kandi?’ First, especially if your creation is a little smaller, you might want to consider using your perler on a cuff or as a mask charm instead. With cuffs, you can have it rotate, you can make it look a bit more 'framed’. Does that make sense? I mean, when you make a Perler necklace, the background it’s on is your clothing/kandi-style clothing. If you put it on a cuff, you can custom-create a more intricate background, especially if you’re more inexperienced.
[ID for the links: The first link, marked with the word 'rotate’, contains 4 different pictures of a DR2-themed rotating cuff. The first picture shows the cuff on the person who created it. The second has it on a table, with the middle rotating part a bit rotated from before to show off more Perlers on it. The third is the same thing as the second, but with different Perlers being shown due to the rotation. The fourth is a top-down picture of the cuff. The top of the cuff is black and white. The rotating part is neon pink and a less-saturated pink. The bottom is black and white. In addition, in the black and white sections, there are some mildly transparent pink glittery beads. The Perlers featured on the cuff are partial-melted, and they’re the pixelated heads of the DR2 characters, I think stylized like the anime. The second link, marked with the word “framed”, features a picture of an alien-themed rotating cuff. The cuff makes use of an alien perler that’s various shades of green, black, and white. The cuff itself makes use of various shades of green, black, and clear beads. End ID]
Though, Perler necklaces are a good way to attract more attention to your Perler creations, especially if you’re only wearing one or two. They aren’t competing with everything else on your wrists.
If you’d like to go that route, here’s a couple ways to attach stuff to your string. Once you get a bunch of string, enough where it’s as long as you’d like and you’ve shoved some beads on it and you know where you want your Perler to go, you have a couple of options. One is that you get a jump ring and you put that on your Perler (stab a hole in your Perler, shove the jump ring through it). Then you can loop the string through the loop. This avoids the– in my opinion, at least– ugly happening of the beads coming from the back or front of the Perler. On the other hand, this requires a jump ring. If you’re interested in it looking neat, and you already dabble in other crafts, chances are you already have jump rings.
The other option is to poke two holes in your Perler creations, level with each other and usually a fair distance away from each other. Depending on how you put the string through the holes, the beads will come from the back and create a weird lump, or they’ll come from the front and kinda look weird? But this doesn’t require anything other than something to poke holes, and the other method requires that too!
There’s likely more options but those are the two I’ve utilized throughout my… career? I’ve only made, like, two of these though so maybe do your own research if you’re iffy on the ideas I suggest.
Good luck not dumping your Perler beads all over the floor :)
How do I make Perlers?
akaBEE TIME. i’ve kinda been in burnout after i tried a HUGE project and it didn’t really meet expectations, it exhausted me badly. I saw this video in my recs, though, and I thought it’d make for a nice project!
QD doesn’t have a tumblr, so I can’t tag her, but if someone wants to @ her on twitter that’d be appriciated! This post is gonna be really universal, and it won’t focus on the actual bee itself, to hopefully make it fine that I can’t @ her. If she sees this, and wants me to modify this to not use her pattern, I’d like to be informed! It’d be an easy fix lol.
If you’d like to make The Bee, you can do that by following the video, but the standard steps of this (put the beads down, iron them) will be universal across any Perler creation of yours. So, you can make the bee components by following this where applicable. I’m hoping here I can give insight on the tape method, ironing, and putting down beads.
Firstly! You’ll want to count out your beads. Like with making regular kandi, there’s a lot less disappointment if you know you have enough in the first place. In particular, this bee is a 3D creation, but most perlers won’t be. I think this is the first time I’ve done something 3D in my more-than-a-year of doing kandi.
Next, you have to put your beads on your pegboard(s). You’ll want to make sure you have enough room to make the full design. Typically, a board measures 29x29 spaces. You’ll need to see how tall and how wide your design is to see if it’ll fit in those parameters. If it won’t, it’s better to connect extra boards now before you start. If you don’t, you might make a hugemess later on trying to connect them.
Then you just kinda… place down your beads, following your pattern. It’s entirely do-able to make a Perler piece without a pattern, but I’d probably suggest you follow a pattern for your first piece.
Once you do that, I highly suggest that you tape your beads, and you take them off the board before ironing. This is commonly regarded as the tape method, and it prevents your boards from warping– or bending. You can really use any tape– I just don’t suggest dollar store Jot tape– I know people mostly use masking tape, or painter’s tape. I just use Scotch tape lol. You simply just lay your tape on your beads until you’ve covered them all, smooth it out a bit so every bead is probablystuck to the tape, then you either flip the tape, or you put one hand on the tape– another on bottom of the pegboard– then you flip it that way. If you find that your beads keep getting screwed up, I have some advice! Once you start putting down tape, don’t lift your tape. You can cover holes later.
If beads were left behind on the pegboard, you can use tweezers to stick them back in place. Speaking of, invest in a nice pair of tweezers. I use really basic ones, and they help me lay down beads faster too. From here you can poke holes in your tape… or not. I don’t do it a lot, simply because I’m lazy. I hear it helps prevent blow outs– or your beads not closing at ALL– which can cut down on your ironing time a bit and leaves less room for overironing. If you have the patience and time, poke holes. If you don’t, you’ll just have to deal with a slightly flawed project, or you’ll have to hope everything goes over well.
Once your creations are off the pegboard(s)– or they’re still on, i can’t control you– it’s time to iron! For the bee, you won’t wanna iron it all the way. Iron it so the beads connect, but the hole in the middle of the beads aren’t too small. Otherwise, assembly later will be hard.
Iron heat is gonna vary from iron-to-iron. Everybody tells you to have your iron on low-medium, but I personally need to have mine on the low highs, otherwise I’ll be here for hours.You’ll probably need to experiment with different heats to find what works best. Ideally, your perler’s holes should ALL be closed up on the side you’re ironing, with minimal spilling or bleeding of the beads.
When you’re done ironing, you have a choice. You can either iron the other side, which will make your creations more durable, or you can leave the other side unironed, which saves you time. Regardless of, when you’re done ironing, you’ll want to put something heavy on top of your creation while it cools, so it doesn’t curl and it lays flat. Unless you wantit to curl, in which case go for it, I can’t control you.
also the bee came out great, assembly was just a bit hard cause i over-ironed a bit :) in addition, you might notice there’s not many pictures in my posts as of late? and i’ve been slacking big time? my phone broke lol. i have a replacement, but im still adapting to it. we’re also on summer break so im taking the time to hang out… and make 3d bees, apparently? there’s also some life changing stuff kinda going on, nothing really major, but i feel kinda busy all the time yk? yk
anyway good luck on ur perler journey
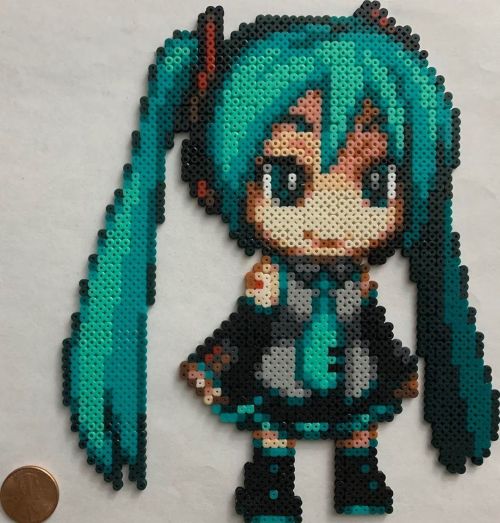
It’s Miku!
-
#miku #hatsunemiku #vocaloid #beadsprites #mikuhatsune #jemzos #beads #minibeads #artkal #perler #cute #cv01
https://www.instagram.com/p/CaXwl6dpdg5/?utm_medium=tumblr
Post link
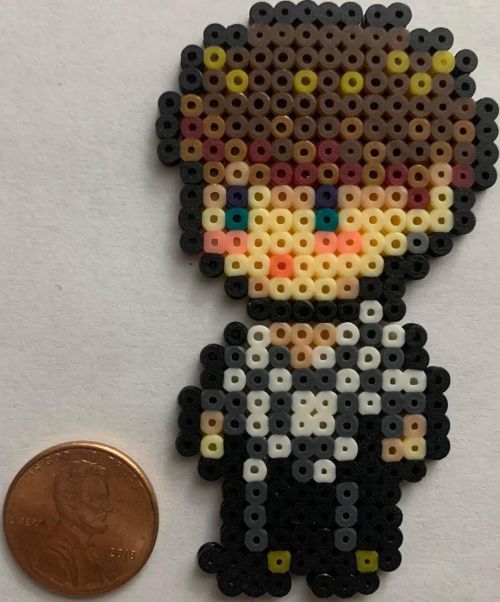
Any BTS fans out there? These mini bead sprites are based off sprites created by Possesen
-
#bts #v #jin #jimin #jhope #namjoon #suga #jungkook #bangtanboys #kpop #minibeads #jemzos #beadsprites #perler #artkal #boyband #cute
https://www.instagram.com/p/CaTmBP2s1cR/?utm_medium=tumblr
Post link


