#custom brush


My new Ghibli inspired brush set for clip studio paint is now online! https://gum.co/Klaii
Please share! :D
Post link


Tired of Medibang adding shoelace brushes and putting em behind a paywall, so I made my own versions and I figured I would share! This should work on basically any program where you can make a custom brush! I may make more in the future, depending on what brushes I like enough to wanna replicate lol
Post link
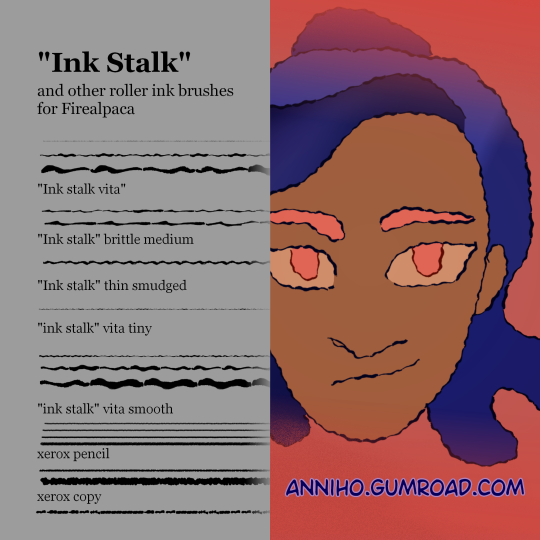
Roller ink brushes!
>>https://4nnih6.itch.io/roller-ink-brushes-for-firealpaca <<
improved set of the roller brushes from a few years ago! Now on itch.io!


You can get my Firealpaca ink brushes on Gumroad now!
I’ve posted most of them here and on dA before for free, but I thought it would be nice to put them up there as well!
Gumroad supports NFTs so I will try to post them up on itchio instead. You can follow my work here: https://4nnih6.itch.io/
spent three hours learning how to make a custom brush so I don’t have to draw every individual tree in my digital maps. i feel powerful
How i made a custom brush for little tree map icons (in Clip):
Caveat that I’m using this guide as a base, because I’m still new to the whole making your own brushes thing. If anyone knows any other tips, feel free to add them on! I’m very much figuring this out as I go along. (@pheita, here is the witchcraft :3)

Designing the brush:
- To design the brush, you’ll want to create a new image. A bog-standard new image, just like you would for making any new artwork!
- It needs to be large; I used 2000 x 2000 px at 300 dpi.
- Set the basic expression colour to grey, so that you can change the colour of the brush when you come to use it.
- Draw your thing. I have drawn a scraggly little stereotypical pine tree.
- Try to use as much of the canvas as you can.
Behold, one of the funky lil pine trees I drew for this brush:

Turning it into a brush tip:
- Now that your drawing is done, go to Edit > Register material > Image … and a new window will pop up:
- Make sure to tick the “use for brush tip shape” box
- Name your material so that you can find it easily. It might be helpful to number it if you’re going to have one brush with multiple tip shapes (I’ll come back to this).
- Choose a save location – I used the standard options, saving it under Image material > illustration > flower and plant

Note:If you want to have multiple tip shapes in one brush, repeat this process. I drew about seven stereotypical scraggly little pines, each one similar but also subtly different. This lends a slightly more hand-drawn feel to the map.
Making the brush:
- Either open a new image, or use the one you were designing your brush in
- Duplicate a pre-existing brush (sub-tool). Do this by right-clicking on a brush and selecting “duplicate sub-tool”.
- Note:When you duplicate a brush, the copy has all the same settings as the original by default. I found a brush labelled “trees”, which I think came pre-installed with CSP; this brush’s settings are exactly what I want for my custom brush.
- On your custom brush, go to the tool properties box and click the wrench icon in the corner. This will open a new window where you can customise the brush to your heart’s content.
- From the lefthand menu in the new window, select “brush tip”. You’ll see a toggle box that lets you switch between “circle” and “material” for the tip shape; make sure it’s set to material (if you’re using the trees or a similar brush, it’ll already be on that setting).
- Add your custom material(s) as the brush tip shape. You can have multiple tip shapes, like this:

If you’re starting from a different duplicate brush, you’ll need to tweak the following settings in the sub tool detail window:
- Anti-aliasing> set to weak
- Brush tip > Flip horizontal: Random | Flip vertical: Off
- Stroke> Gap set to “Fixed” with the slider at 70.00 | Tick the Correct velocity input box | Repeat method: “Random”
- Correction > Stabilization slider at 3 | Taper: 0 | Tick Enable snapping
- Starting and ending > Starting and ending: None | How to specify: Specify length | Enable Starting and move slider t0 20 | Enable ending and move slider to 20 | Enable Starting and ending by speed
Now close the sub tool detail window, and viola! You have a custom brush!