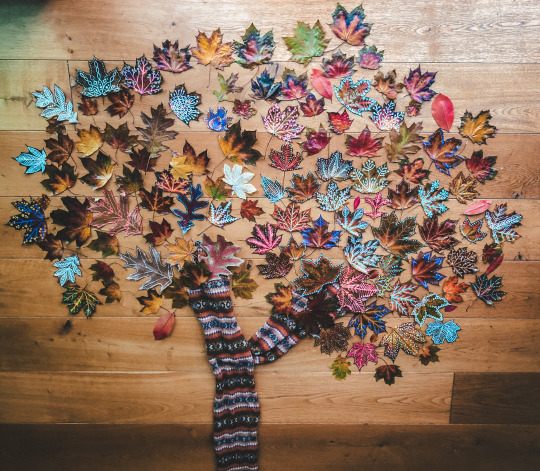
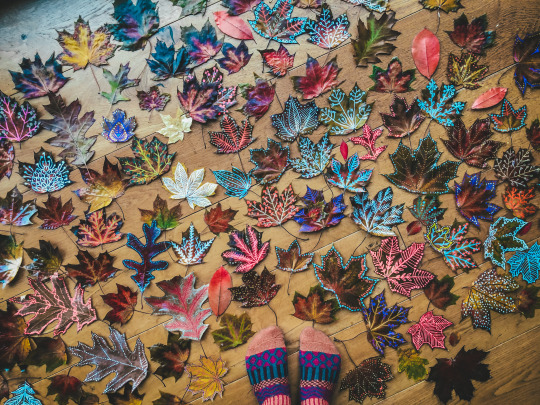
#fall crafts

")

to preserve autumn leaves, you need to find leaves that are as dry as possible and do not yet show any major signs of decay like holes or rotten edges
the foliage must be cleaned from dirt and gently dried before you can treat it any further
now the leaves must be completely dried out to prevent the decomposition process and they need to be pressed and flattened, as drying leaves tend to bend and crumple and thus become unsightly and difficult to work with
there are three methods of drying and flattening leaves:

a) pressing in a classic flower press
or between books or other heavy objects.
to do this, you need thick, absorbent cardboard or several layers of paper towels, and smooth paper like printer paper. arrange the leaves between two sheets of smooth paper in such a way that they do not overlap. underneath and on top you put a layer of cardboard to absorb any liquid. in this fashion you can stack several layers of leaves/paper/cardboard on top of each other. on top you put a flat, plane weight. we have, among other things, used heavy books and large flower pots. the leaves must now be pressed in a dry, warm place for two to six weeks. there are two ways to speed up the process:
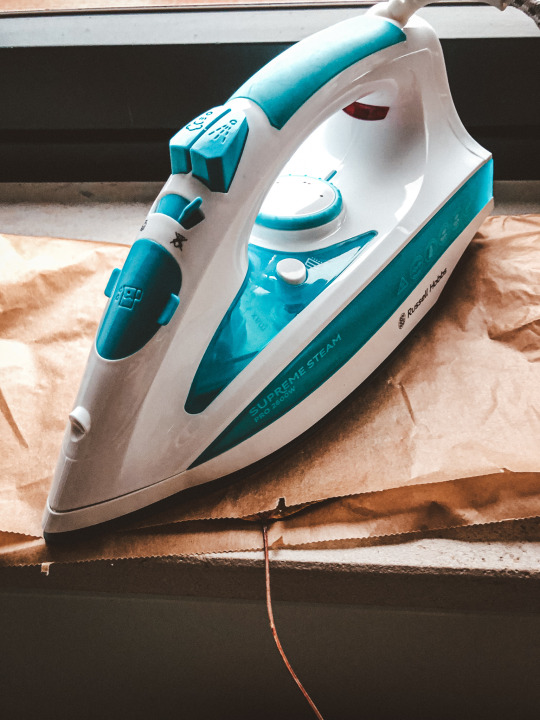
b) the leaves (if possible pre-pressed and smoothed overnight) can be ironed dry between two layers of baking paper. to do this, set the iron to medium strength, switch off the steam option (important!) and carefully iron the leaves from both sides until they feel dry. let them cool down several times in between so all moisture can escape and the leaves won’t start to burn.
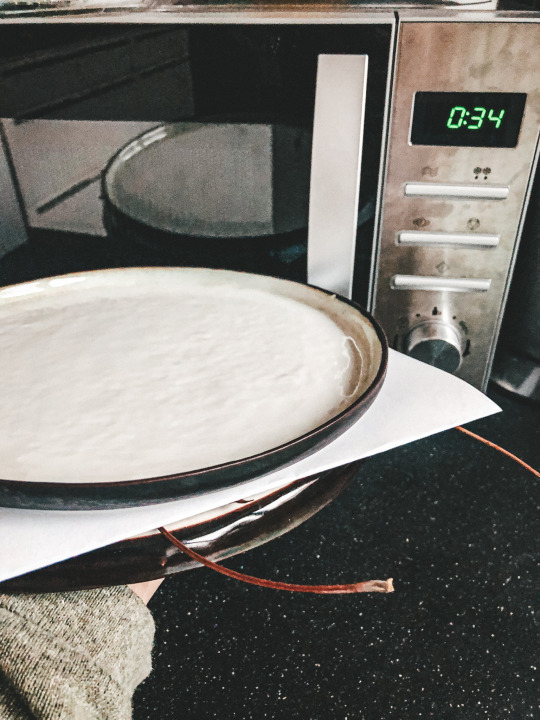
c) you can also express dry the leaves in the microwave. for this you drape the autumn leaves between two sheets of smooth paper (no overlaps!), then sandwich them between several layers of household paper or thick cardboard and finally between two flat and plane ceramic plates. the plates press the leaves flat, by their own weight or reinforced with rubber bands. you can now place this DIY quick press in the microwave and heat it up at 10-second intervals. take a quick look at the result after each heating and let the moisture and heat escape. the leaves are ready when they feel dry and crumbly.
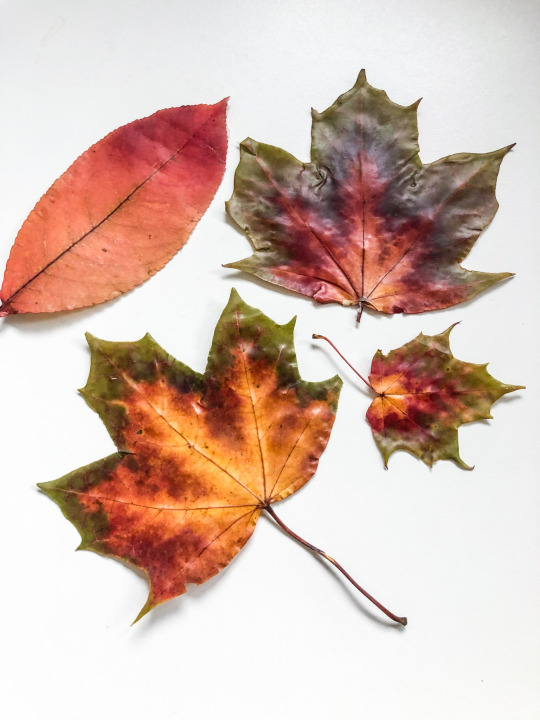
the dried and flattened autumn leaves can now be preserved with various methods. we tried beeswax, glycerine and two kinds of spray paint.

a) BEESWAX: for a wax coating, you melt beeswax in a water bath. the wax (in form of shredded candles or pellets) is carefully heated on a stove top, in a glass bowl or a metal melting bowl inside a water-filled pot. the wax should not be melted directly in the pot, as it can ignite. keep in mind it is also exceedingly difficult to clean the melting vessel, you won’t be able to use it for cooking after this.
once the wax has melted completely, the leaves are briefly pulled through the liquid wax (on their own stem or with tweezers, don’t burn yourself). shake off all remaining wax and place the coated leaf on a piece of baking paper so it can cool and harden without sticking to the countertop.
we used natural yellow beeswax pellets as they make the fall colors shine.
the colors were very well preserved, and the leaves smelled wonderful!.
if you want to do crafting projects with the wax-coated leaves, do so at a warm room temperature, as the wax becomes a little brittle at cold temperatures.
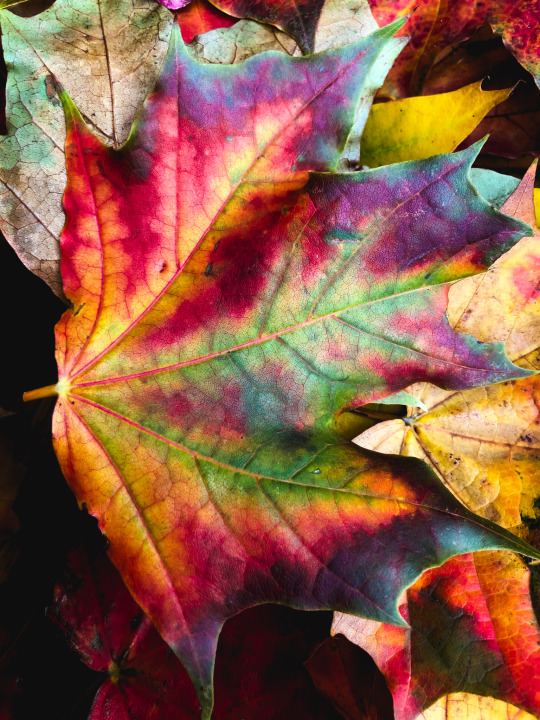
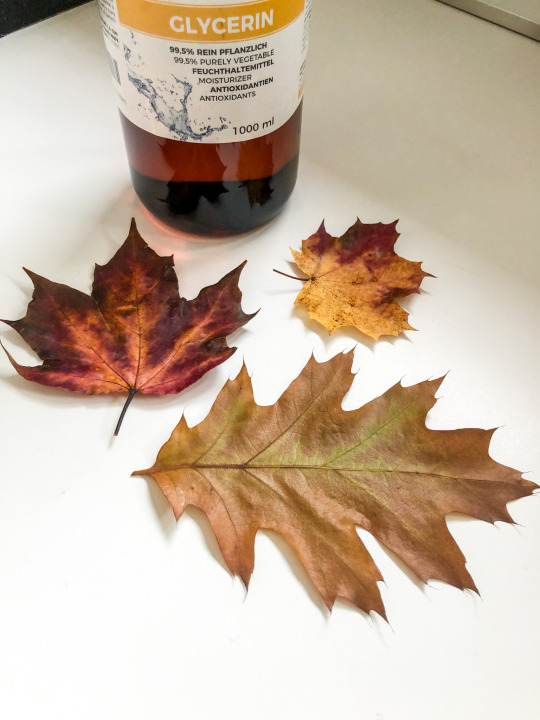
b) if you preserve the leaves with GLYCERINE, they remain very flexible and soft. glycerine is an alcohol of vegetable origin that is often used in cosmetics. it is safe and absolutely non-toxic. to preserve autumn leaves, mix one part glycerine with two parts water and cover the leaves with this solution. weigh them down with a small plate, so they are completely covered and stay put. the leaves should soak in this solution for at least a week. this method is particularly suitable for yellow autumn leaves, as glycerine really makes this color shine. red and orange turn into rust and copper tones, and green turns a little brownish.
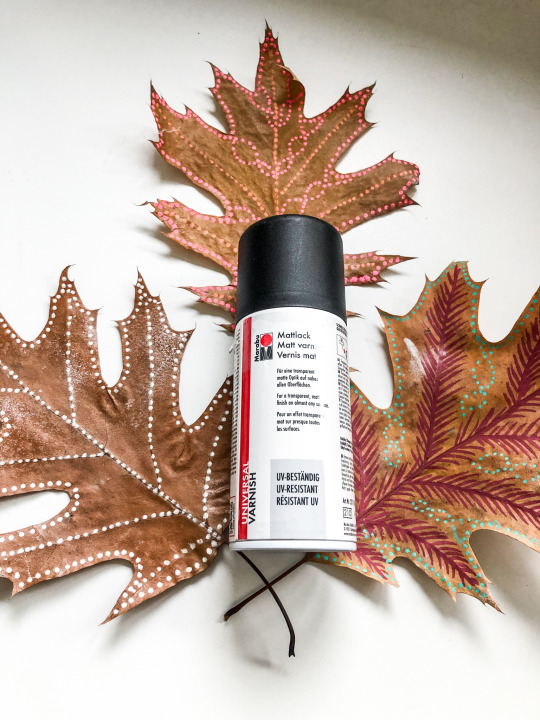
c) better color retention is achieved by spraying the dried autumn leaves with CLEAR VARNISH. the glossy finish makes the autumn colors shine and the dried leaves become flexible and workable again for some time.

for light brown leaves we preferred a matte finish (with matte spray paint) as it looks very natural.
a disadvantage of preserving with varnish is the artificial smell. we also found the colors faded faster into brownish tones compared to the beeswax coating.
the importance of pre-drying the leaves to delay the decomposition process can’t be overstated, this goes for all methods.
yellow, orange, red and brown tones can be preserved very well, but the green (chlorophyll) will break down over time and green hues will become more and more brownish.
to decorate the leaves we have tried various permanent markers like edding and sharpies, but we achieved the best results with liquid chalk pens. they have a rich, opaque finish and can be applied either before or after preservation.

the autumn leaves can also be punched or embroidered, there are no limits to your imagination. have fun with your autumn handicrafts!