✸ Sneak Peek ✸ Year of the Tiger Crochet-Along Coming soon!!!!
Chinese New Year of 2022 will be on February 1st and !!!! It’s gonna be the year of the Tiger! (so we are still in the year of the OX now now)
As a tradition, following my talented friend Stephanie All About Ami ’s step, ☺️I’m also making my Chinese zodiac amigurumi since the year of the snake.
Can you believe this ?! This year would be my 10th year of making the Chinese Zodia amigurumi! BUT I skip the year of the goat, so let’s say it’s the 9th year! No matter what, it’s incredible!!! And I’m very proud of myself and Stephanie,too!
Make sure you check out Stephanie’s profile, I love her year of the OX from last year and everything she makes! I can go on and on and….on!!
Share this post with your crochet friends and maybe we can crochet along together!! I will post more info about this crochet-along soon, Stay tuned! Hope to see you there!
If you want to adopt this Year of the Tiger for your Tiger friend & Families, shoot me a DM!
Let’s Make these kawaii Pink soldiers together! Grab your hook and material along with your drink and snack and let’s go! Feel free to ask questions during the LIVE. I’ll do my best to answer! If you missed this LIVE, you are very welcome to watch this vid later! If following a video tutorial is not your thing, you can also purchase this pattern at a very affordable price from my pattern store later when it’s published!
See you there! Carrie
✸ Support me on Patreon!! Join my pattern club for monthly exclusive crochet patterns and many more!
Welcome to my very 1st Crochet Along YouTube Live stream! We are going to make this baby Koala together before the pattern is published! Come join this crochet along and crochet with me!
Materials are listed in the description box of this vid so you can prepare ahead.
If you missed this LIVE, you can always watch it when you can or purchase this pattern in a very affordable price later when it’s published if the video tutorial is not your thing.
In this LIVE, you will have the early access to this crochet pattern for FREE and I’ll share my tips and tricks of amigurumi making with you. You can also ask questions during the LIVE and I’ll do my best to answer!
Please share this post to your friends and I hope to see you there!
Thank you for those who helped to vote for the LIVE streaming time in my IG stories.
This is one of those patterns that jumped into my head and I had to create it right then. I love when inspirations hits me like that! I crocheted the evening away and finished within 2 hours. I am very happy with how it turned out and am betting for sure that this is going to be my go to scarf for winter!
NOTES
SKILL LEVEL:
Advanced Beginner
FINISHED SIZE:
approx. 64" circumference & 6" width
MATERIALS:
Size J crochet hook 6.00 mm
Yarn needle
340 yards of Lion brand Vanna’s choice yarn in Linen (or any worsted weight (4) yarn)
(each row should be 3" wide so 8 hdc’s for every 3") (each row will be approx. .70" in height)
FOUNDATION ROW: ch 9, hdc in 2nd ch from hook, hdc in remaining ch’s across, turn (8)
ROW 1: ch 1, working in the bl and starting in 2nd ch from hook hdc, bl hdc in remaining ch’s across, turn. (8)
ROW 2- 95: repeat row 1. (8)
Do not fasten off yarn, ch 1, see scarf pattern below on how to continue.
SCARF:
(worked along long side of ribbing, going back along the edge of the ribbing you just worked up)
(To make it even I did 3 hdc’s for every 2 rows of ribbing. Starting with 2 hdc’s in the first row. ending with 1 hdc in the last row)
(gauge is 12 hdc’s for every 4")
ROW 1: (starting in 2nd ch from hook) 145 hdc’s in each st evenly across long side of ribbing, turn. (145)
ROW 2: ch 1, (starting in 2nd ch from hook hdc in the bl), hdc in the bl of every st across, turn. (145)
ROW 3-7: repeat row 2. (145)
If you do not want buttons on your scarf you can fasten off here and weave in loose ends with yarn needle.
If you want buttons do not fasten off yarn, ch 1, turn your work to short side of scarf, see pattern below on how to continue.
BUTTON HOLES: (optional)
ROW 1: hdc, hdc, sk 1 ch, ch 1, hdc in next 10 dc, sk 1 ch, ch 1, hdc, hdc . (16)
ROW 2: ch1, starting in 2nd ch frhom hook hdc, hdc once in every st across. (16)
attach buttons onto other end of scarf that doesn’t have the button holes you just made evenly so they will attach to the holes properly about 1" from edge of scarf.
weave in loose ends throughout scarf with yarn needle.
I hope you enjoyed this tutorial. If you prefer to have a PDF version of this pattern that is available in my shop for purchase.
If you have any questions feel free to ask me anytime!
Don’t forget to have fun making the Andy Crochet Button Scarf! I would love to see your creations when you are done on Instagramusing the hashtag #andyscarf or #rescuedpaw.
Happy Crocheting!
Krista
Please head on over to our shop where a portion of all proceeds are donated to a local animal shelter or rescue that is in need.
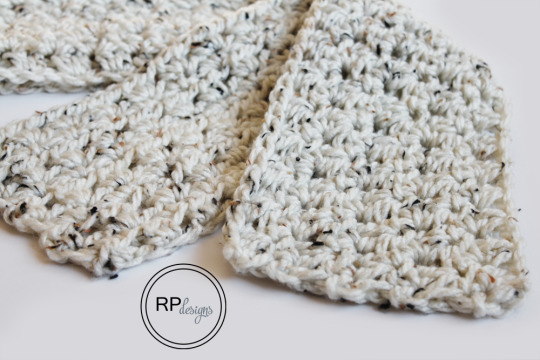
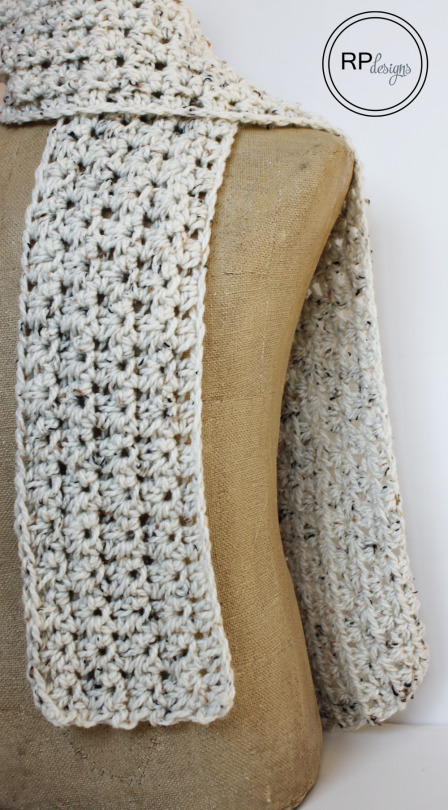
Fall is sneaking up on us fast so you might as well be ready with RPD’s fantastic fall scarf! This crochet pattern is great for beginners and works up in just one hour!
2 skeins (186 yards) of charisma tweed yarn from Micheal’s in Cream or any Bulky 5 yarn.
CROCHET ABBREVIATIONS
ch = chain
sc = single crochet
hdc = half double crochet
sk = skip
NOTES
Gauge is 8 stitches for every 4″
Finished size = 74″ Long x 6″ Wide
To make the scarf smaller or larger chain an even number +1
This is an original pattern created by Krista Cagle for Rescued Paw Designs. You MAY sell items made from this pattern. If you choose to sell items made from this pattern please link back to me at www.RESCUEDPAW.com for credit. Please do not use my pictures to sell your items.
PLEASE DO NOT COPY, SHARE, ADJUST OR RESELL MY PATTERN
Thank you for respecting my work.
PATTERN
Foundation Row: ch 110 +1
Row 1: starting in 2nd ch from hook hdc, * sk 1 ch, hdc 2 times in next ch, repeat from * across ending with 1 hdc in last ch. (110)
Row 2: ch 1, starting in 2nd ch from hook sc, * sk 1 ch, sc 2 times in next ch, repeat from * across ending with 1 sc in last ch. (110)
Row 3: ch 1, repeat row 1. (110)
Row 4: repeat row 2. (110)
Row 5: ch 1, repeat row 1. (110)
Row 6: repeat row 2. (110)
Row 7: ch 1, repeat row 1. (110)
Row 8: repeat row 2. (110)
Row 9: ch 1, repeat row 1. (110)
Finishing: fasten off yarn and weave in loose ends throughout scarf with the yarn needle.
Have fun making this quick project and stay warm!
If you have any questions feel free to ask!
Happy Crocheting!!
Krista
Please head on over to our shop where a portion of all proceeds are donated to a local animal shelter or rescue that is in need.
Foundation Row: start by chaining a multiple of 17, then add 16 sts to whatever length you have chosen. (my sample was 33)
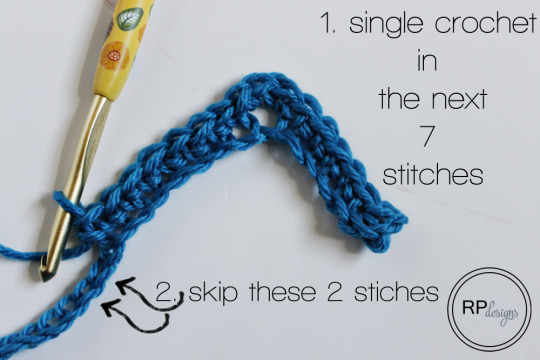
Row 1: starting in the second ch from the hook sc2tog ,sc once in the next 5 st’s then do 3 sc (makes the hump) in the next st. * sc once in the next 7 st’s, sk the next 2 sts. sc once in the next 7 st’s, 3 sc in the next st (hump) repeat from * until you are left with 7 sts, then sc once in the next 5 sts and sc2tog.
Row 2 - ?: ch 1, repeat row 1.
I hope you enjoyed this tutorial. If you have any questions feel free to ask!
Happy Crocheting!!
Krista
Please head on over to our shop where a portion of all proceeds are donated to a local animal shelter or rescue that is in need.
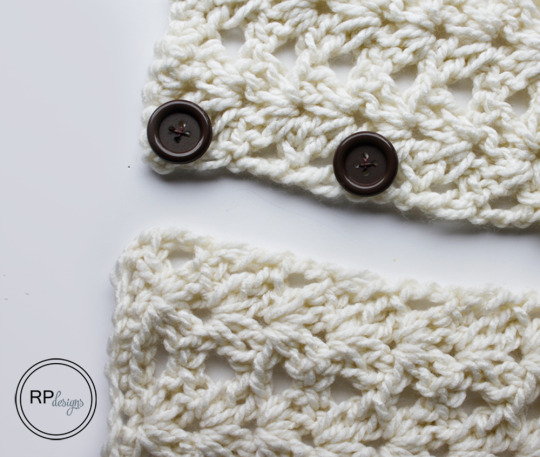
I designed this scarf for myself a couple days ago and am so excited to share this crochet pattern with you all! It is very simple to make and has a awesome texture. I hope you love it!
NOTES:
SKILL LEVEL:
Advanced Beginner
FINISHED SIZE:
One size approx. 60" circumference & 5" width
MATERIALS:
Size M crochet hook 9.00 mm ( or whatever hook is needed to obtain gauge) I used a Susan Bates Bamboo Hook which I love! Find it here on Amazon ➸ Bamboo Hook 9.00MM
Yarn needle
125 yards of Loops & Threads Charisma in Off White or any other Bulky 5 yarn
Two 2" buttons (optional)
CROCHET ABBREVIATIONS:
ch = chain
dc = double crochet
sc = single crochet
VICTORIA SCARF PATTERN:
(gauge approx. 1 row = 5")
Row 1: ch 12, in 2nd ch from hook sc, sc in every ch across. (11)
Row 2: ch 3, in 6th ch from hook * {dc,dc,ch 1,dc,dc} all in the same ch, skip 4 ch’s, in next ch repeat * group, sk 2 ch’s, 1 dc in turning ch. (11)
Row 3: ch 3, {dc,dc,ch 1,dc,dc} in ch 1 space from previous row, {dc,dc, ch 1,dc,dc} in next ch 1 space, 1 dc in turning ch. (11)
Row 4 to 44: repeat row 3 (11)
Row 45: ch 1, * sc in first dc from previous row, sc in next dc from previous row, sc in ch 1 space, sc in next dc , sc in next dc, repeat from * on next group, end with 1 dc in turning ch. (11)
Fasten off and weave in loose ends with yarn needle, or leave a 12" piece to attach buttons, see below (optional)
ATTACHING BUTTONS
(optional)
(you can use the 12" piece of extra yarn or sewing thread to attach)
(button holes are not needed because of the open stitches of the scarf)
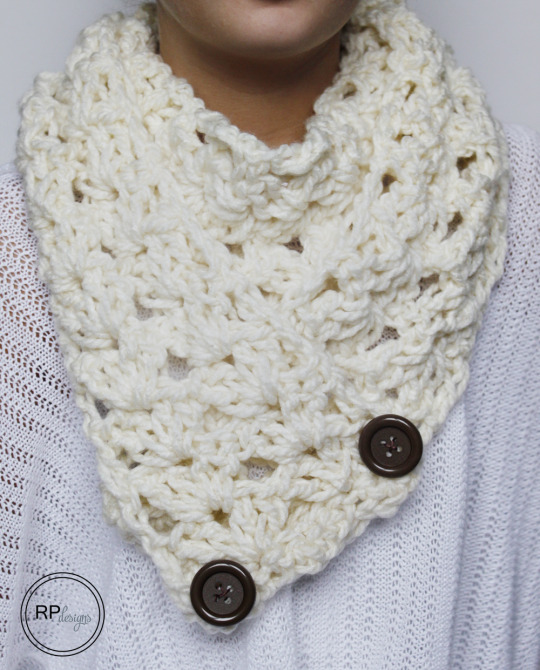
I placed my scarf flat like an upside down U and placed the buttons on the inner left hand side about 2 inches apart. If you want to wear it like the picture you would put it on your neck with the 2 long ends down your back, wrap the left scarf tail around your neck to the right, and the right scarf tail to your left and secure with the buttons.
There isn’t any wrong spot to put them and they can be secured any way you wish. I would also suggest if you aren’t sure on where to place the buttons put the scarf on how you would prefer to wear it and then figure out the best spot for the buttons to be placed.
I hope you enjoyed this pattern. If you have any questions feel free to ask! You can find an ad free version of this pattern over in my Store here ➸ Ad Free Victoria Scarf Pattern or find it on Ravelry here ➸ Victoria Scarf on Ravelry.
Happy Crocheting!!
Krista
DISCLAIMER:
An Original Pattern Created by Krista Cagle for Rescued Paw Designs. This pattern is for the use of the purchaser only. You MAY sell items made from this pattern. If you choose to sell items made from this pattern please link back to me at www.RESCUEDPAW.com for credit. Please do not use my pictures to sell your items.
PLEASE DO NOT COPY, SHARE, ADJUST OR RESELL MY PATTERN
Thank you for respecting my work.
Please head on over to our shop where a portion of all proceeds are donated to a local animal shelter or rescue that is in need.
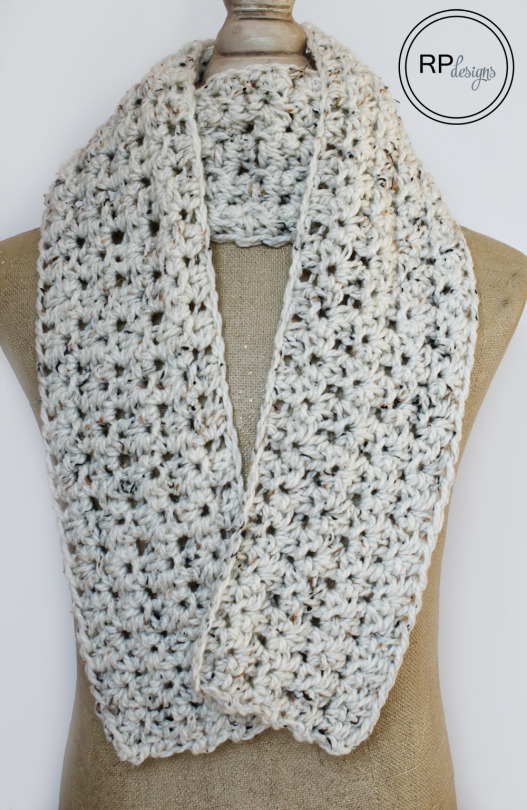
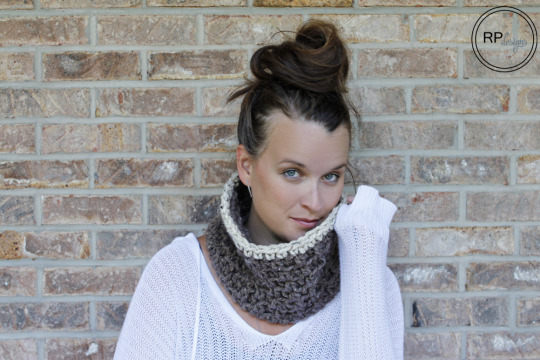
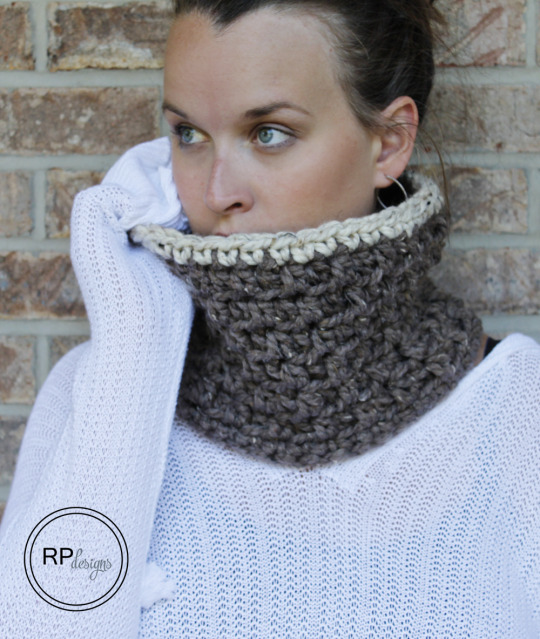
I am thrilled to release RPD latest free pattern the “Jamie”. This crochet cowl is quick to make and is perfect for the upcoming fall / winter season. I used Lion Brand Thick & Quick which is a super bulky and extremely soft yarn. It is easily becoming one of my favorite yarns to work with!
Enjoy and remember ready or not, fall is on its way!
Size M crochet hook 9.00 mm ( or whatever hook is needed to obtain gauge)
Yarn needle
108 yards of Lion brand Wool Ease Thick & Quick in Barley and 2 yards in Oatmeal or any super bulky 6 yarn (for adult size) or if you need a yarn without wool Amazon has many options to choose from ➸ “Shop Bulky Yarn”
CROCHET ABBREVIATIONS:
hdc = half double crochet
ch = chain
bl = back loop
fl = front loop
st = stitch
sl st = slip stitch
JAMIE COWL PATTERN:
ADULT SIZE:
(gauge approx. 7 sts for every 4")
(never crochet in to the sl st and ch 1 - they do not count as sts)
(always start in the 2nd ch from hook after round 1)
Round 1: with barley, ch 40, join with a sl st to first ch to form a circle making sure not to twist ch. (40)
Round 2: ch 1, sc once into every ch around, sl st to top of first sc. (40)
Round 3: ch 1, * hdc in the fl, in next st hdc in the bl, repeat from * around, sl st to top of first hdc. (40)
Round 4: ch 1, * hdc in the bl, in next st hdc in the fl, repeat from * around, sl st to top of first hdc. (40)
Round 5: repeat round 3. (40)
Round 6: repeat round 4. (40)
Round 7: repeat round 3. (40)
Round 8: repeat round 4. (40)
Round 9: Join in oatmeal, ch 1, sc in every st around, sl st to top of first sc. (40)
Fasten off and weave in loose ends with yarn needle.
OLDER CHILD SIZE:
(gauge approx. 7 sts for every 4")
(never crochet in to the sl st and ch 1 - they do not count as sts)
(always start in the 2nd ch from hook after round 1)
Round 1: with barley, ch 36, join with a sl st to first ch to form a circle making sure not to twist ch. (36)
Round 2: ch 1, sc once into every ch around, sl st to top of first sc. (36)
Round 3: ch 1, * hdc in the fl, in the next st hdc in the bl, repeat from * around, sl st to top of first hdc. (36)
Round 4: ch 1, * hdc in the bl, in the next st hdc in the fl, repeat from * around, sl st to top of first hdc. (36)
Round 5: repeat round 3. (36)
Round 6: repeat round 4. (36)
Round 7: repeat round 3. (36)
Round 8: switch colors here and join in oatmeal, ch 1, sc in every st around, sl st to top of first sc. (36)
Fasten off and weave in loose ends with yarn needle.
I hope you enjoyed this pattern. If you have any questions feel free to ask!
Happy Crocheting!!
Krista
DISCLAIMER:
You may sell items made from this pattern. If you choose to sell items made from this pattern please link back to me at www.RESCUEDPAW.com for credit. Please do not use my pictures to sell your items. Thank you for respecting my work.
Please head on over to our shop where a portion of all proceeds are donated to a local animal shelter or rescue that is in need.
You may sell items made from this pattern. If you choose to sell items made from any of my patterns please link back to me at www.RESCUEDPAW.com for credit. Do not use my photos to sell any items. Thank you for respecting my work.
Patterns:
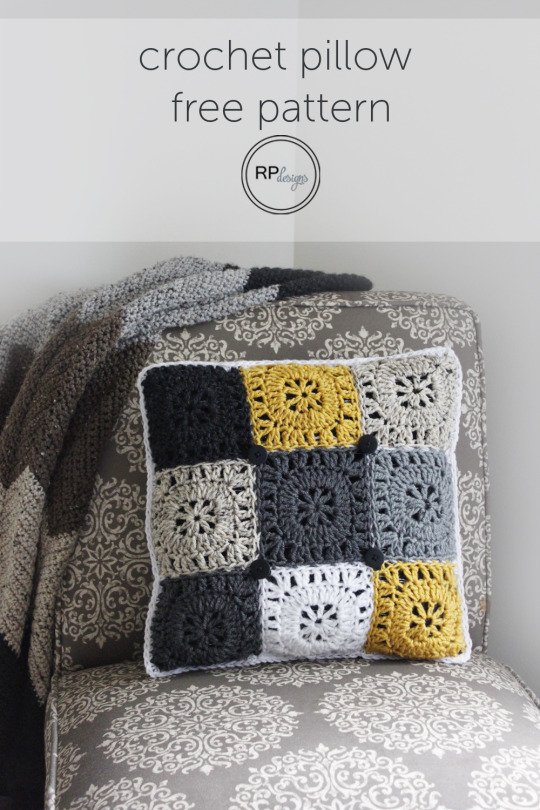
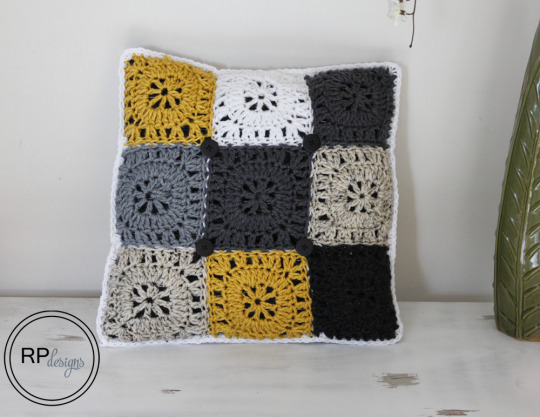
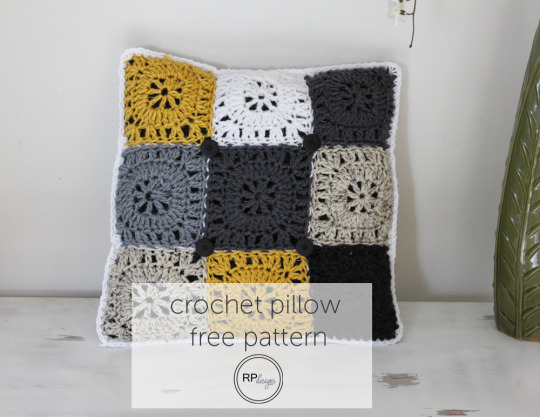
Front of Pillow:
To make the front of the pillow you will need to use my square pattern which can be found here —> “Simple Square Pattern”. You will need 9.
You may block your squares after you are done if you wish. One Dog Woof has a great tutorial on how to build your own blocking station which can be found here –> “DIY blocking station”.
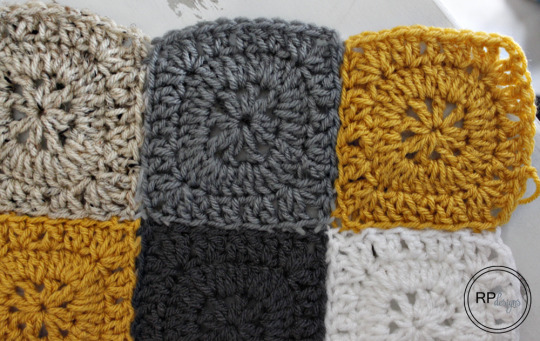
After you are done blocking you can start joining together your squares. I used my yarn needle and did an invisible seam. Here is a tutorial from Oombawka Design –> “Invisible Seam Tutorial”
Now that the squares are sewn together you now need to attach the buttons (optional) 1 at every corner of your center square.
Finished size should be approx. 15″ x 15″
Back of Pillow:
( gauge is approx. 10 hdc’s for every 4″)
Row 1: With white ch 35, in 2nd chain from hook half double crochet, half double crochet in every ch across, turn. (34)
Row 2: Chain 1, starting in second chain from hook half double crochet, half double crochet in every chain across, turn. (34)
Row 3- 25: Repeat row 2 (34)
Weave in loose ends with yarn needle.
Finishing:
Using white yarn single crochet along edges of front and back of pillow while evenly holding them together. Making sure they are both facing the correct direction.
In every corner, single crochet, chain 1, single crochet.
You will do 35 single crochets across every edge. 37 including corners.
Make sure to only do 3 sides and then insert your pillow form. Continue single crocheting across last side to finish your pillow. fasten off yarn and weave in loose ends.
I hope you enjoyed this pattern! If you have any questions feel free to ask.
Happy Crocheting!
Krista
Please head on over to our shop where a portion of all proceeds are donated to a local animal shelter or rescue that is in need.
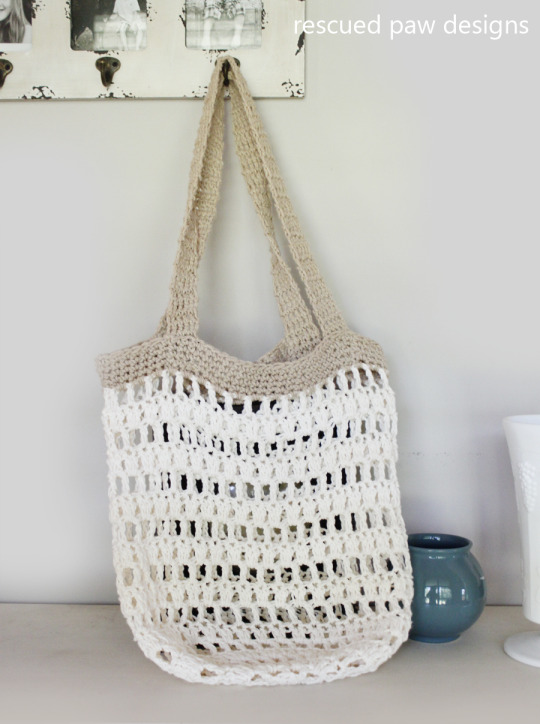
Crochet tote bags are always fun to make and our family always seems to get a ton of use from them. I actually finished this crochet bag earlier this month for my daughter to tote her books back and forth to the beach. I was thrilled the sand fell out the bottom of the bag because of the spaces in the design which meant less mess in my truck and house! You could easily line this tote to make it more useful for smaller items you would wish to carry. I hope you enjoy this pattern.
Materials:
Lily Sugar n Cream Cotton Yarn or any cotton yarn (2 balls of Ecru & 1 ball of Jute)
Size J crochet hook 6.00 MM
Yarn needle
Crochet Terms:
Ch = chain
Sc = single crochet
Dc = double crochet
Sl St = slip stitch
sk = skip
st= stitch
Notes:
Finished size is approximately 12 wide X 15" length (without handles) but will stretch since its cotton.
If you wish to reduce the stretching of this bag I recommend lining it. There are some great tutorials on how to line crochet bags from Pattern ParadiseandCraftsy on the internet.
You MAY sell items made from this pattern. If you choose to sell items made from any of my patterns please link back to me at www.RESCUEDPAW.com for credit. Do not use my photos to sell any items. Thank you for respecting my work.
Pattern:
Round 1: Starting with Ecru ch 3, 10 Dc In 3rd ch from hook, sl at to first Dc. (10)
Round 2: Ch 3, Dc, ch 1, Dc, ch 1 rep around, sl st to first Dc. (20)
Round 3: Ch 3 ,Dc, 2 dc in ch 1 space, DC on top of Dc from previous round, 2 Dc in ch 1 space, repeat around,Sl st to first DC. (30)
Round 4: Ch 3, Dc, ch 1, Dc, ch 1 rep around, sl st to first Dc. (60)
Round 5: Ch 3, Dc, 1 dc in ch 1 space, Dc, 2 dc in ch 1 space, sl st to top of first Dc.(75)
(round 5 example)
Round 6: Ch 3, * Ch 1, sk 1 ch, Dc in next ch, repeat from * around, ending with a ch 1 and sk st, sl st to top of first ch 1, (76)
Round 7: Ch 3, 2 Dc in every ch 1 space around, sl st to first Dc (76)
Round 8: Ch 3, * Ch 1, sk 1 ch, Dc in next ch, repeat from * around, sl st to top of first ch 1, (76)
Round 9: Repeat round 7 (76)
Round 10: Repeat round 8 (76)
Round 11: Repeat round 7 (76)
Round 12: Repeat round 8 (76)
Round 13: Repeat round 7 (76)
Round 14: Repeat round 8 (76)
Round 15: Repeat round 7 (76)
Round 16: Repeat round 8 (76)
Round 17: Repeat round 7 (76)
Round 18: Repeat round 8 (76)
Round 19: Change color to Jute, ch 1, *2 sc in ch 1 space, repeat from * around (76)
Round 20: Repeat round 19 (76)
Round 21: Repeat round 19 (76)
Round 22: Repeat round 19 (76)
Round 23: Repeat round 19 (76)
Handles:
(make 2) approximately 24" in length each (but will stretch)
Row 1: Ch 6, sc in 2nd ch from hook and every ch across, turn (5)
Row 2: Ch 1, sc in every ch across (5)
Row 3-60: Repeat row 2 (5)
attach handles on inside of bag with yarn by using yarn needle and sewing an square and X to make secure (see picture)
to finish eave in loose ends throughout bag with yarn needle. You are done!
(how to secure handles example)
I hope you enjoyed this pattern. If you have any questions please feel free to ask! I am more than happy to assist in any way possible.
Happy Crocheting!!
Krista
Please head on over to our shop where a portion of all proceeds are donated to a local animal shelter or rescue that is in need.
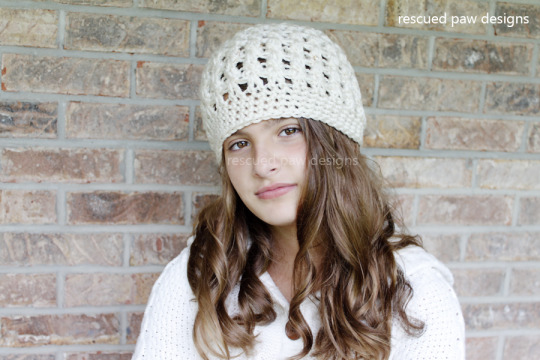
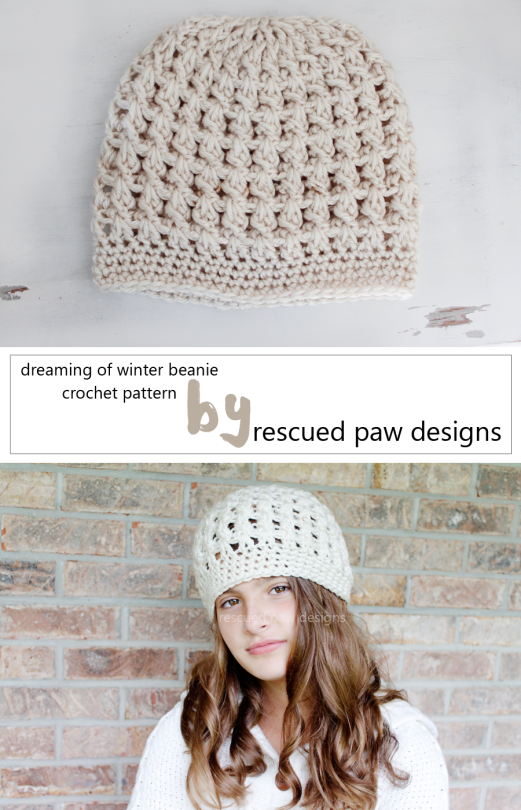
As a crocheter I am already dreaming of winter and all the designs I can create with my every growing yarn stash. Hence the name for Rescued Paw Designs newest pattern was born the “Dreaming of Winter Beanie”. This pattern is worked up with “Red Heart Soft” yarn which is true to its name and is very “soft”. I have used it in the past to make my “Simple Striped Blanket” which my son still sleeps with every night! This particular design has a lot of texture versus a simple hdc or dc beanie pattern. I hope you all enjoy!
You MAY sell items made from this pattern. If you choose to sell items made from any of my patterns please link back to me at www.RESCUEDPAW.com for credit. Do not use my photos to sell any items. Thank you for respecting my work.
Finished size: fits teen / adult woman: 8" length and 20" circumference (but easily stretches if needed)
Round 1: ch 3, 12 dc in 3rd ch from hook, sl st to top of first dc. (12)
Round 2: ch 3, (starting in 4th ch from hook) * 2 fpdc’s around first dc from previous round, repeat from * around, sl st to top of first fpdc. (24)
Round 3: ch 3, (starting in 4th ch from hook) *dc, fpdc around same st as dc, repeat from * around, sl st to top of first dc. (48)
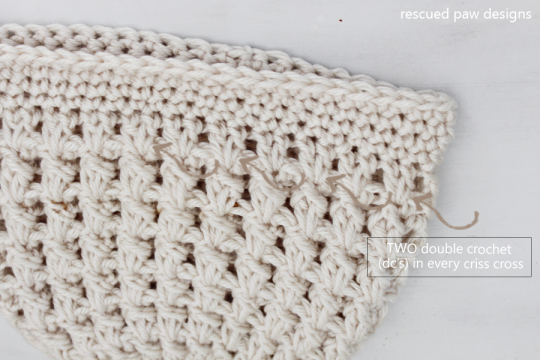
Round 4: ch 3, * sk 1 ch, fpdc around next fpdc from previous round, go back and fpdc around the ch that was sk (forms a criss cross) ,repeat from * around, sl st to top of first fpdc. (48)
Round 5: ch 3, dc 2 times in between criss cross and every criss cross around (see picture example), sl st to top of first dc. (48)
Round 6-15: alternate round 4 & 5 (48)
Round 16: ch 1, (starting in 2nd ch from hook) sc, sc into top of every ch around, sl st to top of first sc. (48)
Round 17-19: repeat round 16. (48)
Finishing: fasten off securely after round 19 and weave in loose ends with yarn needle.
I hope you enjoyed this pattern. If you have any questions please feel free to ask! I am more than happy to assist in any way possible.
Happy Crocheting!!
Krista
Please head on over to our shop where a portion of all proceeds are donated to a local animal shelter or rescue that is in need.
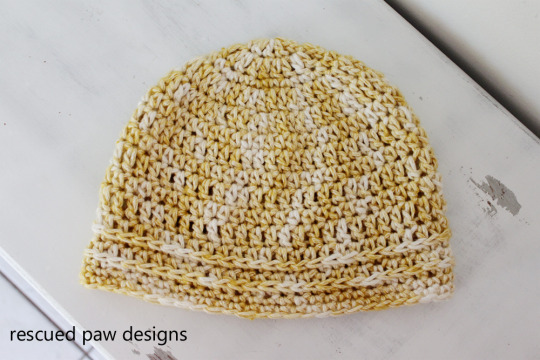
If you are like me and love simple projects then this chained crochet hat fits that description perfectly! This pattern is great for beginners who would like to try something a bit more advanced but still easy enough to finish without a crochet pattern headache.
I used Patons Denim-y yarn in Lemon Curry that I picked up from Joann Fabrics earlier this year which is a cotton, wool, acrylic mix. It has an interesting soft but dense texture to it and definitely will keep a person warm in the cooler months ahead! My kids instantly loved it because they said it reminded them of popcorn. I see a new project in my future.. maybe a popcorn applique? How fun!
Materials:
Crochet hook size J 9.00 mm
Patons Denim-y Yarn in Lemon Curry 144 yards or any worsted weight yarn
You MAY sell items made from this pattern. If you choose to sell items made from any of my patterns please link back to me at www.RESCUEDPAW.com for credit. Do not use my photos to sell any items. Thank you for respecting my work.
Pattern: Teen / Adult Size:
Round 1: ch 3,10 dc in 3rd ch from hook, sl st to top of first dc. (10)
Round 2: ch 3, (starting in 4th ch from hook) 2 dc in every ch around, sl st to top of first dc. (20)
Round 3: ch 1, (starting in 2nd ch from hook) * sc, 2 sc in next ch, repeat from * for a total of 30 sc, sl st to top of first sc. (30)
Round 4: ch 3, (starting in 4th ch from hook) *dc, dc in next ch, 2 dc in next ch, repeat from * for a total of 40 dc, sl st to top of first dc. (40)
Round 5: ch 3, (starting in 4th ch from hook), *dc, dc in next ch, dc in next ch, 2 dc in next ch, repeat from * for a total of 50 dc, sl st to top of first dc. (50)
Round 6: ch 1, (starting in 2nd ch from hook), hdc, hdc in every ch around, sl st to top of first hdc. (50)
Round 7: ch 3, (starting in 4th ch from hook), dc, dc in every ch around, sl st to top of first dc. (50)
Round 8: repeat round 6 (50)
Round 9: repeat round 7 (50)
Round 10: repeat round 6 (50)
Round 11: repeat round 7 (50)
Round 12: repeat round 6 (50)
Round 13: ch 1, (starting in 2nd ch from hook) *sc in the 3rd loop of hdc from previous row (this creates the chained look) repeat from * around for a total of 50 sc in the 3rd loop. sl st to top of first sc (50)
Repeat 14: repeat round 6 (50)
Repeat 15: repeat round 13 (50)
Round 16: ch 1, (starting in 2nd ch from hook) sc , sc in every ch around, sl st to top of first sc. (50)
Round 17: repeat round 16 (50)
Finishing: Weave in loose ends with yarn needle.
I hope you enjoyed this pattern. If you have any questions please feel free to ask! I am more than happy to assist in any way possible.
Happy Crocheting!!
Krista
Please head on over to our shop where a portion of all proceeds are donated to a local animal shelter or rescue that is in need.
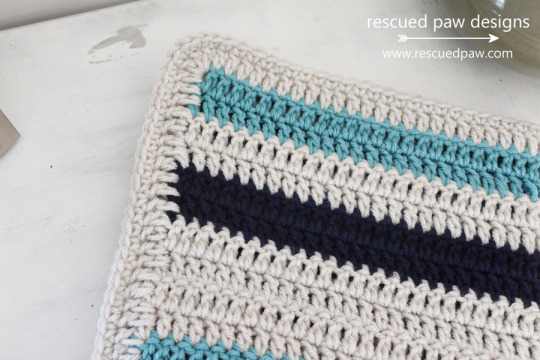
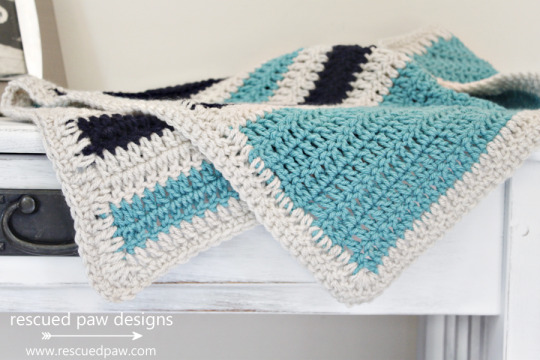
I needed a quick baby boy gift and this blanket pattern popped into my mind so RPD’s newest crochet pattern the Simple Striped Blanket was born! I guess I am loving this navy, turquoise and linen color combo lately since I made my last project “The Blooming Flower Square” with these yarn colors too!
The blooming flower square pattern can be found “HERE” for those of you that are interested.
you MAY sell items made from this pattern. If you choose to sell items made from any of my patterns please link back to me at www.RESCUEDPAW.com for credit. Do not use my photos to sell any items. Thank you for respecting my work.
gauge = 12 dc for every 4″ , finished size depends on starting ch.
Tutorial on how to change colors in crochet is “HERE”.
I did 8 rows of turquoise, 2 rows of linen, 2 rows of navy, 2 rows of linen, 2 rows of turquoise, 2 rows of linen, 2 rows of navy, 2 rows of linen, 4 rows of turquoise, 4 rows of linen, 2 rows of navy, 2 rows of linen, 2 rows of turquoise.
Border is optional: join in linen after last color, dc evenly around outside of blanket, doing 4 dc in every corner, when you reach your beginning dc of border sl st and ch 1, sc in every ch across outside of blanket, doing 4 sc in every corner. when you reach your beginning sc, sl st and fasten off.
Pattern
Row 1: ch an even number with first color of choice (I did 64) , starting in 4th chain from hook dc, dc in every ch across. turn.
Row 2: ch 3, dc in 4th ch from hook and in every ch across, turn.
Row 3-?: keep repeating row 2 changing colors whenever you choose to desired length.
Finishing: Fasten off and weave in loose ends.
This blanket is easy to customize. Just chain your desired width, repeat pattern and change colors throughout until you get to the length that is perfect for your own unique project.
I hope you enjoyed this pattern. If you have any questions please feel free to ask! I am more than happy to assist in any way possible.
Happy Crocheting!!
Krista
Please head on over to our shop where a portion of all proceeds are donated to a local animal shelter or rescue that is in need.
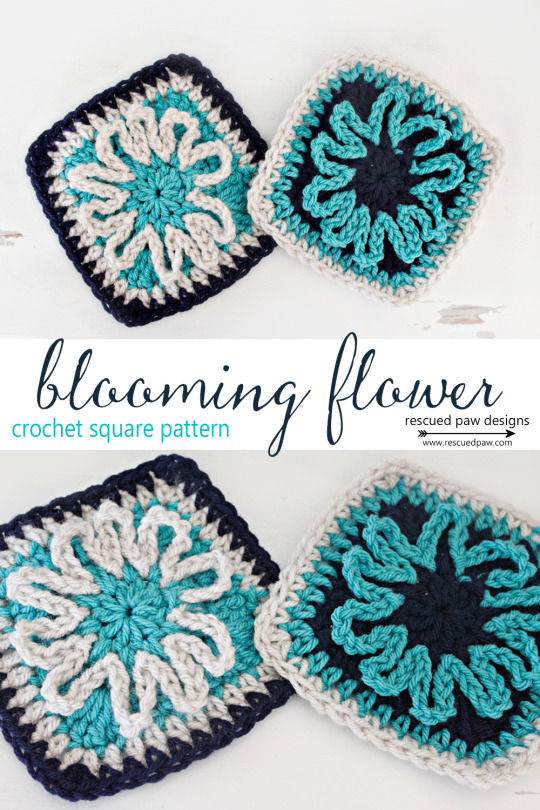
You may have seen the preview picture of this crochet square in yellow, gray and white which I posted on Instagramlast week. (You can view it “HERE”.) I really am excited to finally be able share this beginner friendly crochet square with you all! This fun square works up super fast and is a great way to use up all those yarn scraps.
You MAY sell items made from this pattern. If you choose to sell items made from any of my patterns please link back to me at www.RESCUEDPAW.com for credit. Do not use my photos to sell any items. Thank you for respecting my work.
Finished Size = 6" x 6"
Tutorial on how to change colors in crochet is “HERE”.
Pattern
Round 1:(starting with your first color of choice) ch 3, 10 dc in 3rd ch from hook, sl st to top of first dc. (10)
Round 2:(using second color) ch 10, sl st in next ch, (1 flower petal completed)* ch 10, sl st in next ch, repeat from * around for a total of 10 chained flower petals. sl st in sl st from previous round.
Round 3:(using first color) ch 3, 2 dc in ch between each flower loop around, sl st to top for first dc. (20)
Round 4:(using first color) ch 3, starting in 4th ch from hook, *dc, dc 1 time each in next 3 ch’s, { dc, dc, tr, tr, dc,dc} in next ch space, repeat from * around for a total of 4 times, sl st to top of first dc. (40)
Round 5:(using second color) ch 1, starting in 2nd ch from hook hdc, hdc once in each of next 6 ch’s, *2 hdc’s in next ch, hdc once in each of next 9 ch’s, 2 hdc’s in next ch, repeat from * for a total of 3 times, end with 1 hdc in each of next 2 ch’s, sl st to top of first hdc. (44)
Round 6: _this round is worked between the ch’s not in them, __(using third color)_** **ch 1, starting in 2nd ch from hook sc, sc in next 7 ch’s, {hdc, ch1 hdc} in next ch, * sc once each in next 10 ch’s, {hdc, ch 1, hdc} in next ch, repeat from * for a total of 3 times, end with 1 sc in each of next 2 ch’s, sl st to top of first sc. **(52)**
Finishing: fasten off and weave in loose ends throughout with yarn needle
I hope you enjoyed this pattern. If you have any questions please feel free to ask! I am more than happy to assist in any way possible.
Happy Crocheting!!
Krista
Please head on over to our shop where a portion of all proceeds are donated to a local animal shelter or rescue that is in need.