#newtsdoodles

Is Raining process, (part 2)
Let’s start the fun stuff.
So to recap from part 1, we have the background painted in.

Mountains are a big nexus for clouds and precipitation cause of the rain shadow effect.
Since it’s gonna be raining in the piece, I want to make sure the entire environment is on board. For the mountains, I thought it would look cool to add some misty clouds.
Moving closer,there’s usually a bit of blur where the rain hits the ground, so I added mist there too. For this I use a soft airbrush and gently erase the shapes till I’m satisfied with the result.

Now the rain. Lots of spatters and dots, and then I use the ‘motion blur’ effect to make it looks like rain.

I do several layers of rain. The more layers of rain, the harder the downpour. I try to do a layer of ‘foreground rain’ where the drops are a bit more defined. Then I just fiddle with the opacity till I like it.

My favorite bit. Shiny rain drops on the plants. If I can make anything sparkle in a piece, I will haha.

Character time!

I make sure they blend into the environment. So following the same light source for light and shading. Also since it’s raining, they’ll have little bits of raindrops on them.

Last but not least, I throw a soft light filter to unify the pallet and help set the mood.

And tada. There’s the finished piece.
Hope y’all enjoyed
Is Raining art process. (part 1)
Here’s another process thingy. For fun.
First, I block in the big shapes. I want to set up the environment and sure the colors work.
Since it’s gonna be raining in this piece (eventually), the colors overall are going to be somewhat dull, maybe with a greyish tint.

Next up, pick a light source.
For rocky features like mountains, this where the lighter shapes will be. For this one I opted to have the light coming from the upper left corner.
Again, I want to keep the colors pretty muted and not too saturated.

Time to start adding more details. I like to work from back to front.
For the mountains I can add more cool shadows to suggest more rock shapes, and just add more colors. The eraser took is excellent for carving out rock features
For grass I try to add more texture and shadows to break up shapes. I want this to look like a wild grassy meadow.

A forest at the base of the mountain helps add to the sense of depth.

More shapes and details in the grass. Paint out small clumps. Add some weeds. Little hi lights and shadows to keep breaking up shapes.

Last thing I add is the flowers; they are very fun so I save them for close to the end.

And finally the plants at the front. Since these dudes are closer, they are darker in color and more defined. I love using the really dark greens for plants.

And thats the base!
I’ll talk about the rain and the final touches in part 2


Is raining

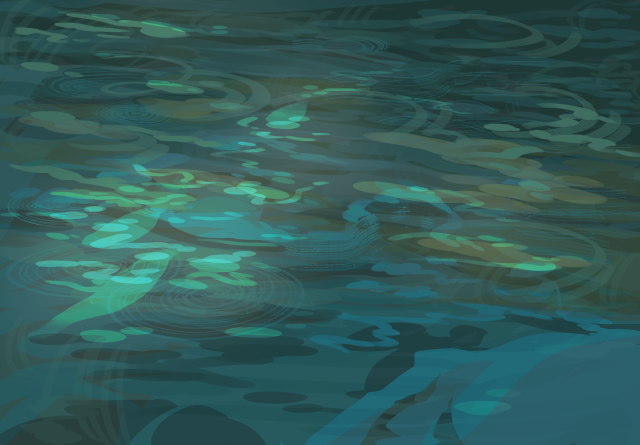
Water study for Wednesday
A silly steampunk AU sketch


MEESE


Moosepaint Speedway
Aka another silly little nature paint
Now kith


Relaxing water paints.
Tried a couple different lightings for fun.

