#s4 tutorial

As requested by a bunch of people, here’s a quick tutorial on how I make accessory overlays for clothing items! This tutorial assumes you already know how to recolour clothing items and cut out layers. I’ve never written a tutorial before so I hope this is clear enough and helpful to people!
What you need:
- Sims 4 Studio
- A photo editing software of your choice (I use photoshop which is what I will talk about in this tutorial)
Step 1: Create your base recolour.
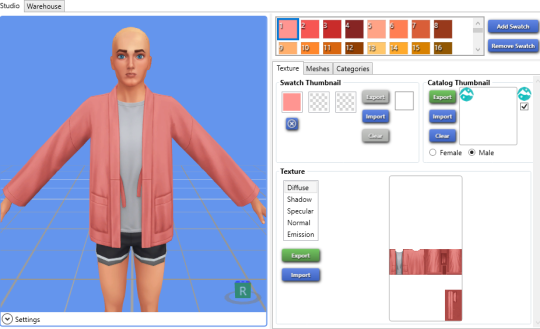
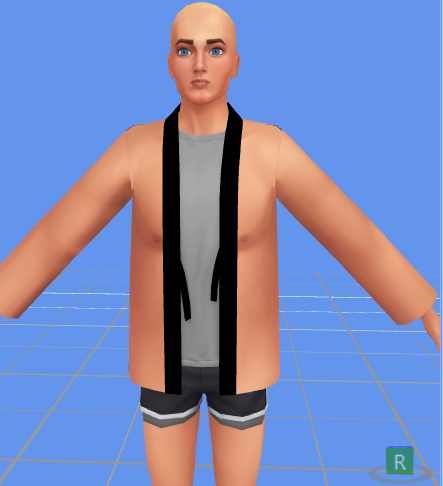
For this example I’m going to use a simple jacket with undershirt from the Snowy Escape EP. First you’re going to want to make your recolour as normal. You can see this item is a prime candidate for an accessory overlay for the undershirt! Save this file, and this is your first file/main recolour.
Step 2: Creating the overlay texture.
To create my texture, this requires a few steps. I probably don’t do this the easiest way but it works for me. To do this, I have two files open in photoshop. One file is my ‘overlay base’ file. In this file, the shirt section I have adjusted to be the perfect colour for my recolour action. The pattern/colour of the jacket section here does not matter as we won’t see this at all. You can delete it completely if you want but it’s not necessary. Here’s what my ‘overlay base’ file looks like:
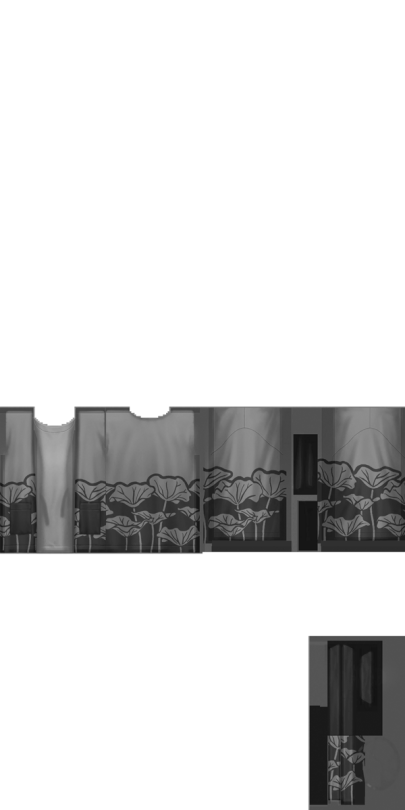
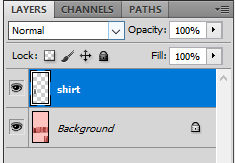
The second file I have open is my ‘layers’ file. I won’t insert the full image again but you can see below in this document I have cut out the ‘shirt’ as a separate layer to the background. This new layer is what we need.

Now we want to look at the alpha layer of our ‘overlay base’ file. Click on the channels tab and select ‘Alpha 1′.
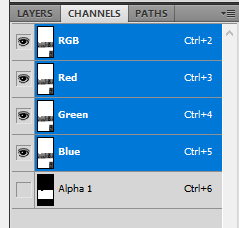
With alpha 1 selected, your file is going to look something like this:

This is telling your item which bits of the texture will ‘show up’ on the item. Anything in white will show up, anything in black won’t! As it is currently, all of the jacket is showing up, which is great for the normal clothing item but not for our overlay. We only want the area of the undershirt to be white on the alpha.
So, to do this, the best way I have found is to head back to the ‘layers’ file, then duplicate or copy/paste-in-place the shirt layer over to our ‘overlay base’ file. Then ctrl+left click on the shirt layer to select that layer.

With just our shirt selection highlighted, we then head back the alpha channel.

Then click on the Select tab > Inverse and press delete. This should delete/fill in black everything but your shirt section.

Head back to your normal RGB layer and delete the extra ‘shirt’ layer you used for the selection. Your file shouldn’t look any different in photoshop, but the alpha layer is where your important changes are. Save your file as a dds and your overlay texture is now all set!
To test everything worked right, load your new dds file into your original recolour. As you can see, my model now shows up with his shirt on but no texture for the jacket, which is exactly what we want, as we only want the overlay to affect the shirt.
With your ‘overlay base’ dds file all set, you can now run your recolour action on it to make your textures.
Step 3: Creating the overlay file.
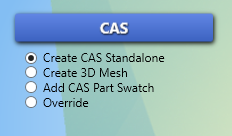
To create our overlay file, we want to open a new sims 4 studio window. Create a CAS standalone file.
Since the update that enabled sliders for makeup this step now requires one extra stage. We can no longer use makeup as a base as it uses a different DDS file type which increases the file size drastically, so instead choose Part Type: Tattoo - I use Upper Arm (Left).

We’re using this file as our base to make the overlay as it does not have a mesh attached. I have seen other tutorials recommend using gloves but do NOT do this as it has a very small mesh which can mess it up if you are enabling your overlay for multiple ages.
With your file named and created, we now have a few steps to do before we can import the swatches. The most important thing we need to do is change the sort layer. This determines which items show up on top of which other items. If your overlay’s sort layer number is lower than the original item’s, it won’t show up on top of it! You can find a list of the sort layer numbers of different items here.
For my overlays, I go 1 number above the item’s sort layer. Click on the warehouse tab in sims 4 studio and scroll down til you find SortLayer. Since the item I am making an overlay for is a top, I changed the sort layer to 16,001.

Since we are using a tattoo, to make sure that your overlay layers correctly we also need to change the Composition Method. Change this from 1 to 0. I don’t fully understand composition method but it is to do with how things like tattoos and face details interact and layer with your sim’s skin, so we don’t want it messing around with clothing.

Next, head back to the Studio tab and go to the Categories section. You will see the ‘Outfit Type’ tab is currently listed as Tattoo. For my clothing overlays, I want them to show up under rings , so I change this to ‘Middle Finger (left)’.

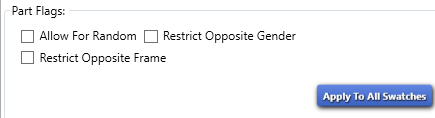
Next I want to make sure my overlay has all the same flags as the original outfit. I open both my original recolour and overlay files next to each other and change the flags of the overlay to match, so it shows up for the correct age, gender, outfit type etc.
There are two notable exceptions to this. Overlays have an annoying habit of spawning randomly on townies in the wrong outfits, but I have found two ways to limit this. One, make sure the only Occult it is tagged for is Human. (It will still be useable by the other occults, just won’t spawn on them at random).

Two, make sure your overlay is NOT enabled for random!
With all this complete, your file should now be set up! You can now add your swatches using the S4S Colour Palette tool.
Step 4: Import your textures.
With all of this done and your recoloured textures created in the previous step, you can now go ahead and import your textures as normal!

Don’t be alarmed if they show up looking like this or you can’t see them on the model at all - depending on the location of the texture of the overlay it might not appear on the naked model. As the overlay has no mesh of its own you can’t see the full effect until you’re in game.
You can now add a thumbnail for your overlay, save your file and then fingers crossed your overlay now works perfectly in game!


How to build a trailer/caravan… or just download one.
I used my own custom content for the wheels, the windows and the awnings.
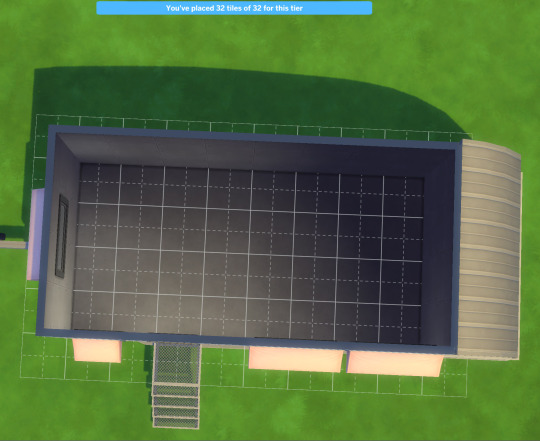
This version is a micro home with 32 tiles.
Everything can be substituted with content already in the game, but the trailer wheels in debug doesn’t fit quite as well.
Guide below, ending with a list of the content I used as well as a download link for the trailer itself.
1. Begin by enabling MOO (type in bb.moveobjects and press enter)
2. Build 2 rooms. A large exactly 4x8 tiles and another smaller room 4x2 tiles
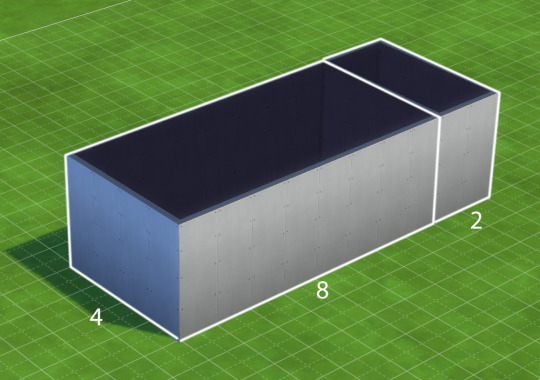
3. Build two similar rooms on top.
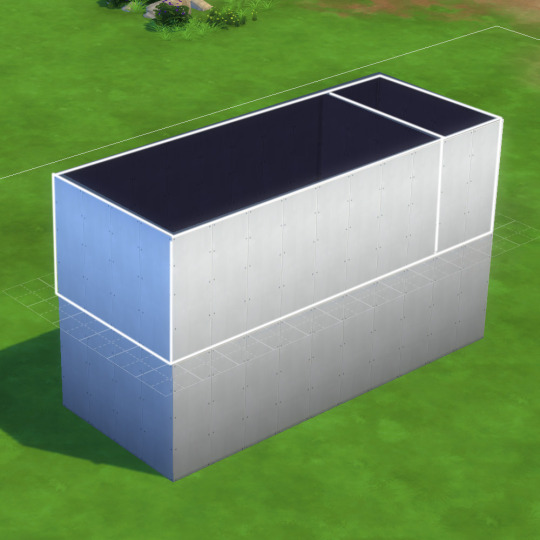
4. Mark the two outward corners of the small bottom room by placing two floor tiles.
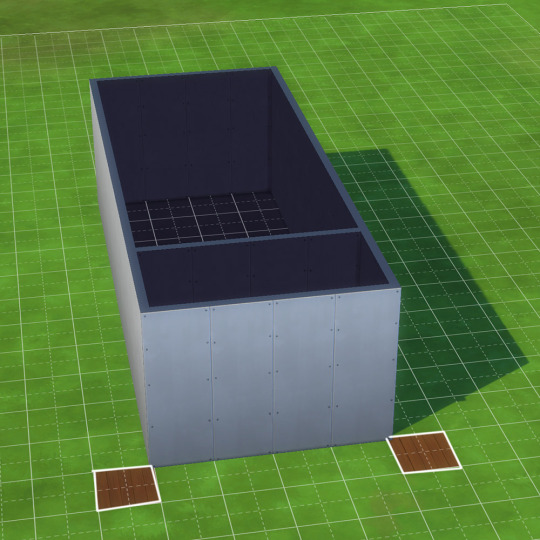
5. Delete both bottom rooms

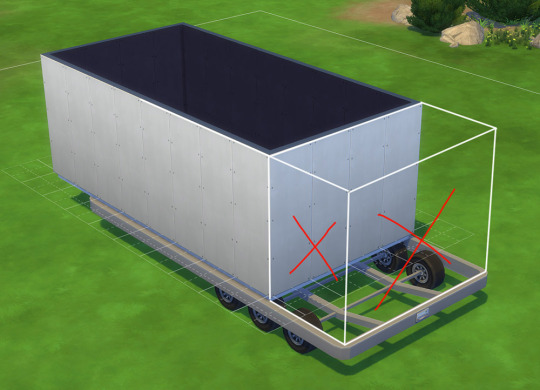
6. Place the trailer wheels, and use the two floor tiles as guidelines.
(My Trailer Wheels are located under decorations.
Perform a search for trailer wheels, or a text search for ditzn.)
7. Drag the top floor down until the green line is just above the trailer bottom.

8. Delete the small room (and the floor tiles)
9. Draw a Half Gabled Roof instead. (Adjust size until it fits, and minimize the edges of the roof. Adjust the height until it looks like the image below).
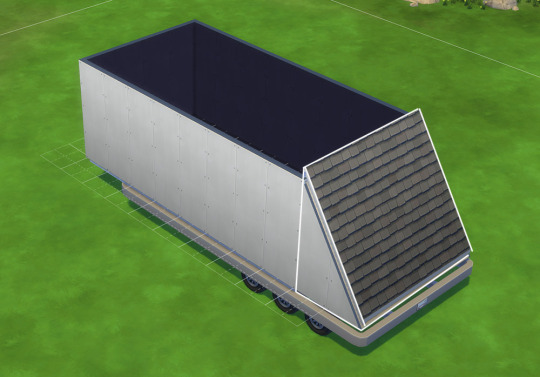
10. Place a Gabled Roof on top.

11. Reduce height to the lowest possible and curve the roof as much as possible.

12. Curve the end roof until it fits the top. This might take some tweaking.

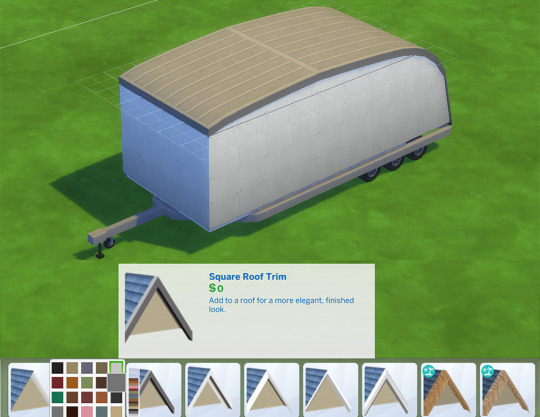
13. Assign the roof texture of your choice, and assign a “square roof trim” in a matching color, to the edges.
14. Assign a Beveled Roof Trim to the bottom of the roof.
(The white swatch matches the trailer wheel object.)

15. Assign an Inlaid Exterior Trim to the bottom of the main room.

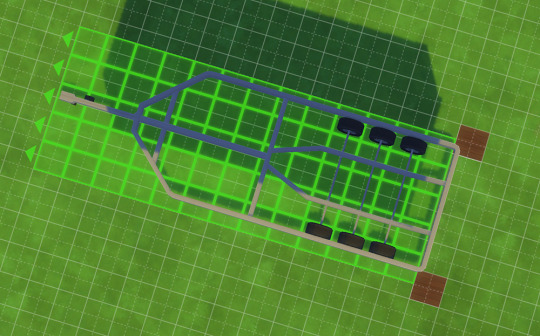
16. Place wall-textures, windows, doors and decorate the 32 interior tiles as you please. :)
Objects used for the original caravan :
- Walls: “Stones That Groove” from Discover University
- Door: “Inviting Swing Out Door” from StrangerVille
- Solar panels:Found in debug and scaled down (Get Famous)
- Window Box:“Neighborly Windowbox” Basegame
Custom Content
- Awnings: CC “Strange Awning” Basegame Compatible
- Windows: CC “Trailer Windows”, matching the door. (Requires Get to work)
- Trailer Wheels: CC “Trailer Wheels” Basegame Compatible
Download the Trailer Lot
DOWNLOAD (SFS - no ads)
Unzip and place in TRAY folder. Place with MOO!
Packs needed for the completeTrailer Lot:


Post link
 Tutorial : Notes and Tips for Trans SimsXan here! What started as me trying to figure out a m")
 Tutorial : Notes and Tips for Trans SimsXan here! What started as me trying to figure out a m")
 Tutorial : Notes and Tips for Trans SimsXan here! What started as me trying to figure out a m")
 Tutorial : Notes and Tips for Trans SimsXan here! What started as me trying to figure out a m")
 Tutorial : Notes and Tips for Trans SimsXan here! What started as me trying to figure out a m")
 Tutorial : Notes and Tips for Trans SimsXan here! What started as me trying to figure out a m")
 Tutorial : Notes and Tips for Trans SimsXan here! What started as me trying to figure out a m")
 Tutorial : Notes and Tips for Trans SimsXan here! What started as me trying to figure out a m")
(Semi) Tutorial : Notes and Tips for Trans Sims
Xan here! What started as me trying to figure out a mesh turned into…this. I’m sure someone else has written guides on the topic, but I couldn’t find them, so I put this together. I made it mostly for my own reference–I keep forgetting which tags to use–but I thought I’d share in case anyone else might find it useful. (Requires: Sims 4 Studio)
Special thanks to:
- @gncc for getting me thinking on the topic (great blog for inclusive cc)
- @saurusness for reading my draft, and trying to explain UVs to me (even if it went right over my head)
- @helgatishaand@sciophobis for the poses
- And to Carmen and Erik for the 48+ hours they spent being dressed and undressed for the making of this tutorial.
@maxismatchccworld@simblrhelp @faaeish
Post link