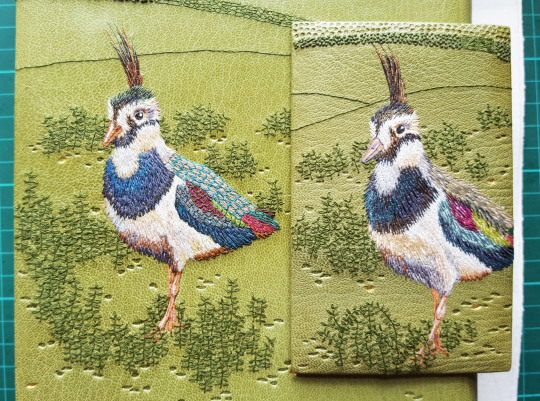
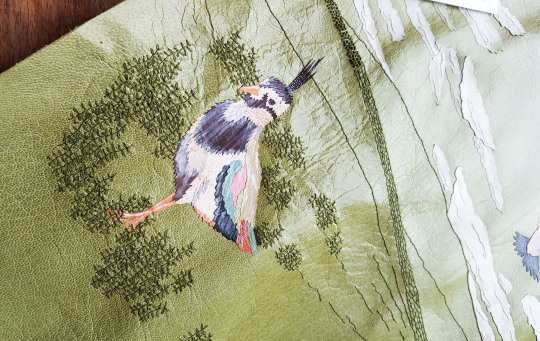
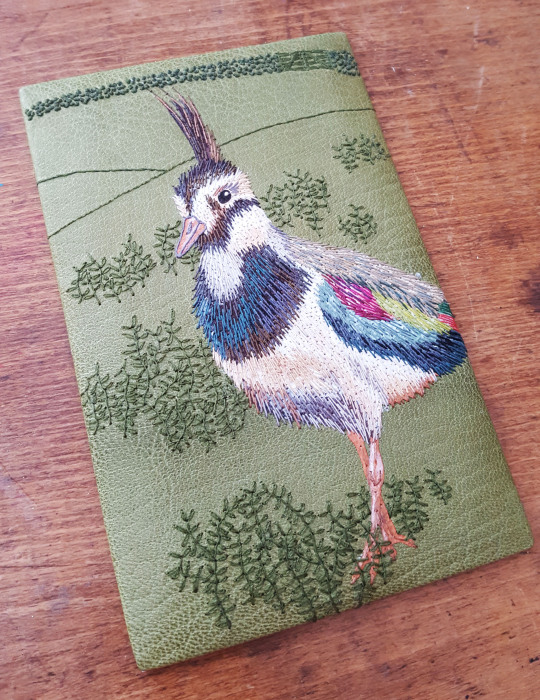
Spot the difference in the above! As explained in the previous post, the reason for me doing my sample boards is they are a test run ahead of working on the actual binding. In this case, I finessed the lapwing on the book by using a wider colour palette overall and also added feather outlines to the back of the bird which I felt made a huge improvement.
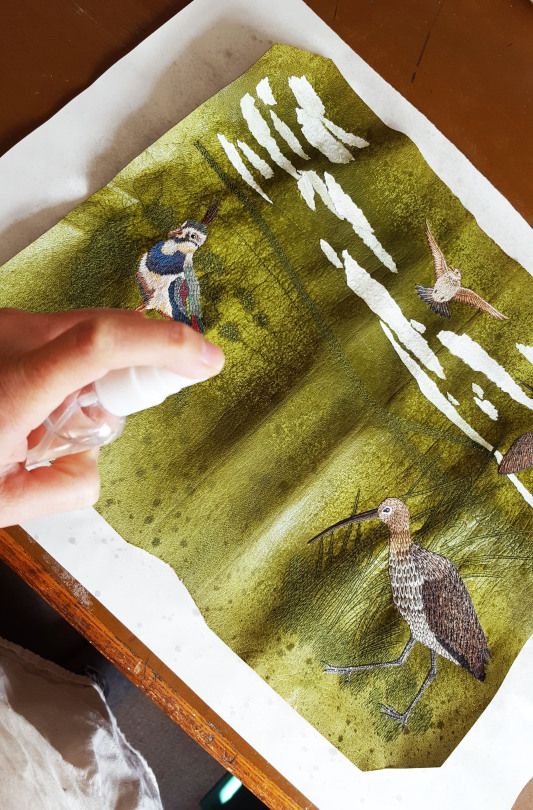
So, onto the covering stage of the binding process. I spritzed the front of the leather using a water spray in order to prevent stains appearing as a result of the pasting out of the reverse after covering.
The back of the leather was pasted out three times and left for the paste to soak in each time.
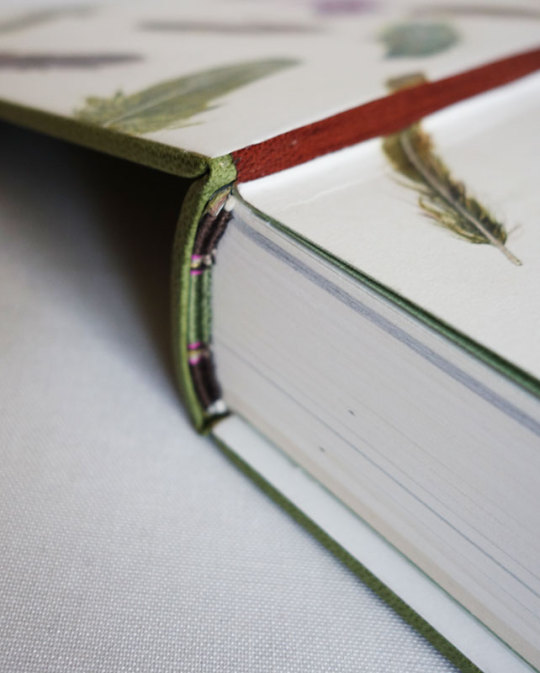
Thankfully the leather went on to the book well and I was able to turn in the edges and form the headcaps before leaving the book to dry for 24 hours. I regularly changed the blotting papers in order to draw out the moisture over this time.
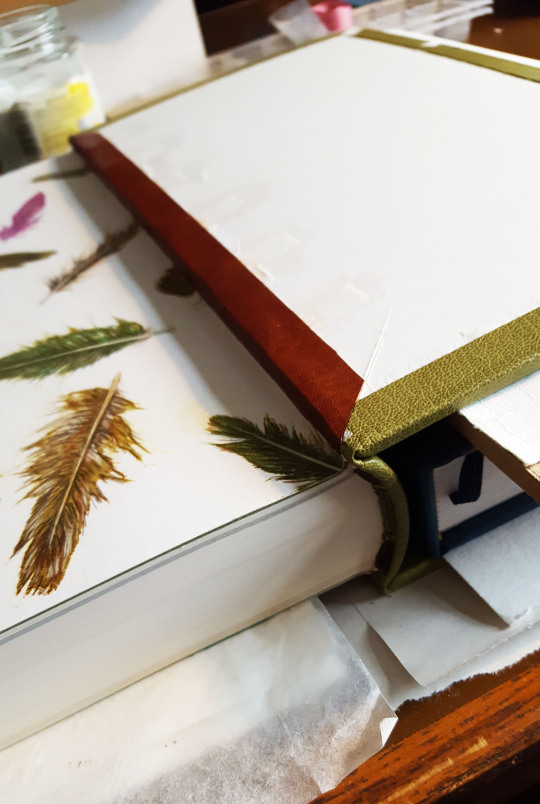
Once completely dry I was able to open up the book boards and work on sticking the leather joints down. The leather joints had been glued into the endpaper before the book was forwarded so I took off the waste sheets that had been protecting the text block to free them.
I laid the book down on my bench with both boards open. I then cut bevels at the corners of the turns-ins and the leather joints so they would lie flush when the leather joints were glued down. I applied PVA glue to the leather joint and rubbed it down using my fingers before closing the board and letting it dry. Once dry the same was done to the other board, then the boards were infilled, sanded and the printed paper doublures were glued down.
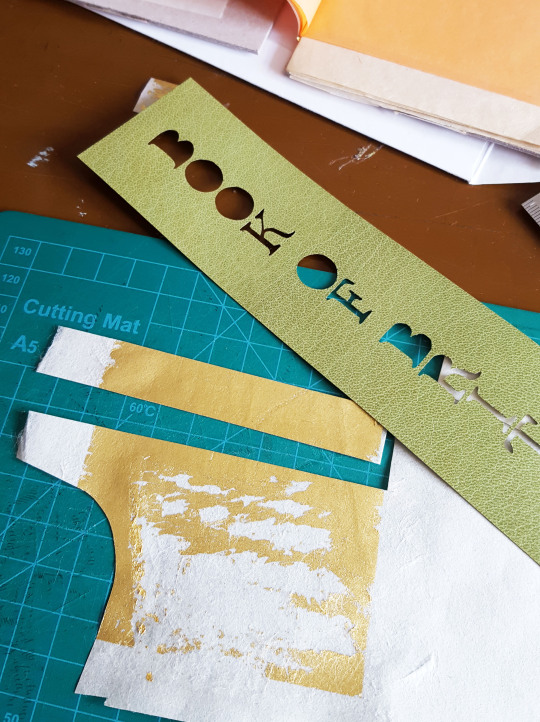
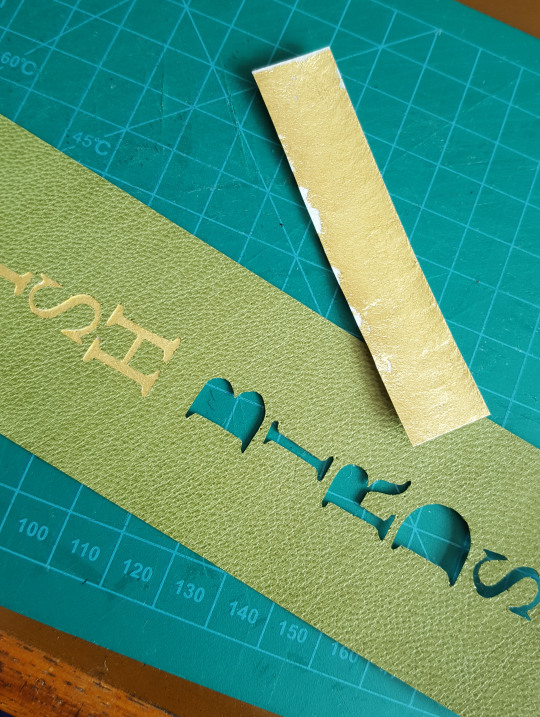
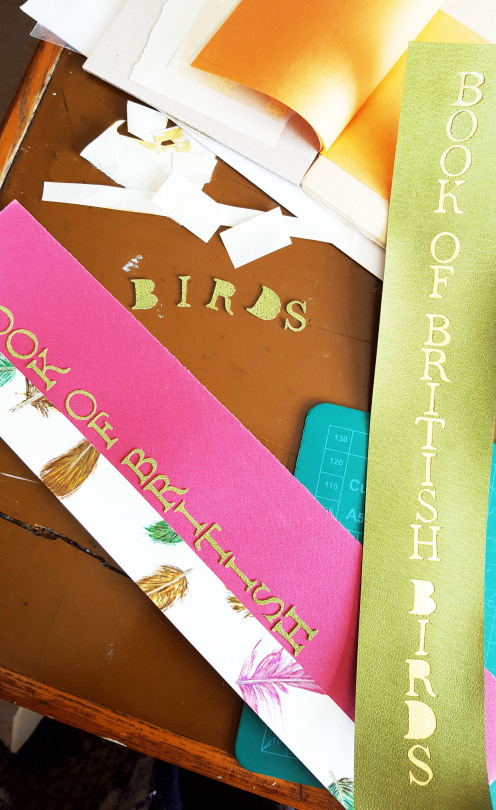
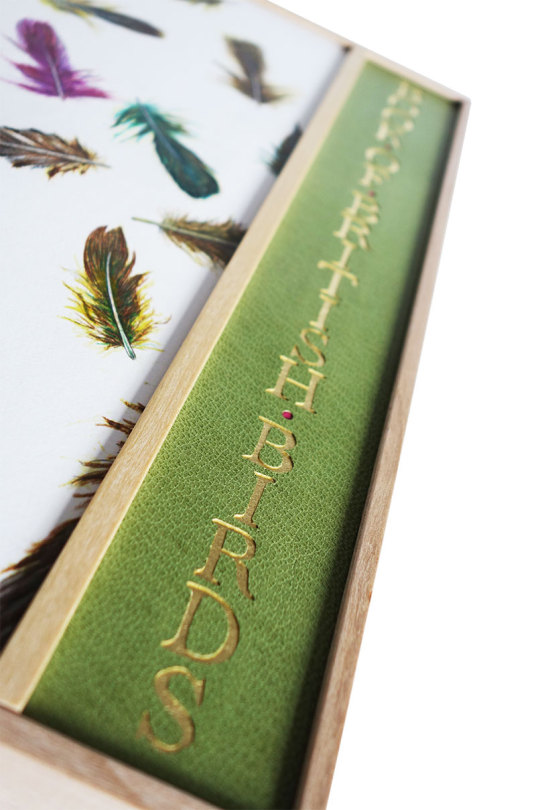
Once the book was complete it was time to work on the wooden container I had planned to house it in. I wanted the title to appear on the lid of the box so carefully cut the letters out of the same colour leather.
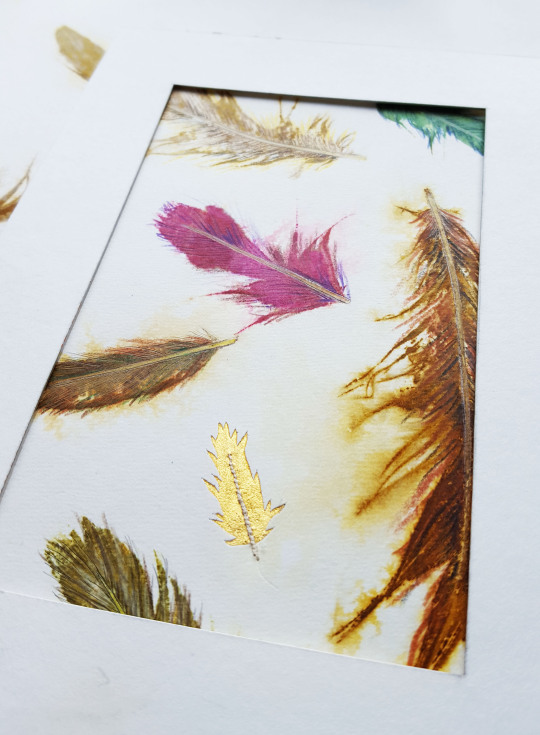
Once they were cut out I backed the voids with gold leaf that I had stuck to Japanese paper (the same as I had done for the ‘highlight’ leaves on the paper doublures).
It was important to cut the letters out especially carefully as I wanted to use them to make a label for an outer conservation box I had ordered for the wooden box to live in.
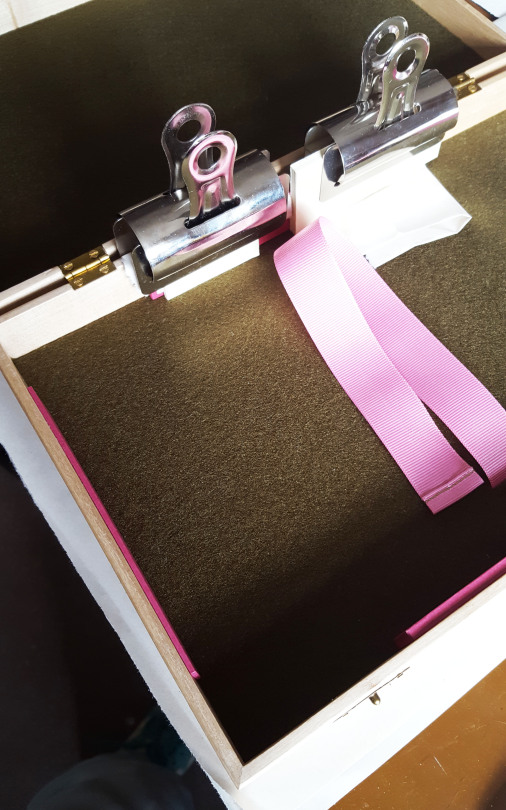
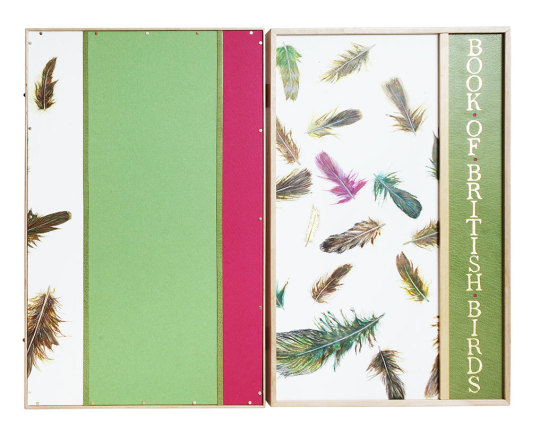
The box itself was machined from tulipwood with a routed channel in the lid and base in which a decorated panel was fixed. It was lined with felt and spacers added on all four sides.
Finally, I will end with some pictures of the end result! More pictures of this binding and box can also be found on my website.
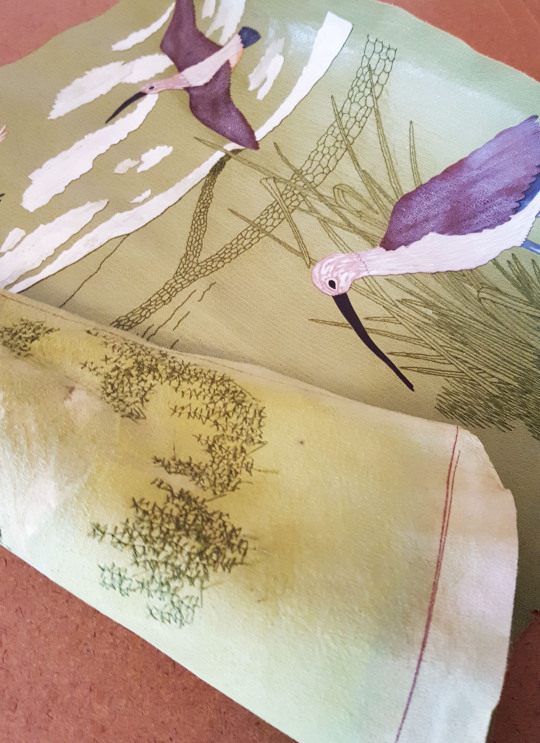
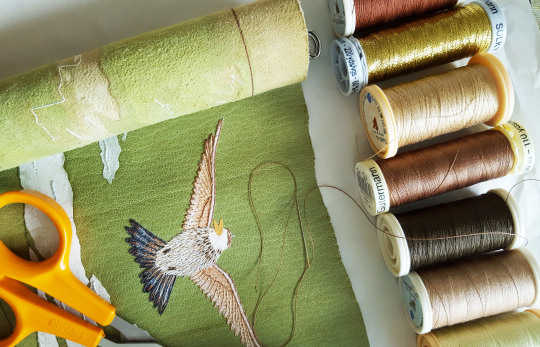
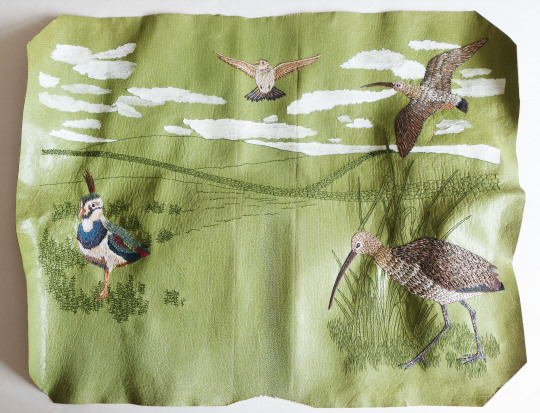
Part three of this blog post details the embroidery I did on the British Birds binding, the bit I always enjoy the most! As described in the pervious installment, I chose to keep the background detail behind the birds to simple lines embroidered in green to match the covering leather. This was to stay in keeping with the illustrations within the book.
The drystone wall ran across the design, changing in size for perspective. The larger part of the wall was detailed with outlines of individual stones and as the wall went into the distance this changed and each stone was represented by a small French knot.
Behind the lapwing, as shown in the previous post through the work I did on the sample board, I added sprigs of heather.
And behind the curlew I depicted the bird walking amongst some long grasses.
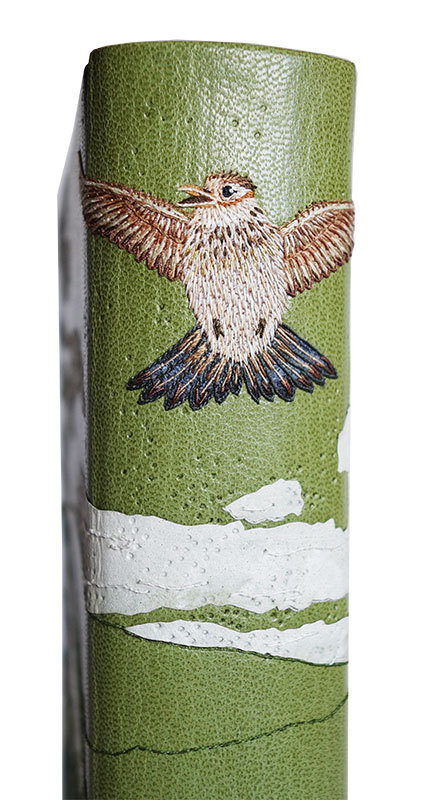
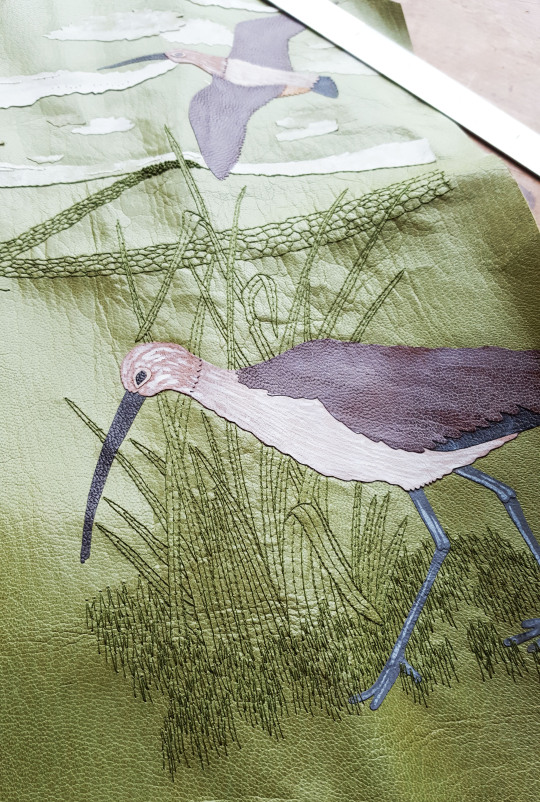
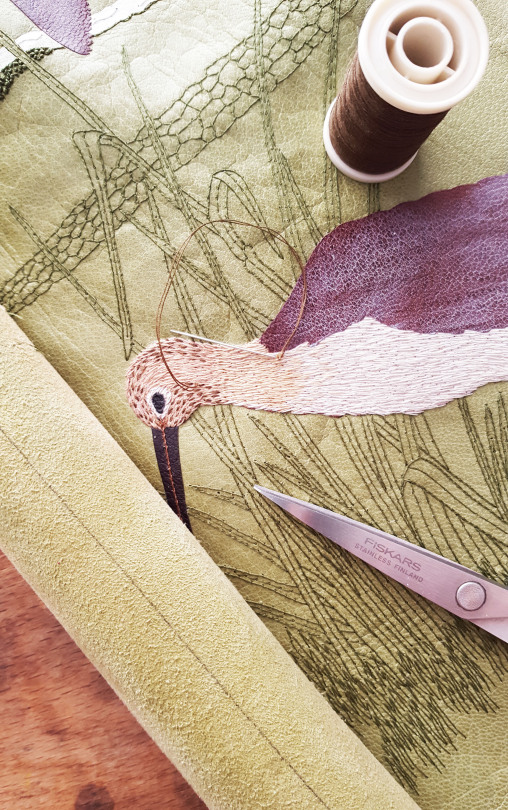
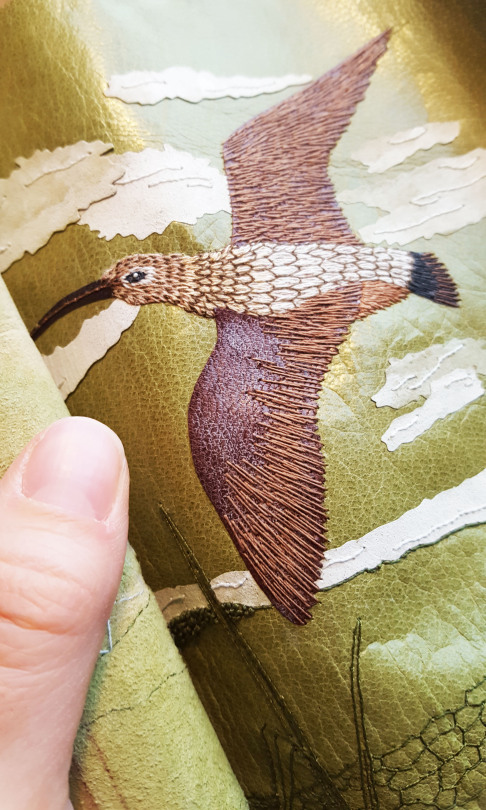
Once the background detail was complete it was time to work on the birds. Firstly, the large standing curlew got the embroidery treatment. I started by building up the colour with some small stem stitches with threads in colours to match the onlay behind.
Once these patches were blocked out with small stitches, I added some speckled detail on the head of the bird using a double length of machine cotton.
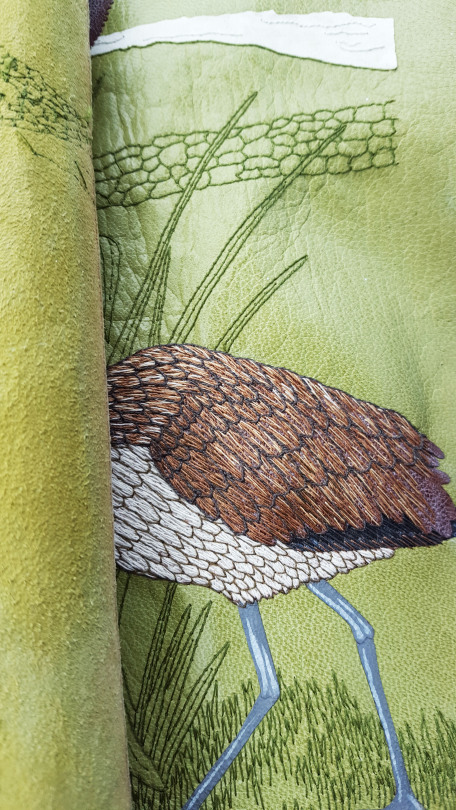
Once all of the colour block was done on the main body of the bird, I added feather outlines using a darker thread.
Within each of these outlined feathers I added further detail in the centre of each using a lazy daisy stitch.
More detail was added to the beak and legs, plus a small white French knot was sewn into the black of the bird’s eye to bring it to life!
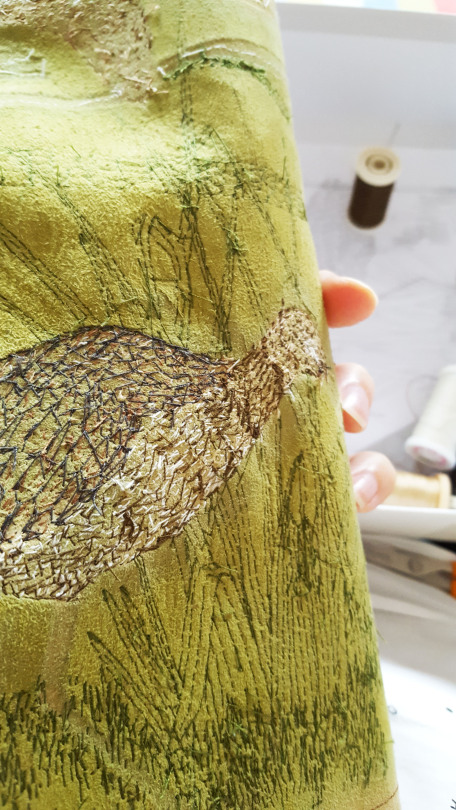
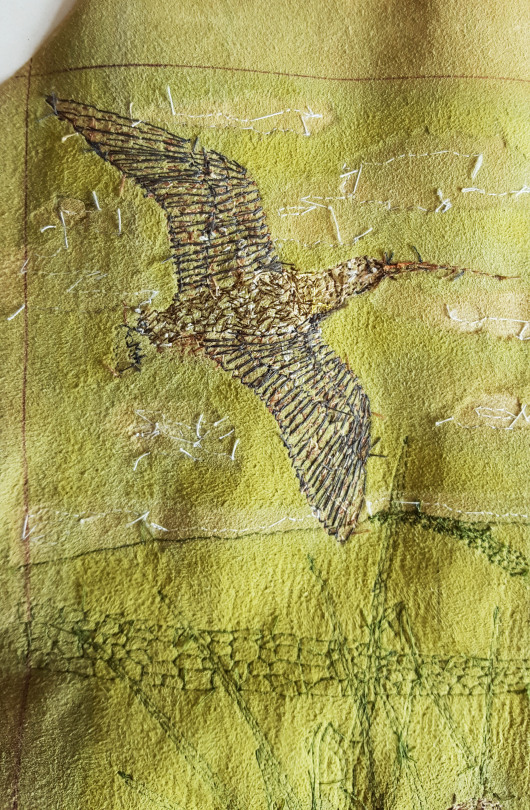
The back of the leather showed the number of stitches that went into creating his feathery look.
The same method was applied to the flying curlew, using smaller stitches on the base and building up detail on top.
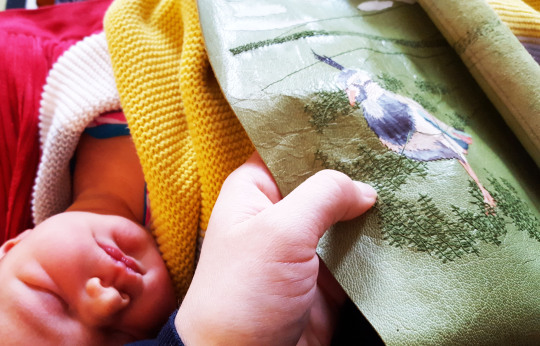
I had company in the form of a newborn baby throughout this process - thankfully at her early age she slept a lot and embroidering the leather was a pleasant task to do with a dozy baby on my lap!
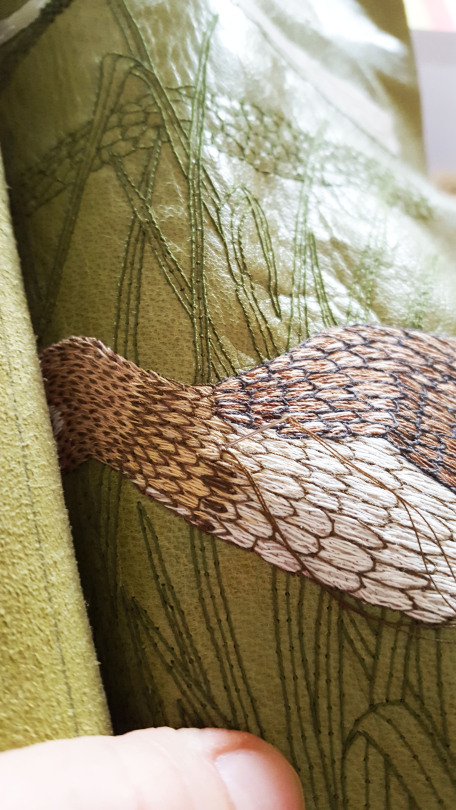
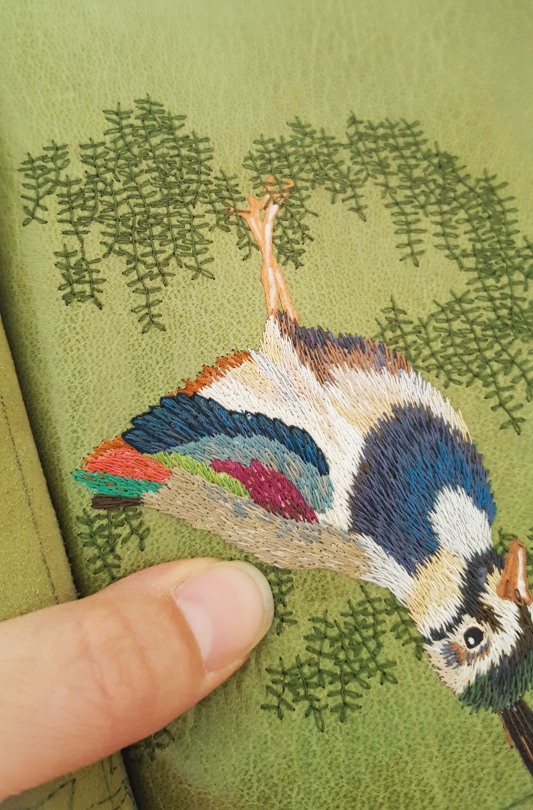
As with the curlews, the lapwing had his feathers built up in the same way. Having worked on a lapwing for the sample board, and therefore having had a “test-run”, I thought of improvements to the way I should embroider the second one. I was able to add finer detail and adapt the way I used the threads a bit on the actual book leather. For example, I used a larger variety of colours and added outlines for some of the feathers on the lapwing’s back.
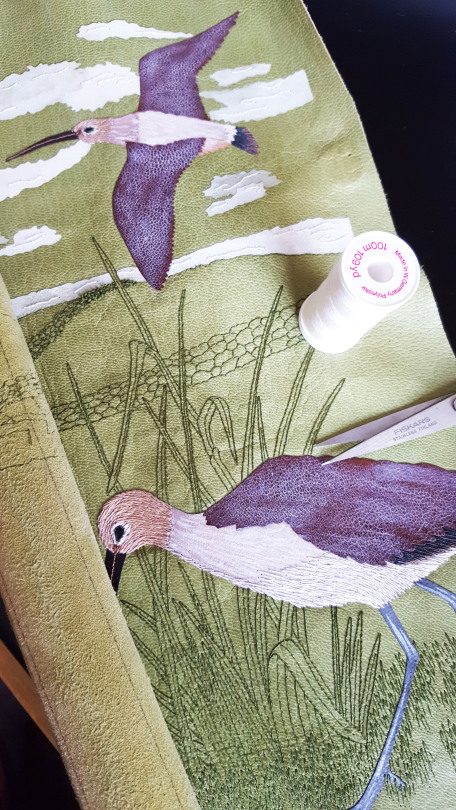
Metallic threads were also woven into each of the birds before completion to add a little sparkle to their feathers!
A little white thread was also added to the clouds to add a bit of textural detail to them too. And with this done the embroidery stage was complete!
COMPLETED FRONT OF LEATHER:
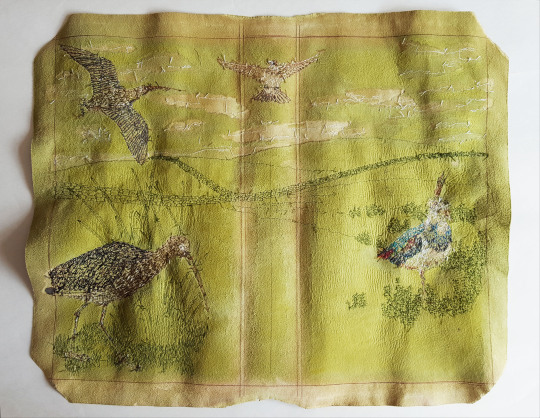
COMPLETED BACK OF LEATHER:
The next, and final, installment sees the leather going onto the book and the end result…
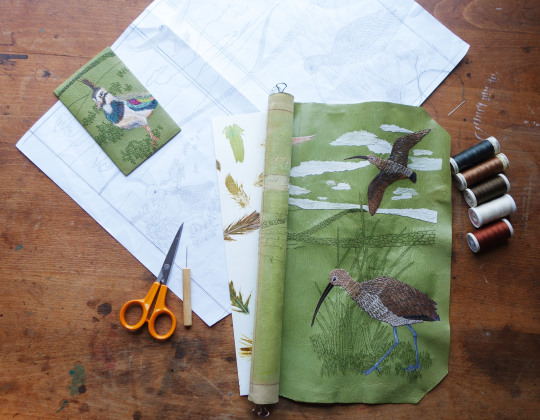
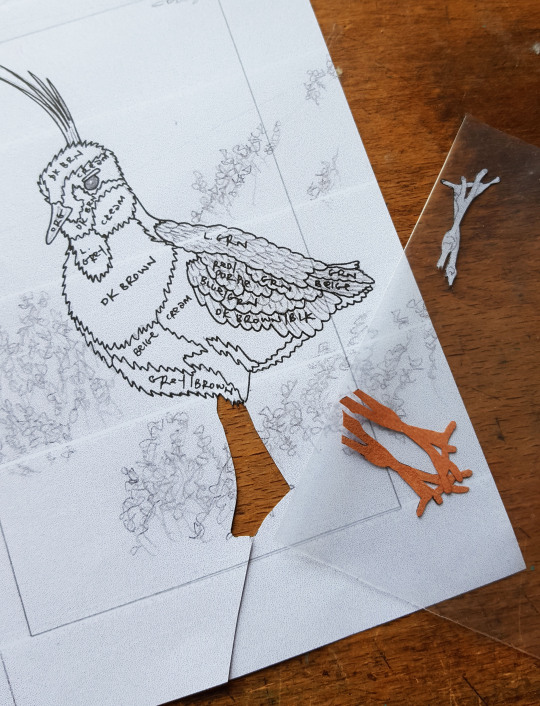
The curlews, skylark and lapwing were each broken down into block colours in order to plan out their onlays. I chose a lovely shade of green to have as the covering leather to compliment the birds and to achieve a background colour I was happy with.
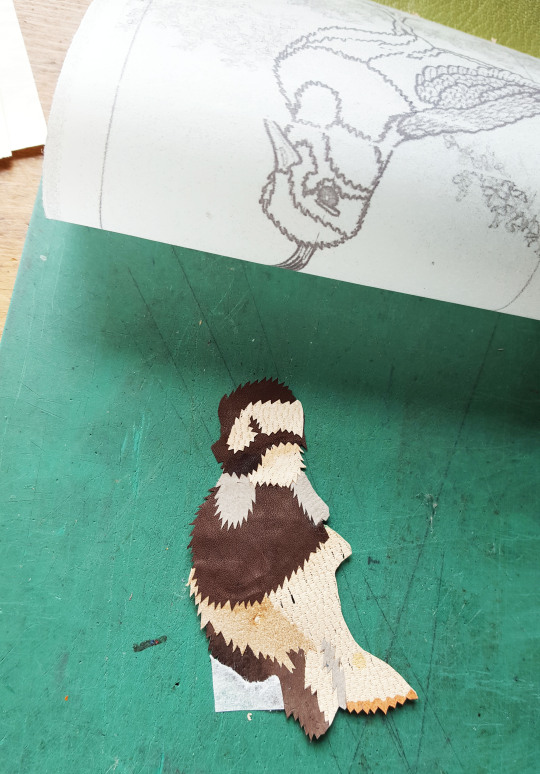
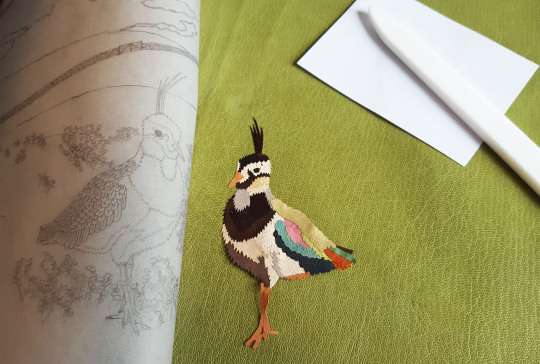
For the sample board I chose to illustrate just the lapwing, so worked on two lapwing onlays simultaneously (one of the sample board and one for the book). The onlays were each cut out with a scalpel, giving each one a slight border so that it could be stuck to the next in a patchwork off the book.
The small onlays were stuck together off of the book using a tracing paper template as a guide.
Finally producing two lapwings!
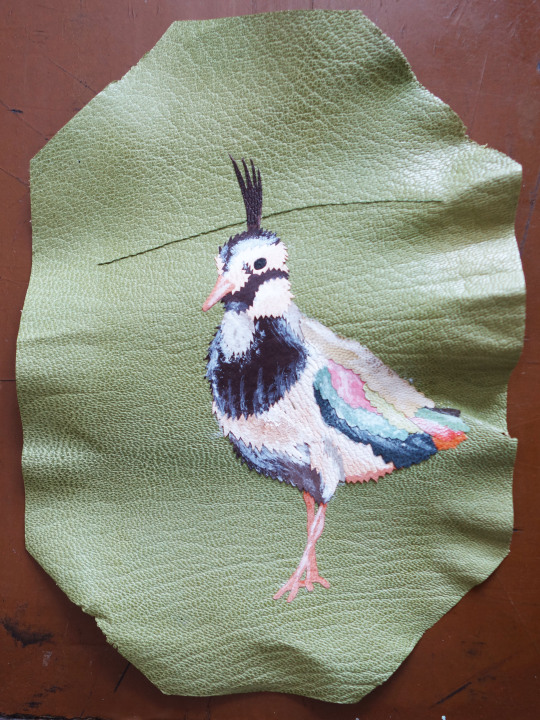
One of the birds was stuck down onto the sample board leather using PVA glue. The colours were then muted down using a very thin wash of white acrylic paint. Once this had been done I was able to back-pare and then embroider the leather.
I first worked on the background detail, in a green thread to match the colour of the leather. In the book all the full-colour illustrations of the birds were shown against a muted grey, line-drawn background so I wanted to compliment this on the cover design.
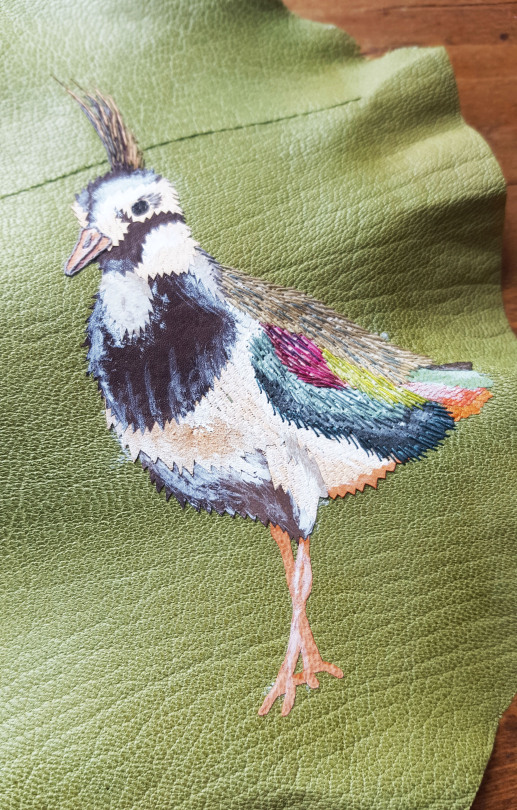
Stitches were gradually built up over the whole surface of the sample board leather including coloured stitches all over the bird to give it a more feathery look and feel.
‘Heather’ detail was also added around the lapwing.
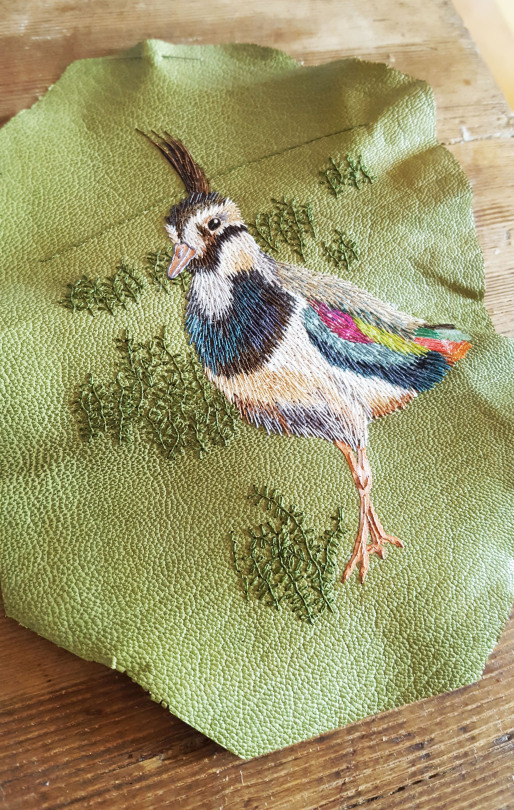
A drystone wall was included in the design drawing (including a four-bar gate) using French knots to give the impressions of the stones. Once the embroidery was complete the leather was stuck onto the sample board with paste and the edges turned in.
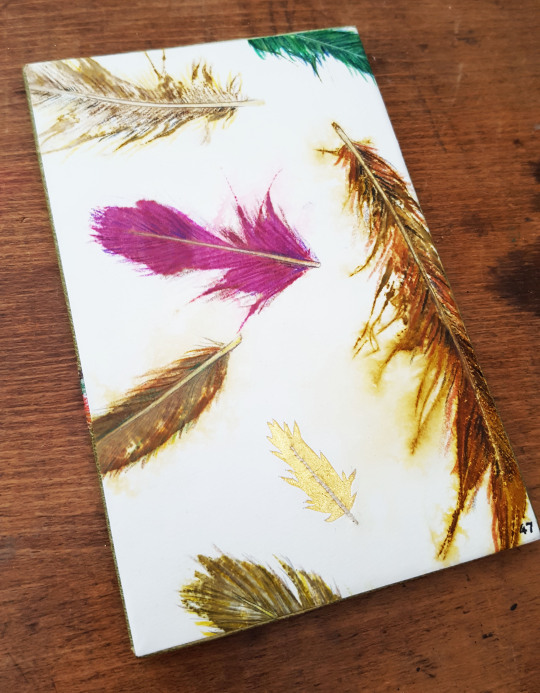
A section of the printed feather paper was selected to use on the sample board. In addition to the printed feathers, a single feather made from gold leaf was also added as a highlight. This was done by cutting out the feather shape from the endpaper and then backing the void with some gold leaf that had been adhered to Japanese paper. The shaft of the feather was embroidered with thread.
Once stuck down this board became number 47 in my sample board series!
And so once I was happy with the sample board I was able to move onto working on the book itself. In the way I had laid down the lapwing onto the sample board using my tracing paper guide, I did the same for on the covering leather, rubbing it down with a Teflon folder to ensure even adhesion.
The two curlews and the skylark were also glued down in the correct positions.
I painted some strips of suede with white acrylic paint in a mottled pattern to use for clouds. These were also cut out and laid down in place.
The whole of the leather was then back-pared on the reverse in preparation for the next stage, the embroidery. This is detailed in the next blog post, part three.
“Hail to thee, blithe Spirit! Bird thou never wert, That from heaven, or near it, Pourest thy full heart In profuse strains of unpremeditated art.” - To a Skylark, Percy Bysshe Shelley, 1820

Vila Franca de Xira/Portugal (5/05/2022)[Nikon D5")
Vila Franca de Xira/Portugal (5/05/2022)[Nikon D5")