#bullskinleather


“Music” Miniature Board
Commissioned as part of a series on the same theme by Neale Albert, New York, USA.
Measuring 3 inches square
Made in 2020
This series of boards was inspired by a collection of full size boards which Neale Albert was shown during a trip to George Bayntuns in Bath in 2018. The boards he saw had all been made by members of Designer Bookbinders for a separate project on the theme of Architecture. This project gave Neale the idea for a new project: a series of miniature designer bound boards on the theme of music, three inches (7.62 centimetres) square in size. In early 2019 myself and a number of other binders were asked to participate in this project. Each binder was given total control of the design of their piece (as usual for Neale’s commissions) the only common ground between them was to be the size and the musical theme.
Neale started collecting dolls house miniatures in the mid-1980’s, which then progressed to commissioning miniature reproductions of his favourite things leading eventually to having entire miniature rooms made for him. But of course miniature rooms need miniature things to go into them, and naturally when Neale’s second room project was going to be the library at Cliveden House in the UK he needed miniature books for the shelves! Initially these were blank books purchased at doll house shows until he discovered the world of real miniature books with real type and real illustrations.
I believe that this was the start of Neale’s passion for collecting miniature bindings, commissioning bookbinders from around the world to create miniature books for him. Over 250 of Neale’s bindings are illustrated in the 2008 publication, “The Neale M. Albert Collection of Miniature Designer Bindings: A Catalogue of an Exhibition Held at the John Rylands Library 4 June – 18 October 2008”, and he has commissioned many more since then too.

When I considered the theme my thoughts naturally turned to cellos as I played the cello up until the age of 20. I made it all the way up to Grade 8 (which seems unbelievable to me now as I can barely remember how to read music anymore!) and was a member of both the orchestra at my secondary school as well as a local music centre. I started learning the cello when I was at primary school - here I am on the far right!

I was also part of a record breaking attempt in 1998 and made it into the local paper (below on the right!). Nearly 4000 young musicians got together at the National Indoor Arena in Birmingham along with the City of Birmingham Symphony Orchestra and the conductor Sir Simon Rattle to perform Sir Malcolm Arnold’s Suite No.2, along with school children from all over the country - we successfully broke the previous record of 2212 musicians!
Sadly leaving home to go to university was the end of my cello playing as I decided I didn’t want to take such a large instrument away with me. It sat in the cupboard at my parents house for many years however I am pleased to say that it has finally gone to a new owner and is being played again.

As luck would have it a neighbour of mine is a luthier, based in Somerset and specialising in cellos. Kai-Thomas Roth was born in Germany. From the age of eight he knew he wanted to become a violinmaker and made his first instrument at the age of thirteen. After training as a cabinetmaker in Switzerland he came to England to study at the Newark School of Violin Making. Following work experience in the trade he established with his wife Caroline Crowley their business as makers of fine instruments of the violin family in 1990.
Below: Head of Baroque cello, No 103, after Guadagnini (Photo Credit: Kai-Thomas Roth Instgram account @kaithomasrothcellos)
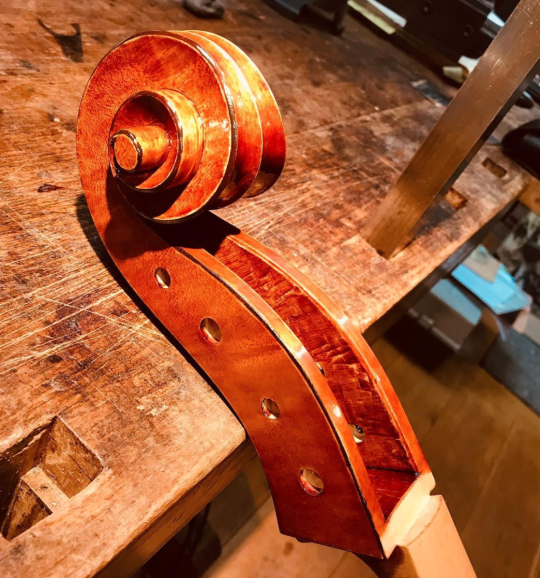
Specialising exclusively in making bowed stringed instruments all experience and expertise gained since 1986 are concentrated on the manufacture of these intricate complex artefacts. For that reason Kai-Thomas neither has a shop nor employees and he does not deal in old instruments or undertake repairs. This puts him amongst the few makers who immerse themselves completely in creating instruments but amazingly he’s never played the instrument he so lovingly creates!
I approached Kai to ask whether he had any technical drawings of cellos that I might borrow to base the design of my board on. What he lent me was a drawing of a “Violoncello Piccolo” made by Johann Christian Hoffmann in Leipzig in 1732. This instrument belongs to the Museum of Musical Instruments of Leipzig University and the maker was in Leipzig at the same time as Johann Sebastian Bach. This violoncello is a small cello that would be played braced against the shoulder rather than between the legs. This instrument is also a five-string version of the instrument, standard cellos have just four strings.

The inner board was made up as I would make up the board for a binding. Two 1mm think squares of Gemini board were glued together, with a piece of kraft paper glued on the inner side of the board and two layers of 145gsm water colour paper to the outside. Once dry the outside face of the board was bevelled using sandpaper.
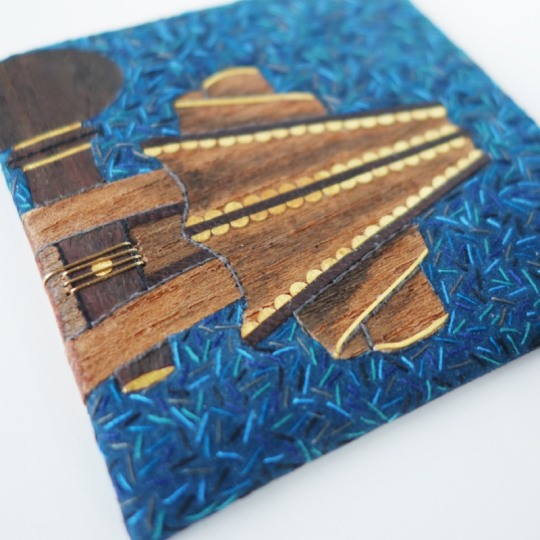
The front of the board is covered in “Colvert” coloured bull skin from the Remy Carriat Tannerie in France, this was edge pared for the turn-ins using my Brockman paring machine and then further pared with a rounded scalpel blade. The bull skin is very stretchy and difficult to pare with a conventional paring knife so I have found through experimenting that I get the best result using a scalpel with a size 23 Swan Morton blade in it.
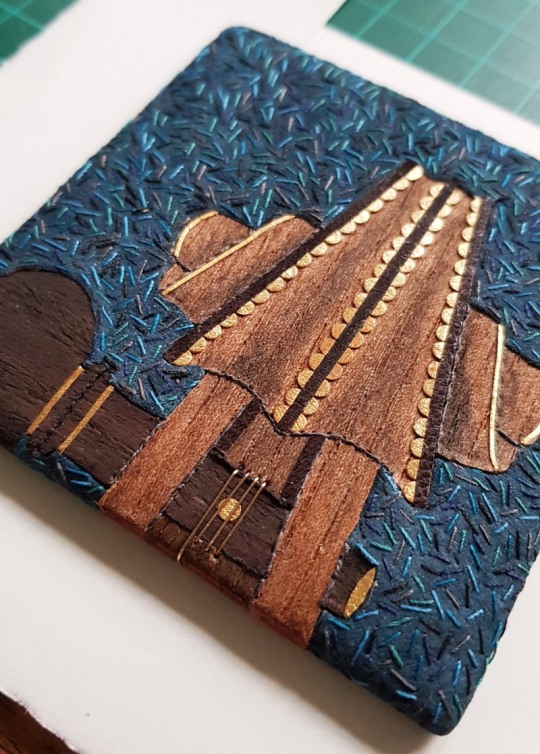
I traced the scroll section of the cello, including the top peg, onto some paper and transferred this onto the back of the leather I chose to use for the board. I then embroidered a series of individual short lines in a variety of colours of cotton thread to break up the uniform blue of the leather. These stitches were done around the outline of where the scroll was going to sit on the board.
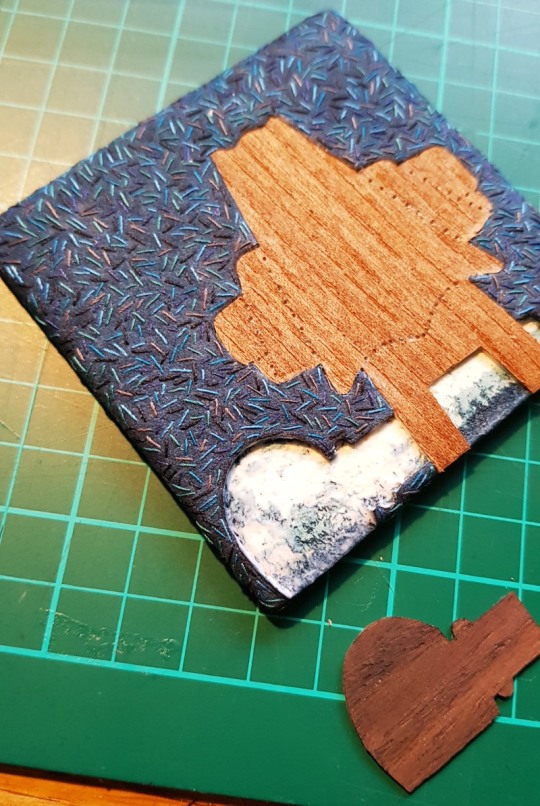
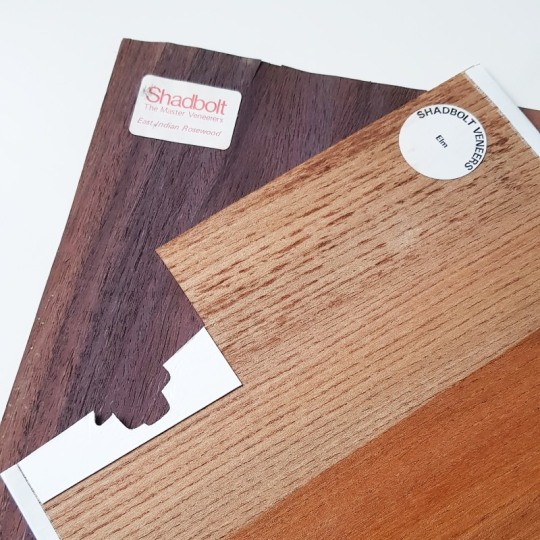
The leather was then pasted to the board, turned in and left to dry. I then cut out the outline of the cello scroll (within the line of stitches) and peeled this away to leave a void. I used two varieties of veneer (Rosewood and Elm), which I backed onto card to give extra thickness and strength, cutting them out very carefully with a sharp scalpel so that they exactly matched the void that they needed to fill.
They were glued in place using PVA glue and held with small clips whilst the glue dried to ensure that they dried flat. Where the veneer met the edge of the board I bevelled the veneer to match the profile of the leather as it thinned towards the edges.
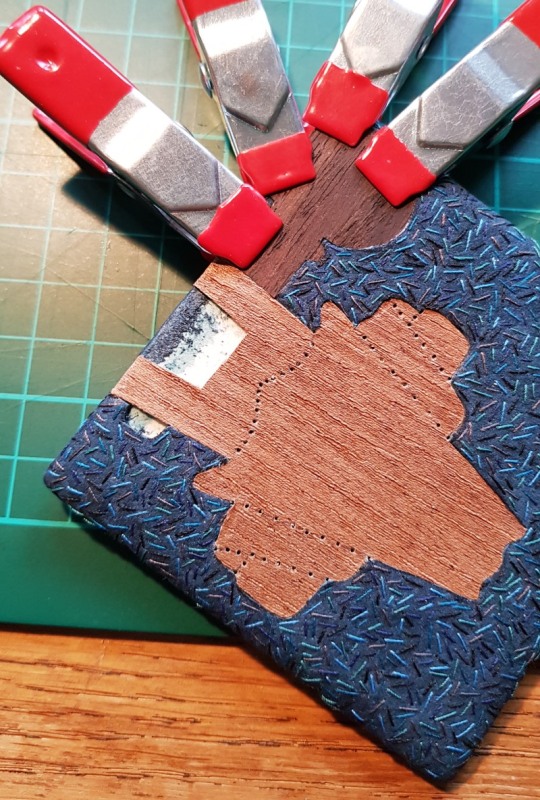
I forgot to take too many photos of how I built up the detail on the veneered sections of the board (I was enjoying this part too much and forgot!), but I drilled small holes right through the board using a fine drill bit in my Dremel and added outlines using thread sewn through these holes. I also added a thin wash of acrylic paint to some areas of the veneer to add an appearance of shading and depth to the surface, plus I also included some detail in gold leaf to jolly up the design!
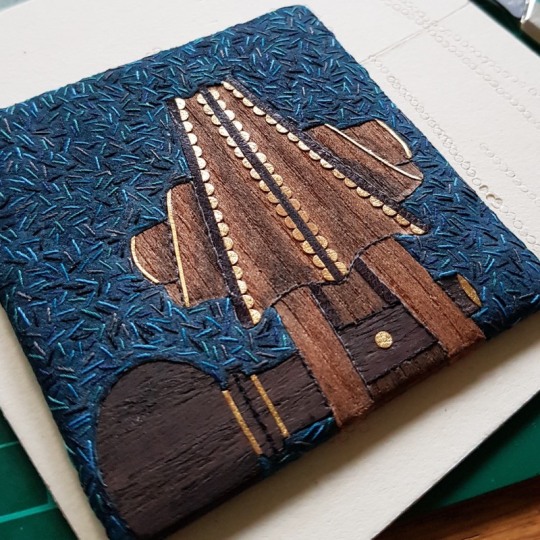
Finally, I used thin gold wire that was also passed through more small holes drilled in the board to depict the cello string wound round the topmost peg. The wire was passed through the board and embedded into the reverse before being covered with the infill on the back of the board.
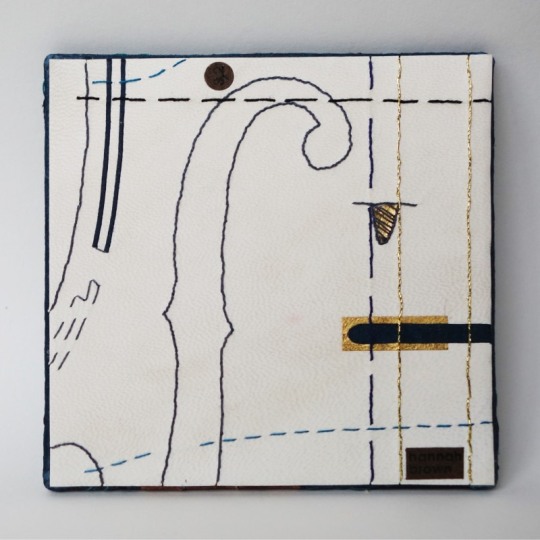
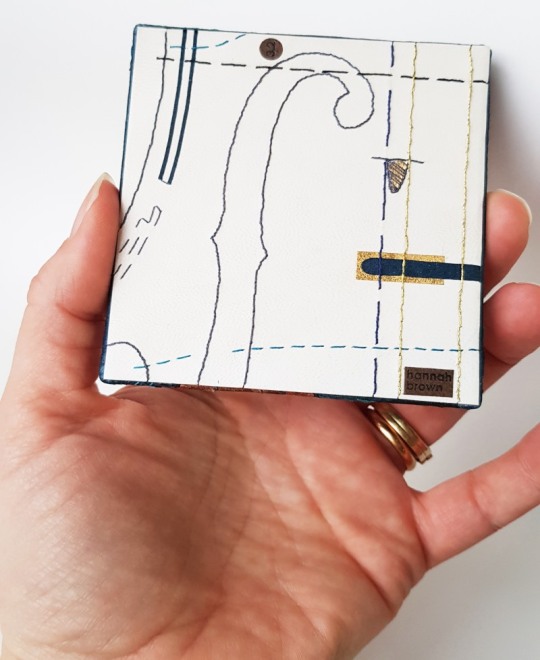
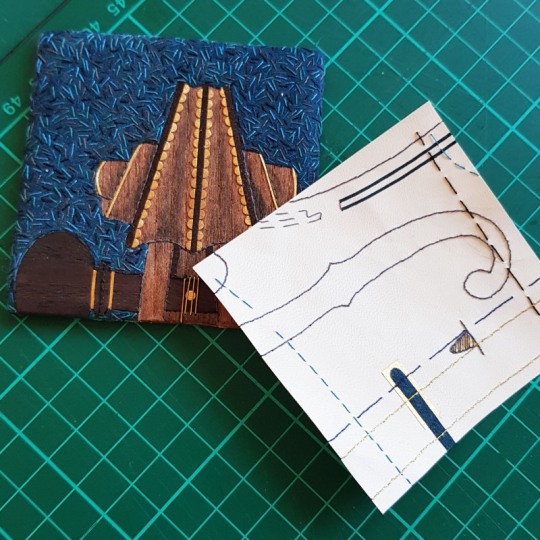
Once the back of the board had been infilled and built up it was time to work on the design for the back of the board. I cut a small piece of vellum to 3 inches square and traced another part of the cello technical drawing onto the reverse of it using a light box. This section included part of the F hole and the bridge that supports the strings.
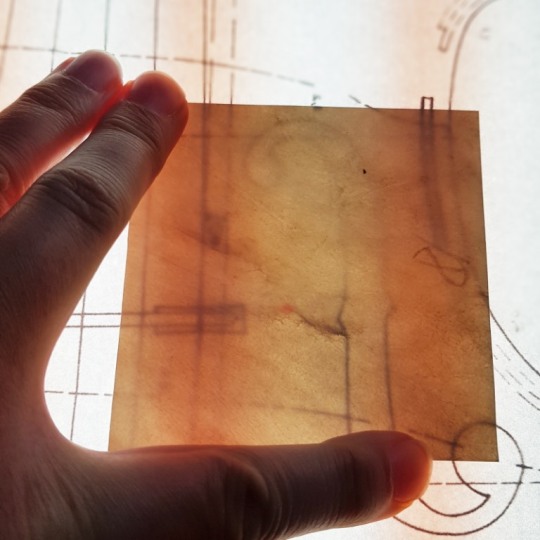
I was then able to use these lines as a guide for embroidering the design using the same colours of thread as used on the front of the board.

I also used some gold leaf and small elements of the “Colvert” bull skin to match what I had used on the front of the board.
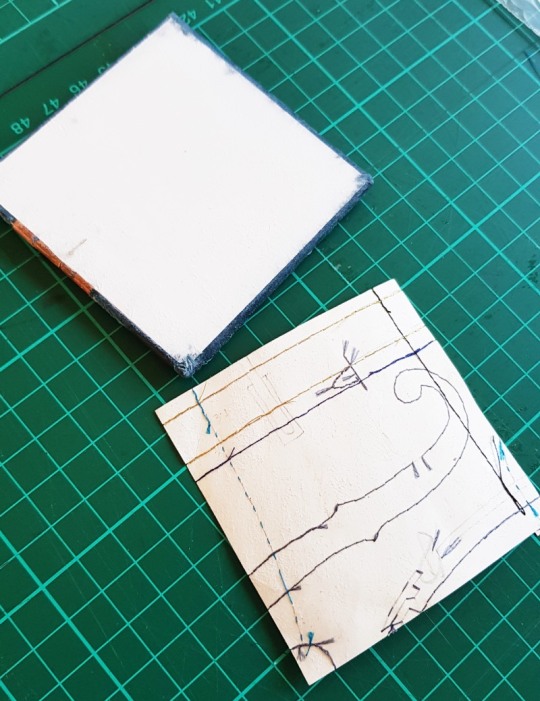
The back of the board was built up with a couple of layers of Zerkall paper and sanded flat. Once the vellum was complete I stuck it down to the back of the board and left it to dry, making sure I rubbed it down all over to ensure it stuck down properly.
And so we had a completed board! All that was left to do was to add my signature and a small number annotation to the vellum back of the board then it was photographed and posted over to join the other boards in New York. This was a very pleasurable little project to work in in amongst other commissions and I was pleased to reminisce back to my more musical days!