#space painting

How to Paint the Milky Way
I show you how to paint the Milky Way in 15 minutes or less. This method is super easy, really effective and makes a great backdrop for your astronomical art

100kg Meteorite Impacts
Shockingly my paper couldn’t handle 45000 circles so here’s the 304 recorded meteorite impacts over 100kg. Printed with a pen plotter.


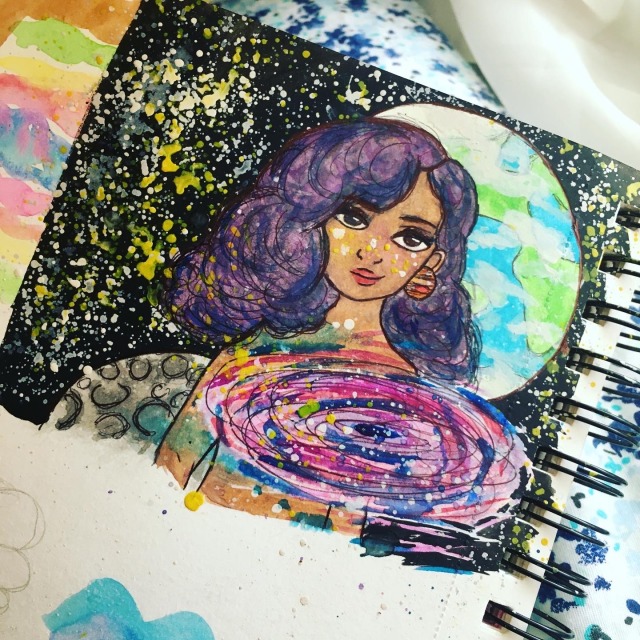
Ringed Planet


After painting the background for my ‘Rayllum’ painting, I’ve been feeling an itch to paint backgrounds, especially sky scenes, since it’s really relaxing and I always feel kind of magical creating my own world.

This one was quick, the stars are blotchy but I love it, and I adore the purple-ish space sky I created. I love this, even if it’s a little silly.


At this point I may cycle through all the colors

“She lived in the clouds and told them all her secrets”
Here’s a tutorial/demo using ArtResin to coat my artwork! These are tiny oil on glass planets I decided to coat before I framed them to give depth to the iridescent paints I used as well as smooth out the edges of the glass discs.
I’m going to add more to this video and put it on YouTube once I have footage of it after it’s dry, and after I mount the finished work, but I wanted to share this part with my lovely followers first with some extra info on using epoxy resin at home!
I really like ArtResin out of all the ones I’ve used- it has great UV resistance and a long pot time (how long it stays liquid in your mixing cup while you work). The UV resistance is important because epoxy resins like Envirotex Lite that don’t contain it will yellow and cloud up over time with exposure to light- you don’t want that to happen to your work, right? It’s also much easier than a lot of the Smooth-On resins I use that have complicated 50:20 by weight mixing ratios that I constantly fuck up trying to calculate, because it’s 1:1, so you can literally use tiny Jell-O shot cups to measure it like I did here.
✨TUTORIAL: COATING WITH EPOXY RESIN✨
You will need:
Whatever object you want to coat
Oil based plasticine/plasteline
1 box ArtResin (comes with bottles of resin and hardener)
2 small disposable cups OR a flexible plastic/silicone mixing cup
1 medium disposable cup OR a flexible plastic/silicone mixing cup
Mixing stick (dowel or Popsicle stick is fine, any thing that is a clean stick, whatever)
Nitrile gloves
Surface Protection (I recommend parchment or baking paper, I used a large disposable palette here because i have one lying around)First, make a little stand for your object with plasteline. You want to lift it about 1"-2" from the surface and be steady and level, a little stump shape usually works for small objects but you might need to make up to four or five for something wide.
Then mix your resin: first measure out however much resin you want, then an equal amount of hardener. Mix it for like 2 minutes like its a cake batter- gently, don’t create too many air bubbles, make sure you scrape the bottom and sides.
Then make sure your object is level, and pour your resin in a thin stream from the center of the object. Have enough resin mixed to flow over the edge and collect at the bottom (make sure you have parchment or silicone paper underneath since resin doesn’t stick to t when cured; it doesn’t stick to plasteline either!) Just let it drip down for a while, it’s fine. After about an hour, when it’s dripped away and stabililized and hardened up a bit, you can gently pick up the piece (the base should stick to it when you lift it) and place it on a clean piece of parchment or silicone paper to keep it somewhere safe, level and dust-free while it cures. It takes 8 hours to dry to the touch, 24 hours to hard cure, and 48 hours to completely cure. That’s still a lot quicker than oil varnishes that can take weeks or even months depending on how humid it is!
If you get bubbles, use a hair dryer on low or a heat gun to pop them.
Easy right? I did this last minute because these are oil paintings and I need to frame them tomorrow, but they’re not dry yet… It’s totally fine to resin over a not-quite-dry oil painting in my experience since it just seals it all in with a solid coating. It took me literally five minutes. I used the extra resin to fill a couple of molds I made from stones and jewelry.