Having trouble with shading and shadows? I draw a mini sun to remind me where the main light source is. This allows me to visually see where the light should be coming from, instead of randomly guessing. I’ve found this to be very simple, and helpful! ️
Don’t underestimate the basic round brush! Using and downloading custom brushes won’t magically upgrade your art skills. Here I only used the “Hard Round” and “Soft Round” which are default brushes in most programs! ️
Anonymous said: I know you’ve shown how you draw faces from different angles very briefly before, but I was wondering if you’d ever go more in depth? For example, I always struggle with drawing the eyes at a ¾ angle…
Ok, I get this question so many times that I decided to do something about it. I’ve already made a tutorial about drawing eyes and tbh it should help with drawing eyes from any angle, the tricky part is to understand the human face, its anatomy. If you see the face/head as a three dimentional object you’ll be able to draw it, I can’t say it enough, 3D thinking is important. Also, references are important, drawing from life is important because then you have a 3D model of the head right in a front of you. All you need to do is observe and understand.
so… listen up baby!artists! this is mainly… my process and some thoughts i keep in the back of my head while drawing. there are different ways on how to draw teeth.
but when you are unsure always pull up a reference! or look at yourself in a mirror! take a selfie!
i just like to esagerate some shapes here
when you see this post. go wash your teeth and don’t forget to floss!!!
SHOULDERS! Tutorials BOOKS (inc. a special 3-BOOK “STARTER SET” for new collectors)availableONLY ONCE THIS YEAR on a SECRET DATE in MAY - the ONLY WAY to get the books is to send “Add me, Lorenzo!”to[email protected] -if you’ve joined any of our mailing lists before, you’re already on it!
BIRD WINGS! Tutorials BOOKS (inc. a special 3-BOOK “STARTER SET” for new collectors)availableONLY ONCE THIS YEAR on a SECRET DATE in MAY - the ONLY WAY to get the books is to send “Add me, Lorenzo!”to[email protected] -if you’ve joined any of our mailing lists before, you’re already on it!
ARMS parts 1 and 2 of 4! Tutorials BOOKS (inc. a special 3-BOOK “STARTER SET” for new collectors)availableONLY ONCE THIS YEAR on a SECRET DATE in MAY - the ONLY WAY to get the books is to send “Add me, Lorenzo!”to[email protected] -if you’ve joined any of our mailing lists before, you’re already on it!
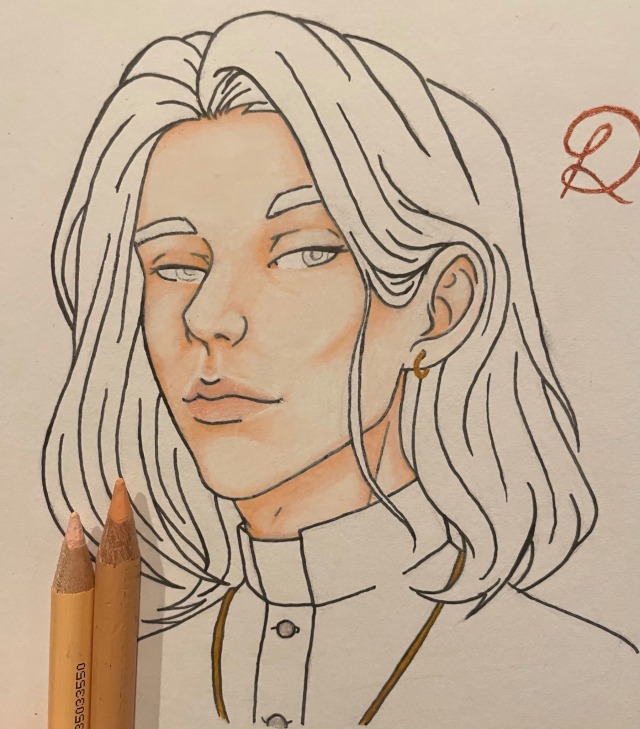
So. I thought I’d do a little semi-art tutorial. It’s more just walking through my colouring process. I work light to dark to help avoid smudging, so I usually start with the skin.
Base coat
Base shading
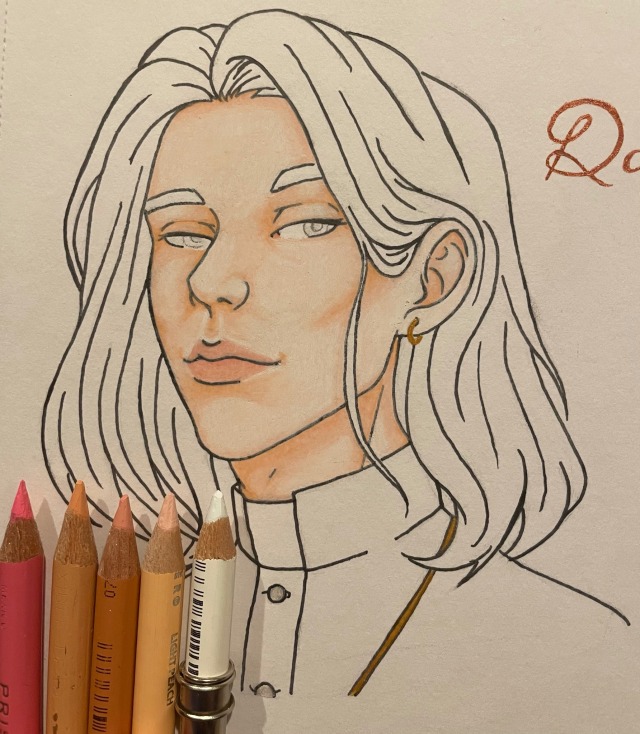
Blend
Deepen shadows
Blend
Detail
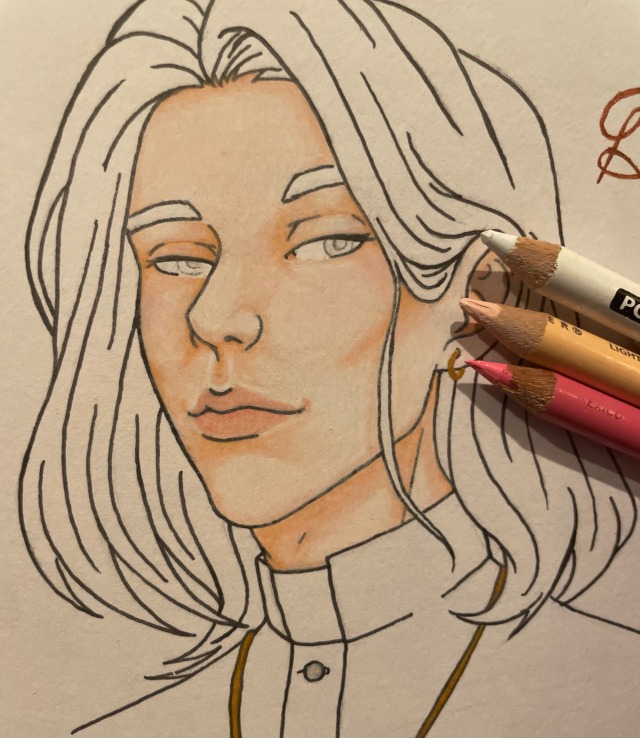
Depending on the character, I like to add some colour to the cheeks
Blend
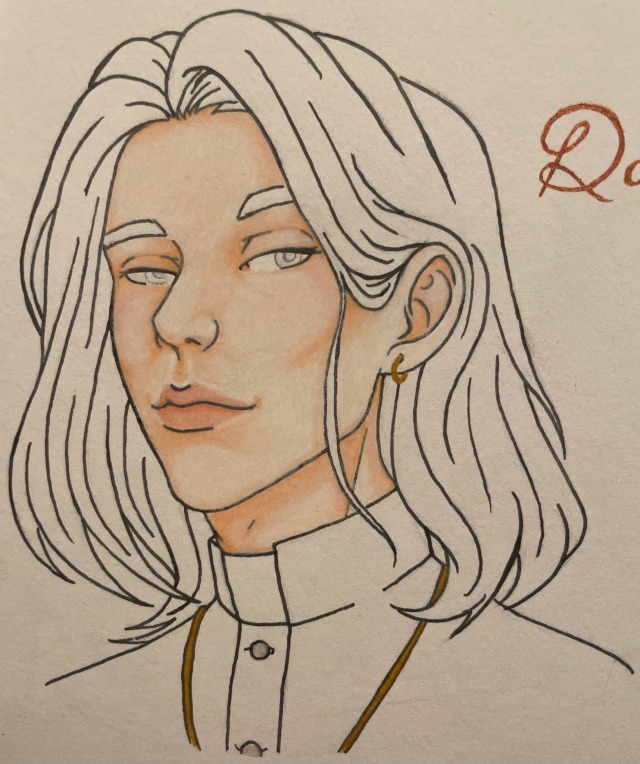
And then I just fine tune the last of the details.
I may or may not reblog this with other parts of my colouring process.
Eyes!
You need really sharp pencils for this bit.
As we established earlier, I work light to dark. So I start by shading the whites of the eyes
Then I blend out the shadows and add the highlights
Then I start with the highlights in the irises
Then the main colour around the highlight
Then the shadow cast by the eyelashes
Last step is to fill in the pupils!
I usually use a few more steps than this, but brown eyes are pretty simple on this small of a scale.
Okay. Hair. Skoden. Stoodis.
Plan the highlights and the general flow of the hair.
Actually colour the highlights. Fancy that.
Very important step. Get interrupted by your cat named Chainsaw as he headbutts your sketchbook out of your hands and sticks his face in your drink immediately after you take this photo. Do not skip this part.
Colour the main body of the hair. I like to blend this part into the highlights as I go.
Add in the shadows. Again, I like to blend as I go so I don’t miss any spots. ADHD who?
So. I thought I’d do a little semi-art tutorial. It’s more just walking through my colouring process. I work light to dark to help avoid smudging, so I usually start with the skin.
Base coat
Base shading
Blend
Deepen shadows
Blend
Detail
Depending on the character, I like to add some colour to the cheeks
Blend
And then I just fine tune the last of the details.
I may or may not reblog this with other parts of my colouring process.
Eyes!
You need really sharp pencils for this bit.
As we established earlier, I work light to dark. So I start by shading the whites of the eyes
Then I blend out the shadows and add the highlights
Then I start with the highlights in the irises
Then the main colour around the highlight
Then the shadow cast by the eyelashes
Last step is to fill in the pupils!
I usually use a few more steps than this, but brown eyes are pretty simple on this small of a scale.
So. I thought I’d do a little semi-art tutorial. It’s more just walking through my colouring process. I work light to dark to help avoid smudging, so I usually start with the skin.
Base coat
Base shading
Blend
Deepen shadows
Blend
Detail
Depending on the character, I like to add some colour to the cheeks
Blend
And then I just fine tune the last of the details.
I may or may not reblog this with other parts of my colouring process.
I painted this as a demo for students at a Zoom event recently and since I get a lot of questions about how I paint shallow water, here’s a step by step! It’s honestly a really fun subject to paint and pretty accessible even for people who are newer to painting environments.
If you like this type of content, I have an artbook on Kickstarter right now with tutorials just like this!