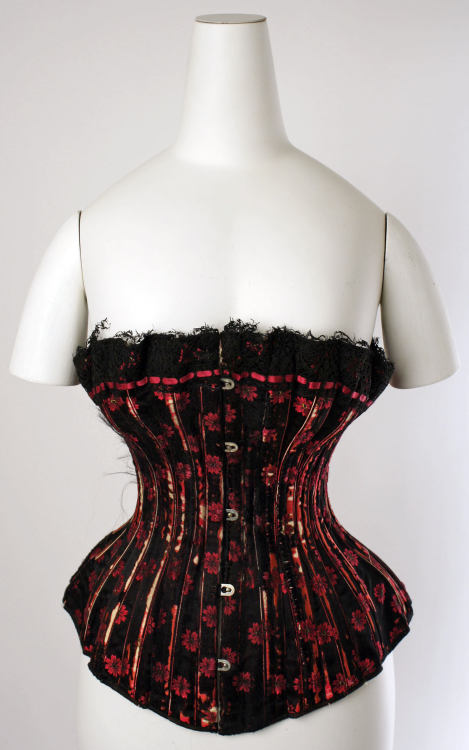
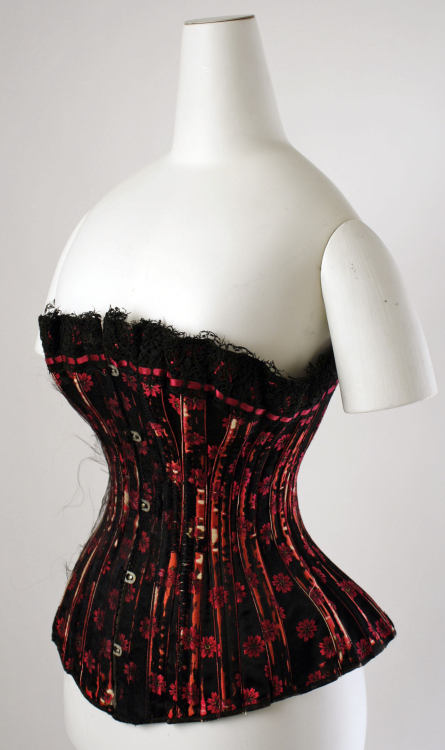
#victorian corset
Making an 1890s Symington Pretty Housemaid Corset - Part 3 (final)
So… I’m done?

I was going to post an update before and then do the finishing touches but I was on a roll and just finished it this week end!
But yes, let’s get into the actual sewing adventure that led to this beautiful finished product.
Before my eyelets were delivered I took advantage of the time before I got them and added the lining on some panels, doing the back ones first so I could insert the eyelets once I got them. It was therapeutic once you develop a steady rhythm and accept the fact that it’s going to take you a while. For some reason I just love hem stitching… It makes everything look so authentic!

I decided not to line the busk panel as it already had the busk in and the lining wouldn’t really have had any effect at all so I just hemmed the raw edges. I was a little unsure whether I should line the side panels as I had messed up my stitches when making the side boning channels but in the end I tried my best to line it anyways. I also thought I would add some hip padding but I left that out, for comfort reasons and once I tried it on I also wasn’t too pleased with how bulky it made me look. I made the padding though so if I need it for structural reasons I can just quickly sew it in place.
I had done most of the lining on one side and only the back on the other when the eyelets got delivered so of course, I had to put them in to be able to try it on!

I added thirteen eyelets just like in the original and it was a process but I finally figured out the right method to punch the holes and then I got pretty quick at it. Then I could finally wear it for the first time, and let me tell you… it’s *chef’s kiss* so freaking comfortable! It’s hands down the most comfortable corset I own, and even as someone who constantly annoys people trying to educate them that corsets weren’t torture devices I was still very surprised by this. But it makes so much sense - it’s a Pretty Housemaid Corset. It was made for working women so it had to be comfortable. It provides just the right support in just the right places and I honestly didn’t wanna take it off again. But I also wanted to continue.
Next, I finished the rest of the lining and then I could move on to the binding. Binding is probably my least favorite part of making a corset, it is so time consuming but I decided to hem stitch it this time because I wasn’t going to use my sewing machine anyways so I might as well save some time hand stitching it. I actually made the binding out of the twill lining, I’d never made binding before but (this particular) twill made it pretty easy because once you press it with an iron it stays in place, which I really appreciated.

Then it was time for the lace trim! I fell in love with this lace the very first time I saw it back when I didn’t even have a project in mind but I just knew it would be perfect for a corset.

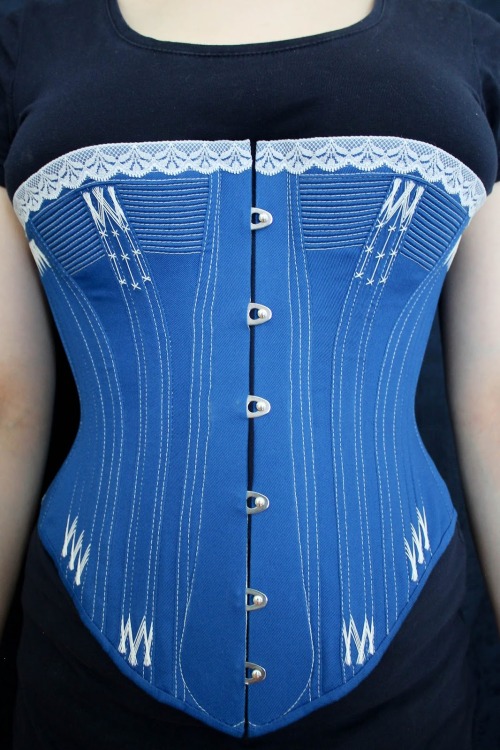
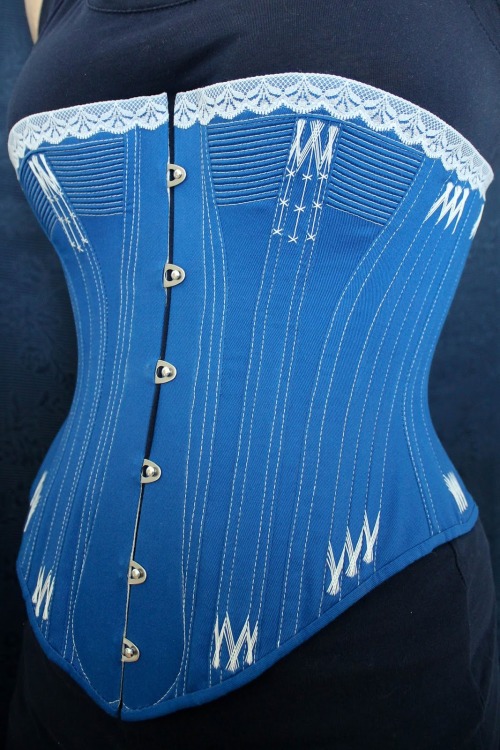
The last part was the flossing. I was going to do the same design as was on the original but I forgot to stock up on thicker flossing thread so I used regular thread but quickly came to the conclusion that it would take me forever, so I used the rest of the cream colored embroidery thread that I had leftover from the Anne With An E dress, but I didn’t have a huge amount so I looked through google pictures and found this design that I really loved.
But yes that was the sewing journey and I’m really happy with how it turned out and especially with the fit! It doesn’t cinch my waist by a lot, but then again it’s not meant to, it’s a corset specifically designed for work. A little padding or a bum pad can certainly help with the illusion of a small waist.
Here she is in all of her glory.


I might post pictures of me actually wearing it sometime in the near future. If the pictures turn out good. I already wore it over my late Victorian skirt and it’s awesome. I might just need a petticoat to cover the edges…
Making an 1890s Symington Pretty Housemaid Corset - Part 2
Last time I only had half of the corset “done”, or better, sewn together, so now I had to do the other half. Surprisingly, it didn’t take me nearly as long to do it as it did the first time, probably because I realized I wasn’t using the sewing machine properly. So now I’m hoping that my thread will look much better and won’t create any bumps in my future projects! The more you know.
But anyways - as promised, I then took care of those side seam boning channels that I did wrong the first time. For that, I cut out two bands on the bias, pressed them and sewed them on top of the already exisiting channels. Of course, when I measured the width I didn’t keep in mind that I had to have some sort of allowance for the stitching but after an hour of pushing the boning in with all of my strength I finally got it into the channel. The second one I made slightly bigger. Lesson learned!


Then it was time for the boning. I still have more than enough cable binders so I’m using those but I’ve looked into buying actual corsetry boning, maybe if a future corset explicitly requires steel I’ll try working with it.
I always clip the cable binders with nail clippers into the right length and keep the raw edges rounded so they don’t poke through the seams. Then I usually wrap the raw ends in insulation tape, or what I called insulation tape in my stays post but recently found out it’s actually sealing strip. It’s much better and easier to work with than actual insulation tape, but I ran out of it halfway through and used insulation tape on some and nothing on others when I felt like the edges weren’t too sharp.

Then I had to put the busk in. And let me tell you… Don’t be like me. Just… please learn from my mistakes, it’ll save you so much time! I had already sewn the front pieces to the rest of the corset, which I shouldn’t have done. You need to be able to turn your fabric inside out to sew the edge by machine. But I didn’t, so I ended up spending a long time trying to sew that seam from the outside. in the end it looked alright but it’s so time consuming and it’s the exact same effect.

But you’ll have to sew the busk in place by hand or you’ll be really really careful and slow doing it with a sewing machine. My needle got on the busk after three stitches and broke, so then I decided to just hand stitch it all.
And then it was done - two halves of a corset.

Now I’ve continued working on it, but I’ll write about it in my next update. But I’m doing the canvas lining and eyelets next. I’ve had to order the eyelets because this whole time I was under the impression I still had enough but turns out you need double the amout for both sides, and I only have enough for one. So whenever that gets delivered, I’ll make the next update!
Hi everyone, it feels like it’s been a while. Has it? I’ve lost all track of time.
My studies are keeping me busier than I expected for some reason even though I only have classes 3 days a week. But that doesn’t stop me from thinking about my next projects! But then again this is just me daydreaming because even though I would absolutely love to have a dress from every decade of the 19th century, realistically speaking that’s kind of impossible (and I’d have zero opportunities to wear them all).
So for now, I’m stuck with my old blue corset


that I’m trying to fix. We won’t even talk about the embroidery, what was I thinking? I’ve made so many mistakes that I basically have to redo the entire thing now. I’ll make a post on that soon when it’s done.
Then, I’ve also been very into the regency era recently and I’d love to make a dress for myself and just in case in a post-covid time I’ll find a Regency Ball somewhere nearby that doesn’t automatically make me broke just from looking at the ticket prices. I’m actually pretty certain I’ll end up making one, I just don’t know when. I’m searching the internet and all online fabric stores for musselin but I can’t find anything even remotely close to what I’m looking for. Does anyone maybe have tips on what other fabrics I could use that are somehow historically accurate?
I also have a corset on my list of future projects, I even have all the fabric that I need but I still haven’t ordered my cording. It’s going to be an 1890s Symington Pretty Housemaid corset that I’ve been very excited but also very anxious to make.

There’s so much cording! But hopefully that’ll fit me better than the blue one.
I also have an idea, or better it’s something I’d like to do but something I don’t think I’ll do in the near future simply because I have so many other things on my list that just have a bigger priority right now. I’m thinking about making an Italian Renaissance dress. I know it’s an insane amount of work but I’ve also noticed that the older a garment is, the easier it is to make. Which sounds crazy, but they didn’t have fancy sewing machines back then like the Edwardians did so they did it all by hand so it had to be possible to make and not overly complicated. But I still know next to nothing about Italian Renaissance fashion so I’ll have to look more into that before I commit to a style.
So yeah, these are some of my plans and ideas for future projects! I hope I get to make them all, I know I’ve talked about things in posts that I never ended up making but that’s just how it is. I get an idea and I’m really motivated so I come up with things that are unrealistic and so beyond my skill level. But I’m working to get there someday.
Unidentified model
for Esty lingerie
News
=============================================================
Try my new blog at In search of beauty and please let me know what you think about
=============================================================
Post link
Unidentified model
by Sasha Medvedeva on 500px
News
=============================================================
Try my new blog at In search of beauty and please let me know what you think about
=============================================================
Post link


