There are quite a few versions of coffee/tea/latte crochet patterns out there, but I decided there wasn’t one quite like what I wanted! As always, if you use this pattern, please link back to my page, and tag me here on tumblr or @ erin.gurumi on instagram! I love to see what people make!
Technical stuff:
Unfortunately, the blue and cream yarns I used both came from the stash I inherited from my grandma, and I don’t know exactly what they are! The blue yarn is definitely thicker than Red Heart Super Saver, so much so that I used a 4mm hook for the blue yarn, as opposed to the 3mm yarn I used for the cream (unknown, but very similar to Red Heart Super Saver) and brown (Red Heart Super Saver in Cafe Latte).
^Cup
I was not the most happy with the shaping on the cup, but I think it turned out ok in the end! Keep in mind again this was with a thicker yarn than what I usually used (ie thicker than Super Saver yarns), so trying this with a thinner yarn will make it end up smaller!
6 sc in a magic circle
inc 6x to make 12 stitches
(1 sc, inc) 6x to make 18 stitches
(2 sc, inc) 6x IN THE BACK LOOPS to make 24 stitches
(3 sc, inc) 6x to make 30 stitches
(4 sc, inc) 6x to make 36 stitches
6 rows of 36 stitches
Finish off and weave in end - I didn’t use the tail because i only needed the brown tail from the coffee!
NOTE! Before stuffing, I put a small circle of cardboard at the bottom of the cut, about the size of the 18 stitch circle. This just helps the bottom to hold its shape better! AND I made a cardboard circle the size of the opening, but you don’t need to put that in until you make the coffee surface!
^Coffee:
I think it makes sense to do the surface “coffee” next, so that you can stuff the cup and have something to hold while attaching the handle and cat! Like I mentioned, my yarn sizes did not match, so this was very much just crocheting a flat circle until it filled the walls of the cup - here is how many rows it took me, but it might be different for others!
6 sc in a magic circle
inc 6x to make 12 stitches
(1 sc, inc) 6x to make 18 stitches
(2 sc, inc) 6x to make 24 stitches
(3 sc, inc) 6x to make 30 stitches
(4 sc, inc) 6x to make 36 stitches
(5 sc, inc) 6x to make 42 stitches
(6 sc, inc) 6x to make 48 stitches
Finish off with a long tail. Add cardboard to bottom of cup, stuff fairly lightly. Begin sewing brown circle to the inside of the blue stitches, slightly below the lip. As you start to secure the coffee surface, you may want to add more stuffing, but try not to add enough to puff it out! ALSO don’t forget to add in the cardboard circle (I slide it in when I’m about half way around sewing them together), as this will really help keep the surface flatter!
^Cup handle:
Very simple, just a small tube! I really eyeballed it until I got the desired length I wanted, so I would recommend the same! You can see in this pic I didn’t attach the handle until I added the surface of coffee and was experimenting with the size of the foam mound, so also don’t feel like you need to sew it on at a particular time - it’s probably easier to add once the cup is shaped!
chain 6
sc into the first chain to make a loop
~10 rows of 6 sc
leave a tail, sew to the body of the cup!
^Cat head:
Just a big lump! I kinda think this could have been smaller, but it’s totally up to you just how big a pile of “foam” you want! I didn’t want it to be perfectly round, so I had several repeat rows where I didn’t increase, and at the end I did a more extreme increase to make the last row kinda flatten out.
6 sc in a magic circle
inc 6x to make 12 stitches
(1 sc, inc) 6x to make 18 stitches
one row of 18 stitches
(2 sc, inc) 6x to make 24 stitches
one row of 24 stitches
(3 sc, inc) 6x to make 30
one row of 30 stitches
one row of 30 stitches
(sc, inc) 15x to make 45 stitches
OPTIONAL: I used a pet slicker brush to fluff out this yarn so that it would have more of “foamy” look, and so that the needle felted parts were more likely to stick, but this is not necessary and I’m sure it would look cute with smooth stitches!
leave a long tail to sew into the coffee surface, being sure to leave a bit of room in front for the paws!
Cat ears:
I started from a smaller magic circle so they are a bit pointier, and I used the hook to really press the tips into a point!
4 sc in a magic circle
inc 4x to make 8 stitches
attached to head with tail, use slicker brush if you would like them to also be fluffy!
^ Needle felting:
I definitely don’t think needle felting the features of the cat is necessary - and if you want this to be a toy for a child or animal I would probably recommend against it in favor of using something like embroidery and safety eyes! I used brown felt so it would look like the cocoa powder details that people sometimes add to latte art! I’m not very good at needle felting so I didn’t do a lot of detail, but how much you add is up to you!
^ Paws:
I couldn’t decide between a paw facing up (so you can see the cute pawprint!), and the folded over paw (as if the foam is dripping over the side of the cup!) I’ve seen both in irl latte art, and decided I can do whatever I want! The only difference is the folded over paw is slightly longer, and the upright paw has a bit more needle felting that needs to be done!
Upright paw:
6 sc in magic circle
2sc, inc 2x to make 8 stitches
~1 row of 8 sc
press it flat, use slicker brush, needle felt the pawprint, and use tail to sew into coffee!
Folded over paw:
this one is longer:
6 sc in magic circle
2sc, inc 2x to make 8 stitches
~4 rows of 8 sc
press it flat, use slicker brush, sew bottom of paw to coffee, fold over and use remaining tail to secure it over the lip of the cup!
This is a nice simple pattern with not too many bits to sew together! I hope you like it, and don’t forget to tag me here on tumblr or @ erin.gurumi on instagram if you end up using the pattern! Happy crocheting!
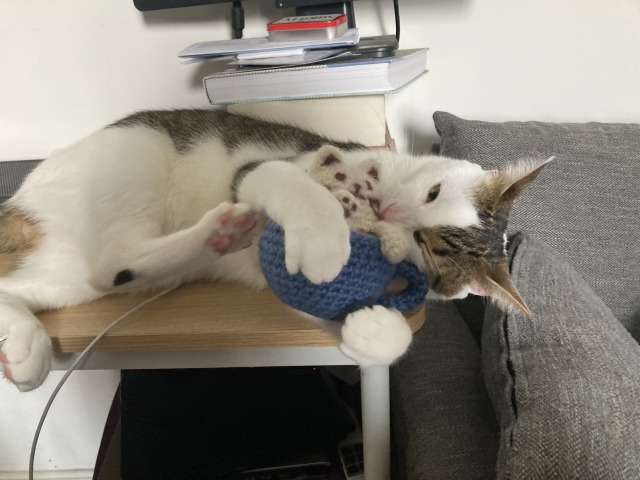
Has the weather cooled down even though it’s mid-September? No! Do I even drink coffee? No! But did I think crocheting a cat latte art amigurumi would be extremely cute? Yeah!! I needled felted the features on, and I think it turned out great! Cat approved too!
Has the weather cooled down even though it’s mid-September? No! Do I even drink coffee? No! But did I think crocheting a cat latte art amigurumi would be extremely cute? Yeah!! I needled felted the features on, and I think it turned out great! Cat approved too!