#doll restoration


And thus, Lucie’s underwear is complete! She has her original petticoat so now all that’s lacking is outerwear. I’m going to wait on that until her wig is done, and her pate’s set to arrive on Monday so that should be the next step in the process.
Post link


More progress shots! Lucie now has eyes and is stitched onto her body. Now if the wefts for her wig could just get through Customs Hell we’d be in business. As it is, hurry up and wait mode is activated and I’m working on her underwear in the meantime. I actually have patterns for 11-13″ poupees, so I don’t have to just drape and pray for a change.
Post link


The Resurrection Of Lucie Doll
Earlier, I posted the top photo of a size 0 Gaultier fashion doll named Lucie who’d fallen on very hard times. My boss was generous enough to let me have her (head, shoulder plate, and neck articulation mechanism) when I noticed her sitting on a workbench, separated from the body she’d been purchased for. Armed with epoxy, a round file, sandpaper, and admittedly vague knowledge of what I was doing, I set to work.
The first method I tried involved making a mold using Sculpey and self-hardening Alley Goop silicon mold clay. I must have done something wrong, because the silicon never hardened and I had to scrap that method altogether. I instead just worked with the epoxy (Apoxie Sculpt, recommended by a friend/lifelong restoration artist) sans mold- freehand, I guess? As you can see, the result is generally correct but somewhat clumsy, which I’m attempting to remedy as best I can by sanding.
In several 20-minute periods.
Because the hardware store doesn’t stock size small respirator masks and the larger one makes me lightheaded if I wear it too long. #petiteproblems
Once the arduous task of sanding is done, the equally arduous airbrushing begins. Have I mentioned I’ve never used an airbrush before? This is going to be…interesting.
(That being said, I do flatter myself that I’ve done pretty well for a first try. Having an intact French fashion doll as a model helped immensely in the sculpting phase. Otherwise it seems largely a matter of forcing myself to slow down and take as long as necessary to get things right.)
Post link


1, 2, and 3 rounds of conditioning and flat ironing.
She’s going to need at least one more, and will lose about a cm of length in the end.
Post link
last part of fixing up rebecca !!
her hair was by far the biggest problem. it was frizzy and broken and had flecks of dirt (?) in it. here’s the before:

after washing and conditioning it and about 15 minutes of trying to brush through it (it broke my brush) i finally could see what i was working with. her hair is extremely thin btw, and the wig cap is visible at almost every angle so i tried my best

in the picture above, i had trimmed the uneven strands, brushed it, and took it under a flat iron to manage the frizz. all that’s left was to curl it with roller and be patient…


on the left was after i took out the curlers, and on the right is after i brushed and untangled. you can still see her wig and the thin nature of her hair, but overall i’m super happy!! it’s really soft now and is definitely an improvement from before.

here she is all dressed up !! thanks for coming with me on this journey guys !!! it was definitely worth it :)
continuing my last post…
thank you for your suggestions !! they helped a lot :)
here’s my progress so far…
this is what she looked like when i first opened her. as you can see, her face is really dirty and her hair is extremely frizzy:


i listened to your advice and used baking soda and water on the vinyl, then i washed it again with soap and water. it worked great! the only stains remaining were a couple ink spots on her arm and leg, but i didnt worry about them.


next time i will tackle her frizzy hair! she should be ready by tomorrow :)
also i cant tell if she’s a historical or a beforever..what do you guys think? her tag doesn’t have a date like most beforevers do which typically says 2014. let me know!
hey guys!!
i accidentally bought a major TLC prebeforever rebecca a couple days ago, and she just arrived. i might document the process of fixing her up!
i’ll do an updated all my dolls for the spring since the first one i did in the fall was when i had 10 dolls. 6 more girls have been added to my collection since then !!
(also, i think i’m done adding new dolls to my collection for now because i need to start saving up my extra money )
update: she’s here and well ….
she’s A LOT more TLC than i thought:
- her hair is matted and has dirt in it (i think it’ll be fine after a couple washes)
- her limbs aren’t insanely floppy but they aren’t tight either
- her face is COVERED in makeup and other mystery stains (none of which were shown in the listing picture)
- her limbs also have mysterious brown, red, purple, and dirt stains
- her body is fine from what i could tell, but she smells very strongly. like a mix of incense, potpourri, and other perfumed smells. it made my entire living room smell.
needless to say, this will be a huge project. i’ve never fixed up a TLC doll before, and i would love to have any input from you all about which methods work best and how to clean her safely. rebecca is one of my top 5 dream dolls so i’m just grateful to finally have her, regardless of the condition. she was only $25 so i think this will be a worthy process.
my next post will be the first stage in this process: cleaning her limbs.
stay tuned !!

fixed the weft coming off Kirsten II’s wig. Used normal sewing thread and needle and a whip stitch.


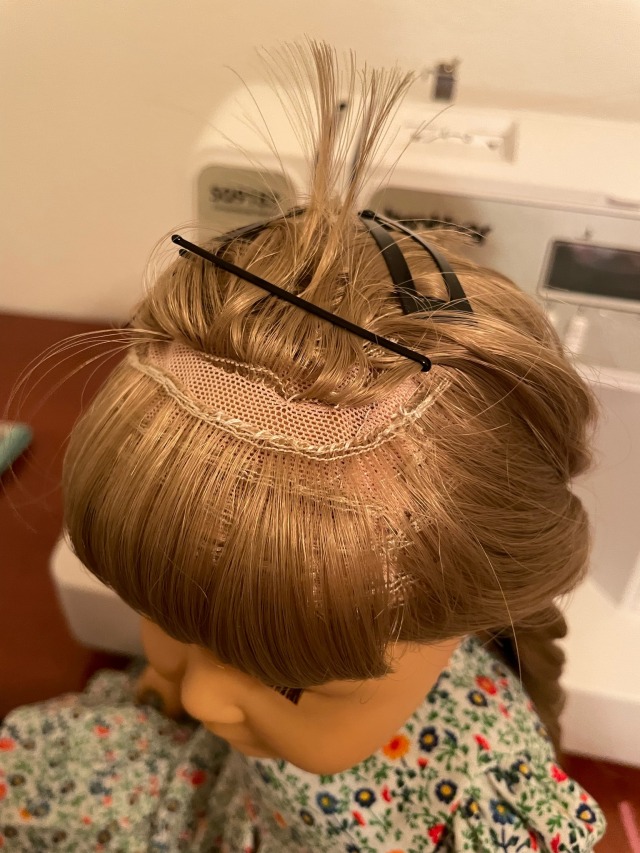
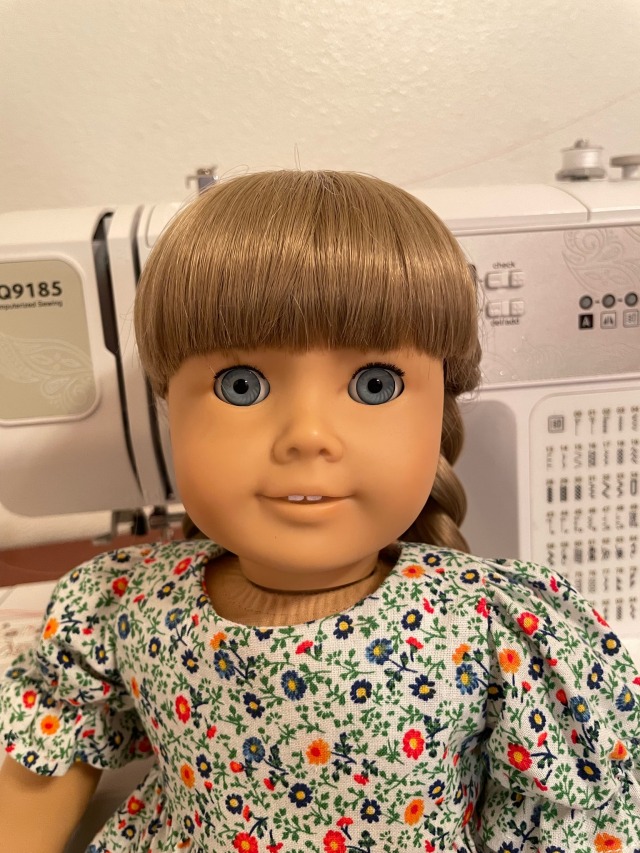
Kaya’s hair is restored!! She feels great after her spa treatment. She is also nice and cool, having changed from her winter dress into her white summer outfit :)


Just some shots of Sasha all cleaned up and restrung! I gave her some brains even though I’m not very good at them. She’s just wearing an SD sweater until her clothes are washed.
Post link


Sasha doll updates! She got a good thorough wash and I conditioned her hair, then I went about pulling out her cut bang plugs (quite difficult) and replacing them. I made an order from Monique Trading Co on their last day, and while I had ordered one of their hair sample rings, they sent me four of them, so I had plenty of hair and colors to try. I picked some of the hairs that matched best - they were the regular hair type, not synthetic mohair, i.e. I think Modacrylic and not Kanekalon. I rooted them in using the tension method, and this hair was pretty terrible for that because it’s stiff and had a bend set into it pretty hard already where it was folded over the metal piece on the ring.
After rooting the bangs in I treated the hair using the sage advice of @dollsonmain , with conditioner and a straightening iron on low. I was really shocked by how soft and silky it was after this. Finally I re-thatched the part and gave her a boil wash. I decided to part her bangs instead of cutting them, which she really wasn’t rooted for, so it doesn’t look the neatest but I still prefer it to the very thick bangs that she was originally rooted with.
I still don’t have any more insight on what kind of Sasha she is other than that she’s from 1970 according to her white strings.
Post link