#fashion history
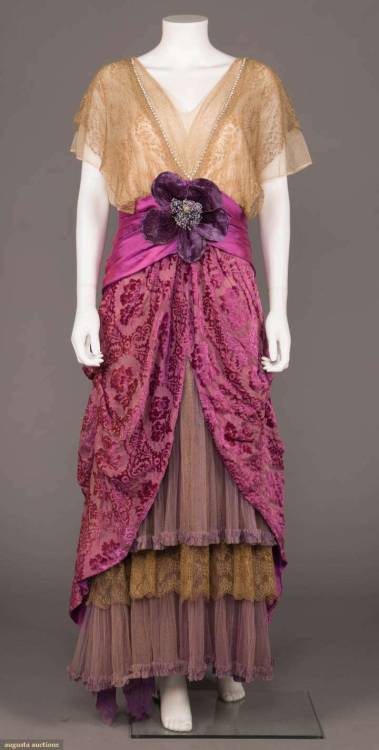
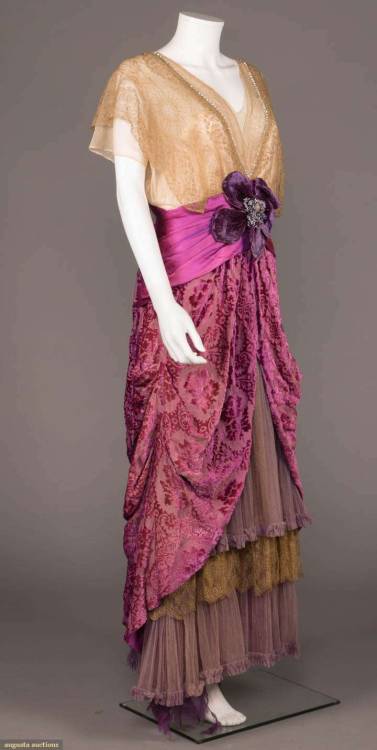
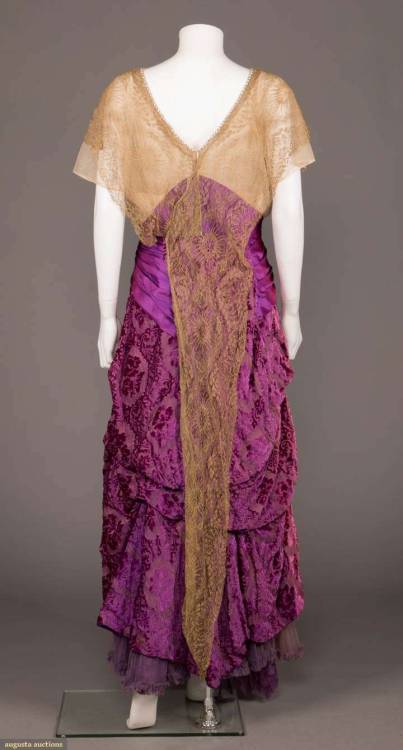
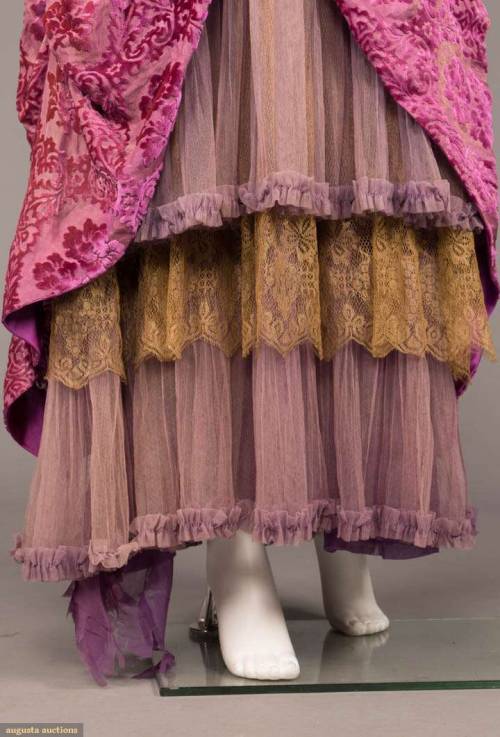
DEVORE VELVET, c. 1912
V-neck bodice of cream mesh trimmed in single row of prong set paste round brilliants at center front & center back, over-layed w/ double draped layers of metallic lace extending to hem, draped & pleated magenta silk satin W band w/ oversized purple silk velvet flower to center front waist tiered skirt of pleated purple mesh , purple silk chiffon & gold metallic lace w/ swagged, open front devore velvet overskirt.
Post link
LILLI ANN SKIRT SUIT, AMERICA, c. 1953
2-pc skirt suit, wide scalloped & notched collar, long sleeve w/ turn back cuff, flared peplum w/ mocha velvet ribbon applique, center front self covered donut button closure w/ mocha velvet insert, straight knee length skirt, c. 1953, label “An Original from Lilli Ann of San Francisco”
Post link
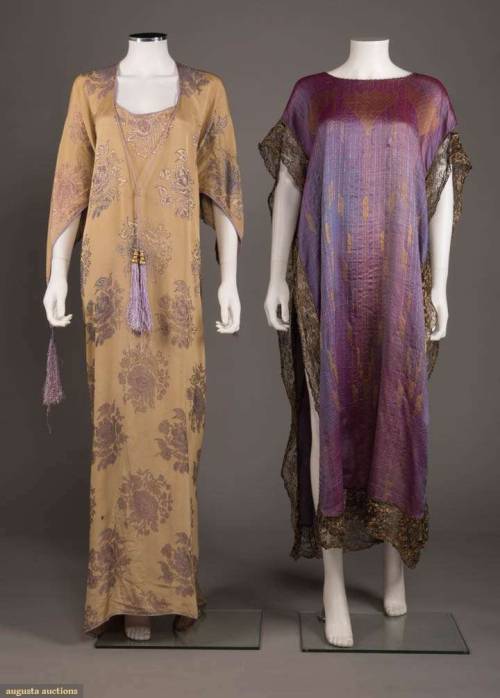
TWO ORIENTALIST HOUSE DRESSES, 1920s
1 purple raw silk & gold lame tabbard w/ black & gold lace trim and 1 golden yellow & purple patterned silk gown w/ draped open back panel, center front tie w/ tassels
Post link
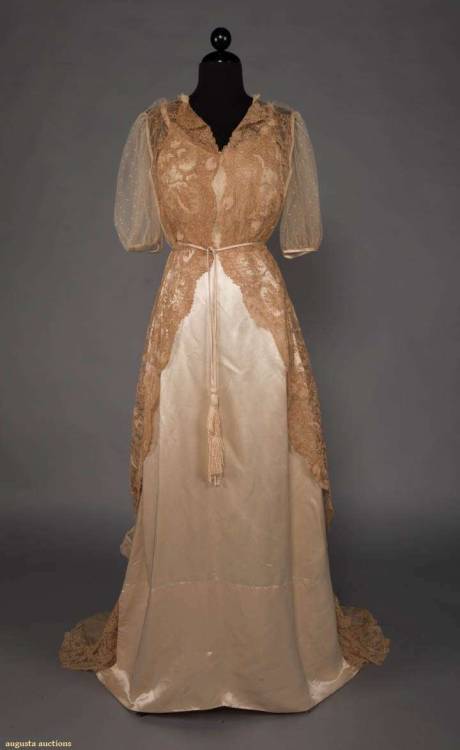
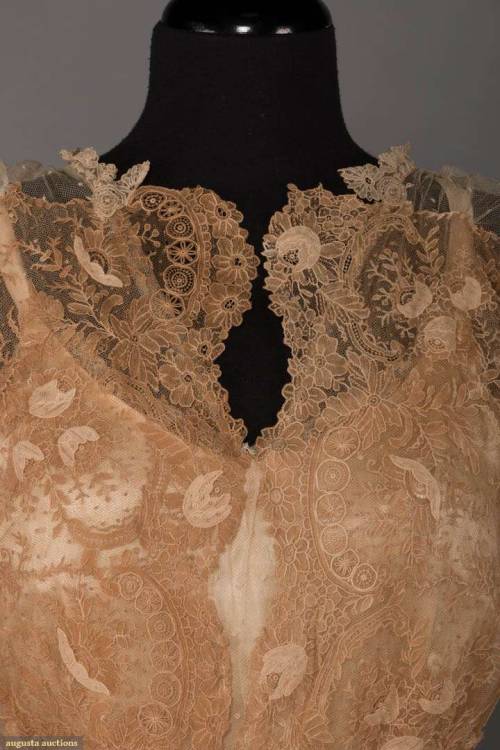
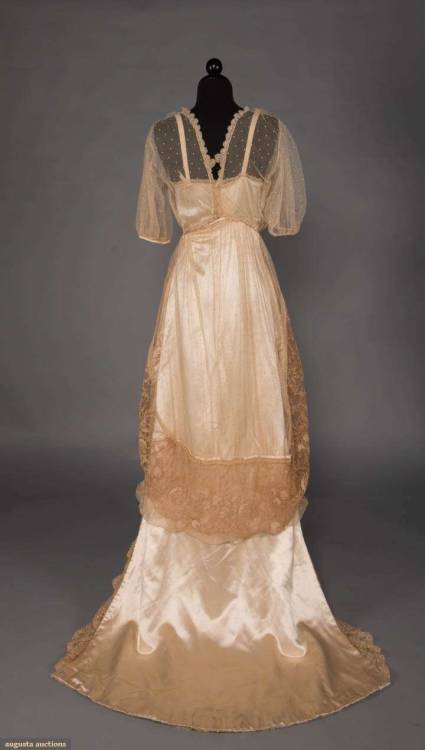
CHARMEUSE & BRUSSELS MIXED LACE GOWN, c. 1910
Ivory silk charmeuse trained gown w/ overbodice of point d'esprit net trimmed in handmade Alecon lace including rosebud motif w/ three-dimensional leaves, point d'esprit cap sleeve, slender self tie belt w/ passementerie, machine lace added to hem & inserts to side train
Post link
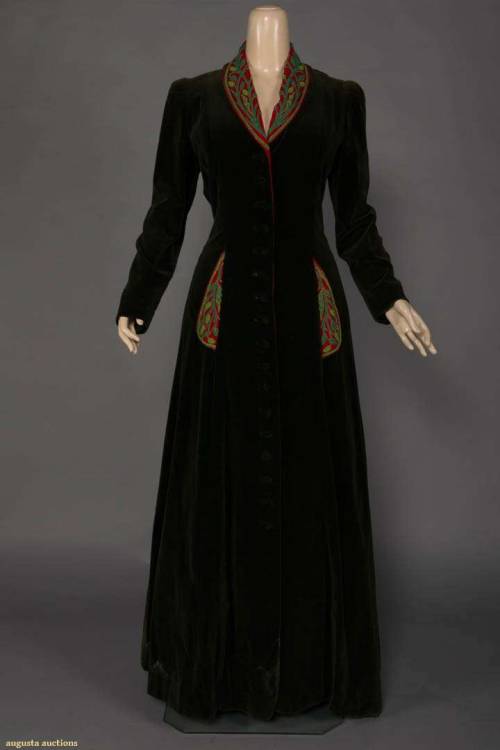
VELVET EVENING COAT, 1940s
Olive green floor length cotton velvet coat w/ red flannel lapels & pocket trim, decorated w/ gold lame thread & two tone green beading in bud & vine motif, gathered at the center back.
Post link
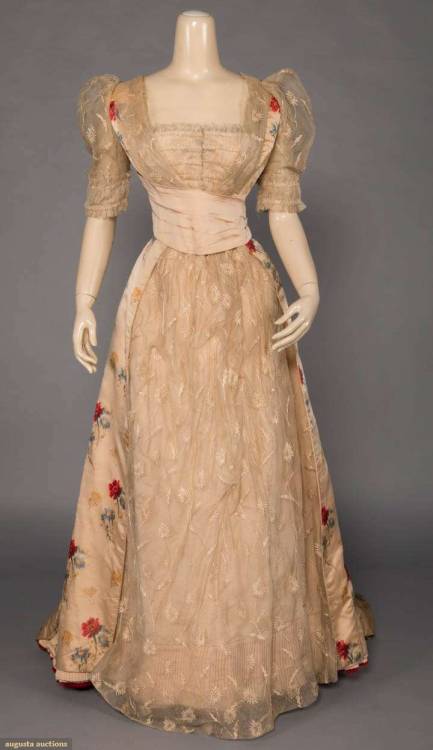
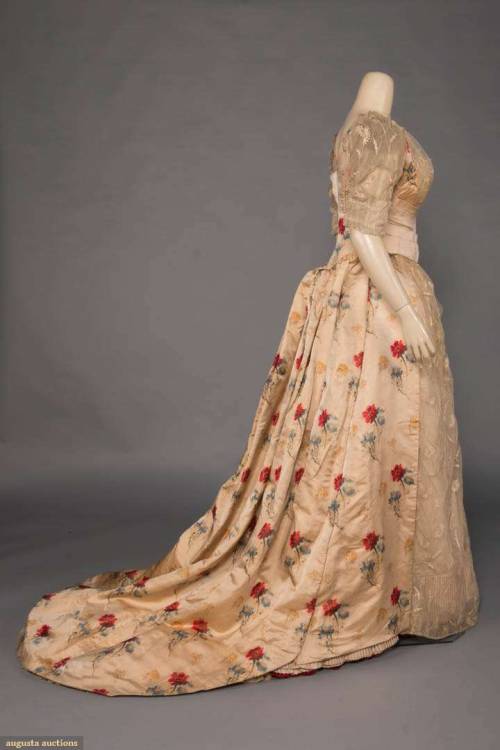
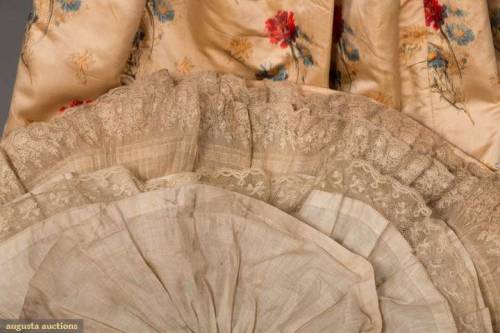
CHINE SILK EVENING GOWN, 1880/1900
Trained evening gown of blond silk satin w/ warp-printed red, yellow & blue flowers over embroidered net, w/ satin cummerbund sash closure, originally 1880s, altered c. 1900,
Post link
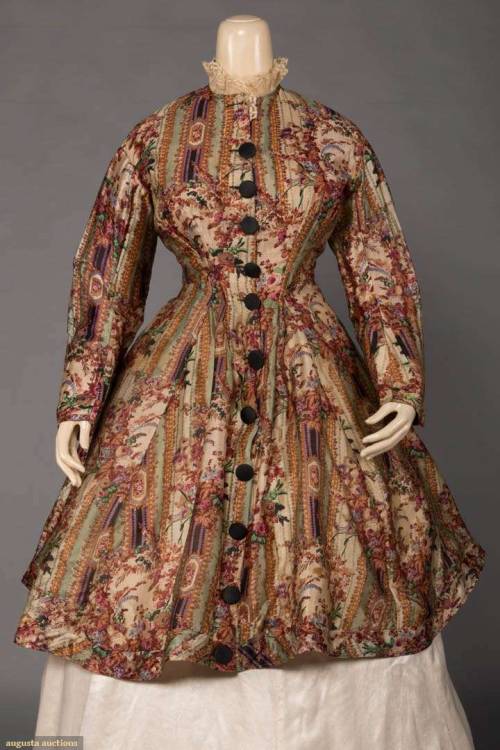
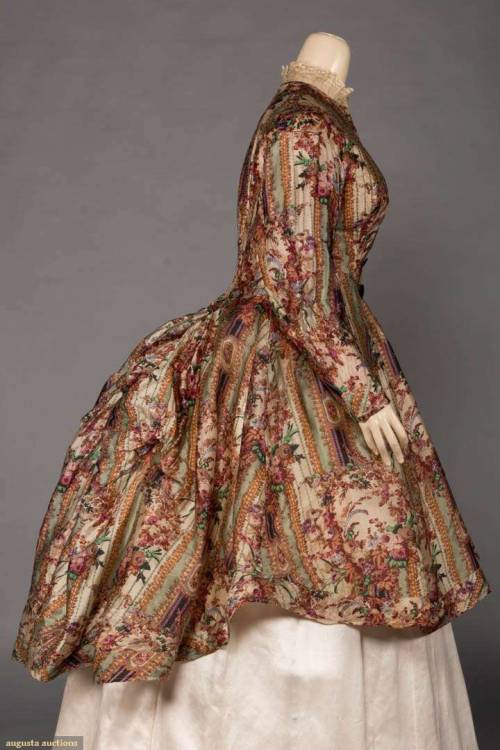
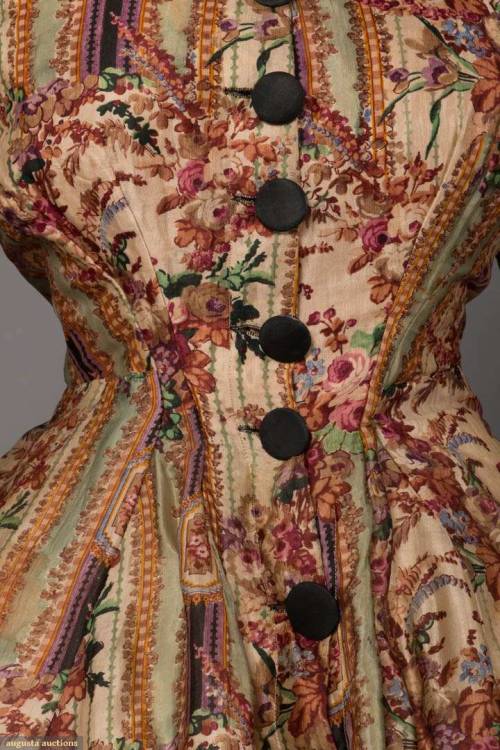
SILK GAUZE BODICE WITH POLONAISE, 1870s
Polonaise silk gauze bodice printed in multi-colored floral & geometric band motif w/ lace trim to high collar & CF black satin button closure, lower half lined in horsehair, c. 1870s
Post link
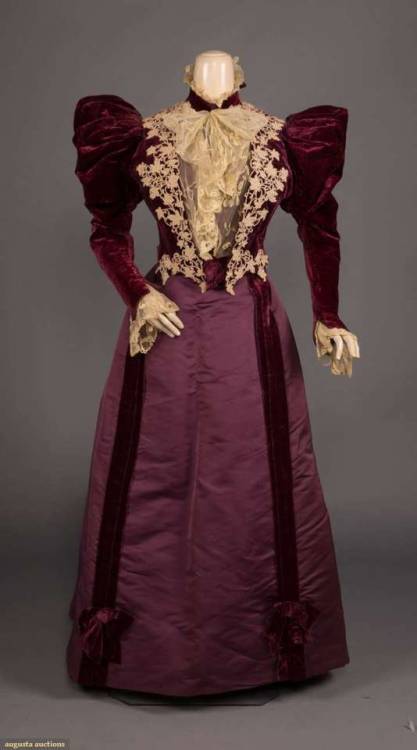
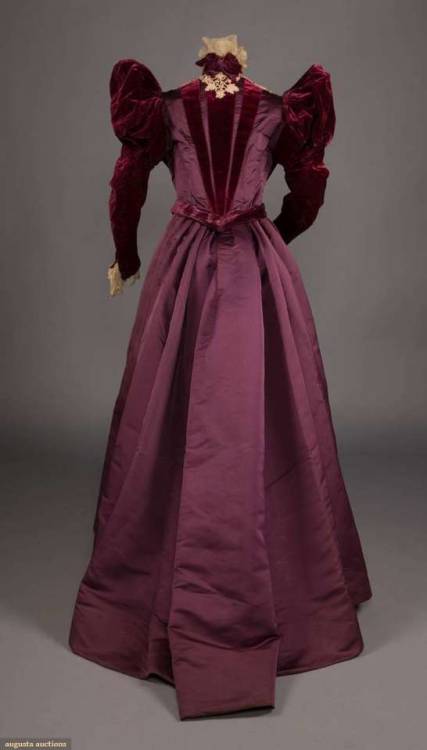
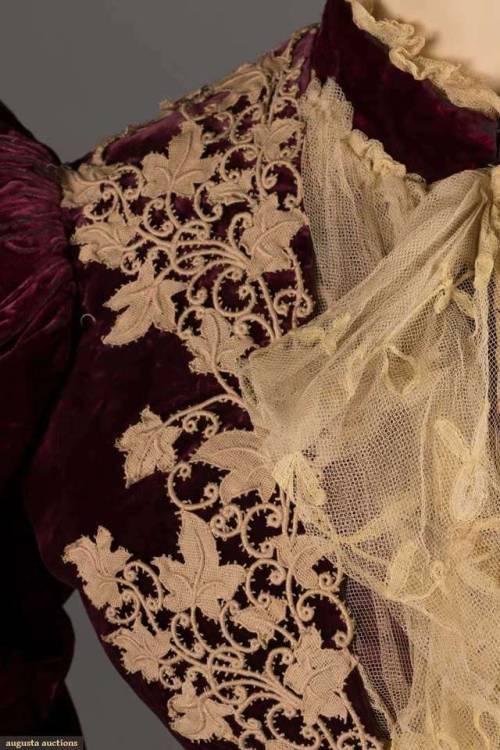
BURGUNDY SILK, VELVET & LACE VISITING DRESS, c. 1894-1895
2-pc visiting dress in burgundy satin & velvet/ blond lace at collar, front & cuffs, high neck, lace applique to back neck, gigot sleeve, trained bustle skirt w/ velvet trims & bows at front
I’ll take 10 of these, please and thank you.
Post link
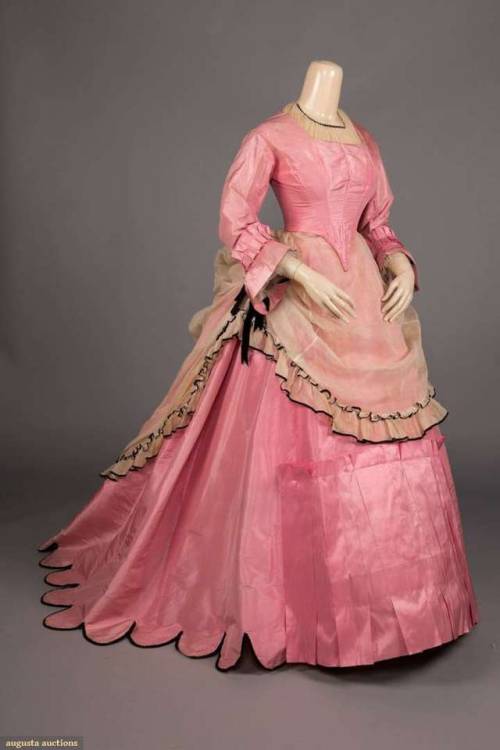
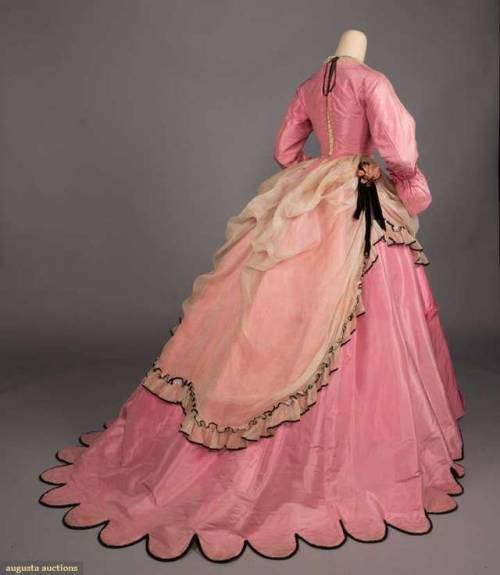
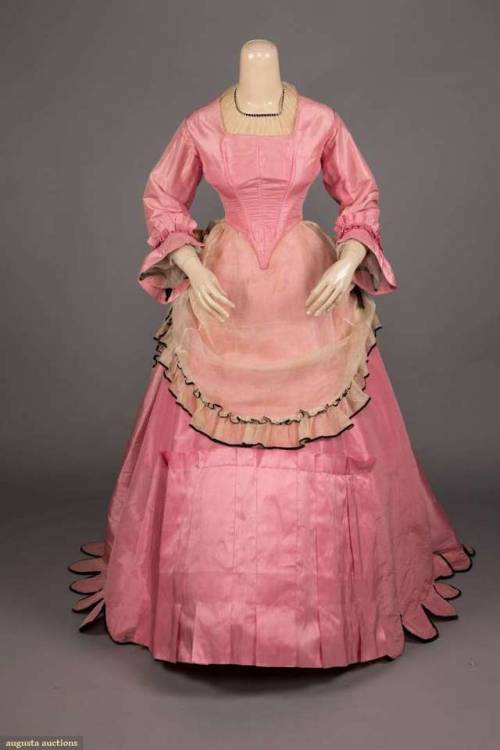
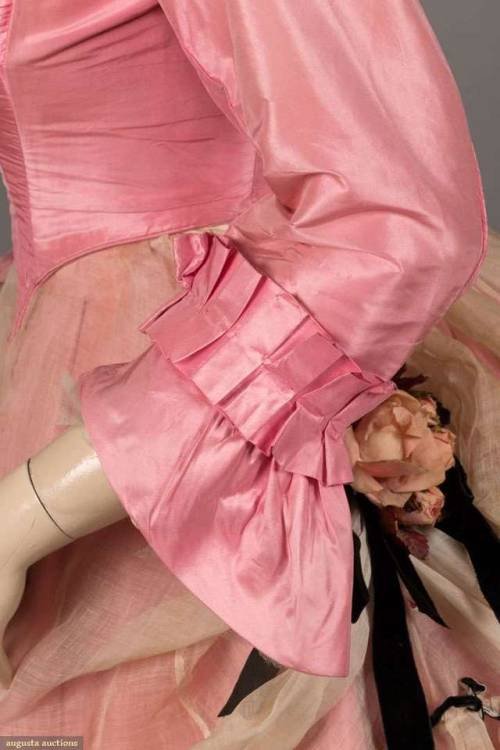
PINK SILK TAFFETA DINNER GOWN, c. 1869
Bubblegum pink silk taffeta 3-pc gown w/ square neckline & net & ribbon modesty panel, corset bodice w/ back lacing, shaped bell cuffs, trained skirt w/ scalloped hem edged in black velvet, box pleat detail at center front, cream organdy ruffled overskirt draped to rose & black velvet ribbon detail at side.
Post link
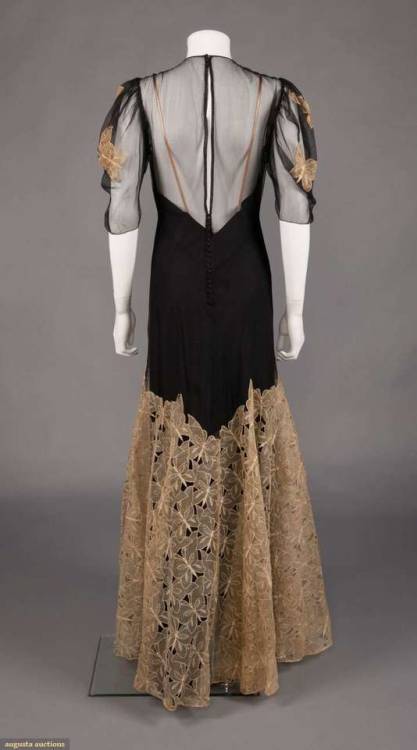
NET EVENING GOWN, LATE 1930s
1930s sheer net gown w/ cream butterfly appliques to shoulders & skirt, center front button closure, jewel neckline & slip,
Post link
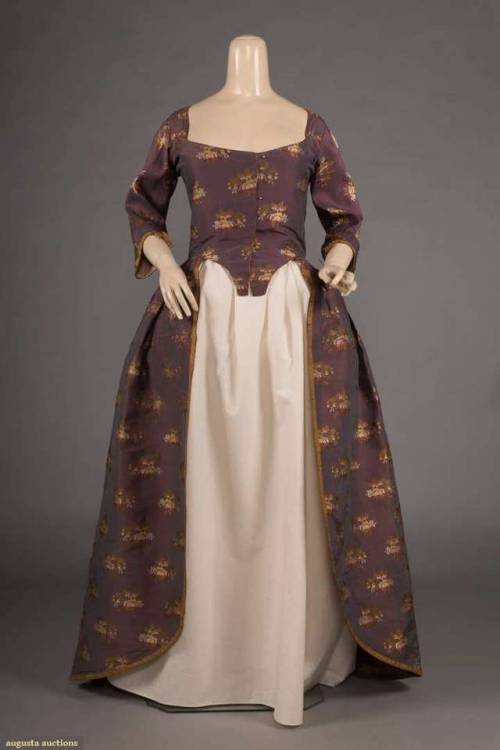
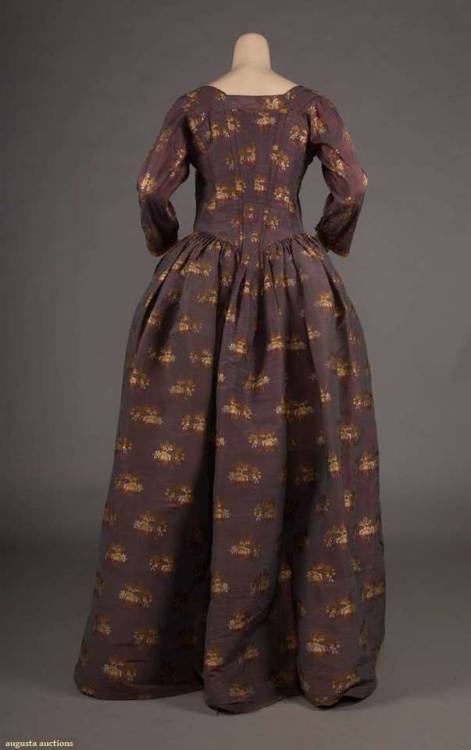
LADIES BROCADED PURPLE SILK OPEN GOWN, AMERICA, 1770-1785
Open robe a l'anglaise of aubergine-copper changeante silk brocaded w/ floral sprays, square neckline, front of gown & sleeves below elbow trimmed w/ goldenrod satin ribbons, bodice lined in linen, tapes & tulle on interior, American.
Post link
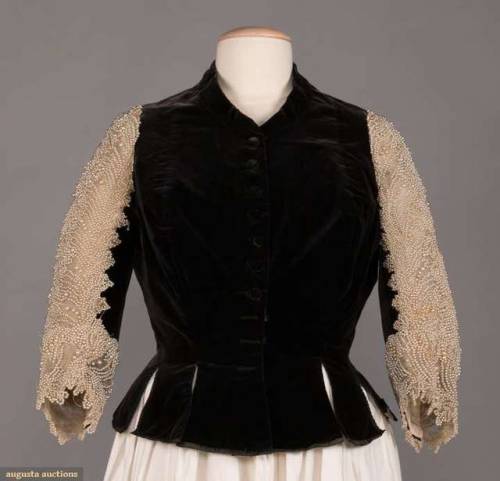
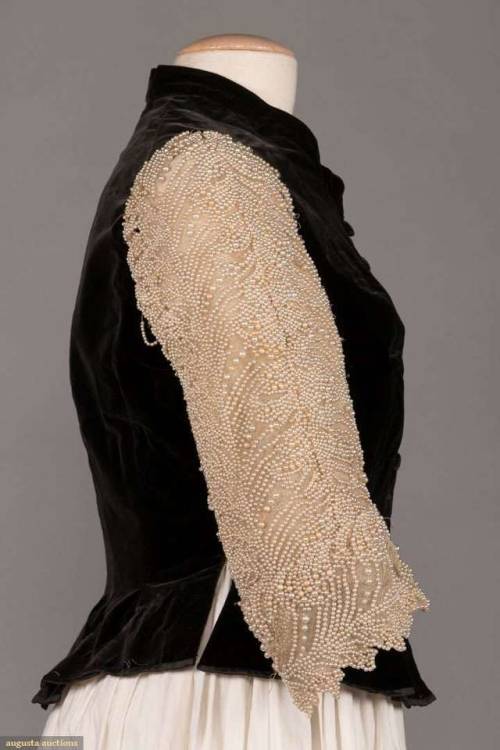
CHARLES WORTH PEARL BEADED EVENING BODICE, c. 1880
1880s black Victorian bodice, center front button closure, tabbed peplum, net & pearl encrusted long sleeves, label “Worth, Paris”
Post link
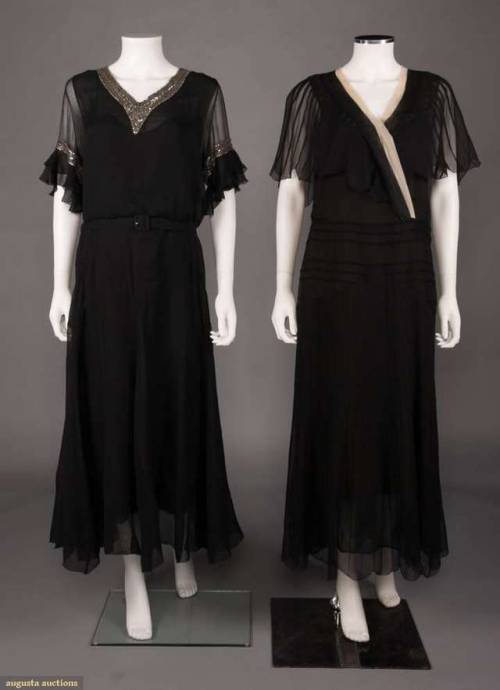
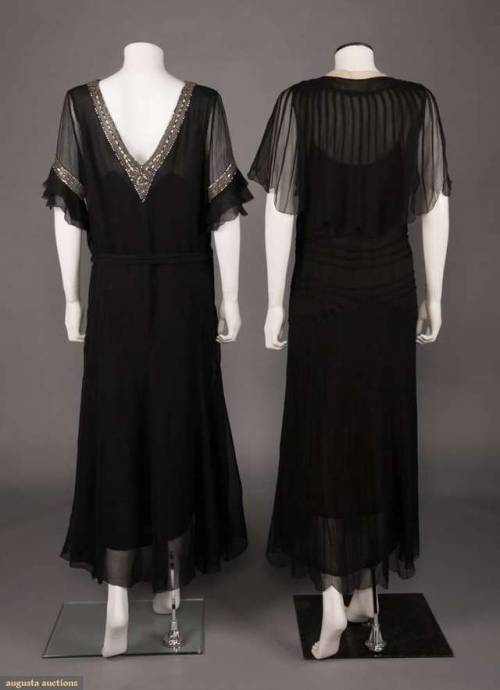
TWO BLACK CHIFFON EVENING GOWNS, 1930s
2 early 1930s black chiffon evening dresses: 1 w/ crystal beading & rhinestones to V-neck & short ruffled sleeves, black belt, & 1 faux wrap front to caped collar,attached black silk slip, label “Blackshire, Paris, NY”
Post link
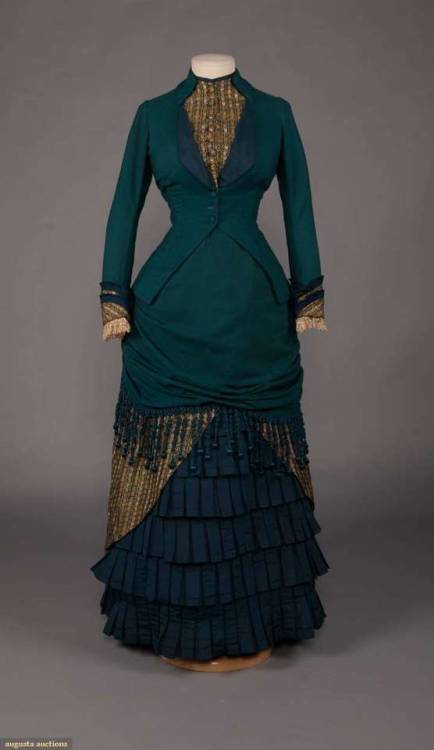
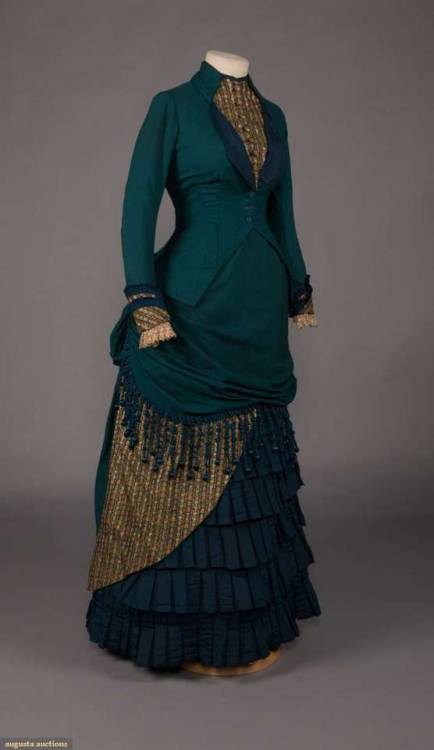
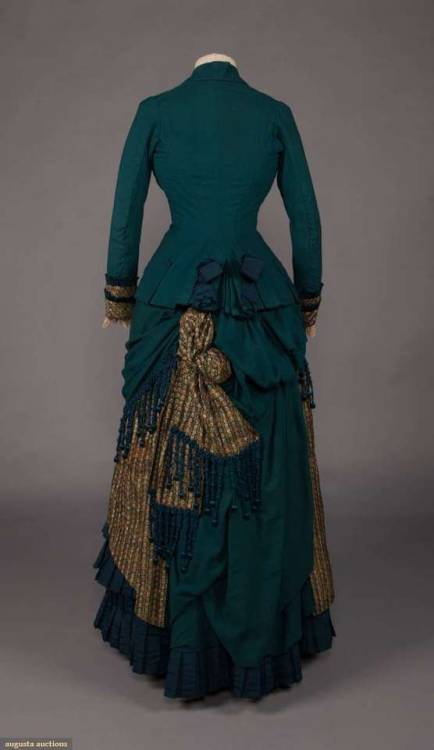
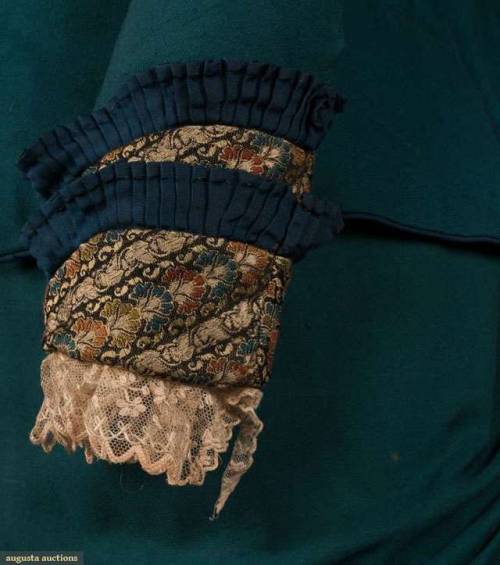
TEAL WOOL VISITING DRESS, c. 1880
2-pc teal wool & brocaded silk day dress with center front button closure, marine blue corded trim to bustled skirt,
Post link

Historical Fashion Details in art.
Antebellum Fashion Detail.
Making a Modernized 1890s Skirt - Part 2/2
Last time, I finished off with the insertion of the zipper, so now it was time to hem the bottom. Since the Anne With an E dress was a little longer than what I would like the skirt to be, I didn’t add any seam allowances and decided to shorten it in this step. For that, I folded over the raw edges and stitched everything down. Easier said than done, as the skirt flares out quite a bit in the bottom so the hem ended up really bulky at first, but I was able to fix it by adding tiny pleats to the left side of the hem.

Ironically enough there aren’t any visible in this picture (unless you take a close look in the bottom right corner) but I added one pleat to every panel and two to the back one because it’s wider than the others.
Next, I wanted to add the decorative bands. Now this proved so much trickier than I had anticipated, and I still don’t really know what exactly it was that caused the problem.

So this is what I wanted to do. Three rows of bands, and I actually thought this would be the easiest part. Oh boy how wrong I was. The first, thickest band turned out alright, but the second one ended up being super taught, almost as if my thread tension was too high, except I didn’t change a single setting. So I ripped out the seams again (quite literally) and just left the bottom one. I didn’t bother trying again at this point because it was very time consuming and besides, to make the thinner bands I had cut a wider band in two and the edges were starting to fray quite a bit.
Lastly, I added a button to the back above the zipper and it was done! And… I did a little photoshoot.


I love how the color of the blouse matches the fabric, I actually had this exact combo in mind when I decided for a brown skirt. So yeah, hope you like it as much as I do, and I’ll try to post again very soon!
Making a Modernized 1890s Skirt - Part 1
I spend a lot of time making historical costumes but I’m just never really able to wear them. In my day to day life I dress rather modern, with a few puff sleeve sweaters and ruffled tops, but overall it’s chain store with a small nod at history. For a while now, I’ve been wanting to make some modernized clothes I can wear on a daily basis, without needing a specific occasion to not look completely out of place (and time). So I decided a skirt was one, super quick and easy to make and two, a perfect way to give my outfits that much needed ✨vintage vibe✨.
This idea has been in the back of my mind since I watched this video by Bernadette Banner, I haven’t rewatched it since but I would say it is loosely based on it.
The idea was that I’d use the skirt pattern from the Anne With an E dress, as it was taken from an actual 1890s skirt pattern that I just shortened. So immediately when I received my package, I started working on it.
I didn’t need a mock-up as I’d successfully used the pattern before, so I cut it out of the fashion fabric right away - I’d bought 2 meters for this but honestly could’ve done with one. But having leftover twill is never a bad thing, there’s so much you can do with it!

As you can see, there are three pieces. Two of them I cut on the fold, so they’re double the width, and the third one is actually two seperate pieces, same shape but mirrored, those will be the side panels.
Next I stitched them all together and cleaned up the edges right away. So much easier to work like this.


Now it was time to pleat the back. I eyeballed it, pleating the entire back panel with pins and then tried it on to add some pleats to the side panels as well so it looks a little better.

I then decided to stitch down the pleats so I could take all the pins back out; it was impossible to add the waistband with them in place.

For the waistband I just cut out a rectangle, pressed it and sandwitched the raw edges and pleats between it. It was a little finicky but thankfully once pressed the fabric stays in place pretty well.
Next up was the zipper.


This was actually the first time I used a zipper foot, up until now I either sewed it by hand or used a regular foot, but it worked so well and i’m never not using a zipper foot again.
And that was it for one day of work. I’ll be finishing up the skirt asap and maybe even do a photoshoot, who knows!
Making an early 1900s corset cover
Hey everyone, I’ve been absent for so long and that has many reasons, my studies are definitely taking up so much more time than I had anticipated. I feel like I should mention that I am not studying dress history, so like I always say - costuming is a hobby of mine but please be aware that I might not always be 100% correct about things. But I am minoring in art history where we do occasionally talk about costumes so… it’s something? Anyways, a while ago I made a corset cover that I forgot to take pictures of when it was finished, so now I’m doing that. But first, this is what I was roughly going off of:

Having made some more complex things before I thought hey, this can’t be that hard? It’s basically just a bodice shaped piece of fabric with ruffles on. And surprisingly, I wasn’t that far off from the truth. I still severely underestimated the time that it took to sew all of those six pieces of ruffles on. That being said, here’s where I started:

Please excuse the fact that it’s not ironed, I was making it kind of in a rush.
I did make a mockup first that I tried on and made sure everything fits, but didn’t take a picture. Here you can see the mock up parts cut out of fashion fabric. I got out my french curve for the first time and was totally expecting to fail but it worked out really well! I used it to draw in all the curved lines. The reason only the back is curved and not the front is because I wanted the back to sit flat while the front would be gathered with a string and tied in the front, to help create that pigeon breast silhouette without having the back be puffy as well. As you can see, for that to work I’ve had to adjust the length of the side edges in the front so they had the same length as the curved ones.

So then I sewed all the edges together and cleaned them up right after so I wouldn’t have to do that later when it’s done.

I then cut out some rectangular strips for the ruffles and folded over and stitched all edges but one - the one that would be ruffled. Instead, I did a running stich that I could pull on to gather it, and then machine stitch it to the rest. Here’s where I began to struggle: I didn’t really know how to attach the ruffle so it would look nice. I didn’t necessarily want the stitches to be on top, so I initially stitched it upside down to the fold it over but that didn’t work at all, so I had to take it all out again and just stitch it down normally.

I kind of just eyeballed where I wanted the ruffles to go, used a ruler to rougly make sure the ruffled pieces are the same length and tried putting them all about three centimeters apart. I do like how the ruffles curve up on the sides, I thought the finished piece looks so much better like this.

Like I said, I wasn’t super happy with the top stitching, and since I had some white ribbon left I used that to cover it up.
Then it was time to insert the string, aka that same white ribbon. I originally wanted to add a separate channel for that but I thought maybe I can just use the cleaned up edge for it. I used a bobby pin to get that ribbon through this makeshift channel but it worked.
So then I added the buttons and made little “buttonholes” out of thread and sewed five buttons in place.


Here’s the finished piece. And you know what the ironic part is? It doesn’t fit me over a corset. And I have nothing but my own stupidity to blame. Thing is, I made this in order to wear under a dress that I’m going to make at some point, and I’m not really planning on wearing a corset with it (I want to modernize it a little), so I wanted something to help with the silhouette. So I never took my measurments in a corset, and I thought if I leave a little wiggle room it’ll be fine. No, learn from my mistakes and take your measurments! It’s not that big of a deal though because I did make it specifically with that dress in mind and having it fit over a corset would’ve just been a nice plus. And if I really try I can make it fit, it’s just a tiny bit small.
So, long story short, corset covers are great and not hard to make if you don’t make these obvious mistakes.
Fixing my Robe à la Polonaise to make it more ✨historically accurate ✨
With every project I do, I learn more and more about techniques, sewing, and dress history as a whole. So there’s no surprise if I look at an older dress I made and find all kinds of mistakes that need fixing, and I know even in a few months I’ll look at my current projects with the same criticism. Just know that the obvious mistakes are something I’ve been very much aware of since I made it, I just added a fichu because I didn’t know how to fix it.

Here’s the dress. You can immediately tell that something went terribly wrong with the neckline, but there are also some issues with the undergarments that I’m going to deal with.
I made the mistake to cut the neckline straight when it should have been slightly rounded, that’s why it slopes up in the middle. For that, I’m taking out the boning in the front (and later replacing it with actual synthetic whalebone) and folding that slope over to make it rounder. This will however create an even lower neckline which is also one of the many flaws of this dress, so that’s what I dealt with next. Another problem that I had was with one of my sleeves. The right sleeve (left in the picture) wouldn’t lie flat on my shoulders. I have no idea how that happened as I cut both sides the exact same but it’s something I needed to fix so I folded this part over on the inside and stitched it in place.


I did this on both sides so I could raise the neckline as well.
Then I noticed that the front of the bodice wasn’t laying flat, and I noticed that it’s probably too long. I folded the bottom seam over until I felt like it looked flatter and stitched that in place as well. It does look a bit awkward and is not the historically accurate way to fix it, but you can’t really tell from a distance so for the sake of facing my mistakes to practice it was good enough.
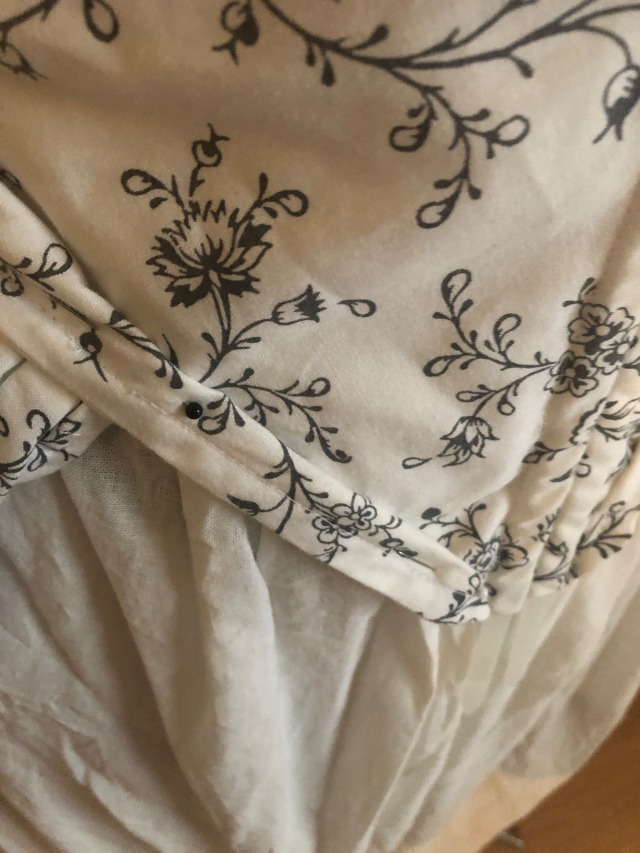
The gown still has many more issues that I’d need to make a new one to really make it work so I only tackled the most obvious parts.
There was this big fold in the back that I planned on fixing by resewing the side seam but for some reason after fixing the front it wasn’t so bad after all so I left it as it was.
Now to the petticoats. They’re fine overall, but I didn’t use bands for the ties, I made a tube out of the same fabric, which made it super bulky when tied. And since you have like, two or three of those underneath the actual gown it could make it look a little bulky in the waist area, which I wanted to avoid so I bought some cotton bands about a centimeter wide and replaced all the ties.


This is the fixed dress for now. The back is very boxy so I might resew the side seams after all but this is it for now.


Like I said, to fully fix it I’d just have to make a new one and I will eventually but probably in the distant future as I have many more projects that I want to do. But all in all I can say that I’m really glad I fixed this dress as best as I could because like I said, every project is a big learning experience and fixing something even more so. This way I can make sure I won’t make the same mistakes again!
Hi there! I really tried not to disappear again for over a month but I’m in the midst of moving at the moment and it’s been super stressful. I really thought I could start the new project before but it was impossible. It’ll take a while now to get settled and get everything sorted and by the time I do I think I’ll be starting uni again, but my deadline for this one is June next year so I will definitely have to start it at some point. So I decided to post a quick little sneak peek while I’m sorting out my sewing stash -

This will hopefully be made into a beautiful early 1900s gown, with some alterations to bring it a little bit into this century so I can wear it to a wedding and not feel completely out of place. I might add that the bride is very extravagant in her clothing as well and she granted me permission for this so I definitely will not outshine her. I’ll tone it down a notch too, so don’t worry. She said as long as it’s not white I can come up with whatever I want.
That being said, I’m basically going to be following (or trying to) this pattern from Patterns of Fashion 2:

It’s not going to have the massive train and the flounces at the sleeves, and I don’t think I’ll be wearing a corset with it, much rather just a corset cover for the shape and put some additional boning into the bodice itself so the silhouette will still be there, roughly. The rest I think I’m going to make up as I go. It is also completely possible that I’m going to scrap this project last minute and buy a dress from the store. If it turns out nice, I’ll wear it!
This is it for now, and I’m truly hoping to start working on it this month but realistically speaking, I don’t know. Hopefully soon though!

