#natural dyeing

A couple weeks ago, I tried indigo dyeing for the first time! I thought I’d share some of the process.

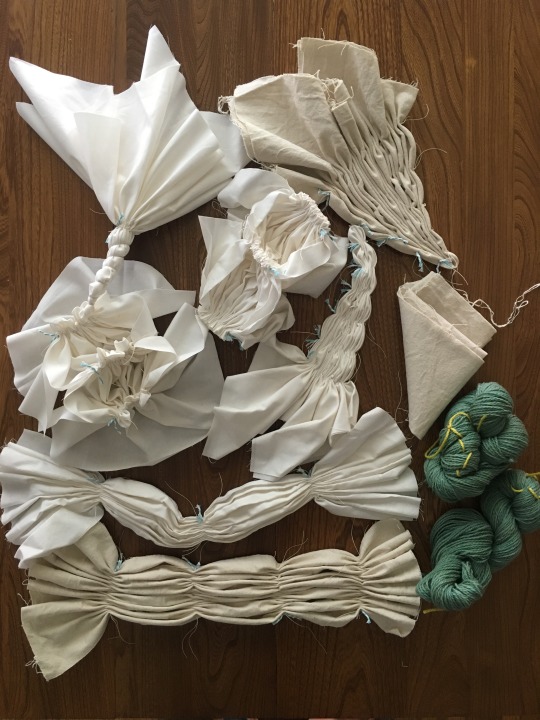
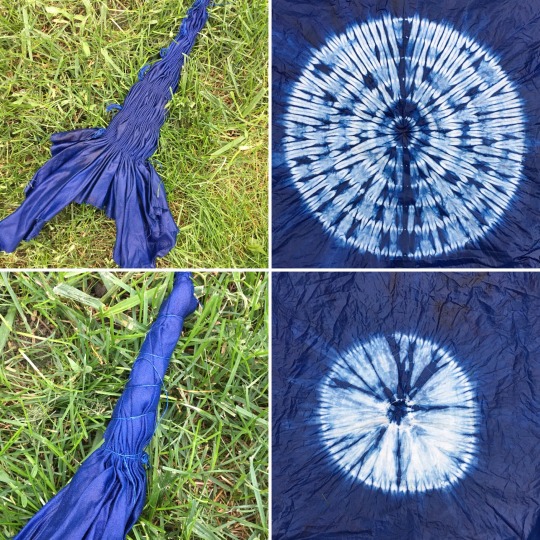
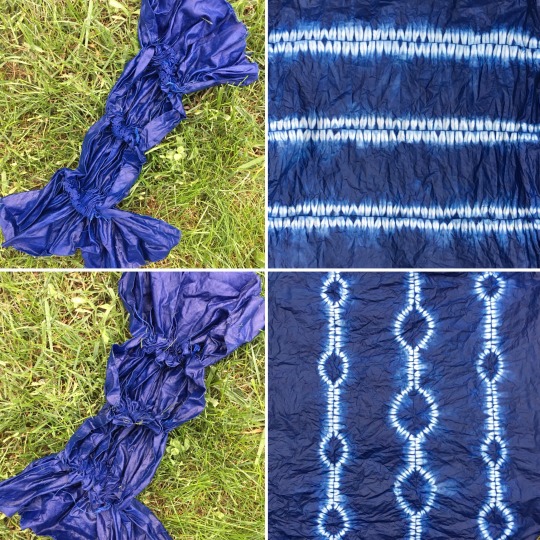
I had already prepared several pieces of fabric for dyeing, by stitching them up with various shibori stitch patterns. I used Kona PFD Bleach, and some painters canvas that I had pre-washed before stitching. I also had yarn that I wound into skeins.
To make the natural indigo vat, I used natural indigo extract, calcium hydroxide thiourea dioxide as a reducing agent. (Side note - I’m using the term “natural indigo” because you can also use “synthetic indigo” and I specifically wanted to try the natural vat.) If you are curious about the details of the indigo recipe I used, you can check out and download lots of great, detailed information from Maiwa Supply Shop.
I collected other supplies over the last month from various stores (mostly Giant Tiger and IKEA, and white buckets from Canadian Tire). I was careful to get only stainless steel, glass or plastic because other materials could react with the dye or alter the process.

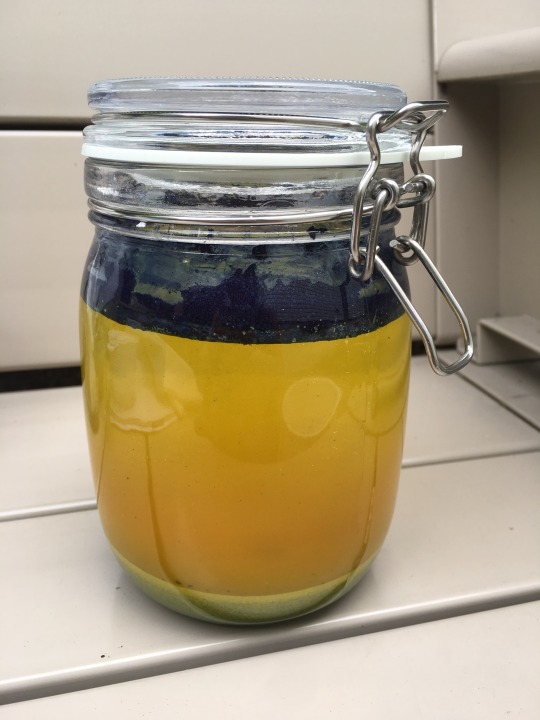
I first made the indigo stock solution. It started out pale blue but soon turned bright yellow! (See below). When I added it to the bucket, it turned a pale yellow-green, with a coppery sheen on top – which is apparently how it’s supposed to look.
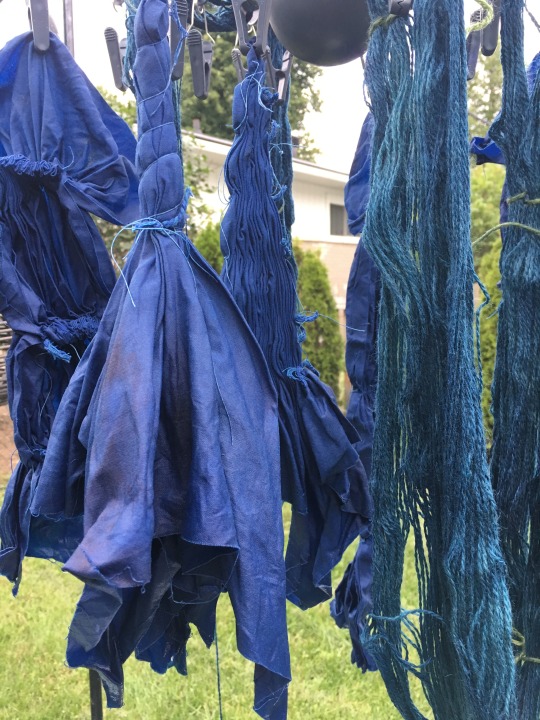
When I put my first few items in the vat, I wasn’t sure if it would work! I left the items in for about 15 minutes then slowly took them out. They were bright chartreuse coming out, but quickly started turning green, then aqua, then blue. It was amazing!

I did several “dips” in the vat for each piece -letting them sit in the vat for 10 minutes or so, then taking out to let oxidize in between dips. For my canvas, I did 3 dips each, and for the cotton squares I did 4 or 5. I also overdyed some yarn (more on that in another post!)
Then, it was the moment of truth - to see the final results! After the last dips, I rinsed the pieces in water, took out the stitching, and rinsed again. I was so pleased with the results and how the shibori stitching turned out! Here are the results from stitched piece to final design!

Now that I have all the supplies, I will do indigo dyeing again for sure! This time was definitely a learning process and I know next time I’ll tweak a few things. It’s so fun trying something new!
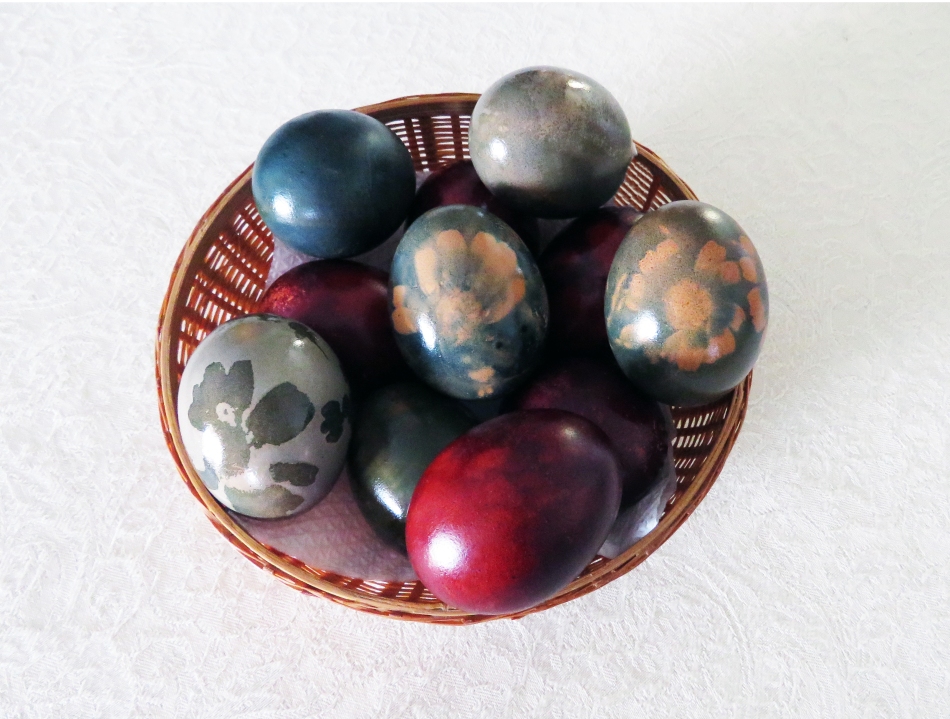
Eco-dyeing eggs for Greek Easter with onion skins, turmeric and red cabbage.
The eggs were pre-boiled and allowed to cool before being decorated with gathered flowers and then wrapped in old pantyhose. The onion skins, turmeric and red cabbage were boiled separately with 2 tbsps white vinegar and then cooled before adding the eggs.