#painting guide

Brushing
This is the most basic painting technique. Prep the brush by dipping it in water and gently smoothing it between your fingers to squish out excess moisture (like with your skin, keeping a brush slightly moist will keep the bristles from drying out and breaking). Then you dip the brush in paint and go to town.

Dry-brushing
Painting without dipping the brush in water first. This gives a streaky effect that works really well for weathered props.

Stippling
It’s pretty much poking the surface with the tip of the brush again and again to make dots rather than lines. It might sound silly, but you can create an amazing texture using it.

WeatheringviaPunished Props
Aging a prop by painting it with a color and quickly rubbing it off, leaving behind a residue in its cracks and crevasses. This is great for warrior, soldier, sci-fi, and steampunk props.

Sponging
Dabbing the paint on with a sponge. It give the prop a very organic look.

Stenciling
Painting through the gaps in a created form to create clear lines between colors. You can do this with reusable forms or painter’s tape.

Splatter
Sprinkling paint onto a prop to create a splatter shape. Great for war-torn costumes, this is a really fun technique that packs a lot of punch.

Spray
Using a spray can! Because it’s so quick, easy, and even, this is a favorite technique for prop-makers. Base coats are usually spray-painted on.

Airbrush viaSpikey Bits
A more intense version of spray-painting. Using different air pressure and painting from different distances lets you create broad or fine lines, adding depth to the paint job.
Tutorials
Remember–using a combination of these techniques to apply your primer, paint, and sealant will give you the best result! These tutorials will show you what I mean:
Spray painting and dry-brushing:http://www.youtube.com/watch?v=cQk6zA3PFVA
Airbrushing and stenciling (it is a painting, but your approach will be the same. Just remember to use paint that’s appropriate for your material!): http://www.youtube.com/watch?v=ymXZLT7PfAk
Stenciling, brushing, and weathering:http://www.youtube.com/watch?v=nM9k7o0_wnI
Splatter:http://www.youtube.com/watch?v=jlyxZuELowg
Spray paint and sponging:http://www.youtube.com/watch?v=fwlGgTAA4zo
And finally, practice every technique before you use it. Even a few minutes of testing a method will improve the final look of your prop.
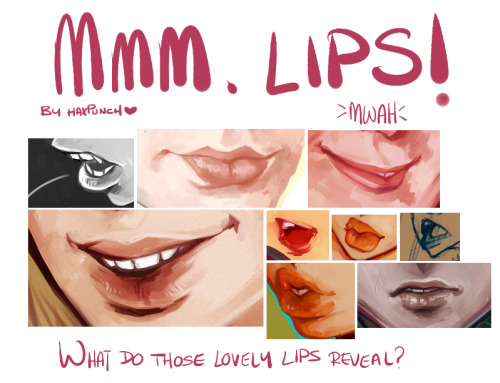
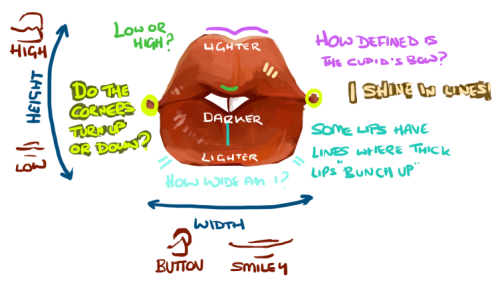
As requested, a tutorial on how I approach lips. This is just how I see them, but I hope it helps!
Post link
Messing around with a fur brush that I made recently. It works well for creating clumps of hair, as the brush looks better the larger the size. When used on a smaller setting, it becomes fuzzier and less appealing. A lower “min size” also seems better for longer clumps of fur.
To make the clumps look more organic, I then go back with an airbrush— or brush that does not blend much/at all— and fray up the tips.
Threw on some luminosity and multiply for half-assed extra shading, erasing it away to fit the fur shapes.
Here’s the brush if anyone wants to give it a go:
Post link
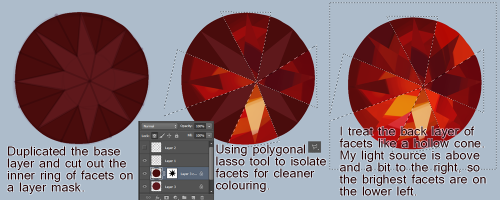
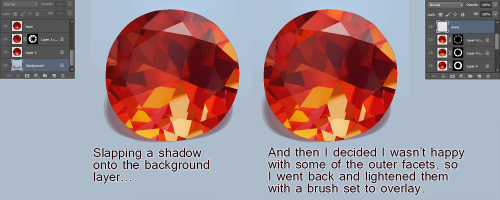
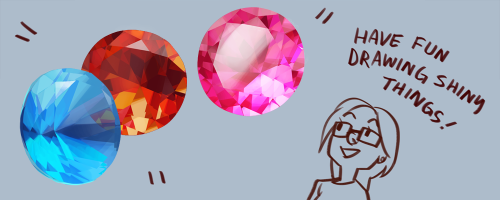
I made a walkthrough of my process for drawing faceted stones! Judging by the timestamps from the screenshots I took, drawing this one stone took an hour and three minutes, although I know I went and checked tumblr a couple times while I was working, so let’s just call it an hour.
Now MISCELLANEOUS NOTES
- This walkthrough assumes you already know how to use layer masks, the clone stamp, and the lasso tool. There’s also one part where I didn’t label it, but I inverted the selection so I could keep my lines consistent. It’s in the third image.
- Unfortunately I can’t really help with colour choice and the actual colouring of the pinwheel shape that makes up the back facets, but you can kind of see that I tended to colour with lines that cut across the facets and and kept the outer parts of the facets darker. It would probably be best to find a reference to work from!
- This particular cut of stone is called the ‘brilliant’ cut.
- There’s actually a lot of internal reflection business that goes on in a stone, but I elected to ingore all of it since at a distance you can’t really tell anyway.
now GO FORTH AND DAZZLE YOUR FRIENDS WITH YOUR SPARKLE
Post link
part11: http://i.imgur.com/5Br1j.jpg
part12: http://i.imgur.com/Ff46c.jpg
you can get the lineart here if you want to use it: http://fav.me/d5awm0r
Post link

