This is the most basic painting technique. Prep the brush by dipping it in water and gently smoothing it between your fingers to squish out excess moisture (like with your skin, keeping a brush slightly moist will keep the bristles from drying out and breaking). Then you dip the brush in paint and go to town.
Dry-brushing
Painting without dipping the brush in water first. This gives a streaky effect that works really well for weathered props.
Stippling
It’s pretty much poking the surface with the tip of the brush again and again to make dots rather than lines. It might sound silly, but you can create an amazing texture using it.
Aging a prop by painting it with a color and quickly rubbing it off, leaving behind a residue in its cracks and crevasses. This is great for warrior, soldier, sci-fi, and steampunk props.
Sponging
Dabbing the paint on with a sponge. It give the prop a very organic look.
Stenciling
Painting through the gaps in a created form to create clear lines between colors. You can do this with reusable forms or painter’s tape.
Splatter
Sprinkling paint onto a prop to create a splatter shape. Great for war-torn costumes, this is a really fun technique that packs a lot of punch.
Spray
Using a spray can! Because it’s so quick, easy, and even, this is a favorite technique for prop-makers. Base coats are usually spray-painted on.
A more intense version of spray-painting. Using different air pressure and painting from different distances lets you create broad or fine lines, adding depth to the paint job.
Tutorials
Remember–using a combination of these techniques to apply your primer, paint, and sealant will give you the best result! These tutorials will show you what I mean:
Airbrushing and stenciling (it is a painting, but your approach will be the same. Just remember to use paint that’s appropriate for your material!): http://www.youtube.com/watch?v=ymXZLT7PfAk
I’m really sorry! I’ve made a good amount of props, but I haven’t had as much experience with them as I have other aspects of cosplay/costuming. I did as much research as I could to make up for the lack of expertise, but…it wasn’t enough. Thank you OHI Cosplay for the corrections!
****
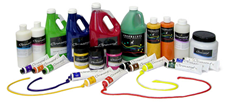
It can be overwhelming to try and select the right kind of supplies for a project, so it’s best to start small. These are some of the most commonly used primer, paints, and sealants for props:
Kinds of Paint
These are divided into two classes (primers often use the same kinds of bases as well):
Acrylic-based
This is what you should be using. Initially designed as the poor man’s oil paint, acrylic is is easy to use, durable, and has a nice finish when dry. It is, however, more expensive than water-based paint and a little harder to clean (but not by much).
When you buy a can of spray paint, the actual paint you’re spraying is usually acrylic-based.
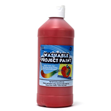
Water-based
Poster paint is water-based. It dries quickly, is easy to clean, and cheap. It doesn’t have the same smooth finish and lifespan as acrylic paints, though.
Primer
You know that scene in The Adventures of Tom Sawyer where he has to whitewash the fence? That was pretty much priming. You’re completely covering up the materials you used to make your prop, blocking out any of its original color and smoothing out the surface so the paint looks the same way on the prop as it does in the bottle.
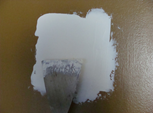
Gesso
Very easy to use, provides great coverage, works for several different kinds of projects, and goes a long way. If you apply it in layers you’ll cover up any bumps in the surface of the prop. You need to sand it to make it smooth.
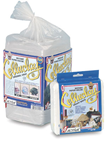
Paper Mache Clay
Requires a little more skill than gesso to use, but allows for molding and sculpting. It totally covers the surface of your prop. You will need to sand this as well.
Paint primer
This doesn’t cover up any bumps; it only blankets the color of the building material. Paints and primers share the same kind of bases (water, acrylic, oil, etc.). You should try to match your primer to your paint, but acrylic primer will work for most projects.
Sealant
This goes on last and is essential to any project. It makes it waterproof, protecting both the paint job and the material used to build the prop. Sealants range from matte (don’t reflect light, like paper) to glossy (reflect lots of light, like glass).
Modge Podge
Also used as a glue, this sturdy and glossy sealant will become your best friend. It really is one of the best products a crafter can have.
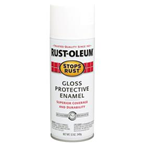
Spray Enamel
Works surprisingly well for how cheap it is. It’s extremely easy to use but will get cloudy if you touch it before it’s dried completely.
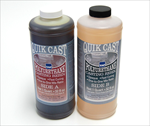
Casting Resin
Also used to make props, resin dries very hard, helping add support to relatively weak crafting materials. It’s a favorite for paper-based projects.
With the selection narrowed down, it’s a little easier to choose what to work with. You can find all of these at any craft store.
I’m really sorry! I’ve made a good amount of props, but I haven’t had as much experience with them as I have other aspects of cosplay/costuming. I did as much research as I could to make up for the lack of expertise, but…it wasn’t enough. Thank you OHI Cosplay for the corrections!
****
It can be overwhelming to try and select the right kind of supplies for a project, so it’s best to start small. These are some of the most commonly used primer, paints, and sealants for props:
Kinds of Paint
These are divided into two classes (primers often use the same kinds of bases as well):
Acrylic-based
This is what you should be using. Initially designed as the poor man’s oil paint, acrylic is is easy to use, durable, and has a nice finish when dry. It is, however, more expensive than water-based paint and a little harder to clean (but not by much).
When you buy a can of spray paint, the actual paint you’re spraying is usually acrylic-based.
Water-based
Poster paint is water-based. It dries quickly, is easy to clean, and cheap. It doesn’t have the same smooth finish and lifespan as acrylic paints, though.
Primer
You know that scene in The Adventures of Tom Sawyer where he has to whitewash the fence? That was pretty much priming. You’re completely covering up the materials you used to make your prop, blocking out any of its original color and smoothing out the surface so the paint looks the same way on the prop as it does in the bottle.
Gesso
Very easy to use, provides great coverage, works for several different kinds of projects, and goes a long way. If you apply it in layers you’ll cover up any bumps in the surface of the prop. You need to sand it to make it smooth.
Paper Mache Clay
Requires a little more skill than gesso to use, but allows for molding and sculpting. It totally covers the surface of your prop. You will need to sand this as well.
Paint primer
This doesn’t cover up any bumps; it only blankets the color of the building material. Paints and primers share the same kind of bases (water, acrylic, oil, etc.). You should try to match your primer to your paint, but acrylic primer will work for most projects.
Sealant
This goes on last and is essential to any project. It makes it waterproof, protecting both the paint job and the material used to build the prop. Sealants range from matte (don’t reflect light, like paper) to glossy (reflect lots of light, like glass).
Modge Podge
Also used as a glue, this sturdy and glossy sealant will become your best friend. It really is one of the best products a crafter can have.
Spray Enamel
Works surprisingly well for how cheap it is. It’s extremely easy to use but will get cloudy if you touch it before it’s dried completely.
Casting Resin
Also used to make props, resin dries very hard, helping add support to relatively weak crafting materials. It’s a favorite for paper-based projects.
With the selection narrowed down, it’s a little easier to choose what to work with. You can find all of these at any craft store.