#cosplay guide


Brushing
This is the most basic painting technique. Prep the brush by dipping it in water and gently smoothing it between your fingers to squish out excess moisture (like with your skin, keeping a brush slightly moist will keep the bristles from drying out and breaking). Then you dip the brush in paint and go to town.

Dry-brushing
Painting without dipping the brush in water first. This gives a streaky effect that works really well for weathered props.

Stippling
It’s pretty much poking the surface with the tip of the brush again and again to make dots rather than lines. It might sound silly, but you can create an amazing texture using it.

WeatheringviaPunished Props
Aging a prop by painting it with a color and quickly rubbing it off, leaving behind a residue in its cracks and crevasses. This is great for warrior, soldier, sci-fi, and steampunk props.

Sponging
Dabbing the paint on with a sponge. It give the prop a very organic look.

Stenciling
Painting through the gaps in a created form to create clear lines between colors. You can do this with reusable forms or painter’s tape.

Splatter
Sprinkling paint onto a prop to create a splatter shape. Great for war-torn costumes, this is a really fun technique that packs a lot of punch.

Spray
Using a spray can! Because it’s so quick, easy, and even, this is a favorite technique for prop-makers. Base coats are usually spray-painted on.

Airbrush viaSpikey Bits
A more intense version of spray-painting. Using different air pressure and painting from different distances lets you create broad or fine lines, adding depth to the paint job.
Tutorials
Remember–using a combination of these techniques to apply your primer, paint, and sealant will give you the best result! These tutorials will show you what I mean:
Spray painting and dry-brushing:http://www.youtube.com/watch?v=cQk6zA3PFVA
Airbrushing and stenciling (it is a painting, but your approach will be the same. Just remember to use paint that’s appropriate for your material!): http://www.youtube.com/watch?v=ymXZLT7PfAk
Stenciling, brushing, and weathering:http://www.youtube.com/watch?v=nM9k7o0_wnI
Splatter:http://www.youtube.com/watch?v=jlyxZuELowg
Spray paint and sponging:http://www.youtube.com/watch?v=fwlGgTAA4zo
And finally, practice every technique before you use it. Even a few minutes of testing a method will improve the final look of your prop.
**IMPORTANT EDIT**
I got a lot wrong here! I don’t have time to go through and edit/rewrite/relink this right now, but until I do please look at this post from @ohicosplay! https://ohicosplay.tumblr.com/post/154557884784/primer-paint-and-sealant
I’m really sorry! I’ve made a good amount of props, but I haven’t had as much experience with them as I have other aspects of cosplay/costuming. I did as much research as I could to make up for the lack of expertise, but…it wasn’t enough. Thank you OHI Cosplay for the corrections!
****
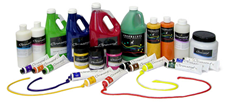
It can be overwhelming to try and select the right kind of supplies for a project, so it’s best to start small. These are some of the most commonly used primer, paints, and sealants for props:
Kinds of Paint
These are divided into two classes (primers often use the same kinds of bases as well):
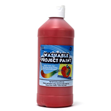
Acrylic-based
This is what you should be using. Initially designed as the poor man’s oil paint, acrylic is is easy to use, durable, and has a nice finish when dry. It is, however, more expensive than water-based paint and a little harder to clean (but not by much).
When you buy a can of spray paint, the actual paint you’re spraying is usually acrylic-based.
Water-based
Poster paint is water-based. It dries quickly, is easy to clean, and cheap. It doesn’t have the same smooth finish and lifespan as acrylic paints, though.
Primer
You know that scene in The Adventures of Tom Sawyer where he has to whitewash the fence? That was pretty much priming. You’re completely covering up the materials you used to make your prop, blocking out any of its original color and smoothing out the surface so the paint looks the same way on the prop as it does in the bottle.

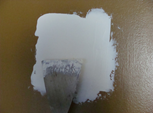
Gesso
Very easy to use, provides great coverage, works for several different kinds of projects, and goes a long way. If you apply it in layers you’ll cover up any bumps in the surface of the prop. You need to sand it to make it smooth.
Paper Mache Clay
Requires a little more skill than gesso to use, but allows for molding and sculpting. It totally covers the surface of your prop. You will need to sand this as well.
Paint primer
This doesn’t cover up any bumps; it only blankets the color of the building material. Paints and primers share the same kind of bases (water, acrylic, oil, etc.). You should try to match your primer to your paint, but acrylic primer will work for most projects.
Sealant
This goes on last and is essential to any project. It makes it waterproof, protecting both the paint job and the material used to build the prop. Sealants range from matte (don’t reflect light, like paper) to glossy (reflect lots of light, like glass).

Modge Podge
Also used as a glue, this sturdy and glossy sealant will become your best friend. It really is one of the best products a crafter can have.
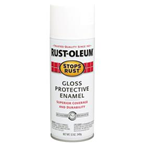
Spray Enamel
Works surprisingly well for how cheap it is. It’s extremely easy to use but will get cloudy if you touch it before it’s dried completely.
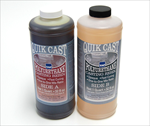
Casting Resin
Also used to make props, resin dries very hard, helping add support to relatively weak crafting materials. It’s a favorite for paper-based projects.
With the selection narrowed down, it’s a little easier to choose what to work with. You can find all of these at any craft store.
Even an expert painter would have trouble leaving a smooth coat if their brushes were garbage. You need to make sure you have the proper gear before you begin painting your prop! Here are some of the basic tools that you’ll need:
Brushes
For Glue (low-quality)

You’ll go through these fast, so don’t spend a lot of money on them.
● A thin-tipped brush
● A medium-tipped brush
● A fat-tipped brush
For Sealant (low to moderate quality)

Since sealants harden, these brushes will also need to be replaced at some point. Don’t overspend.
● A thin-tipped brush
● A medium-tipped brush
● A fat-tipped brush
For Paint (high-quality)

● A thin-tipped brush
● A medium-tipped brush
Everything Else


Primer
This is 100%, irrefutably, totally, non-negotiably crucial to painting. You don’t use primer, your project looks bad. End of story.

Sand paper
You’ll need this for sanding out bumps in the primer.

Palette
It doesn’t have to be fancy. Anything that won’t disintegrate and taint your colors will do.

Gloves

Smock/Apron/Old Clothes

Protective Covers for Your Work Area


Waterproof Sealant
If you don’t use this, than you paint job will bleed, run, and look generally gross.
I’m sure you’ve noticed that there aren’t any specific tools listed here. That’s because there are as many kinds of paints as their are materials for construction! This is a checklist to follow when you start painting any kind of project, whether it’s in wood, fabric, Wonderflex, paper mache…you get the idea.
“Make it blue!”


Before and after painting via Kamui Cosplay.
Your prop could be so well-constructed that it looks like you took it right out of a movie, but if you don’t paint it well, all that hard work will go down the drain. I’ve seen more costumes ruined by a bad paint job than I want to remember. It’s important to know the right products and techniques before you put a brush to your project!
You’ve always loved how professional wooden props look, but you have no idea where to start. Watching and reading tutorials is a great way to figure out how you’re going to make something. Take a peek at these projects and see what you can make of them:
Beginner’s Sword (all you need is a marker, a plank, a knife, and sandpaper):
http://www.wikihow.com/Make-a-Wooden-Sword
Beginner’s Rubber Band Gun (it’s given by a little kid who uses mixing sticks and hot glue. It’s a great way to get you thinking about layering and open up your mind to different resources):
http://www.youtube.com/watch?v=ELw8XBSfg1Y
Keyblade from Kingdom Hearts (helps you get a handle on construction):
http://www.youtube.com/watch?v=Uzd6BcYxiw4
Sword of Altair from Assassin’s Creed (good for working on carving skills):
http://www.instructables.com/id/Sword-of-Altair-Assassins-Creed/?ALLSTEPS
Functioning Wooden Crossbow (will help beginners transition into medium-skill carpenters):
http://www.youtube.com/watch?v=LoNqkiQQHzc
Sword Template for Workshops (meant for seasoned workers, this provides an awesome guide for medieval-style swords):
http://www.instructables.com/id/How-to-make-a-nice-wooden-sword/?ALLSTEPS
What you’ll see again and again in here is the importance of planning your cuts, taking your time when you’re cutting and sanding, using primer, and patience. All the time you put into making wooden props will come back to you three-fold: they’ll be able to stand more abuse and will last much longer than most other props.
“Don’t run with scissors” was one of those rules we all heard when we were kids, and probably the one we ignored the most…only to get some kind of cut later on. When you’re working in carpentry, though, those scissors are a heck of a lot bigger and you’ll end up with way worse than a trip to the nurse if you cut yourself with them.
It’s important to keep safe when you’re working on a new project. If you don’t take common precautions before you begin, you could cause serious and permanent damage to yourself. You will also use up way more time and effort than you would normally need to when you’re working with an injury.
Follow these tips to avoid wasting all that blood, sweat, and tears:
1)Wear protective gear. You know how much it hurts when you get an itty-bitty splinter in your finger? Now imagine that in your eye. When you’re working with high-powered machinery, always wear safety goggles. If you’re using unfinished wood or paints, wear gloves. When you’re sanding, put on a ventilator. You don’t realize just how important these are until you’re sitting in a waiting room wondering how you’re going to pay for the extra medical bills.
2)Use the appropriate guards and guides with your tools. They were made to protect from common accidents that happen again and again. If you decide you’re good enough to not use them, you will pay the price for it.
2)Dress appropriately. Don’t ever wear loose-fitting clothing when you’re working. You can’t manage it all the time, and it will eventually get caught in something. At the least you’ve ruined a shirt and a tool. At the worst you’re the one that gets torn up.
3)Stay focused and aware. There’s a reason workshops are large and closed-off areas. When you’re working with such powerful tools, you need to tune everything else out–phones, friends, pets. Distractions=looking away from your tools=injuries and messed up projects.
You also shouldn’t be under the influence when you’re working. You need to be completely in the moment, both mentally and physically; it’s the only way you can put your all into what you’re doing. When you’re drinking or smoking you aren’t all there, plain and simple.
4)Turn off and unplug machines when you aren’t using them. If that means that you only use a single outlet to force yourself to switch between power cords, do it. You’re using stuff that’s meant to cut through limber like it was butter. Imagine what it would do to your foot if you left it on by mistake and put it down on the floor.
5)Put tools away when you aren’t using them. This doesn’t only help you keep track of everything, it makes sure you don’t end up being surrounded by heavy, pointy, metal things.
6)Don’t use dull or dirty tools. This isn’t just about precision. When you use dull blades, there’s a better chance that your tools will bind and kick-back (get pinched between the pieces of wood you’re cutting and fly off in unpredictable directions). That make things go real bad, real fast.
Having them get gunked up by pitch (resin that comes from the wood) will have the same effect. Use a pitch cleaner to take care of your tools and keep them factory-fresh.
7)Don’t let exposed blades or tips point towards you. That might seem like common sense, but it’s also really easy to do without realizing it. Reaching over a table to get a drink of soda is fine, but when that table is full of spinning blades, nail guns, screws, and sanders, it’s a bit more dangerous. You also don’t want to put your hand down for balance only to put it on the sharp edge of something.
The long and short of it is, don’t be stupid. You’re a vulnerable blob of flesh that’s real easy to cut through and you don’t have mind powers that can control your tools or supplies. Take proper precautions and you’ll have a great time in the workshop. Skip them, though, and you’ll have an ambulance taking you out of it. If you don’t believe me, just search for carpentry accidents on YouTube (they’re really graphic, though, so don’t look it up if you can’t handle blood and gore).
When you’re making a drawing, you need to know what kind of paper you’re using. When you’re sewing a shirt, you have to decide on the best kind of fabric. Woodworking is no different.
There are as many kinds of lumber to use as there are species of trees, so it can be hard to choose just one. Since you’re making small portable props, though, you’ll want to work with softwood. These are some of the most popular choices:

PlywoodviaSteven Mattern
A manufactured material made out of several thin layers of wood. It’s cheap, widely available, strong, takes well to paint, and is resistant to warping. However, because the outside veneer protects the wood inside, it cannot be sanded down to give it smooth edges or to remove dents.

PineviaMarlin Bills
A dense and beautiful material that will stand up better than many softwoods. Strong, easy to work with, and relatively cheap, but may warp if exposed to too much water. Good for the bodies of props.

MDF (Medium-density Fibre Board)viaTested
It isn’t actually wood, but a manufactured composite made with fine wood particles. It’s far cheaper than wood and shapes well, but is prone to warping and splitting. It will also dull your tools faster.

BasswoodviaFred Zavadil
A light, high-grain wood that’s excellent for carving. Cheap, easy to work with, and takes well to paint, but isn’t meant to stand up to abuse. Best for intricate details.

Balsa wood
It’s that stuff you built the tiny planes out of when you were younger. A very light and porous wood best used for layering and detailing. It can be fragile, though, so you need to be gentle with it.
Carpentry can seem like magic if you aren’t familiar with it. Once you’ve learned about some of the tools, though, you’ll have a better handle on what you’re doing. When you decide to make any of your accessories out of wood this is some of the basic gear you’ll need:

Markers
You use them to draw your outlines on the wood before you cut it. Get plenty of these–they’ll dry out faster than you’d think.

Level

Combination Square
Really great for adjusting measurements and a heck of a lot less clunky than a framing square.

Tape Measure

Handsaw
Good for cutting out large pieces.

Coping saw
Good for cutting out curved or unusual lines.

Hand plane
This is used to shave wood down to a nicer finish.

Chisels
These are used for shaving down wood and carving out details.

Sandpaper
…lots and lots andlots of sandpaper.

Safety Glasses

Respirator
When you have to stop working every ten minutes because there’s too much dust in the air to breath, you’ll really appreciate this.

Hammer

Screwdriver
The double-ended kinds with both flat-slot (the metal tip is flat) and Phillips (the metal tip is cut into a cross-shape) heads are great ways to save space and make sure you have everything you need with you.

Nails and Screws

Drill

Drill Bits


Pliers
A pair of slip joint (ones that lock in when you squeeze the handle) and needle-nose pliers will be the most useful to start off with.

Wrench

Wood Glue

Clamp
If you’re looking through this list and thinking that everything seems kind of expensive, don’t worry. Most of these cost less than or about $5. The most expensive item on this list is the drill, and you can find that online for a little under $20. If you’re still nervous, though, plan out your project first and buy only the tools you’ll need. Many carpenters use this technique to save money over time.
This guide was made under the wing of Costume Discounters (www.costumediscounters.com). Please go check out their site!! They sell wigs, shoes, shirts, essentials…all sorts of goodies.
Got Wood?
viaLeon Chiro Cosplay Art…and it’s just as big as it looks. Badump-tss.
Carpentry is one of the oldest professions, and for good reason. You can make beautiful, strong, resilient pieces that will get you compliments for years. A lot of people feel like it’s beyond them, though, and that’s a real shame. Anyone can learn how to do it if they start off simple enough! These tutorials will get you started in your woodworking career and give you inspiration for more projects as you get better.
This guide was made under the wing of Costume Discounters (www.costumediscounters.com). Please go check out their site!! They sell wigs, shoes, shirts, essentials…all sorts of goodies.
Nothing is worse than putting the last details on your prop, messing up, and not having enough time or supplies to fix it. These tips will help save you a lot of grief in the long run.
1. Research the piece you’re making. Whatever you do, research the fudge out of every prop you make. If you’re making armor for a specific character, find several different pictures and videos of that character from all angles. If it’s wings for a steampunk prop, look up a few species of birds and see how their feathers come together. This is intrinsic to getting your pattern right. After all, you don’t want to get to the event only to realize that your prop is totally wrong.
2. Do mock-ups. Whenever I’m getting ready to make a prop, I sketch it out and construct it in paper first. It might seem excessive, but it will make the entire project run more smoothly. Mock-ups help you:
a. See where there will be strain in the prop.
b. Determine the best way to connect each piece.
c. Rework the design if something isn’t meshing.
d. Create a template for your patterns.
3. Make sure your pattern is perfect. Never rush making the pattern that you’ll use to cut out the pieces for your project. If you start with ill-fitting pieces, the best you’ll get out of all your work is a bad-looking prop. At the worst you’ll get to the event and have it fall apart around you.
4. Beware of hot tools. I once burned my heel with a heat gun so bad that I couldn’t walk right for a month, and now I have a permanent scar. If you’re using a heat gun, make sure you have somewhere safe to put it when you’re molding your prop. If you’re working in boiling water, look out for drips of hot water.
5. Beware of hot plastic. The plastic will get deceptively hot as well, and a lot of times you won’t notice it until it burns you. If you don’t want lobster red, hyper-sensitive fingertips for weeks, use thin leather gloves and proxy tools (rollers, spoons, etc.) to work on your prop.
6. Don’t leave your props in the heat. They won’t totally melt, but they will get bent out of shape…and then you will too.
a. When you’re driving to your event, make sure any Wonderflex or Worbla props are packed in a cooled compartment out of the sunlight.
b. When you come home, keep them safely stored in room temperature or below and don’t put them in front of a window. It’s pretty easy to fix the droopy parts if your prop does melt, but you won’t want to do it.
And finally…
1. Save your scraps.
2. Fit together your pattern pieces like a jigsaw on your sheet.
3. Use primer!
4. Glue beforeyou paint.
5. Don’t try to bend or stretch the material too far.
6. Hold the corners of each unrolled sheet down with weights.
7. Prevent bending by using several layers of material.
8. Mix and match Wonderflex and Worbla so you’re always using the best material for the job.
9. Update old patterns for new projects.
Stupid mistakes end up costing you a lot of time and money, not to mention bodily harm. Try to keep these in mind when you’re working on your next prop and you’ll be amazed at how well it turns out.
Whenever you’re just starting out on something, you’re going to need a little help. Here are a few helpful guides for getting the ball rolling on your next Wonderflex or Worbla project.
Introduction to Using Wonderflex:http://www.youtube.com/watch?v=YElXK-_uIAg This five minute video shows the process that you’ll use for your entire project.
Getting custom-fit patterns:http://kamuicosplay.deviantart.com/art/Armor-Pattern-Tutorial-416269738 (Kamui Cosplay is really simple to understand).
Making a Valkyrie Helmet:http://www.projectfancy.net/?post=132
Dressing up heels:http://lumis-mirage.deviantart.com/art/Tutorial-Shoes-with-Worbla-413196274
Making She-Ra’s headpiece:http://www.thestylishgeek.com/2011/08/11/wonderflex-tutorial-she-ra-headpiece/
Remember, you can adapt these tutorials to fit anything. Just use proper planning to make some good templates and you’ll be set!
This guide was made under the wing of Costume Discounters (www.costumediscounters.com). Please go check out their site!! They sell wigs, shoes, shirts, essentials…all sorts of goodies.

I love origami. When I was a kid, I spent an entire summer working through an origami book I got for my birthday. It was amazing to watch this flimsy piece of paper turn into a beautiful, self-sustaining sculpture.
It gave me a major advantage when I started working with Wonderflex years later. The ideas are the same–you take a flat, moldable plane and turn it into a sturdy three-dimensional object. The benefit is that Wonderflex and Worbla let you create much more complex structures in half the time.
Before you start working with Wonderflex and Worbla, I suggest you do a few really simple origami. It will help you understand the importance of following an outline, using good foundations, and maintaining balance in your project.
This site has really clear instructions and a lot of different origami to choose from: http://www.origami-fun.com/easy-origami.html
This guide was made under the wing of Costume Discounters (www.costumediscounters.com). Please go check out their site!! They sell wigs, shoes, shirts, essentials…all sorts of goodies.
You can’t wait to start making your home-brewed suit of armor, but you’re not sure what you’ll need before you sit down. Here are some basic tools that you’ll use whenever you’re working with Wonderflex and Worbla:

Pencil
So you can mark where you will cut.

Paper
If you’re prone to making mistakes, it’s good to make stencils on paper and cut out each piece according to them.

Tape
For keeping stencils down.

Scissors
For long, straight cuts and trimming frayed edges.

Exacto knife
For cutting intricate designs. You’ll want to get a lotof these.

Heat gun
A hairdryer on PCP. A heat gun is, hands-down, the single most useful tool you will have at your disposal. It heats up quickly, will let you target specific areas, and gets the plastic nice and malleable faster than anything else will. You can get one for a little over $20 on Amazon. A microwave or heater will do if you don’t have a heat gun, but trust me, this is so much better.
And that’s it. Six tools and a whole world of prop-making has opened up before you.
This guide was made under the wing of Costume Discounters (www.costumediscounters.com). Please go check out their site!! They sell wigs, shoes, shirts, essentials…all sorts of goodies.
What is Wonderflex and Worbla?

Worbla armor by Yaya Han

Wonderflex Wings via Kelly Chehardy
Wonderflex and Worbla are a costumer’s best friends. They can be used to make armor, jewelry, weapons, wings, shoes–pretty much anything you can imagine.
Okay, but…what is it?
Both Wonderflex and Worbla are plastics that are pliable when heated and that hold their shape once cooled. You can get it to that point by using an oven, microwave, boiling water, or (my favorite) a heat gun. They’re treated with a skin-safe adhesive that will make any two surfaces of the plastic stick together once it’s been warmed up. You can use almost any kind of paint to color it. They are sold in thin, rolled sheets that can be cut with scissors or knives and layered to make rock-hard props. Despite their durability, they’re very light and easy to carry.
In other words, they’re like magic.
The best thing is that you don’t need much experience to work with them. If you’ve ever cut something out of paper and tried to fit it together into a bigger shape, than you’ve got it down.
Is there any difference between them?
This is a common question because the two are so similar. The simplest answer is…
Wonderflex has a light netting on one side of the plastic and is adhesive on both sides of the sheet. Worbla does not have any netting and is adhesive on one side of the sheet.
That means that Wonderflex is a little stronger than Worbla but won’t bend as well, while Worbla will stretch to fit organic forms but will break more easily. You can see the example of each on this armor (the Wonderflex is blue, the Worbla brown). Some people swear by one or the other, but both plastics are pretty much the same in the long run.
If Wonderflex and Worbla are so great, why doesn’t everyone use them?
It’s probably because they don’t know how easy it is to use and how long it will last. When you first start looking to get some, it will seem expensive because you might think that you’ll go through it really fast. I’ve made two masks, two hand claws, two cuff links, and seven bangles out of a large sheet of Wonderflex that I bought four years ago. I still have half of the sheet left and those props have outlasted all the other ones I’ve made. The minor splurge is definitely worth it in the long run.
Wonderflex and Worbla really are amazing materials. Get them and they’ll become the bread and butter of your props.
Wonderflex armor via Volpin.
This guide was made under the wing of Costume Discounters (www.costumediscounters.com). Please go check out their site!! They sell wigs, shoes, shirts, essentials…all sorts of goodies.
You have a bunch of cans of expanding foam at the ready and you’re wondering what to make with them. The easiest answer to this is pretty much anything, but very large props or weapons with solid bases and clunky armor are your best bets.
That’s because anything made out of expanding foam will naturally be a little thick. Those props will have seven layers once completed: cardboard base, foam, masking tape cover, newspaper paper mache cover, clay paste paper mache cover, primer, and paint. You could make, for example, a great Buster Sword from Final Fantasy VII out of expanding foam, but try to do that with a pair of delicate Steampunk wings and they would just look awkward.
Take a look at some of these amazing props to get an idea of what’s possible.
Weapons

Armor


viaIrarenovo
Large Props

viaTemperance

Basically, the sky’s the limit. Get your base ready and spray away!
This guide was made under the wing of Costume Discounters (www.costumediscounters.com). Please go check out their site!! They sell wigs, shoes, shirts, essentials…all sorts of goodies.
Since expanding foam is so easy to use and plot out, there aren’t many step-by-step tutorials out there (when the process goes so smoothly, there’s isn’t much to explain!). Here are the best available:
Preparing and carving:https://www.youtube.com/watch?v=O23TM-z0OXk Look at how much she uses, and how much she carves away. Don’t go chintzy when you’re spraying on the foam.
Applying paper mache:https://www.youtube.com/watch?v=bn_RosA4uFc&list=UU79qFuymkVas5dCScbLF9fw Remember, you have to cut your newspaper into tiny squares! None of those long strips you used as a kid. They willbuckle, bend, and make unattractive gaps in your prop that you can’t cover up.
Making a sword (this has really well-explained steps at the bottom):http://doxiequeen1.wordpress.com/2010/12/13/how-to-make-a-lightweight-cosplay-sword-tutorial/
Examples of complex shapes: http://www.kamuicosplay.com/2010/10/about-my-love-to-expanding-foam.html
And that’s it!
This guide was made under the wing of Costume Discounters (www.costumediscounters.com). Please go check out their site!! They sell wigs, shoes, shirts, essentials…all sorts of goodies.
Using expanding foam is a pretty straightforward process–you spray, carve, cover, and paint. You can’t get to that point if you don’t have the right tools, though. This is what you’ll need to make your next prop:

Cardboard
For making the base that the expanding foam will stick to.

Craft Knives
You’ll want a whole bunch of these–they get dull fast.

Masking Tape

Newspaper

Water
To help the foam rise.

Spray Bottle

Wallpaper Paste
You can use regular old Elmer’s Glue if you can’t find any, but this will work a lot better.

Paper Mache Clay
This may not be the paper mache you recognize. When mixed with water and glue it becomes a thick, clay-like material that is very durable once it hardens. It will give your prop its hard coating.

Sandpaper
For smoothing out the paper mache.
Since it isn’t a tool it isn’t listed above, I’ll write it here: remember to get several cans of expanding foam. You’ll carve away a half to two-thirds of the foam on your prop to get the right shape. You can also always add on foam and recarve if you make a mistake, but you’re out of luck if you don’t have any more left to use.
All of these materials are pretty cheap and commonplace–just pick them up from your local craft and hardware store and get working!
This guide was made under the wing of Costume Discounters (www.costumediscounters.com). Please go check out their site!! They sell wigs, shoes, shirts, essentials…all sorts of goodies.
You have this really cool-looking sword in your head, but it’s got so many turns and dips and twists that you don’t think you’ll ever be able to make it. That’s where expanding foam comes in handy.

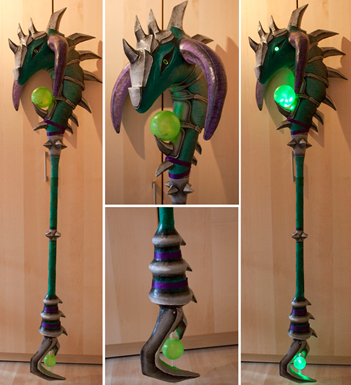
Usually used in home construction, expanding foam is a liquid insulator that, when it comes in contact with the air, expands to fill the space its given. Once it hardens it feels a lot like floral foam (those green blocks you loved to poke holes in as a kid)–it’s just more sturdy. You can use this to create and carve complex patterns that aren’t possible in any other material, like this fabulous dragon-head staff.

Staff head base via Kamui Cosplay
The only downside of expanding foam is that can’t stand alone. Since it has so many air bubbles, paint won’t cover it very well and some of the pieces of your prop may snap off. As long as you wrap masking tape around the form and put paper mache over it, though, you’ll have a light, durable, easy-to-paint prop that was cheap to make and impressive to see!

(The same staff head from above after it’s been prepared for painting.)
This guide was made under the wing of Costume Discounters (www.costumediscounters.com). Please go check out their site!! They sell wigs, shoes, shirts, essentials…all sorts of goodies.
When you were younger, you made spaceships, suits, houses, clothes, all out of a cardboard box. You can still do that today! It’s just a matter of proper planning, precise cutting, and patience.
Armor

That’s not one but threewearable, true-to-life Iron Man suits made out of cardboard. Because of how stiff and boxy cardboard is, it makes a great material to use for plated armor. As long as you’re careful you can recreate smooth bends and stiff folds to build shape. There are a few different ways you can do this.
Layering and molding: http://thegadgetfish.deviantart.com/art/Basic-Cardboard-Armor-Tutorial-325580032
Layering alone:http://www.youtube.com/watch?v=7z51JVYqphQ
And pepakura:http://www.instructables.com/id/How-to-make-a-Halo-Helmet-using-Pepakura/?ALLSTEPS
Weapons

You’ll need to be a little careful with them, but you can make very convincing weapons out of cardboard.
Here’s an example of how to make a shot gun: http://www.youtube.com/watch?v=pZzpfqFHVuA#t=126
Entire outfits

viaDestructoid
Those aren’t sprites lifted from Metroid–they’re cardboard costumes made by Dan Cattell. If you’re going for an 8-bit look, cardboard is probably the single best medium you could use. The way you do it is really simple and straightforward:
Part 1: http://wonkyfacecrafts.blogspot.com/2010/10/tutorial-how-to-make-8-bit-video-game.html
Part 2: http://wonkyfacecrafts.blogspot.com/2010/10/tutorial-how-to-make-8-bit-video-game_30.html
There you go! And just as a reminder of what’s possible…watch this cardboard gun fight, complete with cardboard pistols, grenade launchers, and tank.
This guide was made under the wing of Costume Discounters (www.costumediscounters.com). Please go check out their site!! They sell wigs, shoes, shirts, essentials…all sorts of goodies.
You have to make sure you can use your prop without having it buckle and crack. Reinforcing cardboard is an essential step if you’re planning on using it for your costume! There are a couple different materials that will do the trick; here are some of them, listed from least hard to hardest:
Stiff fabric: Good for tight corners inside of props.
Fiberglass Tape: Not as stiff as craft foam, but easier to manipulate and layer.
Craft Foam: Good for the insides of worn props and those without steep curves.
Paper Mache Clay: Great for carving in intricate details, but not waterproof. It must be covered with a sealant after painting.
Gesso: Once sanded, it will leave your prop with a clean finish for painting. Must be covered with a sealant to make it waterproof.
Resin:The most common choice for cardboard and paper. Will make your prop smooth, strong, and waterproof, but it can be difficult to sand and has toxic fumes.
Bondo:Very, very strong, but isn’t waterproof. It must get a sealant top coat or be mixed with resin.
Just to prove how sturdy you can make these guys:

viaThorssoli
He’s standing on the helmet he just made. No supports, no hidden wires, no tricks–just good crafting. And it’s made out of paper(that link actually shows an excellent way to craft, reinforce, and paint if you want to check it out). Your prop will be able to stand up to most hard use as long as you reinforce it properly.
This guide was made under the wing of Costume Discounters (www.costumediscounters.com). Please go check out their site!! They sell wigs, shoes, shirts, essentials…all sorts of goodies.