#psd template


TEMPLATE #27 : Charac PSD #5 (animated charac psd inspired by “Nosedive” from Black Mirror)
I finally made a new character psd ! On this new one, I recreated the “rate thing” from the “Nosedive” episode of Black Mirror (Season 3). There are two psds for this character psd, one with only the circle, the thumbnail, the name and the rate number, and the second with the list of five infos. If you just want a static version, keep only the 50th timeline layer (on the first version) or the 62th timeline layer(on the second version). To move the “face focus” circle and/or the “charac infos” select all the timeline layers from the first one to the last then move the layers from the “layers window”. You can easilly change the texts, the thumbnail picture and the main background picture. Important : I made this PSD file with Photoshop CC 2019, it is possible that they will be some little issues with the file. To save as GIF : CMD+ALT+SHIFT+S then choose your parameters. (CTRL instead of CMD if you are on Windows PC).
Informations about these psd files :
» Dimensions : 1280 x 800 pixels (reduce the size if the gif file weight is more than 3mo) ;
» Add your own pictures by changing the different psb files (info to use/change them) ;
» Included : the background and thumbnail shapes and the texts (in Helvetica Neue) ;
»You used and posted it ? Tag me, I’d like to see what you do :3
» { DOWNLOAD}
Don’t forget :
• Don’t redistribute or claim as yours ;
• Don’t recreate a template from this file in order to distribute as an other one ;
• For personnal use only (not for commercial purpose or anything else), obviously, you can post on your blog your own picture ;)
• A like or a reblog if you like or use, please :3
• A credit link if you use it and post it on your blog would be appreciate, necessary if you use it on an other website than tumblr ^^
made by thlaugraphics
with love and pleasure, always ❤
Do you want a specific resource ? Ask me or request it here︎
Post link
After my first moodboard template, I come back")
After my first moodboard template, I come back")
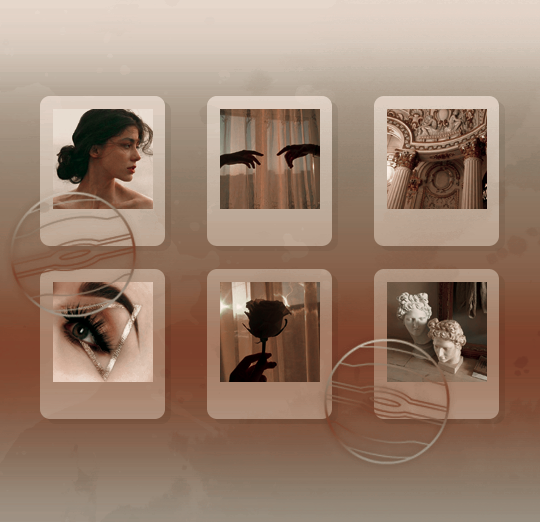
TEMPLATE #26 : Moodboard n°2 (pack of two minimalist)
After my first moodboard template, I come back with a new style, but this time it’s a pack of two. These two new moodboard template are minimalist, you will be able to add your own pictures on the premade shapes but you can too add everything you want as I did for my examples : brushes, pngs, texts, coloring, etc. I hope you will like this new moodboard templates pack ! ^^
Informations about these psd files :
» Dimensions : 1080 x 1440 pixels ;
» Add your own pictures by changing the different psb files (info to use/change them) ;
» Included : the shapes to put your own pictures (here’s the preview of the templates without changes) ;
» Add by yourself the texts, coloring, brushes, etc. as I did for my examples ;
»You used and posted one of these templates ? Tag me, I’d like to see what you do :3
» { DOWNLOAD}
Don’t forget :
• Don’t redistribute or claim as yours ;
• Don’t recreate a template from this file in order to distribute as an other one ;
• For personnal use only (not for commercial purpose or anything else), obviously, you can post on your blog your own picture ;)
• A like or a reblog if you like or use, please :3
• A credit link if you use it and post it on your blog would be appreciate, necessary if you use it on an other website than tumblr ^^
made by thlaugraphics
with love and pleasure, always ❤
Do you want a specific resource ? Ask me or request it here︎
Post link

TEMPLATE #24 : Stack of real instax polaroids
For this template, I used real instax polaroid sheets I scanned. I was really happy to receive my own instax camera this year so I would like to share a special template mixing scans and digital. I hope this template will be easier to use than it was hard for me to make it ahaha You use it ? Tag me on your post, I’d like to see what beautiful stuff you did with my templates ^^
Informations about the PSD files :
• Dimensions : 1200x800px ;
• Includes : The 20 polaroid films placed like the exemple without my pictures and texture effects ;
• How to use : Just change the .psb files to add your own pictures (click here to know how to use and modify psb files), change the shapes colors by double-clicking or by add a color/gradient overlay ;
• Tag me if you use and post it, I’d like to see what you do ^^
•{download}Don’t forget :
• Don’t redistribute or claim as yours ;
• Don’t recreate templates from these files in order to distribute as an other one ;
• For personnal use only (not for commercial purpose or anything else), obviously, you can post on your blog your own picture ;)
• A like or a reblog if you like or use, please :3
• A credit link if you use it on an other website than tumblr ^^made by thlaugraphics
with love and pleasure, always ❤
Do you want a specific resource ? Ask me or request it here︎
EDIT 10th April : I received messages about the broken link for this template so I updated it :
http://www.mediafire.com/file/n15q38idbo1ne57/24_temp_thlaugraphics.psd/file Enjoy
Post link
TEMPLATE #24 : Stack of real instax polaroids
For this template, I used real instax polaroid sheets I scanned. I was really happy to receive my own instax camera this year so I would like to share a special template mixing scans and digital. I hope this template will be easier to use than it was hard for me to make it ahaha You use it ? Tag me on your post, I’d like to see what beautiful stuff you did with my templates ^^
Informations about the PSD files :
• Dimensions : 1200x800px ;
• Includes : The 20 polaroid films placed like the exemple without my pictures and texture effects ;
• How to use : Just change the .psb files to add your own pictures (click here to know how to use and modify psb files), change the shapes colors by double-clicking or by add a color/gradient overlay ;
• Tag me if you use and post it, I’d like to see what you do ^^
•{download}
Don’t forget :
• Don’t redistribute or claim as yours ;
• Don’t recreate templates from these files in order to distribute as an other one ;
• For personnal use only (not for commercial purpose or anything else), obviously, you can post on your blog your own picture ;)
• A like or a reblog if you like or use, please :3
• A credit link if you use it on an other website than tumblr ^^
made by thlaugraphics
with love and pleasure, always ❤
Do you want a specific resource ? Ask me or request it here︎
Post link


TEMPLATE #23 : Four magazine covers templates
Hello everyone, finally, I’m back with a totally new template pack today ! I started to work on this one a long time ago now, and I finally have a little time to finish it, post it and share it ! Hope you will like these ones, I made them from personnal ideas and also inspiring by existing magazines.
This time, I made HQ templates of a very large height (1080x1440px), of course you can resize them like you want. You use one of it ? Tag me on your post, I’d like to see what beautiful stuff you did with my template ^^
Informations about the PSD files :
• Dimensions : 1080x1440px ;
• Dimensions of pictures : #1 & #2 (#1080x1440) , #3 (1080x1230), #4 (1000x1000) ;
• Includes : What you see on the pictures above (not exemples), the template will show you the correct size of the pictures to put ;
• Font used : Arial Black, Playfair Display, Aller, Acumin Variable Concept (you can change them ofc) ;
• Preview without change : on the post, without dimensions ;
• How to use : Just change the .psb files to add your own pictures (click here to know how to use and modify psb files), change the shapes colors by double-clicking or by add a color/gradient overlay ;
• Tag me if you use and post it, I’d like to see what you do ^^
•{download}
Don’t forget :
• Don’t redistribute or claim as yours ;
• Don’t recreate templates from these files in order to distribute as an other one ;
• For personnal use only (not for commercial purpose or anything else), obviously, you can post on your blog your own picture ;)
• A like or a reblog if you like or use, please :3
• A credit link if you use it on an other website than tumblr ^^
made by thlaugraphics
with love and pleasure, always ❤
Do you want a specific resource ? Ask me or request it here︎
Post link


TEMPLATE #29 : Simple squared moodboard
Hello! After 2 years without posting anything new, here we go for a brand new template! It has been ready for a while, I edited it a bit and voilà! I hope you will enjoy this new moodboard template. Here’s the link for the previous oneandhere’s the very first one.
I will from now add the release date of each new resource as this is not visible on the Tumblr app. I’ve also changed my way of sorting layers. Now every smart object to be changed by your own pictures are at the top of the layer list inside an hidden layer group. It’s easier than searching inside every layer groups. Plus, every upcoming template will now include an “HOW TO USE” layer guide. I hope these changes will help you to use with more ease these new upcoming templates! But you’re of course still free to ask me for more informations!
INFOS:
» Dimensions : 1280 x 1280 pixels (25MB) ;
» Released date : 22nd May 2021;
» Add your own pictures by changing the different smart object psb files. A “HOW TO USE” guide is included;
» Included : Everything you see on the preview except the pictures used as an example. The tapes, textures, etc. are all included. You are also able to change the color of the tapes in the layer group “CHANGE TAPE COLOR HERE”;
» Preview pictures: Godisable Jacob, Tuan Kiet and Satochi Hirayama;
»Do you use it and post it? :) Why not tagging me #thlaugraphics ? I would love to see what you could do with this template :3
» { DOWNLOAD}
PLEASE:
• Don’t redistribute or claim as yours ;
• Don’t recreate a template from this file in order to distribute as an other one ;
• For personnal use only (not for commercial purpose or anything else);)
• A like or a reblog if you like or use is really appreciated :3
• A credit link if you use it and post it on your blog would be appreciated, necessary if you use it on an other website than tumblr ^^
made by thlaugraphics
with love and pleasure, always ❤
Do you want a specific resource ? Ask me or request it here︎
Post link


♡ PACK OF 7 TEMPLATES — lights in the shadows.
- free pack of 7 templates made from scratch and fully customizable. even when text, colors, and images can be changed easily, you’ll need to know how to use the clipping mask, how to change the bending option of each layer and (maybe) how to make pngs.
- credits: arial and poppins as the fonts used, icons are from flaticons.
- as usual, don’t claim this as your own and reblog if you find it useful. last but not least, it’s a free psd but consider paying whatever you want if you like what i do. i do these things for fun ofc but it would be very much appreciated, tysm!!
Post link

♡ COUPLE TEMPLATE — exist for love.
- free template made from scratch and fully customizable. even when text, colors, and images can be changed easily, you’ll need to know how to use the clipping mask and how to change the bending option of each layer.
- credits: arial and poppins as the fonts used, icons are from flaticons.
- as usual, don’t claim this as your ownandreblog if you find it useful. last but not least, it’s a free psd but consider paying whatever you want if you like what i do, tysm!!
Post link

♡ STRENGTHS / WEAKNESSES CHART TEMPLATE — golden dandelions.
- free template made from scratch and fully customizable. even when text, colors, and images can be changed easily, you’ll need to know how to use the clipping mask, how to change the bending option of each layer and (maybe) how to make pngs.
- credits:arial and poppins as the fonts used.
- as usual, don’t claim this as your ownandreblog if you find it useful. last but not least, it’s a free psd but consider paying whatever you want if you like what i do, tysm !!
Post link

♡ MOODBOARD TEMPLATE — my ordinary life.
- free template made from scratch and fully customizable. even when text, colors, and images can be changed easily, you’ll need to know how to use the clipping mask, how to change the bending option of each layer and (maybe) how to make pngs.
- credits:arial as the only font used. icon used is from flaticons.
- as usual, don’t claim this as your ownandreblog if you find it useful. last but not least, it’s a free psd but consider paying whatever you want if you like what i do, tysm !!
Post link
.free template made from scratch and fully customiz")
♡ PLAYLIST TEMPLATE — this is seulgi (revamped).
- free template made from scratch and fully customizable. even when text, colors, and images can be changed easily, you’ll need to know how to use the clipping mask, how to change the bending option of each layer and (maybe) how to make pngs.
- credits:arial as the only font used. icons used are from flaticons.
- as usual,don’t claim this as your ownandreblog if you find it useful. last but not least, it’s a free psd but consider paying whatever you want if you like what i do, tysm!!
Post link

♡ NATAL CHART TEMPLATE — fall into the sky.
- free template made from scratch and fully customizable. even when text, colors, and images can be changed easily, you’ll need to know how to use the clipping mask, the bending option of each layer and (maybe) make pngs.
- credits:bebas neue and arial as the fonts used. icons used are from flaticons.
- as usual, don’t claim this as your ownandreblog if you find it useful. last but not least, it’s a free psd but consider paying whatever you want it you like what i do, tysm!!
Post link


。・ template psd one hundred thirteen by templatepsds ゜+.*
-`. info .’-
+ here is a icon/moodboard/graphic template.
+ you can change the color of the gradients.
+ to remove the bottom gradient on the image, double-click the “image #” layer, go to gradient overlay tab and un-check it.
+ to place an image in one of the objects, place your image layer above the layer you want to put it in, right-click on your image layer and select “create clipping mask.”
+not for commercial use or anything like that! just for personal use/to have fun.
+ adjust as much as you want to suit your liking.
+ please like or reblog if you download.
+ message if you have any questions/difficulties!
-`. download .’-
Post link


。・ template psd one hundred twelve, template pack fifty eight by templatepsds ゜+.*
-`. info .’-
+ here are a few miscellaneous templates you can use for edits, OCs, etc.
+ when changing the colors, you’ll have to make a gradient and apply it to the other layers that require one. sometimes these gradient or color overlays are in the “Stroke” tab.
+ to place an image in one of the objects, place your image layer above the layer you want to put it in, right-click on your image layer and select “create clipping mask.”
+ the fonts used in the templates are ‘Neothic’, which you can download here, and ‘Perpetua’.
+not for commercial use or anything like that! just for personal use/to have fun.
+ adjust as much as you want to suit your liking.
+ please like or reblog if you download.
+ message if you have any questions/difficulties!
-`. download .’-
Post link


。・ template psd one hundred eleven by templatepsds ゜+.*
-`. info .’-
+ as requested, here is a tarot card template with two different designs, both of which have either a black/gold option, or an off-white/black option.
+ to insert an image, place your picture layer above the layer titled “put image in here*,” right-click on your layer and select “create clipping mask.”
+ you can change the colors, resize it and make it smaller, etc.
+ the font used in the templates ‘OldStyle’, which you can download here.
+not for commercial use or anything like that! just for personal use/to have fun.
+ adjust as much as you want to suit your liking.
+ please like or reblog if you download.
+ message if you have any questions/difficulties!
-`. download .’-
Post link


。・ template psd one hundred ten by templatepsds ゜+.*
-`. info .’-
+ as requested, here is a new calendar template with a photo option.
+ I previously made a calendar + planner template here, if you want to check it out.
+ I premade all months (Jan-Dec) of 2020 as they should be, and I also included a custom one you can make for an earlier month or for a future year.
+ you can add a 540x337 image above the calendar, or crop the template if you do not want it. you can also change the colors, font, text size, etc.
+ the fonts used in the templates are ‘Phosphorus Tribromide’, ‘Phosphorus Chloride’ and ‘Phosphorus Bromide’, which you can download them all here.
+not for commercial use or anything like that! just for personal use/to have fun.
+ adjust as much as you want to suit your liking.
+ please like or reblog if you download.
+ message if you have any questions/difficulties!
-`. download .’-
Post link


。・ template psd one hundred nine, template pack fifty seven by templatepsds ゜+.*
-`. info .’-
+ as requested, here is a wedding-theme template pack.
+ the first template is a wedding invitation, the second is a wedding planner and the third is a guest list.
+ for each template, you can choose the main color from gold, silver, black, red, pink, blue, or green. to learn how to change the color of it, click the read more below.
+ each template also has some decorative flowers that are optional.
+ for the wedding planner and guest list, both have a check-off box. in the wedding planner, you would check off the box if you’ve completed the task. if not, you make that layer invisible. similarly, in the guest list, you would check off the box if the guest is attending. if not, make that layer invisible. in the read more below, I’ll explain how to do this.
+ the fonts used in the templates are ‘Phosphorus’, ‘Phosphorus Sulphide’, ‘Phosphorus Chloride’ and ‘Phosphorus Bromide’, which you can download them all here.
+not for commercial use or anything like that! just for personal use/to have fun.
+ adjust as much as you want to suit your liking.
+ please like or reblog if you download.
+ message if you have any questions/difficulties!
-`. download .’-
1. HOW TO CHANGE THE COLOR
For the invitation template, it is relatively simple. All you have to do is choose the color you want from the options (gold, silver, black, red, blue, green, or pink), and make that folder visible.
By default, gold is featured.

(Sorry, I just noticed the grammatical error in “greem” but it’s too late to change that lol)
If you wish to change this, make the gold folder invisible, and make a different folder visible.

As you can see, I changed it to green (in this case, “greem”).
Just click the box next to the folder and have the eye appear.
Make sure no other folder is visible except for the one you want!
From there you can open the folder and customize the template, change the text, etc.!
For the wedding planner and guest list templates, both of them have the same function.
Like before, gold is the default color. To change this go to the folder titled “change color from gold,” make it visible, and open it.

Once you make the folder visible, green will then be the default color.

If you do not want green, make that layer invisible and make a different color visible.

I changed it to pink.
From there you can customize the rest, change the text, info, etc.
Make sure only one color layer is visible!
For this example, I used the wedding planner, but the guest list is exactly the same. The folder is the same, so you would do the same steps.
2. Editing the planner and guest list
2A. Changing the number of tasks and/or guests:
So for both the planner and guest list, you can have up to 27 tasks or guests. You can choose to have less though.
By default, in the wedding planner, only 8 tasks are visible.
All of the tasks and corresponding info are separated into folders (1-27), and all of those are put into a folder titled “task lists.” Open that folder.

If you want less than 8, hide some of the folders.

As you can see, I hid 4 of them, so now there are only 4 tasks listed.

From there, you can edit the task title, date, and time.
It’s the same thing for the guest list.
By default, on the guest list 23/27 guests are visible.

To make less, open the folder titled “guests,” and hide some of the folders inside until you get to the desired number.

Now only 7 guests are visible.

If you want more tasks or guests, do the opposite.
Make more folders visible.
For example, I’ll change the planner to 20 tasks.

You would make all folders from 1-20 visible, and the other remaining ones invisible.

Same thing for the guestlist.
I’ll now change it from 7 to 16.


Edit the text and you’re done.
2B. The checkbox:
The checkboxes are in every task/guest line folder. 1-27.
In the wedding planner, it is called the complete box.
To un-check this, or check it off, you would open each task folder, one by one.

Above, we can see it’s un-checked. To check it off, you need to make the layer titled “if completed” visible.
If you want it uncompleted, you would make that layer invisible, like it is already.
It is the same rules for the guest list.

In the guest list, it is called the attendance box.
As you can see, the box is checked off, meaning that guest is, in fact, attending.
If you do not wish for it to be checked, you would make the layer titled “if attending” invisible.
Always leave the box itself visible though. The only thing you should mess with is the “if completed” or “if attending” layer, depending on the status of it.

Above is the example of a check-offed box, and an un-checked one.
Once again, if you check off the box in the planner template, it means that the corresponding task is completed. If it is not checked, that task is not yet completed.
If you check off the box in the guest list, it means the corresponding person is attending the wedding. It it is not checked, that person is not attending.
You do this for each number of tasks or guests you have.
If you have 14 tasks, you would decide which tasks are completed for each one (14), go to those folders and make sure the box is checked off, and which ones are not for the tasks that are yet to be completed.
Sorry if this is confusing, it was difficult to explain and I’m incredibly tired/out of it while writing this. If you need further help, just ask!!
Post link


。・ template psd one hundred eight, template pack fifty six by templatepsds ゜+.*
-`. info .’-
+ here are some new christmas templates. you can check out last year’s christmas templates here.
+ for the last one, there are several optional details you can add or remove. you can choose to have up to 3 snow piles on the moodboard, a snowflake texture overlay, a coloring psd i made, and two paint overlays.
+ to place an image inside a picture slot, open your image, place your image layer above the layer(s) titled “image” or “image #”, right-click on your image layer, and select “create clipping mask.”
+not for commercial use or anything like that! just for personal use/to have fun.
+ adjust as much as you want to suit your liking.
+ please like or reblog if you download.
+ message if you have any questions/difficulties!
-`. download .’-
Post link


。・ template psd one hundred seven by templatepsds ゜+.*
-`. info .’-
+ here is a neon light text template.
+ you can choose to have 1-3 lines (all in different files) and 1-3 different “styles” (which is just the slantedness).
+ there is also an optional cord and backing in each of them, as well as some extra designs (bars, hearts, etc.)
+the font used is “Quostige,” which you can download here.
+not for commercial use or anything like that! just for personal use/to have fun.
+ adjust as much as you want to suit your liking.
+ please like or reblog if you download.
+ message if you have any questions/difficulties!
+ credits: 1
-`. download .’-
Below I will explain how to use the template and change the color:
Okay, so once you download the template, choose the folder of how many lines you want and which style you want.


Make sure every other style/folder is invisible. Only the one you want should be visible.
Click the text layer.

Click the text tool in the toolbox.

Go to the document and click on the text.
Select the current text and replace it with your own.

Double-click on the text layer.
Upon the popbox, go to the “Outer Glow” tab, click on the tiny pink box, and choose the color you want on that popup.
For example, I’ll be changing it to green.

Before you close the color picker box, select the color code, copy it, and paste it into a notepad or something to remember it. (it is the 6-digit numbers/letters next to the #)
Close the color picker box by clicking OK and go to the “Inner Glow” tab.
Click the tiny pink box and enter the previous color code you pasted into the notepad.
Click OK when you’re done.
Click OK again to exit the blending options popup, and now both of the glows should be the same color.

Now, you can remove the backings and/or the cord if you want.
Or, you can add the extras.
If so, you’d need to change the color of those as well.
In that instance, double-click on the text layer again.
Select “New Style” in the upper right corner of the popup box.
You can name it whatever you please and click OK when you’re done.

This will create a style with the same effects/colors as the text.
Click OK to exit the popup box.
If your styles tab is not open, go to Window > Styles.
The style tab should look something like this, though it may be much bigger.

Go to the extras folder and select the layer of which one you want.

Go to the style tab and click on the style you created. It should be the most recent/last one in the tab.

It should make any of the extra details you chose turn the same color as the text.
Repeat the process for any other extras.
If you want different colors for each element, repeat the process from before. (change the inner and outer glow)
Save it and you’re done.
Post link


。・ template psd one hundred six by templatepsds ゜+.*
-`. info .’-
+ here is a graphic/edit template with 8 television image slots.
+ you can use regular images, or you can import gifs, but the ladder is quite difficult (especially if you’re not too experienced with photoshop), so be cautious if you plan on inserting gifs. if not, images looks just fine too!
+ there are different textures in each slot, but the modes are set to normal, so if you want to include them, you’ll have to put the opacity down or set the mode to overlay, soft light, multiply, lighten, or screen.
+ to put an image inside the slots, place your image layer above the layer titled “put pic in here,” right-click on your image and select “create clipping mask.”
+not for commercial use or anything like that! just for personal use/to have fun.
+ adjust as much as you want to suit your liking.
+please like or reblog if you download.
+ message if you have any questions/difficulties!
-`. download .’-
Post link


。・ template psd one hundred five by templatepsds ゜+.*
-`. info .’-
+ as requested, here is a connection/relationship template you can use for friends, lovers, family, enemies, etc. it was made for OCs.
+ the fonts used are ‘Manrope’ in Light, Semibold, and Extra Bold modes. you can download the font here.
+not for commercial use or anything like that! just for personal use/to have fun.
+ adjust as much as you want to suit your liking.
+ please like or reblog if you download.
+ message if you have any questions/difficulties!
+ credits: 1
-`. download .’-
Post link


。・ template psd one hundred four, template pack fifty five by templatepsds ゜+.*
-`. info .’-
+ as requested, here are a few photobooth/film templates.
+ there are several customization options, including the number of photo slots in the first template, rounded corners, border shadows, different colors, etc.
+ to place an image inside a picture slot, open your image, place your image layer above the layer titled “1”, “2″, or “3″, right-click on your image layer, and select “create clipping mask.”
+not for commercial use or anything like that! just for personal use/to have fun.
+ adjust as much as you want to suit your liking.
+ please like or reblog if you download.
+ message if you have any questions/difficulties!
-`. download .’-
Post link


。・ template psd one hundred three, template pack fifty four by templatepsds ゜+.*
-`. info .’-
+ as requested, here are a couple of playlist templates. the first includes 4 tracks and cover art, whereas the second only includes 8 tracks.
+ to place an image inside a picture slot, open your image, place your image layer above the layer titled “cover art goes in here”, right-click on your image layer, and select “create clipping mask.”
+ the fonts used in the templates are ‘Phosphorus Sulphide’; ‘Phosphorus Bromide’; and ‘Phosphorus Dihydride’–all of which you can download from here, as well as ‘Roboto Italic’–which you can download from here.
+not for commercial use or anything like that! just for personal use/to have fun.
+ adjust as much as you want to suit your liking.
+ please like or reblog if you download.
+ message if you have any questions/difficulties!
-`. download .’-
Post link


。・ template psd one hundred two, template pack fifty three by templatepsds ゜+.*
-`. info .’-
+ as requested, here are some new halloween templates. you can check out last year’s halloween templates here.
+ to place an image inside a picture slot, open your image, place your image layer above the layer(s) titled “image #” or “#”, right-click on your image layer, and select “create clipping mask.”
+not for commercial use or anything like that! just for personal use/to have fun.
+ adjust as much as you want to suit your liking.
+ please like or reblog if you download.
+ message if you have any questions/difficulties!
-`. download .’-
Post link


。・ template psd one hundred one, template pack fifty two by templatepsds ゜+.*
-`. info .’-
+ here are eight simple templates based off of the planets.
+ to place an image inside a picture slot, open your image, place your image layer above the layer(s) titled “img #”, right-click on your image layer, and select “create clipping mask.”
+not for commercial use or anything like that! just for personal use/to have fun.
+ adjust as much as you want to suit your liking.
+ please like or reblog if you download.
+ message if you have any questions/difficulties!
+ here is an example of one of them: jupiter
-`. download .’-
Post link


。・ template psd one hundred, template pack fifty one by templatepsds ゜+.*
-`. info .’-
+ here are three miscellaneous templates you can use for graphics, icons, moodboards, etc., all inspired by this photo.
+ to place an image inside a picture slot, open your image, place your image layer above the layer(s) titled “put image in here”, right-click on your image layer, and select “create clipping mask.”
+not for commercial use or anything like that! just for personal use/to have fun.
+ adjust as much as you want to suit your liking.
+ please like or reblog if you download.
+ message if you have any questions/difficulties!
-`. download .’-
Post link