I made my own SUPER CRAPPY dimmable/ color changing ring light for under $30. The goal of this project was to keep it as cheap as possible while still being functional for the single day we need it.
I found a tutorial that used an extra wide wooden wreath base, but I could not find them anywhere. I found the normal width ones, but they were only 12″ diameter and I wanted to go larger. I decided to use foam board because it’s cheap and the ring light isn’t getting moved around. If you have the tools available to you, wood wouldn’t be a bad idea.
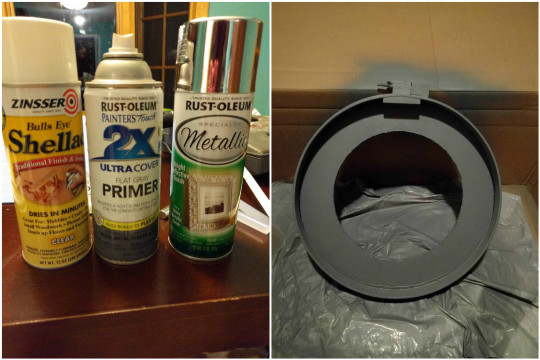
Materials Needed: 18″ Quilt Hoop: $9.25 w/ coupon 2xFoam Board: Had ($4.50 w/ coupon) LED Kit:$14.50 E6000 Glue, Super Glue - Had (~$3.50 each) Primer + Silver Spray Paint + Shellac- Had (~$15 total) Hotshoe mount/ adapter or Tripod mount, depending on how you want to mount the light. I’m using a spare for my Tripod
First off, you can tell even in the product photo I linked above that the quilt hoop isn’t perfectly round. If you’re using a wood base you’ll probably need wood clamps to hold the ring to it in order to keep it steady while your glue dries.
First step is to trace the inside of the hoop and cut out the circles on your 2 pieces of foam board. Make sure you make a mark so you can line them up later, since it’s not a perfect circle. You can see in my photo I traced the outside and then had to fix it, don’t be me.
Next I used E6000 to glue the 2 pieces together and let them dry for 2 weeks while I did other things for at least 20 minutes, you don’t want them to slide around. Make sure you only glue near the outside, we don’t want to cut through glue later.
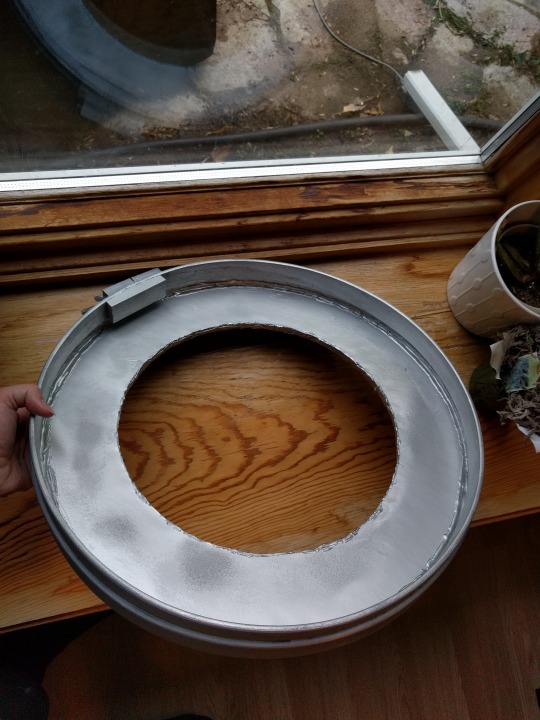
Next I opened up the hoop (see photo below) and used E6000 on the inside and outside to secure it open. I smoothed the glue out with a plastic knife so it’ll look better painted. While that is drying, find the center of your ‘circle’ as best as you can. Pin your measuring tape there and measure so that you have a perfect circle 6″ from the center. That will leave us with a 3″ ring area.
It doesn’t look perfectly round in that photo but I promise you that it is. Now we’re going to cut it out. Score your circle carefully with the X-Acto knife and then keep cutting until you get through each/both layer. In later images you can see that I attempted to smooth the inside with hot glue - don’t do this, it looks awful.
Now, I put my foam board rings into the hoop and used hot glue to secure it on the front & back and fill in any gaps
Yay! It looks like a thing! Now for painting. You can just use the silver paint if you want, but I’m using multiple colors because I had them. Primer + Shellac is going to give you the best reflective finish spray paint could give you. You can also lightly sand in-between each coat (this is required if you made the back part of the ring out of wood).
Primed! I did about 3 coats over the entire thing- front, back and sides. I let it dry for about 15-30 minutes in between each coat, but this primer dries fast. Next I sprayed just the center ring with the metallic silver. Make sure you spray the paint somewhere else first because this kind can be pretty watery, even if you shake it up. After spraying 3 times and letting it dry completely over night, I Shellac’ed the metallic area 3 times. I overdid the shellac and you can see spots of it, but it doesn’t really matter as long as it’s shiny.
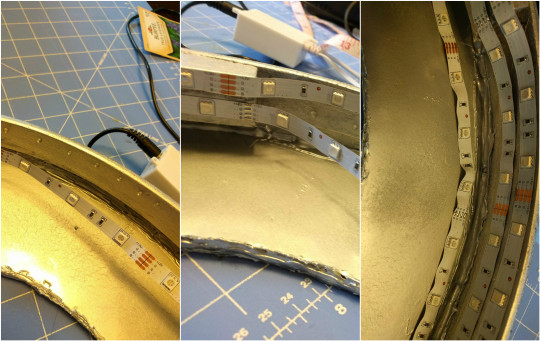
Make sure you test your LEDs before you start gluing! I used gel super glue because it dries much faster than E6000 for the LEDs. I just put drops and held the LEDs down, starting from the top and ending with the inside. Because the last layer is on the flat part of the ring, I had to kind of force the LED tape to turn.
Mounting is a bit of a challenge because the bottom is so flimsy, so here are 2 ways. Tripod: Reinforce the area where the hoop closes with E6000. When that dries, saw off the wood block right above the screw. Attach your Tripod base with glue or by screwing 2-4 screws through it & to the wood chunk. I also think a permanent mount on the back of the ring would work very nicely and be sturdy. Hotshoe: If you want the ring to go around the camera, you will need to add a little wood block to the inside of the ring so it can sit on the hotshoe mount like this:
(Photo from here, my inspiration for this tutorial)
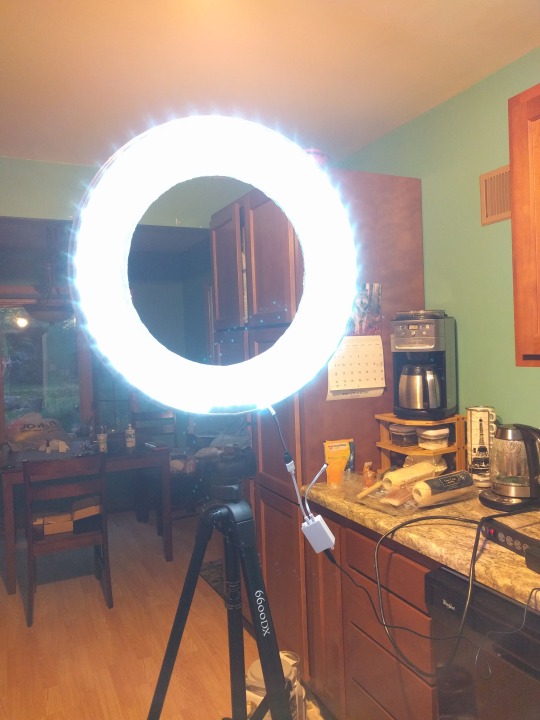
I drilled a single hole into the base and screwed the tripod mount in, but because it’s so weak it needs to be reinforced or fixed. My temp solution was duct tape so I could take photos.
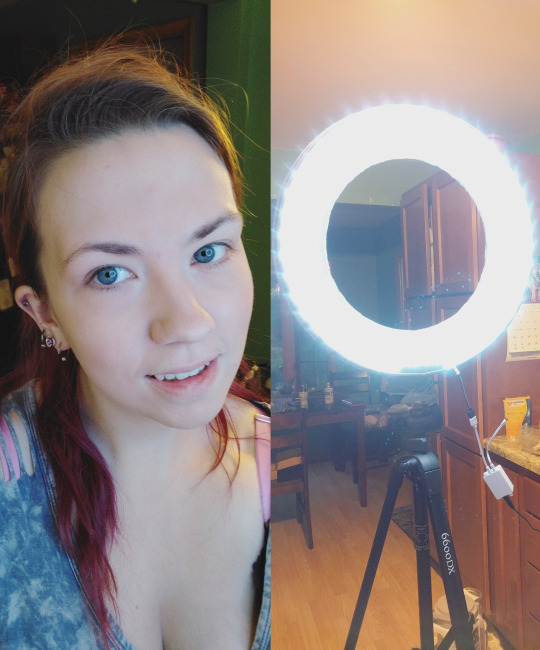
Boom. It’s ugly but it works! The remote has a ton of options.
There you have it! Cheap and simple ring light. Perfect for cosplayers and crafty people who have a lot of this crap lying around :)