#search


THEME 7: Unite
Syncs with your mobile theme colors and mimics the new in-dashboard blog view for a consistent look across platforms.
Live preview (temporary) | Static previews: index page,permalink|Code
Features:
- Appearance options (show/hide header image/avatar/title/description, title font options, and background/text/accent colors) synchronize with mobile settings
- Optional:Featured posts section, updates section, andblog member list in sidebar (require some HTML editing; see under the cut for instructions)
- Unlimited custom links, plus a highlighted link under the title
- Optional second palette
- Customizable post width and font size
- Optional search bar, like/reblog buttons, date/timestamps, tags (plus a show tags on click option), and Archive/Random links
- Responsive
- Supports new post types/pinned posts
- And more!
For help, check my theme guide, or feel free to send me an ask. Theme credits and an HTML editing guide for the special sections are under the cut.
All of the below instructions assume that you’ve gone to your Customize page, then opened the “Edit HTML” menu.
Again, if you have trouble making your edits work, feel free to send me an ask or a DM for help.
Note for HTML beginners
Every bit of text or code is wrapped inside “tags”, which have arrow brackets on either side. For example, a paragraph is placed inside <p> tags.
Every element has an “opening” and “closing” tag; the closing tag looks just like the opening tag, with a / after the opening bracket. The content inside one section is bracketed by these; for example, a paragraph would look like this:
<p>Text here!</p>
In the above line, <p> is the opening tag, and </p> is the closing tag. Tags of this sort can be placed inside each other:
<p>Some <span>special</span> text.</p>
Note that the “span” tags, both opening and closing, are both inside the “p” tags. You don’t want a misordered set, like “<p>Some <span>special text.</p></span>”. The opening tag nearest to the start should also have its closing tag nearest to the end.
It is extremely important that while editing the HTML for your theme, you make sure all opening tags have a matching closing tag. If you have a <div> tag, but no matching </div> tag, this might break the theme.
Featured posts
This section fetches the 3 most recent posts from a chosen tag on your blog. To select the tag:
- Ctrl+F to “EDIT YOUR TAG HERE”.
- On that line, there will be a link inside quotation marks, ending in “tagged=featured”.
- Changefeatured to the tag of your choice; for example, “tagged=photo”. This tag can include spaces, such as “tagged=my writing”.
- Save and ensure your posts show up as intended.
By default, the tagged posts are fetched from your blog, but you can change this so that the featured posts are from a different blog:
- Ctrl+F to “EDIT YOUR TAG HERE”.
- On that line, there will be a link inside quotation marks, starting with “https://{Name}.tumblr.com”.
- Change{Name} to the blog username of your choice; for example, “https://starlightthemes.tumblr.com”.
- Save and ensure your posts show up as intended.
Be careful not to change any other parts of that section. The code for fetching the posts from blogs is easy to break.
Updates section
The updates section has two editable parts: the title, and the actual updates.
To edit the title:
- Ctrl+F to “EDIT HERE: UPDATES”.
- Scroll a few lines down, until you find the line reading “<h2>Latest updates</h2>”.
- Change “Latest updates” to say whatever you want. Make sure the text stays inside the <h2>…</h2> tags. For example, if you want the heading to read “My activity”, that line of code should read “<h2>My activity</h2>”.
To edit updates:
- Ctrl+F to “EDIT HERE: UPDATES”.
- A little under this line, you’ll see a template, with the outermost tags reading <div class=“update”>…</div>. If you’re adding a new update, copy this template.
- Scroll a few lines down, until you find the line reading “<!– all updates below this line –>”.
- Now, for each update, paste the template once over (two updates are present for you to start with), and edit three things:
-> “3-LETTER MONTH HERE”: The first three letters of the update month, e.g. “Jan”.
-> “2-DIGIT DATE HERE”: The two-digit version of the update date, e.g. “01” or “31”.
-> “UPDATE TEXT HERE”: The actual text that’ll show up as the update. - Make sure that all the updates are separate- the starting <div class=“update”> and the ending </div> of two updates shouldn’t overlap.
- Make sure all your updates are above the line reading “”<!– all updates above this line –>“.
- Save and make sure things look how you want them to.
Members list
To change the title of the members section:
- Ctrl+F to "EDIT HERE: MEMBERS LIST”.
- Scroll a few lines down, until you find the line reading “<h2>Blog members</h2>”.
- Change “Blog members” to say whatever you want. Make sure the text stays inside the <h2>…</h2> tags. For example, if you want the heading to read “The gang”, that line of code should read “<h2>The gang</h2>”.
- Scroll further down, until you find the line that reads “<h2>{lang:Group members}</h2>”. Again, change this to your chosen title, such as “<h2>The gang</h2>”.
The actual members list can be customized in two ways. One, for group blogs, you can have it automatically fetch the blog members’ main blog names/titles/icons. To do this, turn on “Members list” and turn off “Custom members list” in the main theme settings.
The other option is to manually add any group members and their icons/links. This will also allow you to add customized names and descriptions for each member. To use this option, turn on BOTH “Members list” and “Custom members list”. Then:
- Ctrl+F to “EDIT HERE: MEMBERS LIST”.
- A little under that, you’ll see a template with the outermost tags reading <a class=“member” href=“//BLOGNAME.tumblr.com”>…</a>. If you’re adding members, copy this template.
- Scroll a few lines down, until you find the line reading “<!– all members below this line –>”.
- Now, for each member, paste the template (two members are present for you to start with) and edit three things:
-> “BLOGNAME”: Next to “href” in the <a> tag, and next to “src” in the <img> tag. Change this to your member’s username, such as “starlightthemes”.
-> “MEMBER NAME”: Takes the place of the username. This will show up in bold at the top.
-> “MEMBER DESCRIPTION”: Takes the place of the blog title. This will show up at the bottom. - Make sure that all the members are separate- the starting <a class=“member” href=“…”> and the ending </a> of two members shouldn’t overlap.
- Make sure all your members are above the line reading “”<!– all members above this line –>“.
- Save and make sure things look how you want them to.
Theme credits: Layout/design/icons by Tumblr, Style My Tooltips by malihu, NPF photosets pluginbycodematurgy,dark/light mode togglebyeggdesign,custom audio postsbyannasthms,scroll to top script by Fabian Lins
Preview header image from Only Vector Backgrounds.


THEME 6: Horizon
Inspired by Han Yoohyun and Haeyeon Guild from The S-Ranks That I Raised.
Static previews: index page,permalink|Code
Features:
- Optional header image
- Text options: choose between standard/uppercase/lowercase for special text, Google and Tumblr fonts, and font sizes
- Appearance options: customizable post widths, and a variety of color options, including an (optional) light/dark mode toggle
- Optional title/avatar/description, search bar, like/reblog buttons, date/timestamps, tags, and Archive/Random links
- Responsive
- Supports new post types/pinned posts
- And more!
For help, check my theme guide, or feel free to send me an ask. Theme credits are under the cut.
Theme credits: Style My Tooltips by malihu, CappucciconsbySuiomi,custom like buttonsbyDemirev,NPF photosets pluginbycodematurgy,dark/light mode togglebyeggdesign,custom audio postsbyannasthms,scroll to top script by Fabian Lins
Search drives ROI by creating intent to buy and people go into an e-commerce site more often than not to search and buy a product online, then e-commerce companies have better data about consumer buying behavior than search companies.
No wonder Amazon and Flipkart have a very good idea about the kind of books I read and the kind of lenses I should buy next.
Imagine if search companies started recommending links based on browsing behavior and charged content creating companies to create content relevant to those?


")
 | preview (static) // co")
andrômeda:a slide-out menu theme.
features:
- show/hide the sidebar image.
- custom font and font size.
- right sidebar option.
- four custom post sizes: 400px, 450px, 500px and 540px.
- custom sidebar description.
- personal information space.
- slide-out menu with up to six custom links + unlimited pages.
- responsive
notes:
- you can use any font from google fonts. just enter the site, copy the name of the font you want and paste in the appropriate field.
- if you don’t want to show the links, leave the titles fields empty; same to personal information fields.
sidebar image credits | full credits here
Post link


Theme— Young Forever byvitaminholland
Preview/DownloadFeatures:
- 300x200px sidebar mage
- custom blog title
- six custom links
- option for 350/400/450/500*px blog posts
- option for multiple font families for heading and body
- option for 1/0.9*/0.8rem body font size
- option for 0.9*/0.8rem uppercase font size
- option for hide tags*
- option for show tags
- back to top*
Notes:
- * denotes default features.
- Neither ask or submit links would show if you don’t allow people to ask you questions or allow people to submit things to you.
- I don’t claim any of the fonts, scripts and/or tutorials I used unless stated otherwise. See full credits here.
- Support me on Ko-Fi.
Post link
![vitaminholland:[Premium] Theme — Raindrops by vitaminhollandPreview/Payhip (7$)Features:250x200px si](https://64.media.tumblr.com/3bd141b4e2acff145c1c1c0c9003bd2e/7ca471b9adb62241-b4/s1280x1920/228fd15f36fe23ed1a12f1124796a9acc429df3a.png "vitaminholland:[Premium] Theme — Raindrops by vitaminhollandPreview/Payhip (7$)Features:250x200px si")
![vitaminholland:[Premium] Theme — Raindrops by vitaminhollandPreview/Payhip (7$)Features:250x200px si](https://64.media.tumblr.com/3d15e73f39b707f0c45af360ee1e0673/7ca471b9adb62241-80/s1280x1920/2b594472a9ce22fc149b3973e3e119be016a43f6.png "vitaminholland:[Premium] Theme — Raindrops by vitaminhollandPreview/Payhip (7$)Features:250x200px si")
[Premium] Theme —Raindrops byvitaminholland
Preview/Payhip (7$)Features:
- 250x200px sidebar image
- 40x40px avatar image
- custom blog title
- custom blog subtitle
- five custom links
- option for 350/400/450/500*px blog posts
- option for multiple font families for heading and body
- option for 1/0.9*/0.8rem body font size
- option for 0.9*/0.8rem uppercase font size
- option for hide tags*
- option for show tags
- option for back to top*
Notes:
- * denotes default features.
- Neither ask or submit links would show if you don’t allow people to ask you questions or allow people to submit things to you.
- I don’t claim any of the fonts, scripts and/or tutorials I used unless stated otherwise. See full credits @ vitaminholland.tumblr.com/credits.
Post link
![vitaminholland:[Premium] Theme — All These Flowers Bloom by vitaminhollandPreview/Payhip (5$)Feature](https://64.media.tumblr.com/6f95c937dd1a8ac101b18d49cba879d0/1d3b33a479183bc8-bf/s1280x1920/b0baba707c796d60928e8315e746668bb6b90bc6.png "vitaminholland:[Premium] Theme — All These Flowers Bloom by vitaminhollandPreview/Payhip (5$)Feature")
![vitaminholland:[Premium] Theme — All These Flowers Bloom by vitaminhollandPreview/Payhip (5$)Feature](https://64.media.tumblr.com/fc94c1cf934f89aa0c0ac971ad11f288/1d3b33a479183bc8-2f/s1280x1920/8a16b8d6db850690a370c863c486aee22f57a504.png "vitaminholland:[Premium] Theme — All These Flowers Bloom by vitaminhollandPreview/Payhip (5$)Feature")
![vitaminholland:[Premium] Theme — All These Flowers Bloom by vitaminhollandPreview/Payhip (5$)Feature](https://64.media.tumblr.com/fe4af2e373f2092caecb74b73300c759/1d3b33a479183bc8-a6/s1280x1920/031a11a42366b08d77e57a6bf8d6e84f2afa86af.png "vitaminholland:[Premium] Theme — All These Flowers Bloom by vitaminhollandPreview/Payhip (5$)Feature")
[Premium] Theme — All These Flowers Bloom byvitaminholland
Preview/Payhip (5$)Features:
- two 100x100px sidebar image
- custom blog title
- six custom links
- search bar
- option for 350/400/450*/500px blog posts
- option for multiple font families for heading and body
- option for 1/0.9*/0.8rem body font size
- option for 0.9*/0.8rem uppercase font size
- option for hide tags*
- option for show tags
- option for back to top*
Notes:
- * denotes default features.
- Neither ask or submit links would show if you don’t allow people to ask you questions or allow people to submit things to you.
- I don’t claim any of the fonts, scripts and/or tutorials I used unless stated otherwise. See full credits @ vitaminholland.tumblr.com/credits.
Post link
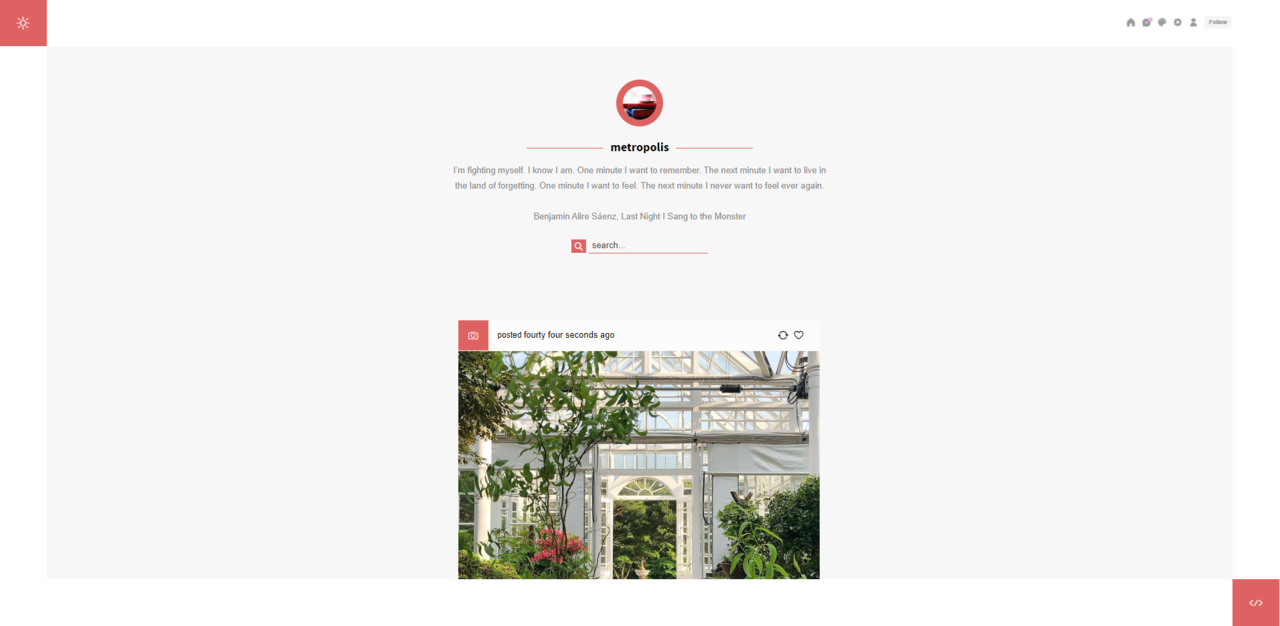
![sheathemes: [ Metropolis ] - one column preview | multi column preview | code [alt]Updated: 01/30/20](https://64.media.tumblr.com/4d10caa9b6b24b8ace4c107c37b03734/3d037496b1ea7a36-17/s540x810/47c730bcd08423afdbfdb1643b0f830282a60c66.png "sheathemes: [ Metropolis ] - one column preview | multi column preview | code [alt]Updated: 01/30/20")
![sheathemes: [ Metropolis ] - one column preview | multi column preview | code [alt]Updated: 01/30/20](https://64.media.tumblr.com/e0d3356d60beb1c21fdb62a9b4db6612/3d037496b1ea7a36-e2/s540x810/f1a3aab5f1e09e50c92ce7d9aafe5bace7b11c61.png "sheathemes: [ Metropolis ] - one column preview | multi column preview | code [alt]Updated: 01/30/20")
[ Metropolis ] -one column preview |multi column preview|code[alt]
Updated: 01/30/2022
A second revamp of one of my favorite header themes, which was broken down and built back up using my recently updated base code, which also includes NPF compatibility. Most importantly this theme uses the new UI trend of 2022 known as claymorphism. I find this UI design to be one of my favorites and decided to implement it into this theme.
Features
- Option for dark mode. New: (theme will stay in dark mode until you manually turn it off)
- 6 post sizes between 300px & 540px
- Up to 3 columns
- 3 post padding options
- 1px - 9px gutter sizes in multiples of two
- 4 post margin options
- 8 font options
- Up to six custom links
- Left & justify post text align option
- Option for small cursor
- Scroll to top
- Grayscale and fading image option
- Option to show/hide captions
- Click to show tags
Extra notes
- Sidebar image is 160px x 160px
- Remember that by using my themes you have agreed to the terms of use
- Font icons are from Phosphor Icons
- Header image is from Unsplash
- Credits are found in the code
If you run into any bugs when using this theme then please do not hesitate to contact me here and I will help the best way I can.
Post link


‘Uncover’ Theme
An ‘all in one’ theme with tabbed links, profile, ask/faq and submit sections, featuring an optional ‘featured tags’ section with post count for 6 tags. It includes fully customisable colours, images, fonts & sizing.
The preview, customisation guide, credits & code can be found in the source of this post.
Pleasereblog/like if you use this theme! If you have any issues please don’t hesitate to message me!
The title of this theme as well as the images & lyrics in the preview are all from Uncover by Seulgi (Red Velvet)
Post link
![vitaminholland:[Premium] Theme — A Little Too Soon by vitaminhollandPreview/Payhip (5$)Features:260x](https://64.media.tumblr.com/6e8c91fe8421332211bce668cf779255/ffc8129a102da14a-10/s1280x1920/ffd1d0cc0b7d229e54b2cc91050fac71c46b44e7.png "vitaminholland:[Premium] Theme — A Little Too Soon by vitaminhollandPreview/Payhip (5$)Features:260x")
![vitaminholland:[Premium] Theme — A Little Too Soon by vitaminhollandPreview/Payhip (5$)Features:260x](https://64.media.tumblr.com/f469d4420e67a2abfe39089796711430/ffc8129a102da14a-0d/s1280x1920/7e125aa63d741cbb0ea999de68b5e3a7d2df0940.png "vitaminholland:[Premium] Theme — A Little Too Soon by vitaminhollandPreview/Payhip (5$)Features:260x")
[Premium] Theme — A Little Too Soon byvitaminholland
Preview/Payhip (5$)Features:
- 260x200px sidebar image
- 236x250px about image
- custom blog title
- five custom links
- search bar
- about section
- option for multiple font families for heading and body
- option for 1/0.9*/0.8rem body font size
- option for 0.9*/0.8rem uppercase font size
- option for hide tags*
- option for show tags
Notes:
- * denotes default features.
- Neither ask or submit links would show if you don’t allow people to ask you questions or allow people to submit things to you.
- I don’t claim any of the fonts, scripts and/or tutorials I used unless stated otherwise. See full credits @ vitaminholland.tumblr.com/credits.
Post link


Theme—Shivers byvitaminholland
Preview/DownloadFeatures:
- 601x250px header image
- 96x96px avatar image
- custom blog title
- three custom links
- search bar
- option for updates section
- option for navigation section
- 500px blog posts
- option for multiple font families for heading and body
- option for 1/0.9*/0.8rem body font size
- option for 0.9*/0.8rem uppercase font size
- option for hide tags*
- option for show tags
- back to top*
Notes:
- * denotes default features.
- Neither ask or submit links would show if you don’t allow people to ask you questions or allow people to submit things to you.
- I don’t claim any of the fonts, scripts and/or tutorials I used unless stated otherwise. See full credits here.
- Support me on Ko-Fi.
Post link


◍ nitrogen theme.
Links:preview|alt preview|install|features
Nitrogen is an exploration into the use of CSS sticky elements. Greet your blog visitors with a flashy header image that transforms into a fixed top bar as you scroll. With several customisation options, pick the style that best fits you!Features: header theme (3 header sizes) + sidebar image, 500px posts, sticky sidebar + topbar + post source icons, searchbar, styled search + tag pages, 2 permalink styles, custom audio posts
Credits:
- Header and sidebar preview images by emeldraws
- Feather icons byCole Bemis
- photosets.cssbyannasthms & eggdesign
- NPF images fix v3.0byglenthemes
- customaudio.jsbyannasthms
Post link
How To Earn More Sales From Your Website: Everything You Need To Know

As a small business owner, you want to earn more sales from your website.
It’s part of the territory for many of us who need to make sure our marketing investments are getting a return.
Websites can be a frustrating thing when they’re not bringing in sales at a reasonable rate.
To make the most of this investment, you’ve got to learn what you can do to help your website do more.


I guess I will try to do the childhood week ! I might be a little late though.
Day 1 : « Search » . I remembre looking for Easter eggs in the garden, and the huge satisfaction when finding one. #childhoodweek #search #eastereggs #illustration #procreate
https://www.instagram.com/p/Bq5cAqdhg0s/?utm_source=ig_tumblr_share&igshid=10c8ha9zp9pet
Post link
Ding dong (that’s not a knock) JSE Community!
Did you enjoy the theory stream me and @fear-is-nameless held? We did too! That’s why we’re planning (gasp) ANOTHER one!
What: Jacksepticeye Community Theory Stream #2!
Where:My Twitch channel! Give it a follow if you want– the stream will also probably get uploaded to my YouTube channel, too!
When: Tentatively planned for Sunday, June 12th! The exact time is yet to be determined, but it’ll likely be sometime in the afternoon again, if not a little earlier (work allowing).
If you missed the first one, come check it out! And if you wanna be on call with me and some other theorists for a specific ego, video, or era of videos, DM me and we’ll try to get something planned out! :)
^^ already excited for round 2!
![ilovecharts:[[NSFWish]] Made this a bit under a year ago. The results are less hardcore at the mom](https://64.media.tumblr.com/tumblr_ls8hxsoYTW1qa0uujo1_r1_640.jpg "ilovecharts:[[NSFWish]] Made this a bit under a year ago. The results are less hardcore at the mom")
[[NSFWish]]
Made this a bit under a year ago. The results are less hardcore at the moment, but it’s still pretty flesh coloured.
All results from the first page or results.
We looked into Google and Google has looked into us.
Post link