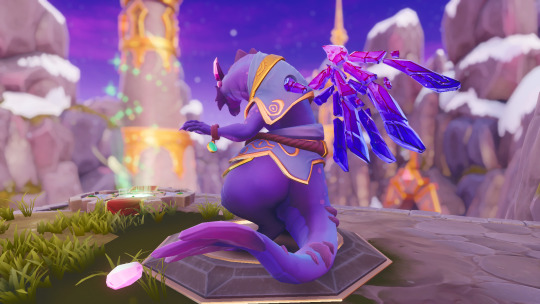
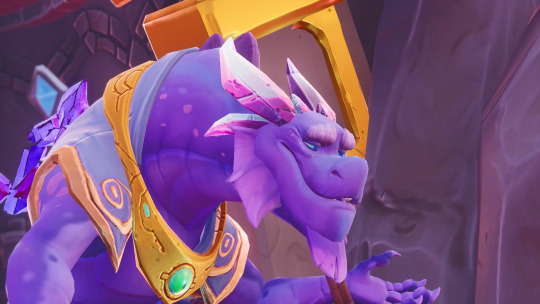
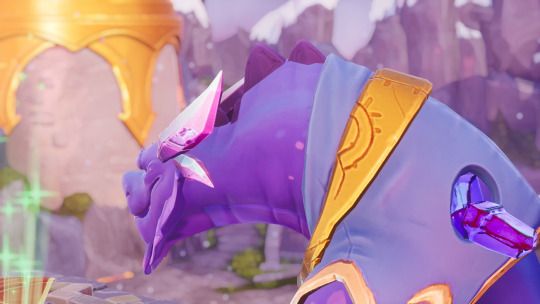
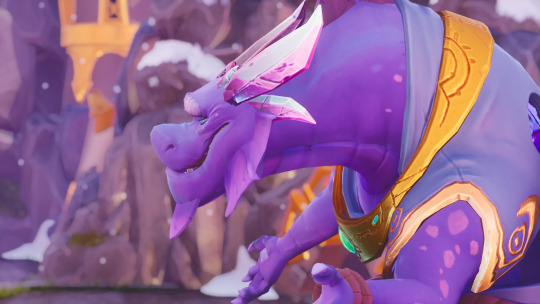
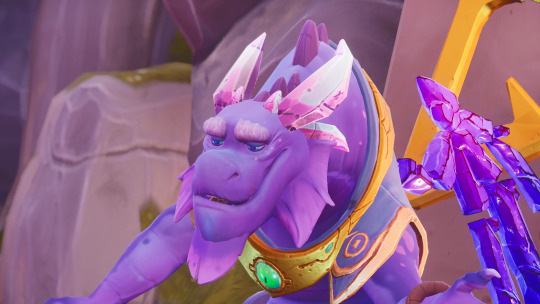
i’ve been meaning to write this up for a long time and i’ve finally gotten around to it. this is a full guide for taking screenshots in Reignited: how to set up and use “screenshot mode” mods, optimal graphics settings for taking screenshots, and tips for adding post-processing effects in-game to add effects to your screenshots while still in the game. this is a MASSIVE post, so to load the whole thing, you have to click “Keep Reading” below.
Screenshot Mode
As of now, Spyro Reignited does not have a native “screenshot mode” (a way to move the camera independently of your character for taking screenshots). However, several people have managed to mod in a sort of “screenshot mode” on PC, mostly by taking advantage of some features in the engine Reignited was developed in (Unreal Engine 4). There are two such mods that I’m aware of which are publicly available and fairly reliable (PC only–I don’t know of anything similar for consoles or Mac): the older Console Injector mod (author unknown), and the relatively newer Cinematic Tools mod by InfinateXtremer. Both can be used at the same time, and they each offer features and benefits that the other doesn’t.
Console Injector mod
The console injector mod is actually a Reignited-specific, bare-bones version of a more generic mod to “unlock” Unreal Engine 4 games to take screenshots (called “Universal Unreal Engine 4 Unlocker”). It works by targeting Reignited while it’s running, and somehow changes a setting which allows you to access a limited debug console present in all UE4 games. This console allows you to activate a couple different commands in-game which work perfectly as a “screenshot mode”. The original UE4 mod was developed specifically for taking screenshots in UE4 games, and the program is harmless.
Compared to the Cinematic Tools mod, I’ve found the console injector mod to be MUCH more stable and less prone to breaking things, although it doesn’t have quite as many features. This is primarily what I use for unlocking the camera freezing the game’s animations (Cinematic Tools can do these too, but I’ve had it break the game to the point where I’ve needed to restart my computer, so I don’t use it for that anymore).
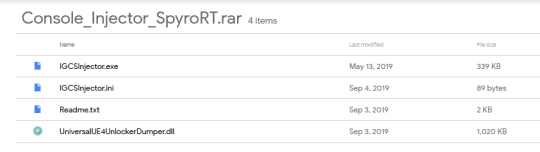
To start, you want to start up Reignited and let it load to the point where you reach the main menu. Once you’re there, you want to start up that IGCSInjector.exe, which will open a window that looks something like this:
This should launch a second similar-looking window, and the first window will tell you it’s done injecting the DLL, and to press any key to close the first window (it doesn’t really matter if you leave it open). Go back into the game, and load into a level, then press “~” to open the console.
A black bar should appear at the bottom of the screen (pressing “~” again will make it fullscreen, pressing it a third time will close the console). Within the console, you can press the up arrow and down arrow to scroll through previous commands. There are only a couple commands you’ll be using:
pause (shortcut is NumPad 0, it’s easier to just press this): This freezes the game, pausing all animations. The first time you load into the game you have to press NumPad 0 twice to get it working, and after that you can just press once to toggle.
toggledebugcamera: This unlocks the camera, allowing you to move it without also moving Spyro. It’s important that you activate the pause command before activating this one, and de-activate this one before unpausing. If you unlock the camera while unpaused, it can mess with your controls when you lock the camera again; you sometimes won’t be able to jump or breathe fire. To fix this, you can just leave the level and come back again. While this isn’t a huge issue, it can be inconvenient, so it’s best to just do the commands in the order above. Another important note: during cutscenes (like speaking with some dragon elders) the camera is hard-locked for some reason, and this command won’t work.
fov [number] (shortcut: “,” and “.” to increase/decrease): This changes the field of view. Whatever knowledge you have about FOV in terms of photography techniques will apply here as well.
“Delete” on your keyboard: toggle to hide UI elements, like your lives counter in the upper right. Useful if you’ve paused the game and the counter is still visible.
This one’s a little more advanced than the Console Injector and offers a lot more features, but is far more prone to breaking things in-game (note that the game resets when you restart it–it’s not possible to “permanently break” Reignited). Because of this, there are only a few features I recommend using:
Freeflight/powerup cheats: Pressing NumPad 1-7 will activate powerups in-game. The most useful ones for taking screenshots are superflame/fireball (activated with NumPad 3) and free-flight (activated with NumPad 7). This allows you to easily take out any enemies when you want to clear a scene, and makes traversing the level with Spyro much easier, as you don’t have to do much platforming.
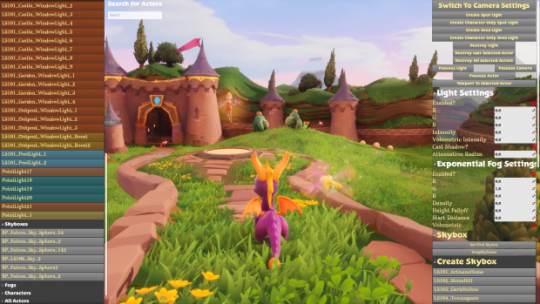
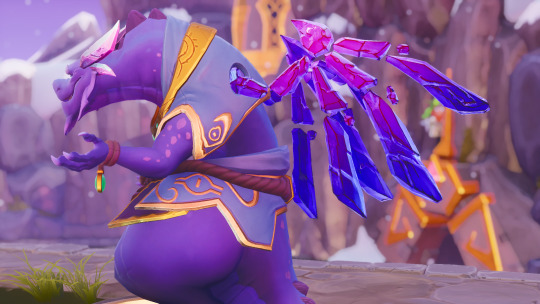
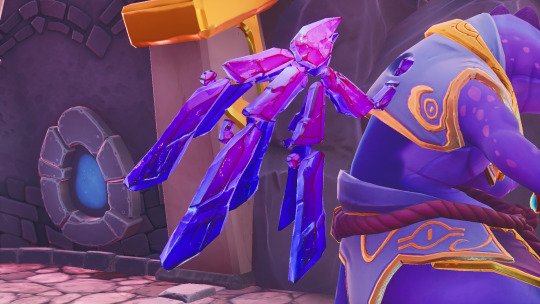
Deleting annoying actors, characters, and lights: To do this, you want to bring up the Cinematic Tools UI by pressing H. The game will freeze for a second, and the menus from the mod will pop up. Pressing H again will hide the menu. On the left side, you should see the menu above. You want to open up “All Actors” to get a list of all items and items in the present level. From here, you’re able to select items you want to be deleted (be as precise as possible, don’t select anything if you’re not sure what it is) and click on “Destroy All Selected Actors” in the menu on the right. I’ve found this very useful for removing level portals when they’re right next to a dragon I’m trying to take a picture of, and they’re kind of ruining the shot. These portals will typically have “Teleporter,” “Whirlwind,” or “Portal” in their names, followed by a number like 114 (the ID of the level they teleport to). You can also delete enemies instead of manually going through and killing them one-by-one. If you delete too much or delete the wrong thing, just exit the level and come back, and everything will be reloaded. You can also force-quit the game if you’re really stuck.
Adding lights in dark places: You can do this by opening the UI with H, then going to the menu on the right and clicking one of the “Create __ Light” buttons. These will spawn a “light actor” which can be selected in the lefthand menu under “Lights” and deleted if needed, and can be adjusted under “Light Settings” on the menu to the right. This is handy for lighting up a scene for screenshotting if it’s too dark on its own.
Setting up the Cinematic Tools mod
Setting up the Cinematic Tools mod is a little more complicated than the Console Injector mod, but not too hard. Download the .zip file containing the mod from this website. Navigate to wherever your Spyro Reignited Trilogy folder is (if you use Steam, it’s in your Steam folder, under steamapps > common > Spyro Reignited Trilogy). In the Reignited folder, go to Falcon > Content > Packs and create a new folder named “~mods”. It should look like this:
Put the “CinematicTools.pak” file from the .zip you downloaded into the ~mods folder. Then you can just start up the game and get playing–you don’t need to run any additional programs like you do with the Console Injector mod, Cinematic Tools loads when the game starts. To uninstall the Cinematic Tools mod you can just remove the “CinematicTools.pak” from the ~mods folder.
I use Cinematic Tools as a sort of supplement to the Console Injector. The Console Injector is for freezing the game and unlocking the camera (the actual “screenshot mode”) and Cinematic Tools is more for adjusting the scene/level and easier in-game navigation. You can use either one however you want of course, but I’ve found this to work the best for me personally.
Extras: Best Game Settings and Adding Post-Processing Effects
If all you care about is being able to take in-game screenshots, and can tweak the game settings/add post-processing effects or edit screenshots manually on your own, the above information is all you really need. The rest of this post will go over recommended in-game settings for taking screenshots and how to add post-processing effects in-game with NVIDIA Ansel (or a similar program).
Reignited Graphics Settings for Taking Screenshots
A lot of this is going to be up to personal preference, and what your computer can handle. For reference I’m running Reignited on a 5-year-old laptop that was considered low- to middle-end when it was brand new, and Reignited still runs really well on medium/high graphical settings (better than a lot of other modern games). So you don’t really need a super-powerful, high-end machine for taking screenshots in Reignited. Also keep in mind that performance and FPS aren’t really an issue if you’re taking screenshots, rather than playing the game–you’re only capturing a single frame. I get about ~20-30fps on very high graphical settings while taking screenshots.
The following graphical settings are what I’ve found to work best for taking screenshots (italicized items are especially important):
Display Mode: I use fullscreen so the mouse is locked in the game, but this one is up to you.
Resolution: For the best quality, you want the highest avaliable setting (for me this is 1920x1080). Taking screenshots at whatever resolution you have your computer set to also ensures that they’ll be scaled correctly for usage as desktop wallpapers.
Max FPS: I have it set to 60 fps, but this setting is pretty irrelevant for taking screenshots. When Reignited first came out I believe there were some weird physics issues when this was set to Unlimited, but I think they were fixed. Set this to whatever is comfortable.
VSYNC: I have this set to off but as far as I can tell this setting doesn’t really matter for screenshots. It can impact performance a little but prevents screen tearing if you have issues with that (it will look like a horizontal section of your screen is misaligned; it’s not very common).
Motion Blur: You want this off. This will cause blurriness if you take a screenshot while anything is in motion. With Reignited, console releases weren’t able to sustain 60fps, so the game was initially locked to 30fps with forced motion blur to try and mask low frames during movement. Later updates made it so you could disable motion blur and unlock framerate (on PC at least).
Vignette: I have this set to off. This one is up to personal preference; I just don’t really like vignette in games.
Graphics Quality: Because we’re going to be manually changing the graphics settings, this will automatically change to “Custom” so don’t bother messing with this.
Bloom: This is another one that’s really up to personal preference. I have this set to low so there’s a subtle bloom effect. If you’re planning on adding post-processing effects or editing the screenshot afterwards, you can turn this off and add bloom yourself.
Anti-Aliasing: So this setting is kind of a weird one. On a basic level, having anti-aliasing enabled will help smooth pixelized edges, making them less jagged. This is the case in Reignited as well, but for some reason having anti-aliasing enabled or disabled will also enable or disable reflections on some objects and surfaces (not ALL, just SOME). This screenshot comparison is from a video looking at Reignited’s graphical settings by 2kliksphilip on YouTube: So you’d think this is something you’d always want turned ON when taking screenshots. But depending on what method is used, if you freeze the game using one of the mods I mentioned earlier, you get this strange effect I call “ghosting”: (this is the link to the video, I can’t get it to embed within this post). Notice how the shadows seem to shoot off moving “trails” even though the game is paused (so nothing should be moving except the camera, which I’m moving myself). There’s also a slight “jiggliness” on the edges of the model if you look closely. The “trails” are unfortunately visible in screenshots. This is something related to the type of anti-aliasing Reignited uses, and the method used for pausing the game. Reignited uses “temporal anti-aliasing,” which basically takes the position of all models on the screen in each frame, plus where each model is expected to be in the next frame (according to the game engine), and sort of averages them together to smooth the edges. There are two different methods to “freezing” the game: completely pausing the game, or setting the game to move at such a slow speed it’s essentially frozen. The “ghosting” problem comes about as a result of using the first method in addition to temporal anti-aliasing. From what I can understand, when you completely pause the game, the game still calculates where it expects the models to move just as it would if they were moving. So the anti-aliasing is taking the current frame and applying the movement of the edges from the “predicted frame” over and over. But if you use the second method of freezing, and instead of completely pausing, you set the game speed so low that it’s practically frozen, this issue doesn’t happen. Because the models are still technically “moving” but in extremely small increments, the current and predicted frames are nearly identical. The Console Injector uses the “real pausing” method, but the Cinematic Tools mod and the more advanced Universal Unreal Engine 4 Unlocker use the “super-slow speed” method. Why not use one of those two, instead of the Console Injector? Like I said earlier, I find the console injector much more stable and I just found out about the more advanced UUE4 unlocker today. The ghosting issue will ONLY happen if anti-aliasing is turned on. With the console injector I keep AA off if I’m taking screenshots of anything that will be moving (dragons, enemies, etc.) and turn it on when there’s nothing in frame which moves (landscape shots), so I don’t get the ghosting issue.
SSR (Screen Space Reflections): Set this to medium or high. This setting changes how much of the environment will be reflected back on reflective objects (metal or water). Having it turned off will still leave you with reflections, but things like characters, lamps, etc. won’t appear in the reflections. There’s not much difference in terms of performance between low-high, so setting it to medium or high is best.
Ambient Occlusion: Should at least be on low, but go higher if you can. This one’s kind of hard to explain, but it’s kind of like a “detailed shadow calculations” effect. Looks nicer when on.
Shadow Quality: This is another sort of strange setting. You’ll want ultra most of the time, or medium if a scene is too dark. “Medium” adds much less intense shadows compared to High and Ultra, and the result is a much brighter game. “High” seems to result in shadows that are a little too dark. “Ultra” is a good balance between the two, though it can still result in shadows so dark you can’t make out certain details very well. I use Medium for the dragon reference pictures, since the shapes and details of the dragons are what’s important in those, and Ultra for the rest of the pictures, since the overall scene is more important.
Foliage Quality: Depending on your personal preferences and what you want to take pictures of, you usually want medium, high or ultra. This controls the foliage/pebble density on the ground. Higher settings can sometimes obscure anything close to the ground, so on reference pictures and for smaller creatures I set this to medium or low. On landscape pictures this is set as high as possible.
View Distance: This actually will only affect the view distance of FOLIAGE, nothing else, as far as I can tell. Set to ultra for landscape pictures, crank it down to medium for close-up shots where the landscape is less of a focus.
Post Processing Effects In-Game: NVIDIA Freestyle or Alternatives
This is possibly the least necessary thing you need when taking screenshots, but I find it makes the editing process much easier than trying to edit screenshots manually, outside of the game. Note that you can only use NVIDIA Freestyle and the in-game filters if you have an NVIDIA graphics card (GPU). To figure out if you have an NVIDIA card or not, open up Task Manager and go to the “Performance” tab. Under GPU (you may have multiple) look for anything beginning with NVIDIA. If you don’t have anything starting with NVIDIA you likely don’t have an NVIDIA card, and you won’t be able to use Freestyle. If this is the case, or if you just don’t want to use Freestyle, I’ve read that ReShade is a good alternative program which offers almost exactly the same features, and is also compatible with Reignited. I don’t know anything about it unfortunately, so you’re going to have to figure it out on your own if you’re interested in it.
To enable Freestyle, you need to have “GeForce Experience” installed. I’ll be honest, it’s kind of an annoying program and I only use it when I need to use Freestyle. To turn on Freestyle you have to go into the settings and turn on “In-Game Overlay” (I would turn it off after you’re done taking screenshots, so it’s not always running and wasting processing power). If it’s working correctly you should be able to start up Reignited, and a little popup will appear in the upper-right corner telling you to press a certain key combination to activate Freestyle and the in-game overlay. Pressing this will bring up the general menu for Freestyle, though you should be able to press different key combinations to bring up specific sub-menus. If this popup never appears, or it tells you there’s been some kind of error, and the key combination isn’t working, you can try restarting Reignited. If that doesn’t work you have to restart your computer. It’s a finicky little program so expect to experience this at some point.
Within Freestyle, you have access to three different sub-menus/functions. The first one (I have this set to Alt + F1) will just take a screenshot. The second is “Photo Mode” which freezes the game and presents you with a couple different post-processing options. Exiting Photo Mode will disable all filters you’ve turned on, and you can’t move the camera at all when it’s active, so you want to have your shot lined up like you want before turning this on. The third and final function is “In-Game Overlays” which is what I use most often. With this menu, you have the option of setting up and switching between three different presets with their own enabled filters and settings. These will affect the game while it’s running, so unlike with Photo Mode you’re able to move the camera freely (this makes it a lot more resource-intensive than Photo Mode, just fyi). I have a preset for simple color correction, one for color correction + depth of field, and one with color correction, a little depth of field, and a painterly filter on top of everything.
The filters available through Freestyle can be enabled in both Photo Mode and with the in-game overlays/filters, and can be rearranged as you see fit. A lot of them are kind of useless in my opinion, stuff that’s only really there for novelty which you’re probably never going to use. The filters I’ve found to be actually useful are Watercolor, Painterly, Brightness/Contrast, Color, Details, and Depth of Field.
Brightness/Contrast is one I use for all my presets, and I would place it at the bottom of the filter order. It’s enormously helpful in correcting for overly bright/dark lighting, and you can tweak exposure, contrast, gamma, shadow darkness, and highlight brightness (possibly something else too).
Above this I typically have Color, and set everything in there to 0 except for Vibrance (which I have set to 0.5, so colors are just a tiny bit more vibrant). Color also allows you to tint the game a specified color at a certain strength, which can counteract the strong color overlays present in some levels. A quick and easy way of doing this is cranking the tint strength to maximum, then slowly shifting the tint hue around. Find the hue in which you’re getting the widest variety of colors or where lighting seems pretty neutral, then bring the tint intensity back down to something like 10-30.
Above Color, I will sometimes turn on Details. The only effects I use in this one are HDR Tone something and sometimes a tiny bit of Sharpen; everything else should be set to 0. With the HDR Tone thing, I set it slightly negative or positive, and it can help shadows pop.
If you’re using Depth of Field, it should go above everything else (except for Painterly, if you’re also using that). Set Near Curve to something like 80, Far Curve to something like 10-20, distance to something like 45, and blur radius pretty low; adjust as you see fit, changing distance to reflect whatever you’re trying to keep in focus.
Painterly goes above everything else, even DOF. I prefer setting Iterations to the absolute minumum, Sample Directions to the max, Radius pretty low, and Edge Sharpness somewhat high. This keeps most details intact while blending together jagged edges and dithering. This and DOF are more resource-intensive compared to the other filters so expect some slowdown.
Keep in mind that you’re going to have to at least adjust Brightness/Contrast, Color, and Details for each level, sometimes multiple times within each level.