Have you tried adding an Exclamation Point to your map’s name? If an Exclamation Point is missing, the map won’t work. (From what I’m finding on MV, MV already has functionality built in, meaning you don’t need a Parallax Locking script! To get the Parallax Lock to work though, you need the “!” in your map’s title.)
Examples:
Won’t Work: wood.png
Will Work & Correct Form: !wood.png
If you’re still having trouble, let me know! And if you want to know the process of how to Parallax Map and making Tilesets for MV, let me know too and I can make a tutorial/answer the ask.
There are so many ways to go about making a map for your story, that I’m almost intimidated to try and make a useful post. I’ve done a few things regarding maps in the past, but this will be a more comprehensive look at the physical act of getting the image of your world down on paper. Or, at least, fanning the spark of your idea and developing it further.
Method One: Freedraw
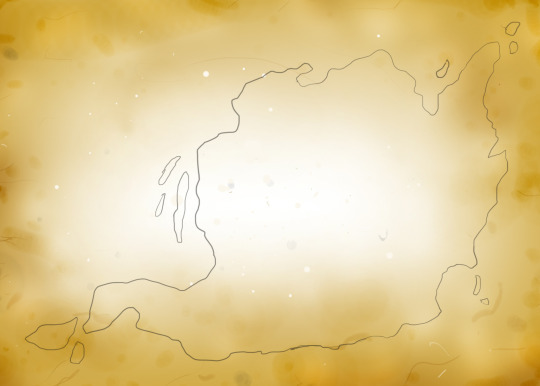
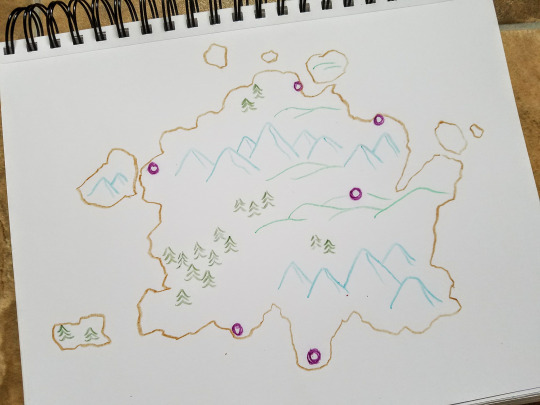
This is my preferred method. I sit down with a pencil (or a drawing tablet, more often) and sketch a wiggly line in a nonsensical shape. I usually end up with something like this:
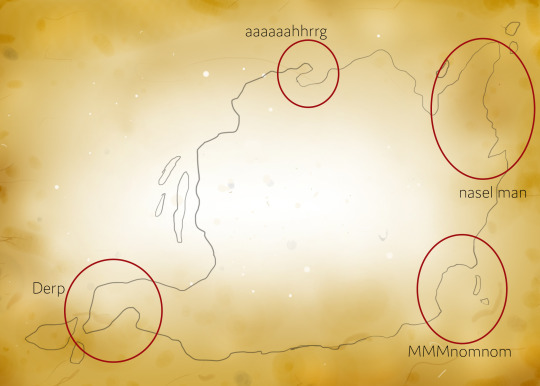
A single country. peninsulas, islands, bays, the works. Inevitably, I see silly faces in my land masses and I always make a point to name them.
That’s not meant to be advice, just…a mething. Anyway…
What helps me design islands and–especially–adjacent continents is the theory of continental drift. You’d be amazed at the difference that makes in sketching out landmasses, thinking about them all fitting together in misshapen puzzle pieces.
Continue sketching, if you need to, and then you have a nice(ish) looking thing.
From there, you can do what suits you. I, personally, start adding land forms and cities somewhat randomly, following patterns that make sense and follow regional climates.
This method gives you a lot of power and control. You can be as random or as intentional as you want, but this method relies almost entirely on your brain and offers little help if you’re stuck. (It’s always a good place to start, get your creative juices flowing, even if you don’t end up using the maps you create.)
Also - HERE is a link to the Photoshop brush set I created while making these maps. Includes 23 brushes and it’s free to download and use. I hope you can find it useful! I hope to make more such things in the future. If you have feedback, please give it!
Method Two: Connect the dots
On a blank paper, draw an assortment of random dots. Using more gives you less empty space, using fewer gives you the opportunity to fill in that space however you want.
Then, connect them! You can be as adherent or liberal as you want.
Then, repeat the final steps of method one.
Method Three: Spilling the beans
Step One: Lay out a piece of paper (or a large sheet of paper, or a piece of poster board) on the ground or table.
Step Two: Gather your beans (or rice or dice sets or pasta…or, if you’re me, your toddlers’ sensory bin contents)
Step Three: Hold a handful of your beans over the paper (not too high, only a few inches or so, depending how large your paper is), and drop them, letting them scatter randomly on the page.
Step Four: Grab a pencil (or a pen, if you’re brave, or crayon if you’re me and that’s literally the only writing utensil you can find in your entire residence) and start sketching land around the beans. If you’ve added some variety to your beans, then you can let certain beans represent certain things.
Example:
Black beans = forest
pasta = mountains
other pasta = plains
pom poms= towns
Now I can add in rivers and roads and other particulars, but this is a great starting point.
And, like your writing, you might find that your map requires a few drafts before it’s perfect. That’s fine! You don’t have to produce a perfect map on your first try. Each time you do it, you’ll see things you like and things you want to change. It’s an art in and of itself.
Allow yourself to be imperfect!
Method Four: Map Generator
Sometimes, if you’re struggling to get started, you really just need someone to hand you something concrete. Generators can be great for sparking the imagination.
THISis a great generator that provides a lot of thoughts on map creation.
Here is a nice little map generator that gives you a lot of customization options. It doesn’t always work, in my experience, but when it does, it’s nice.
Other thoughts:
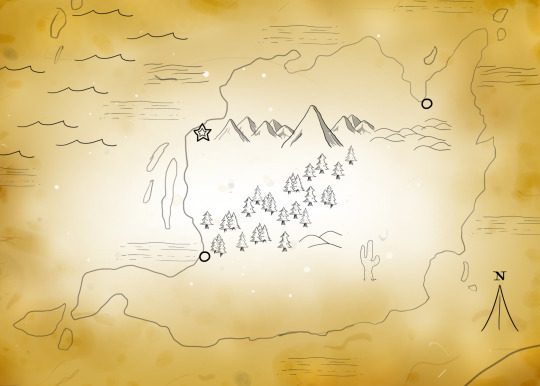
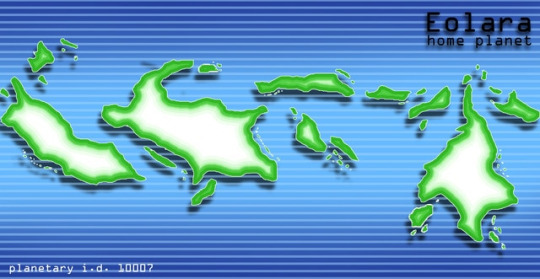
The style of your map will tell a lot about your story. Remember, your map will likely be the second thing your readers sees (the first being your cover), and how you choose to design it will give your reader a good indication of the type of book they’re getting into. If you’re writing a sci-fi novel, you probably won’t be using an antique-style map. Something a little more along these lines (the map for my current WIP):
Choose a style for your map that fits your narrative.
The newest sizing in our floor standing globe collection. These photographs are the colouring called Gagarin - and this example with a matte finish. The base in this photo is rounded with fluted detail in Walnut. This was a bespoke request.
Our floor standing globes spin in a hand-cast and hand-engraved brass meridian which can be moved so the globe spins at different angles.
Included in the commission of the globe are 20 cartography (text) edits as well as a hand engraved message around the brass meridian. For a further charge we can add hand drawn illustrations, travel routes and further bespoke cartography.
For examples of other base designs and colours please take a look at our website - www.bellerbyandco.com - or email [email protected] for more information.
One of our all time favourites the Mint Cassini - seen her in 22cm diameter sizing with a Walnut Standard base - the globe spins 360 degrees in a fluid motion by hand.
Each globe is made bespoke to order - handcrafted and hand painted in London.
Presented with its own bespoke flight-case. Each base is fitted with an inscribed copper plaque noting the edition number and style, and an additional certificate of ownership.
Included in the commission is a personalised engraving and options to personalise the globe itself.
In 2012, I was working on a story called “Project VirscA”. It involved a space colony crashing into an alien world, where the survivors had to fight off Reptilian overlords with god-like technology. In order to write that story, I made a world map and gave locations their names.
Now 4 years later, I needed a world to give the creatures of Project Anima (Tronic) a home. So, I grabbed the old Davellir map, polished it up a bit, and now it looks better than ever!
Sure, the geological features are traced from the old map, but I think it looks nice now. I guess I did learn a few things in the past few years!
This is my poor attempt in trying to replicate the map of Termina, forgive me if it doesn’t look right. Anyways, I got the images off a Zelda guide site that has the maps.