#vegetable patch


Winter Studying Challenge
2nd January: have you made any new years’ resolutions?
Sort of! I’m starting Spanish lessons next week. With an eating disorder my resolutions have always been to lose weight and this year I have struggled not to repeat that, so I would rather not make any resolutions really.
I’ve submitted one essay and have two and a presentation for a grad scheme to go! I also had to do a numeracy test which was so anxiety inducing, so my therapy was digging up these jerusalem artichokes! They’re my favourite! X Emily

As you may know, for the past four months I’ve been building aLasagna Garden in the Veg Patch. And here is how it looks after spending a couple of months nicely tucked under a tarpaulin blanket!
It has indeed decomposed nicely and is almost ready for sowing and planting.
I really am ridiculously happy about this! Removing the cover and discovering how it looks is on the same level as opening Chirstmas gifts, or finding hidden Easter eggs, for a more seasonal comparison! Really!
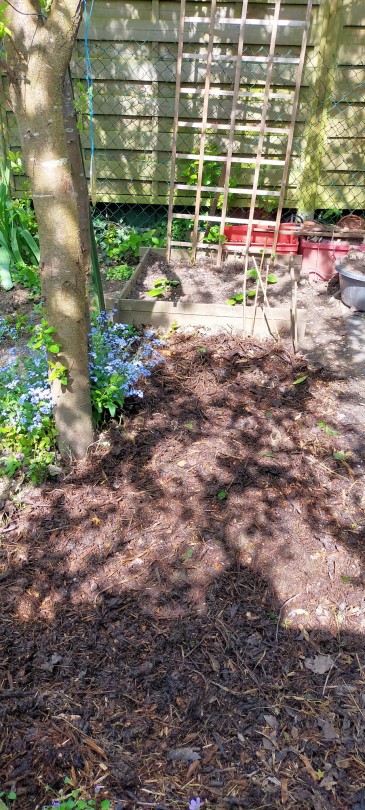
But before we get to this, I’ve levelled it with the rake, and I’m going to let it enjoy the sunshine and warmth of the coming days. And maybe also the rain, which is in this weekend’s forecast…
As usual, I’ll keep you posted!
Growing Tip: An Adventure with Squashes
Well friends, if you are regulars here, you may know that Growing Squashes is indeed an on-going adventure in my garden!
My first attempt was in 2020, and I did not have a single squash; but so many flowers, that you can stuff and cook very much in the same way you would Courgette Flowers, that I considered it a success nonetheless!
Last year, I was very organised and optimistic about Planting my Squashes; but it turned out I planted them too early. That is to say, they only had grown their dicot cotyledon (the first two “leaves”onseedlings, which are rather quite different from their actualleaves). I should probably have sown them a bit earlier than April, though. They did grow eventually and expanded, and flowered beautifully (and I refrained from picking flowers to stuff them, and let the bees pollinate them!) And I did indeedGrow Squashes last year, even if they were tiny and made a meal for the birds rather than for me!
But like I said last year, a gardener learns to be patient, learns from experience and learns from their mistakes.
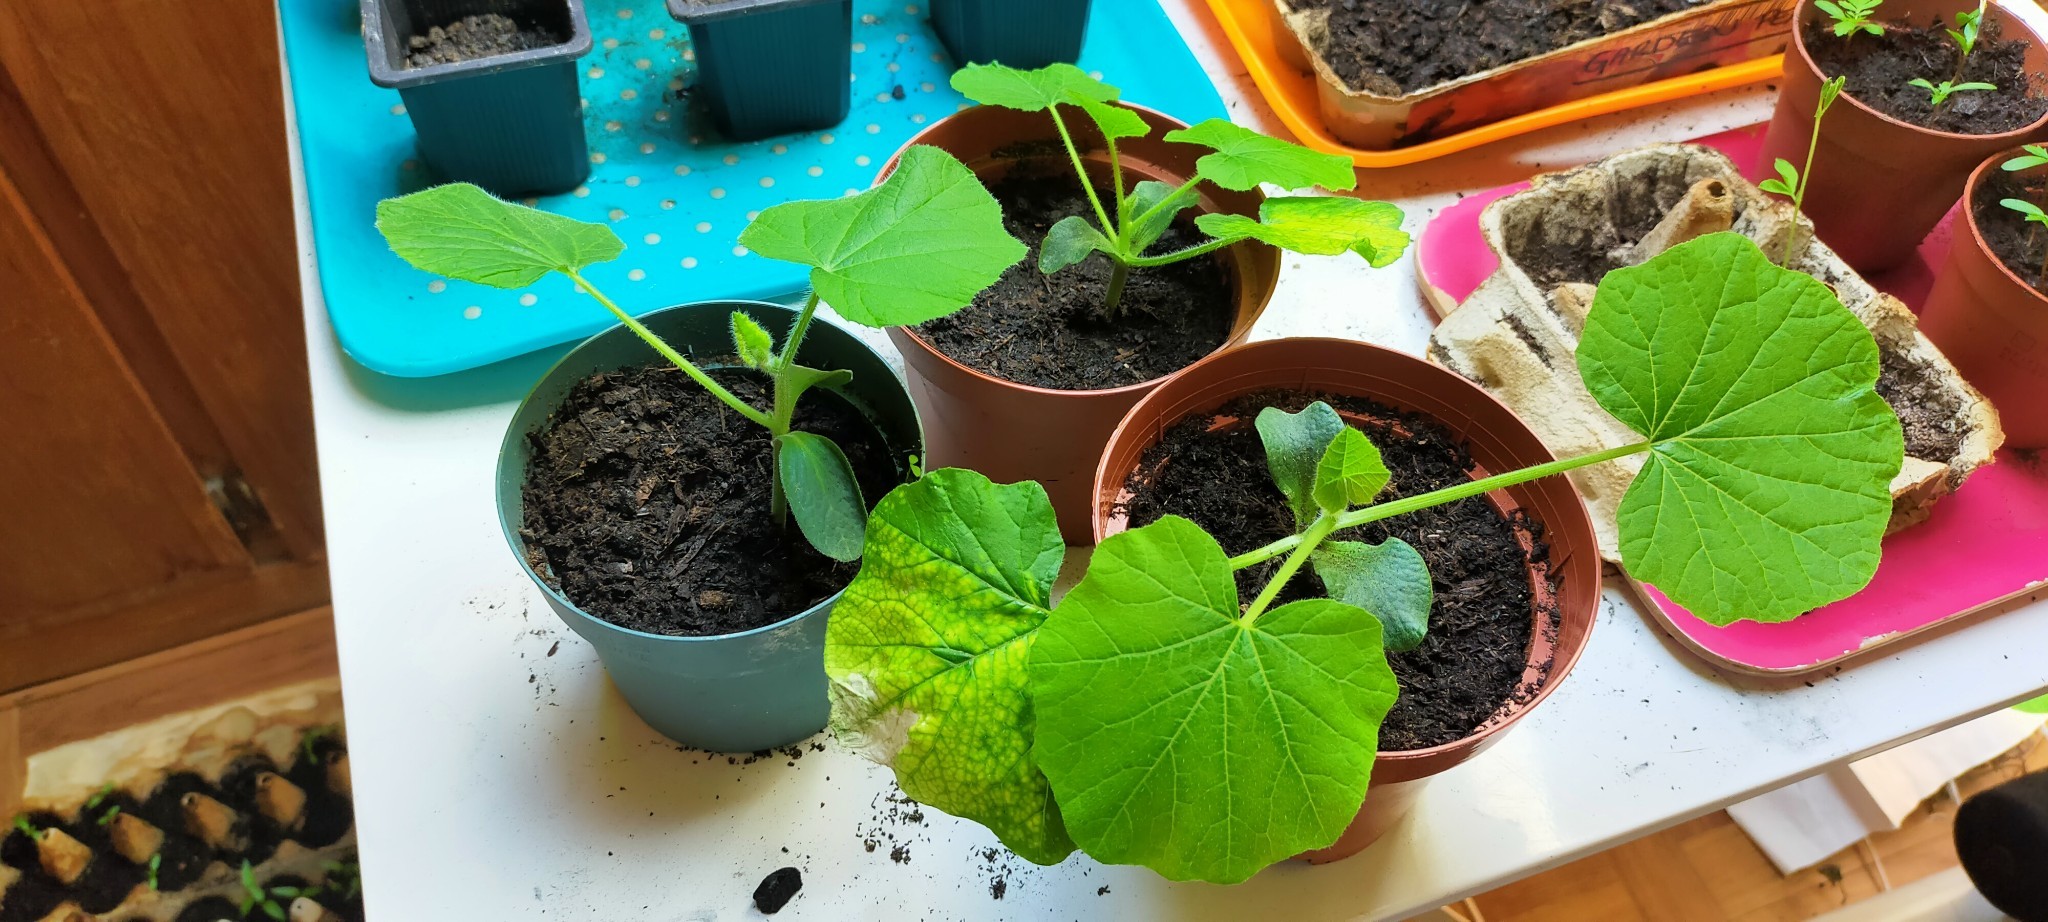
So, this year, I sowed my Red Kuri squashandButternut squash seeds (still collected from the vegetablesI had cooked; beforecooking them, naturally) in egg boxes –truly the ideal seed tray!– on the 27th of February, six seedof each squash, one seedper egg cup. Like last year, I covered them with soil, watered and then I grated coalon top (to prevent seedlingsfrom dying). I kept them inside during germination, on a the table under the window in my seed ‘Nursery’, at a temperature of about 18°C/65°F to 21°C/70°F, and watered regularly (whenever the soilwas dry to the touch; about every couple of days).
On the 11th March, a Red Kuri Squash seedling and a Butternut Squash seedling started sprouting. Three days, later, another Red Kuri Squash seedling sprouted. I was very attentive to them, kept watering them when needed until they reached about 10cm/4”.
At this stage (on the 26th March) though, instead of planting them outside like I did in 2021, I transfered each seedlingto its own larger pot (in potting soil) and kept them in TheNursery. I continued tending to them, until they grew properleaves. On the 4th of April, they had each grown two real leaves!

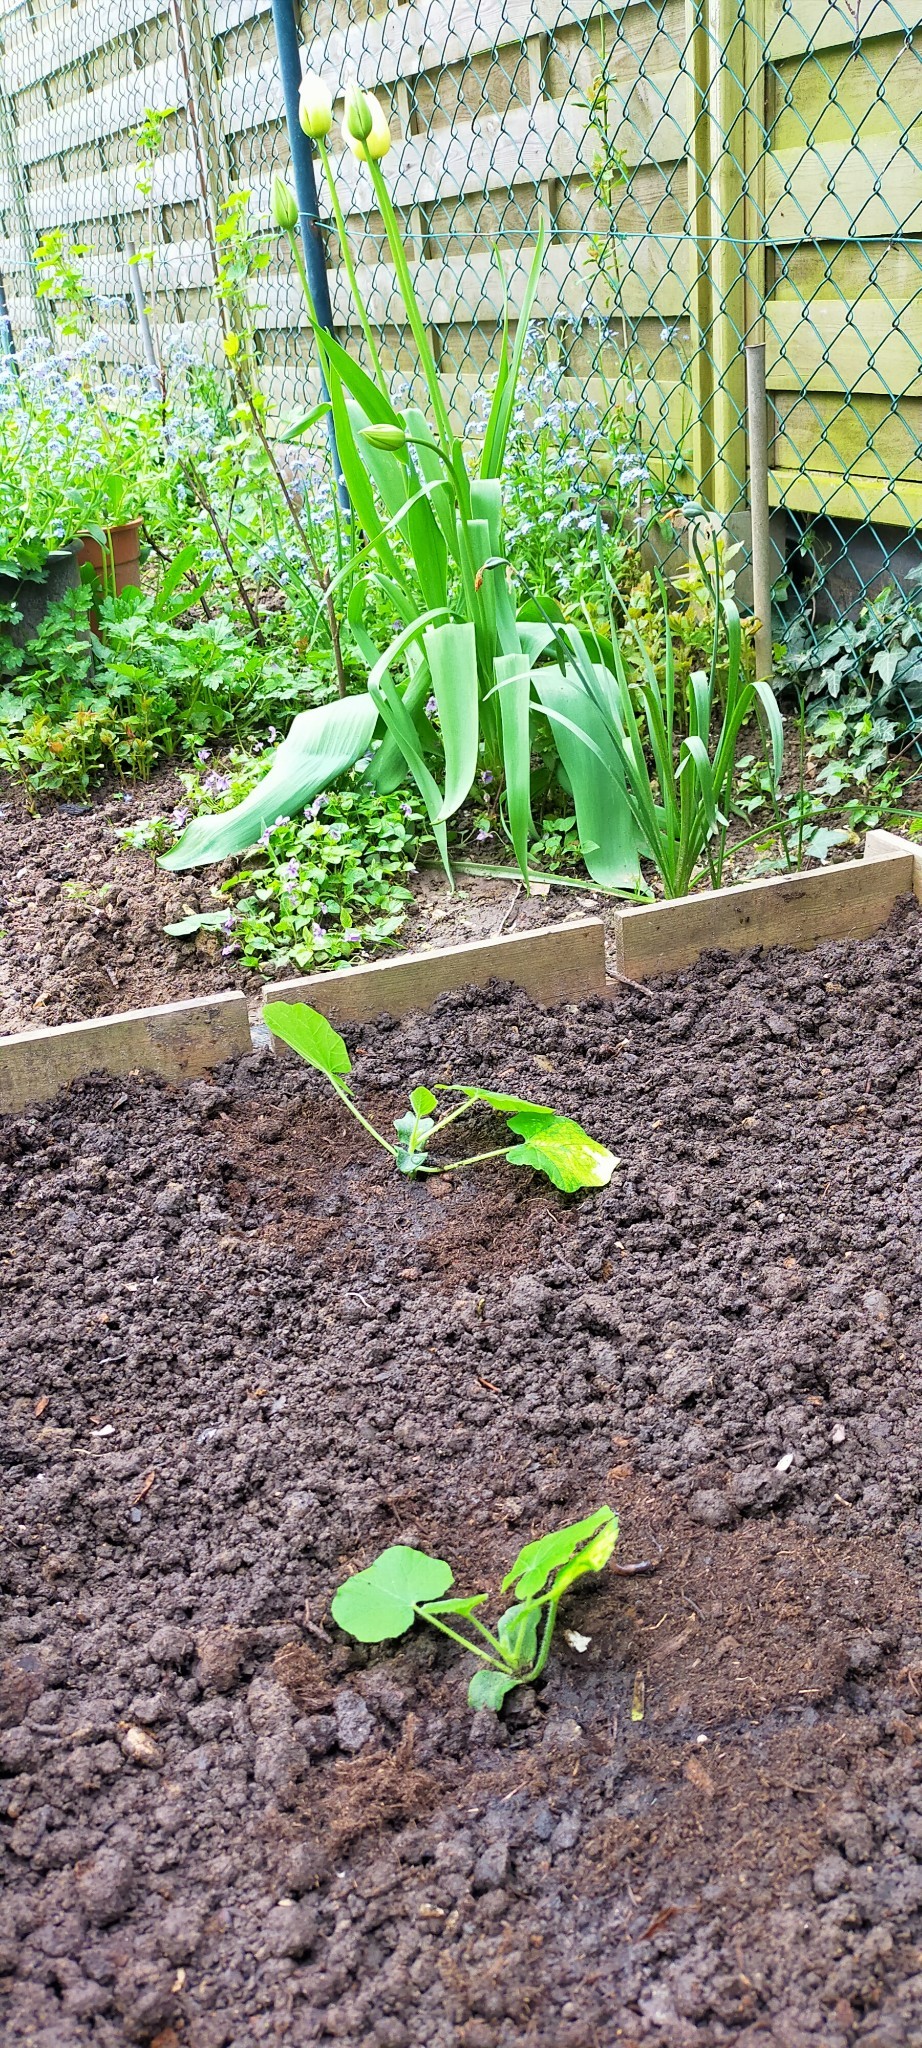
And today, on a sunny and warm day (18°C/65°F), I planted them in the same square where I also planted Wax Beans, as SquashesandBeansare, I’ve read, great companions. I tried to space them by at least 55 centimetres/21.65 inches. I watered them, too.

The fact that each Squash seedling have at least three real leaves, and will be growing on a raised bed alongside their Bean mates make me very optimistic!
The adventure continues; stay tuned until the next episode!!
Growing Tip: Wax and Green Beans
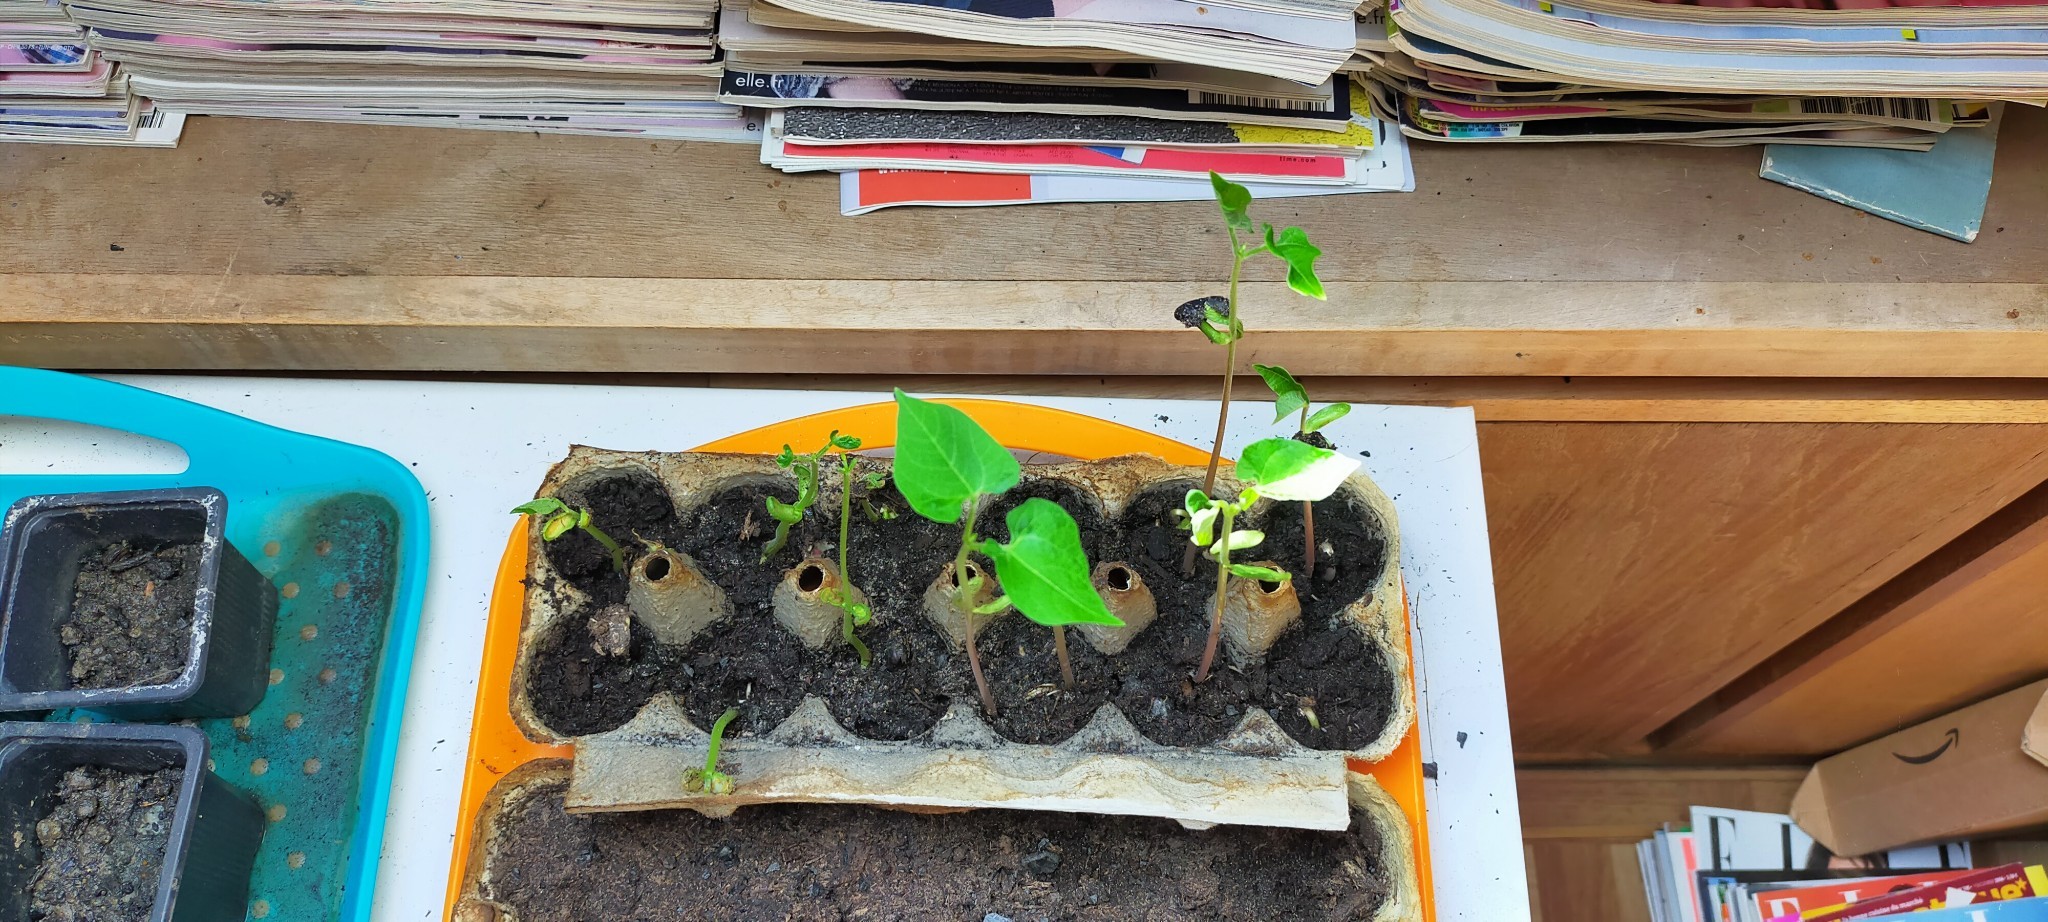
I have many vegetable seeds already, some I’ve ordered in a seed catalogue, and others I’ve collected from the vegetables I cook (that includes bell pepper seeds, butternut and Red Kuri squash seeds.) But when, in the Springtime, there are heaps of seed packets in the shop where I buy my groceries, I can seldom resist it. I thus bought a packet of green bean seedsmid-March.
And then, I remembered I had collected the seeds from wax beans we had eaten in the Summer (possibly Pencil Pod Black Wax.)
I soaked the beans seeds overnight, on the 26th of March. And the next day, they were ready to be sown (soaking them accelerates the germination process.) I sowed two or three beansin each cup of an egg box (dozen eggs), in potting soil. I watered the sowsand placed the egg box (with many others, containing other seeds) on a table under a window (in the room where all the sewing waits and where I also ride the elleptical bike; I now call the room ‘The Nursery’!)
I soaked more greenandwax bean seeds on the 29th of March, and sowed them on the 30th in pots containing a mixture of potting soil and garden soil (taken from the Veg Patch Extension), three to four beansin each pot. Likewise, I watered them and took them up to The Nursery.
I’ve tended to them and watered them regularly, and by the 6th of April, the egg box seeds were sprouting (around the 9th for those in the pots), and since then, they’ve been shooting up, especially the wax beans! Some days, I’d swear they have grown a few centimetres from the moment I went to see them in the morning (a ritual with my baby seeds and seedlings!) and later in the evening!

Thus, I started prepping their next home. I tilled the soilin the Old Herb Square, which won’t be an herb square this year, added good soil and sprinkled with a shovelful of compost. I watered generously, and a very rainy day a couple of days later did the rest!
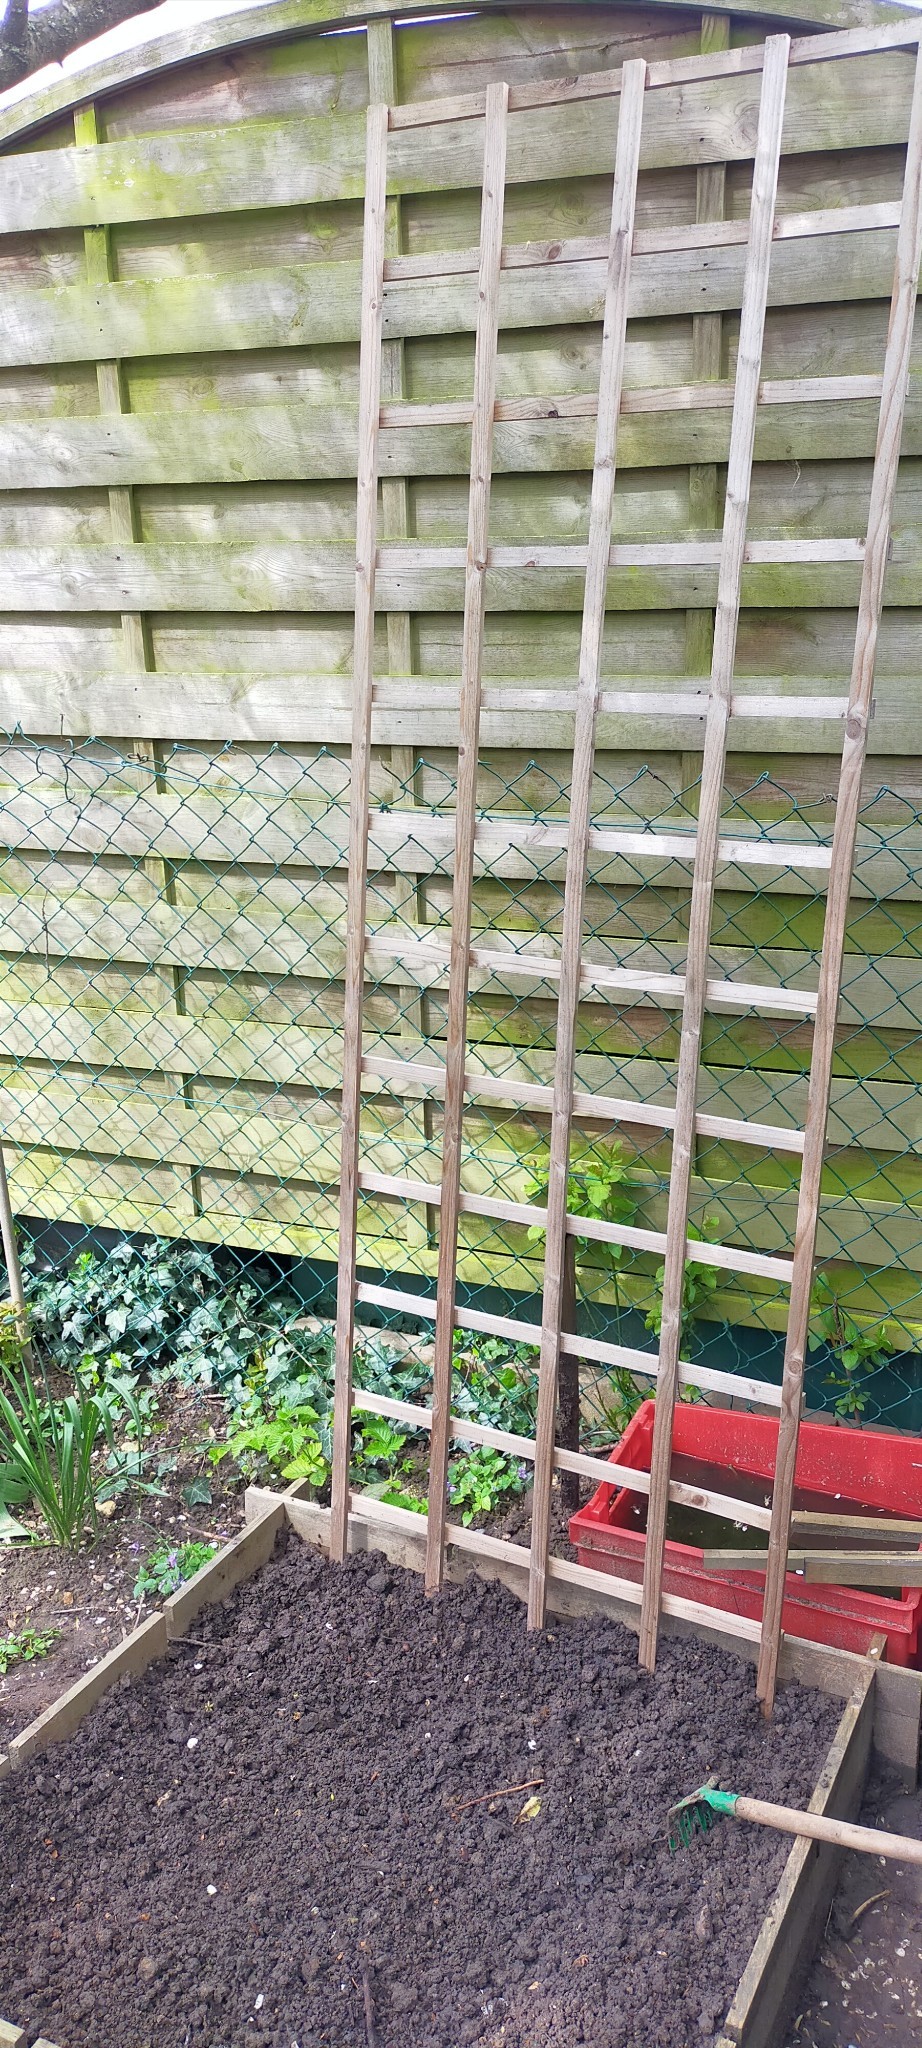
Today, I raked the soilin the square, and planted an old wooden treillis solidly in the soil, to help the beans run up on it.
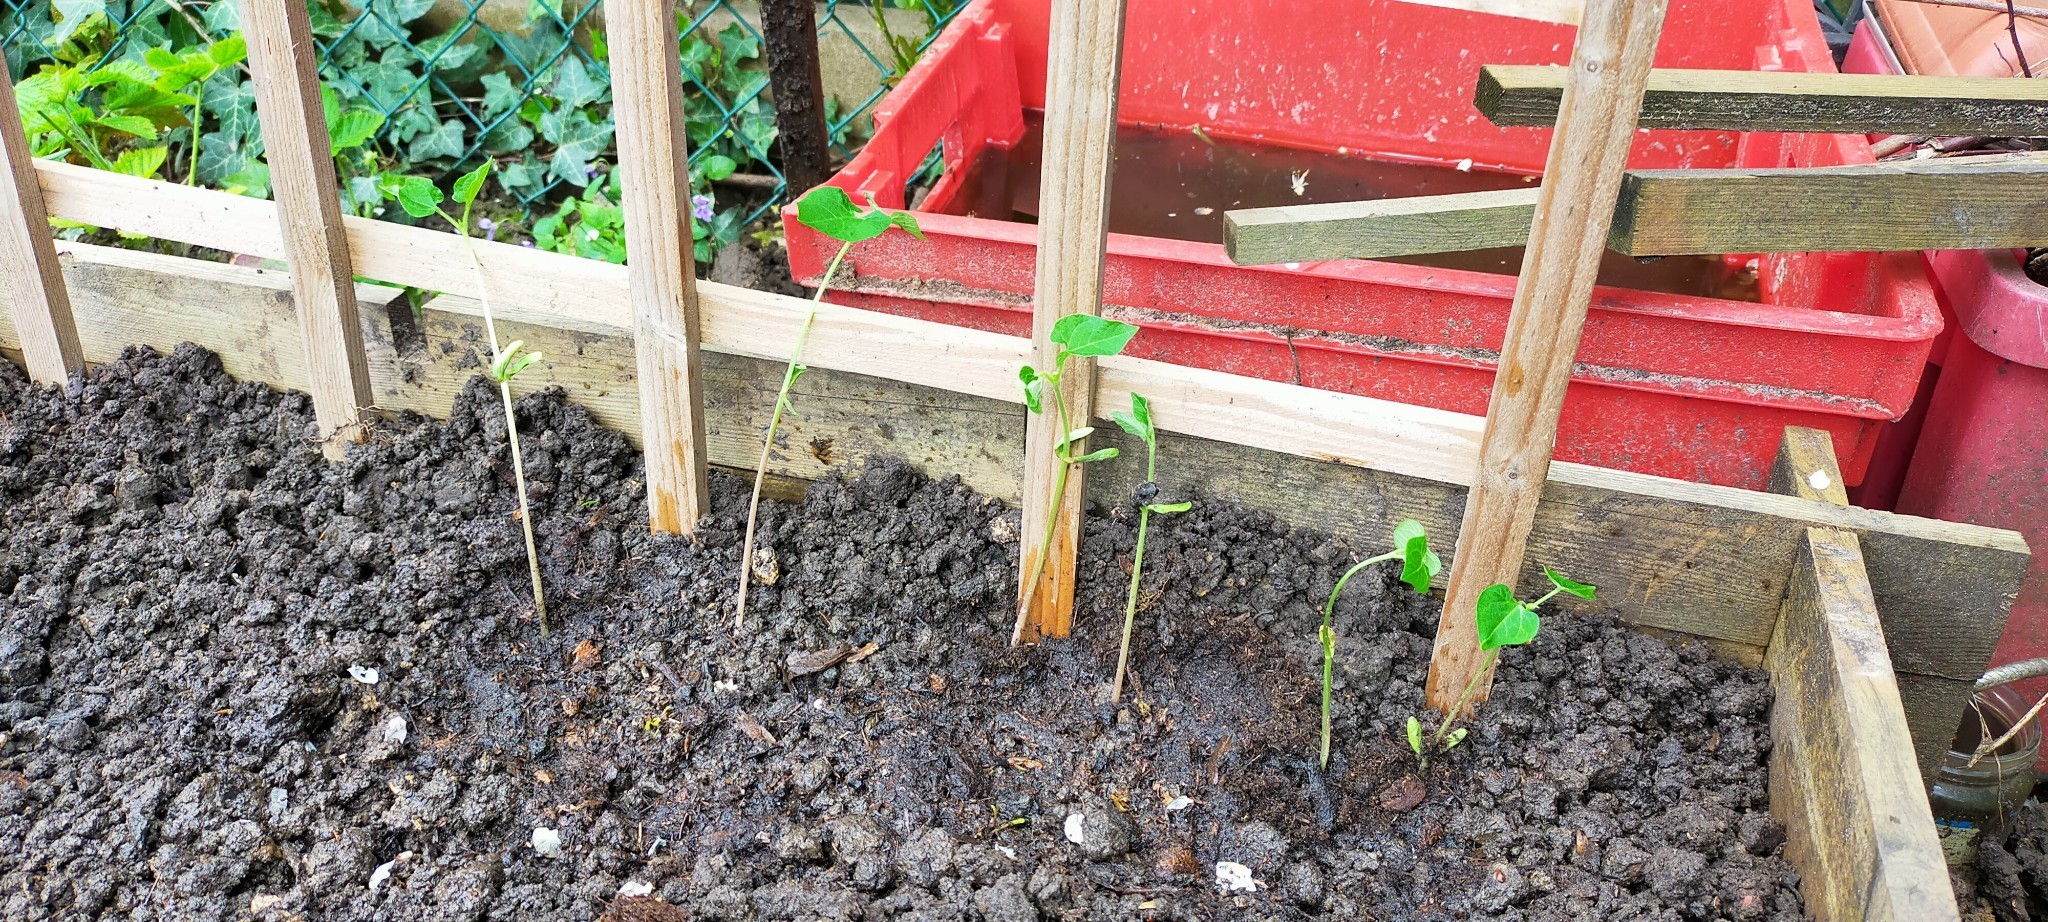
And finally, I planted the wax bean seedlings(thegreen bean seedlings –on the left-hand side in the egg box– which have popped out still need to grow a little more) at the feet of the treillis, watered them, and let them enjoy the warmth and sunshine of this gorgeous day.
And thus, their journey began; I hope I can tell you about harvesting Wax Beans and Green Beans later in the year!
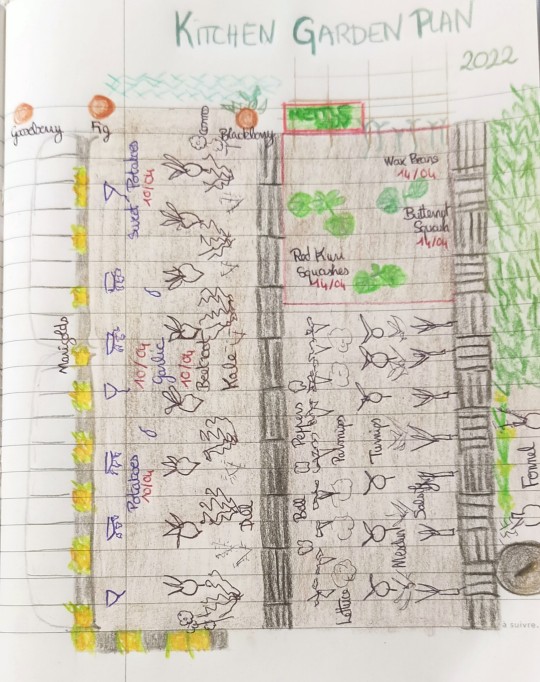
As I told you last year, for the past few Springs, I’ve been sitting and drawing out my Kitchen Garden Plan. In fact, I start mulling and reflecting over it (and even dreaming about it!), in the dead of Winter; when the trees are bare and the soil either sodden and muddy or frozen. I survey the space, and I envision vegetables sprouting out of the earth and it cheers me up and inspires me.
And thus, when the weather holds, I start working on the soil, like starting a Lasagna Garden(Update One) (Update Two) or labouring in the Veg Patch Extension.
Then, I start sowing seeds, inside, in egg boxes, and I watch them grow, and I watch the skies too. And when it is finally Spring again and warm enough I plant seedlings and sow seeds in the Kitchen Garden, hoping the harvest will match the drawing!
So here’s my Kitchen Garden Plan for 2022, the Veg Patch part of it, at least (there is another bed, by the wire fence on which I am stil working!) In black, are fruits, herbs, flowers and vegetables grown from seeds (either sown inside and planted as seedlings, or sown directly in the Patch.) In blue, are vegetables grown from scraps; and in red, the date I planted or sowed them.
Every year, I try to use what I’ve learned and observed to make my plants happier, and hopefully more generous. I am always ambitious, but I’ve enhanced my companion planting even more, and I’ve relied on the power of marigolds to repel aphids and other pests, and to make it look pretty!
Here’s to a bountiful harvest, but more importantly, to fun days pottering in the garden!