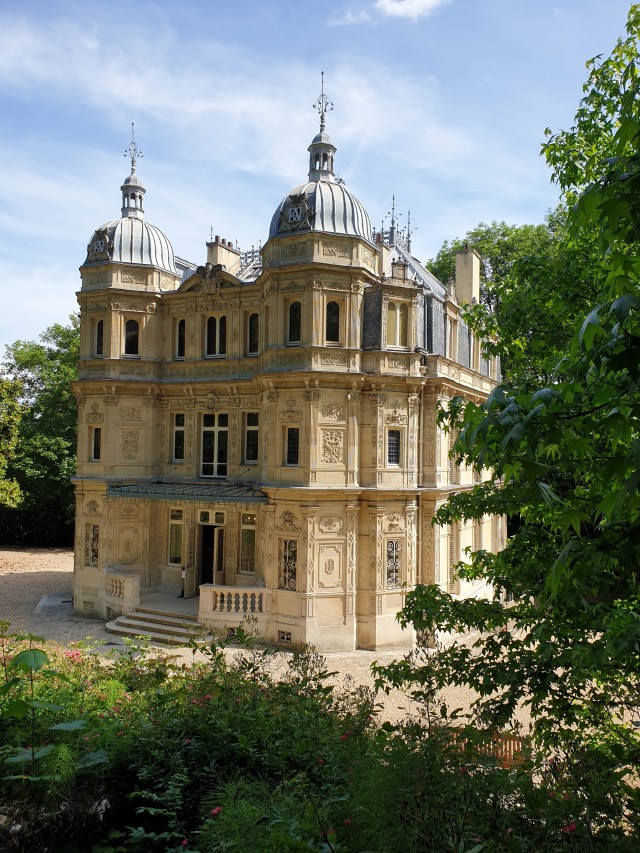
Last weekend I got to visit Alexandre Dumas’ castle and oh boy did he know how to spend his money. This castle has Everything. The whole place just shone with Great Decisions (naturally he had to sell it off after 4 years because money troubles). I genuinely loved it. Look at it:
ALT
He named it after his novel, there’s a grotto, you get there going through a rock tunnel (all with convenient seats carved in of course) he put his faves on the outside and it all just has so much personality!
I’ll put some of my favourite features under the cut:
First of all, I’m gonna make a sepsrate post for Dumas’ writing castle, because yes he built a whole seperate castle to write in and it’s even more amazing. (The architect for both was Hippolyte Durand).
So, favourite features:
ALTALT
ALT
The stonecarvings were so pretty! And so personal! Over everyone window is the bust of a great writer, I spotted Shakespeare, Euripides, Ovid. I can only imagine these were Dumas’ literary faves. The windows had stain glass symbolism too, but sadly no explanation what they meant (lots of playing cards and knights though, very fun and dramatic) @pilferingapples do you happen to know why the inscription on the knight window is German? Did Dumas speak german?
The Moorish room! Orientalism was going strong around 1840, and apparently Dumas went to Tunisia and brought back a father son artisan duo to make him this room:
ALT
(I really want to know what this cost) it seemed like a great lounging room (especially if you might be just a tad hungover).
Dumas had to sell his furniture, so none of that remained, but the museum did get back his chair:
ALT
Very cool, especially since we have a photp of Dumas in that chair (this was apparently where he did his last edits for his serial, it looked very comfy and heavily used)
The dining room was so beautiful and clearly the centre of the house. Dumas apparently cooked for his friends (sadly the kitchen is no more) and the parties must have been so amazing.
ALT
It really wasn’t as grand or austentatious as I expected. I’d live there in a heartbeat.
And lastly, the feature I only just noticed as we were leaving:
ALT
You can barely make it out, but it is Dumas’ personal motto on a very pretty carved stone scroll:
“J'aime qui m'aime”
I love who loves me. I want to shake both Dumas’ and Durand’s hands for every bit of personality they put into this castle. Amazing.
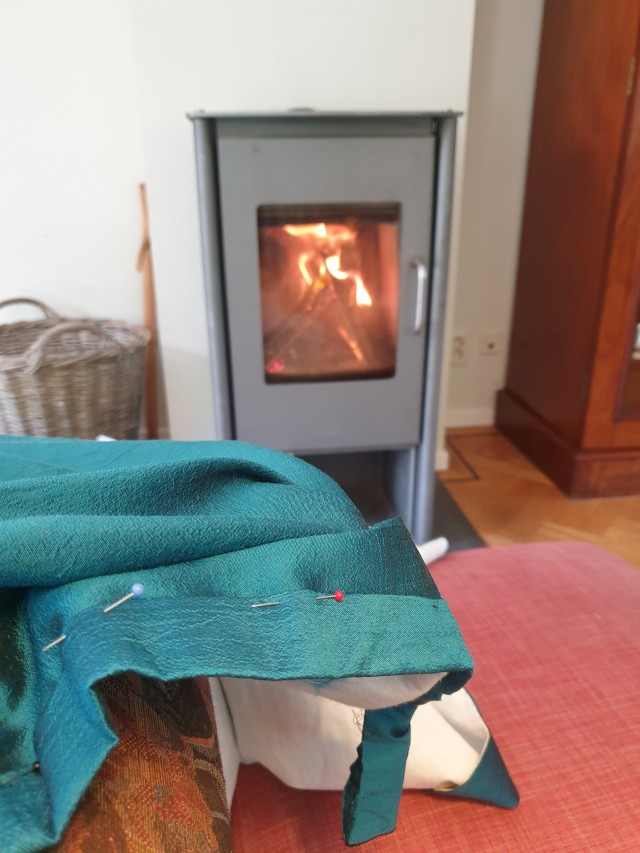
I have located a placeholder ribbon (stolen from a bathrobe) to put on my hat for now as I ponder decorations.
I’m not quite sure whether I just want a simple broad satin ribbon in black or green or red, or something more decorative and whether I want bows or flowers…
I also used the original orange ribbon on the inside, which makes it much more comfy to wear (if more prone to slipping):
The base hat is done! I’m quite happy with the shape, the fact that the brim is wider in front makes it kinda cute.
I’ve got some straw leftover that I’ll save for the next time I’m making a bonnet. I’m thinking of using the original ribbon for the inside and going in search of a ribbon shop tomorrow to get some trimmings. The stitches could be neater, but I sewed half of this from a hammock so I can’t complain.
This was a very nice sunday project that I can definitely recommend. It’ll go a lot quicker if you hotglue the straw, or you could use a sewing machine with a strong needle. But sewing it with the original thread felt very thrifty, so that was fun.
In having some trouble sewing it on neatly, but you won’t see a thing of that from a distance. I’ve wetted the edge and worn it a while to make it the shape of my head instead of a circle, which I hope will make it comfy to wear.
The next step is re-sewing the bands where I want them. I need a much larger crown, the brim is probably okay and I’ll see how high it should be once the crown is done. I don’t think I’ll go properly flat Edwardian, as I don’t have the hair volume to pin those kind of hats too. It’ll probably turn out quite cottagecore-ish, which is perfect since I want for picnics and strolls through the flower fields.
I think reshaping the straw is one of the best bits. I’m using a kettle to steam and press the crown flat and I’ve got some heavy frog friends to help press the brim flat. It’s about 28C here, so I can just wet the straw, press it in the correct shape and let it dry.
I think reshaping the straw is one of the best bits. I’m using a kettle to steam and press the crown flat and I’ve got some heavy frog friends to help press the brim flat. It’s about 28C here, so I can just wet the straw, press it in the correct shape and let it dry.
The easy part is pulling it all apart. I’m saving the ribbon for a later project, I need a flat brim and crown and it needs to be slightly less high. This thing is stitched with one thread so you can just pull it apart like a sweater, very satisfying.
My may holiday turned out unexpectedly summery and I neglected to bring my hat, so I bought a cheap ill-fitting straw hat at market and I’m going to turn it into something that does spark joy
My goal was to create something with a silhouette that works for an 1830ish French gown my friend wants to make. My goal was to:
1. Sew entirely from the stash
2. Not spend more than a day
3. Make something with a chance of fitting even when I’m making it for someone two countries away and I couldn’t actually fit it in her
All three goals were (sort of) achieved!
I’m so pleased!
You start making your circular pattern à la Mariah Pattie. The upper wider circle is your bust measurement, the smaller inside circle your underbust measurement. The straight lines are the distance between your bust and underbust. (Mariah’s video and my previous post explain how to circle with a pen on a string to get the desired curve)
Then the Short Stay instructions take over, but instead of a square, you put it on your circle. If anyone is interested in the details of this, please ask because I’m planning to make one for myself and I can take step by step pictures then.
I only put boning next to the lacing and one to support the bust, making this quite a simple design. The straps are sewn through with a ribbon so they can be adjusted.
I’d rate this a very good project for people wanting to enjoy regency or Bridgerton underwear or starting on corsetting in general. Fitting is a lot easier than victorian corsets, as there’s no waistline or hips to contend with and everything is adjustable.
I bought a lovely look into the past today, a 1967 pattern magazine, including the pattern page. There’s some wonderful examples of the fashion of the time:
We have a nice blend of fashion illustrations and photographs:
ALTALT
The ads are fun (and terrible) too, of course. I also like the hairstyles:
ALT
The children’s drawings are particularly charming:
So Château Monte-Cristo wasn’t even the best bit of Dumas’ castle. There was also his “little writing shack”. And naturally it’s also a castle…
Dumas had Hippolyte Durand create a quiet place he could write and once more it felt like a loveletter from Dumas to himself. I don’t know how much input he had on the design himself, but I’ll show you what I mean:
ALT
Aside from the beautiful stone carvings, the building is covered in stones with the names of the books and plays (and characters therein I think) that Dumas had written up to the finishing of this castle.
The inside is actually really modest (comparatively):
ALT
It might be two-storey, but it really looks like a good quiet writing space (that looks down and out on the castle proper so you can see when your friends arrive for dinner. The sightlines on this estate are excellent)
You can walk around the moat around the castle and the back is super charming as well.
ALTALT
ALT
It really isn’t large, but this neo-gothic castle has it all. A moat, a beautiful stone carved bridge, a stonecarved balcony and a tower. (Sadly you can’t go in, so I don’t have upstairs or balcony details). I have walked around this Castle so much, it’s so pretty!
All the details have been considered, with serious thought to aesthetic and Drama. With a moat and rocks and ivy, ready to be the coolest ruin ever:

 ALT
ALT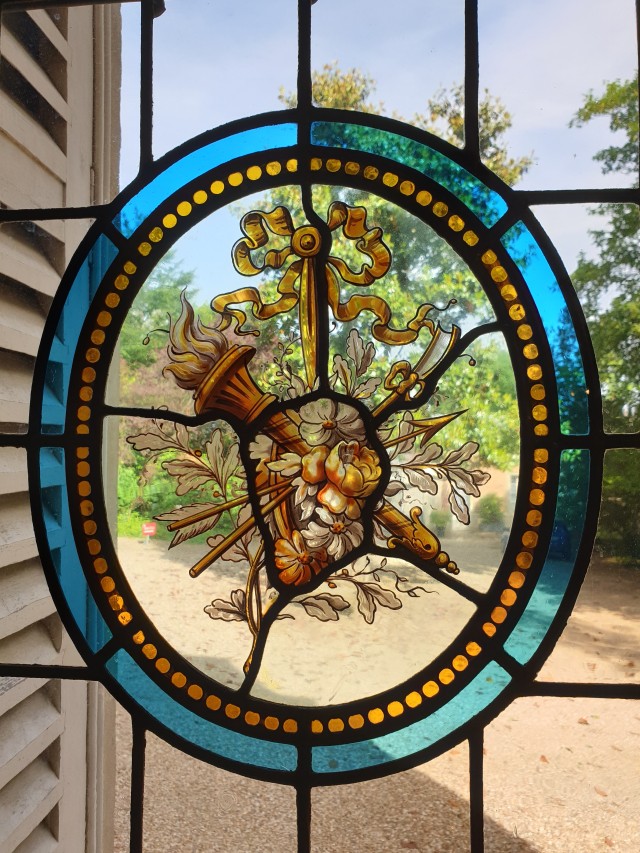 ALT
ALT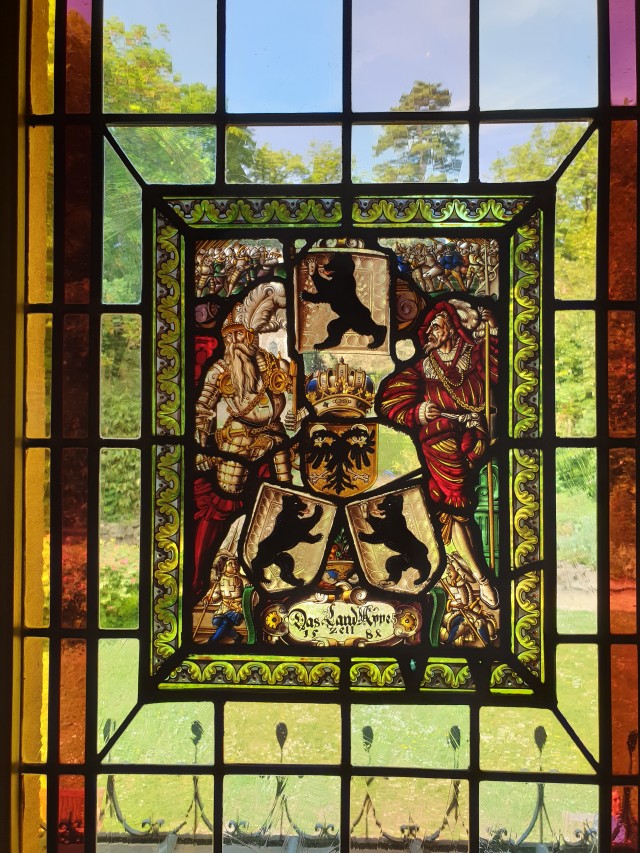 ALT
ALT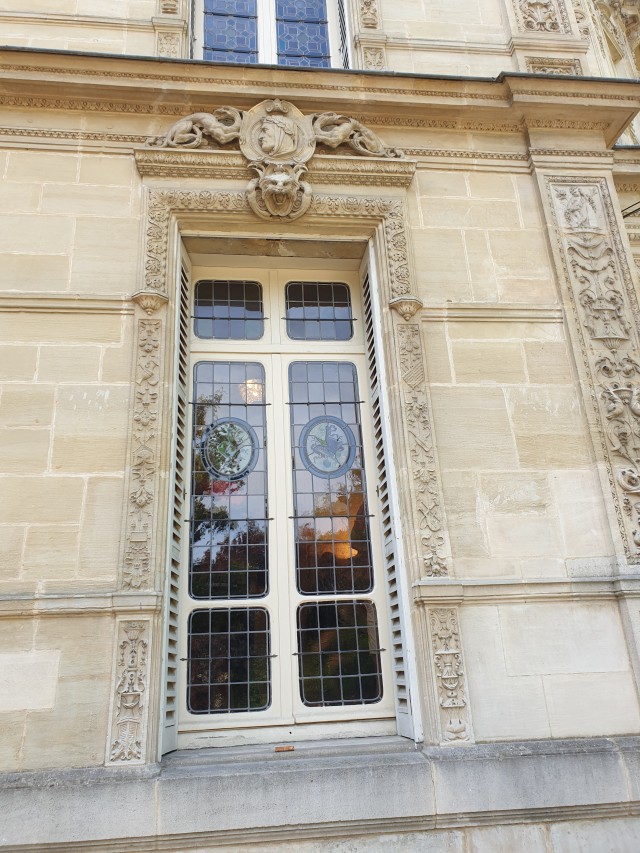 ALT
ALT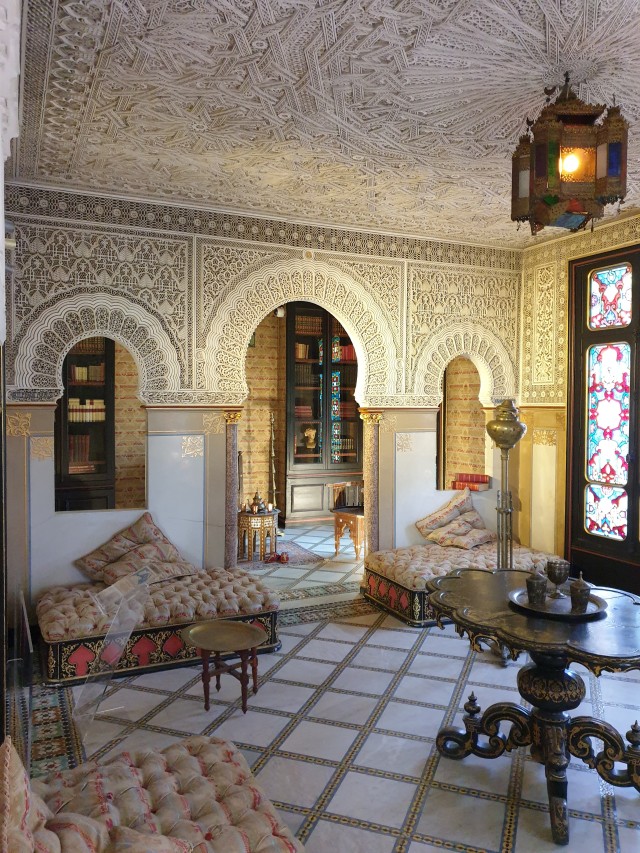 ALT
ALT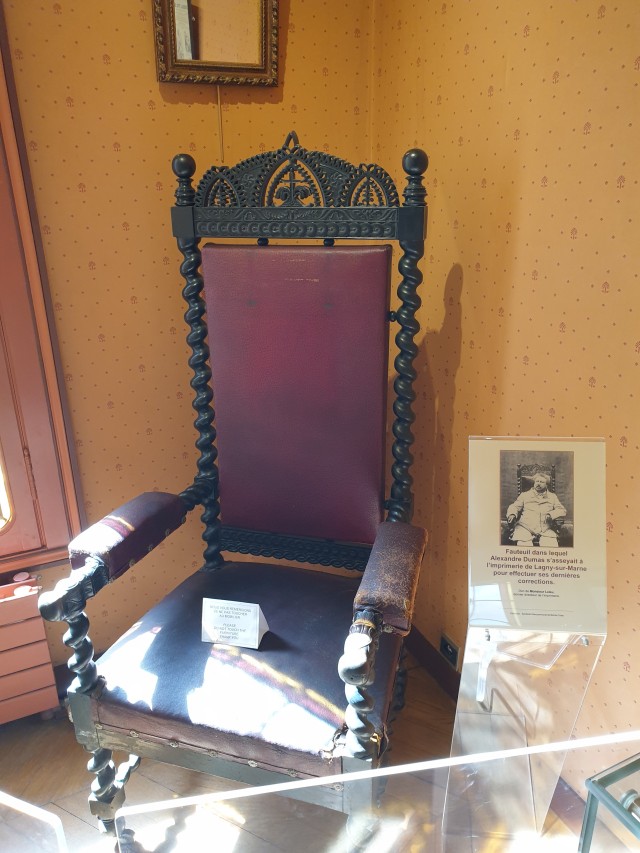 ALT
ALT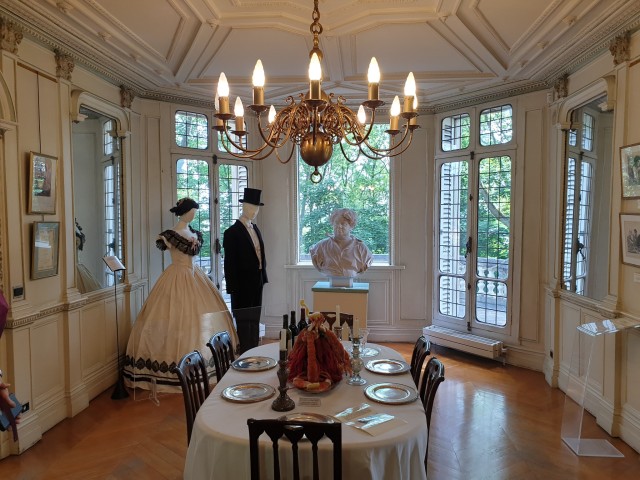 ALT
ALT ALT
ALT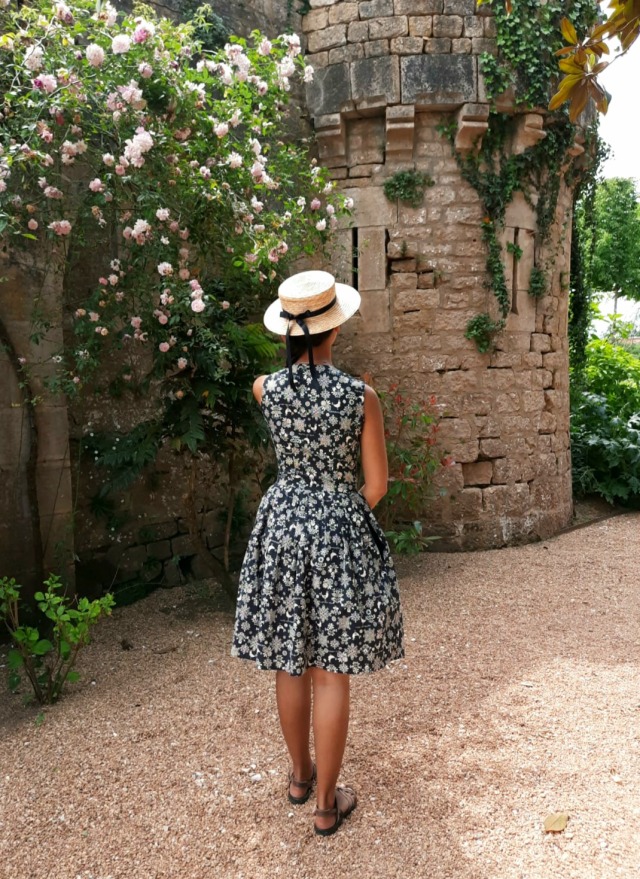 ALT
ALT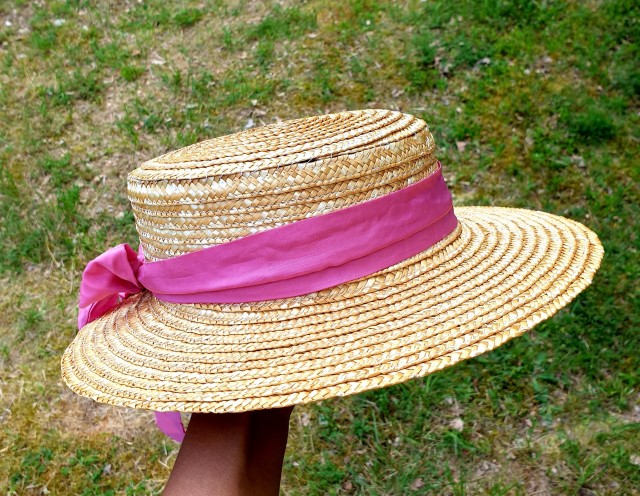 ALT
ALT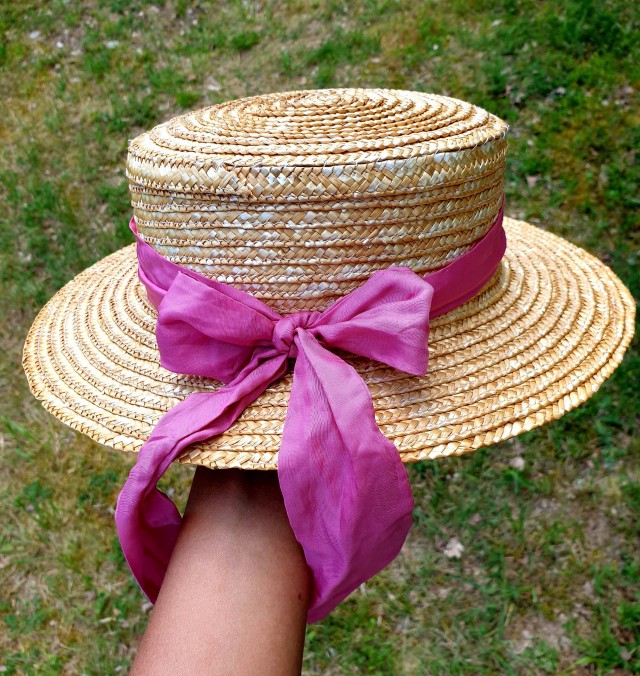 ALT
ALT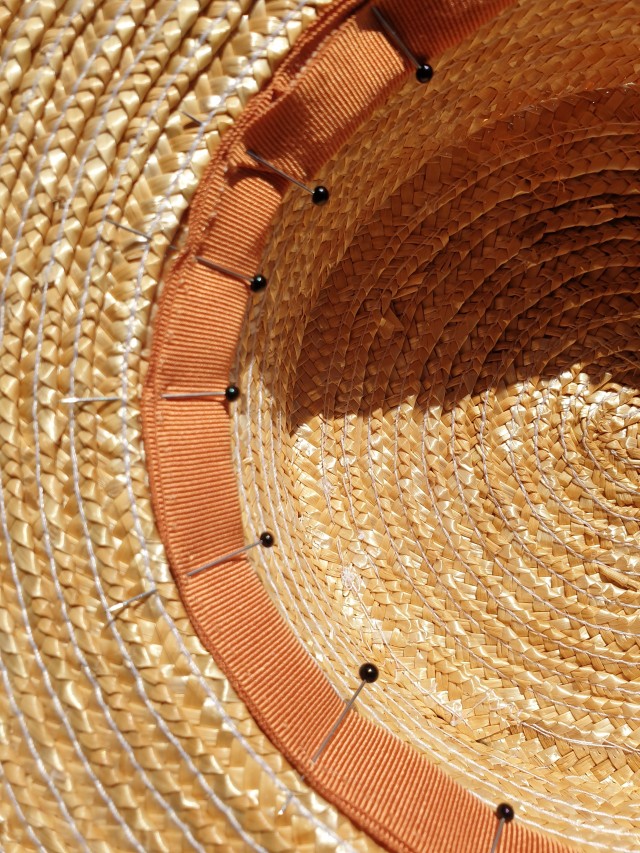 ALT
ALT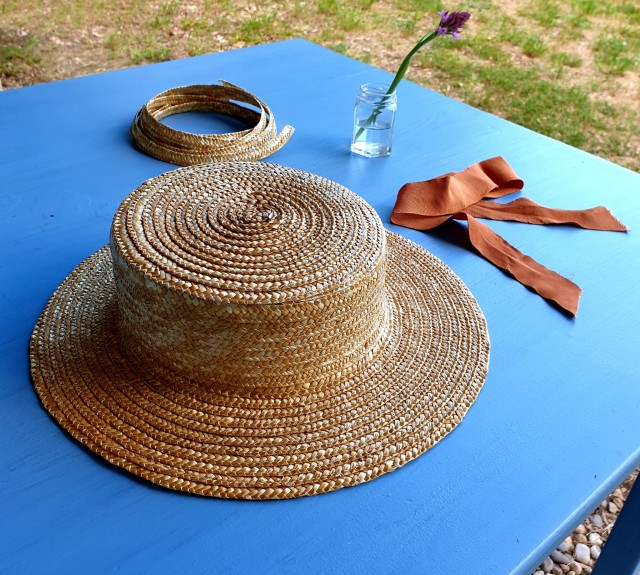 ALT
ALT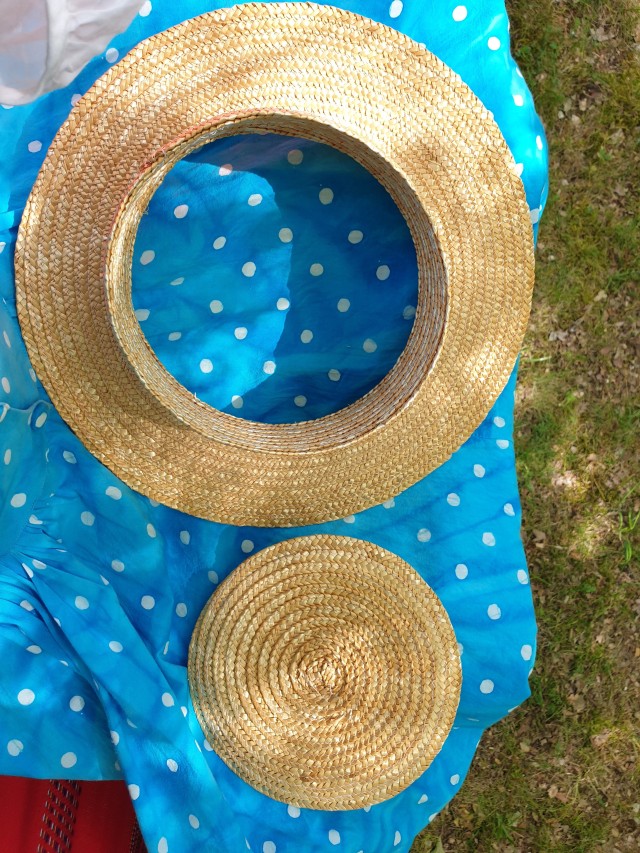 ALT
ALT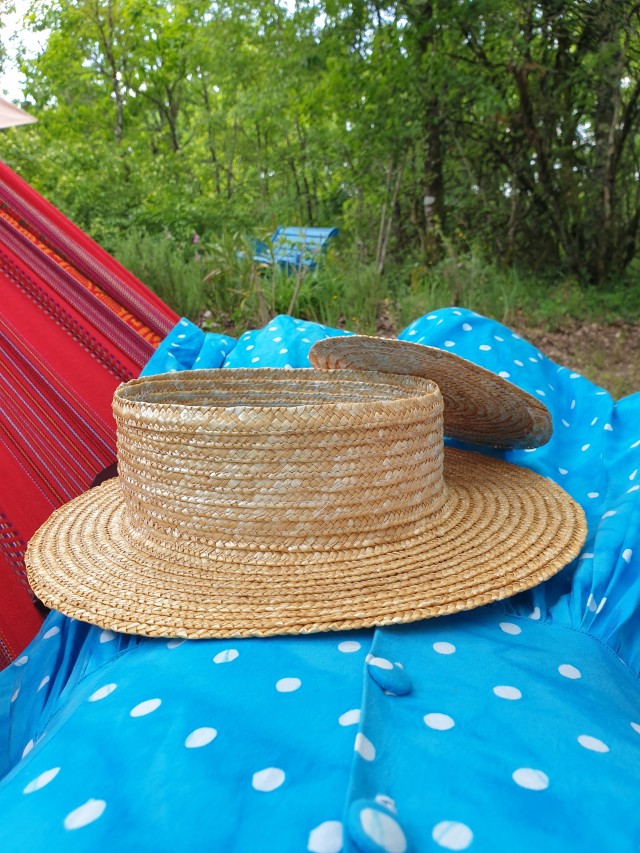 ALT
ALT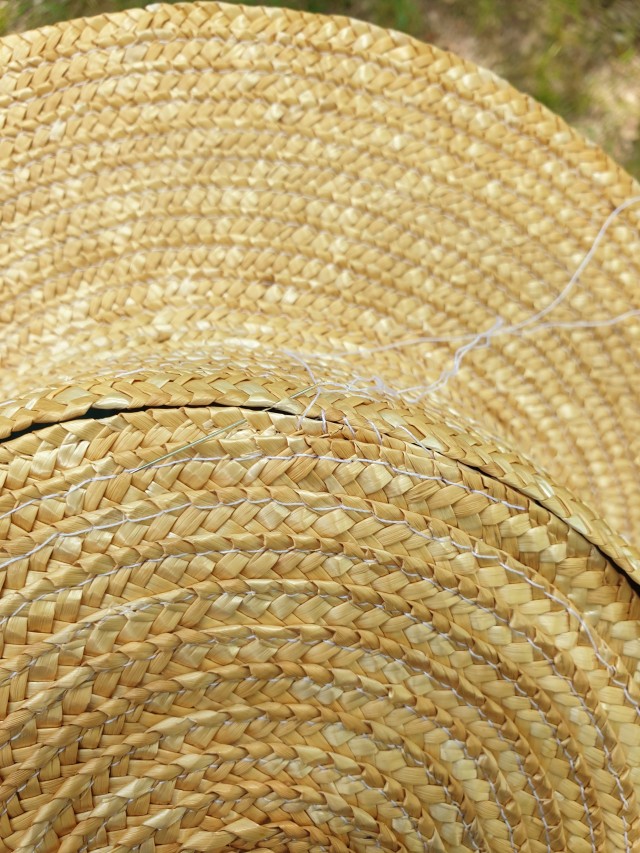 ALT
ALT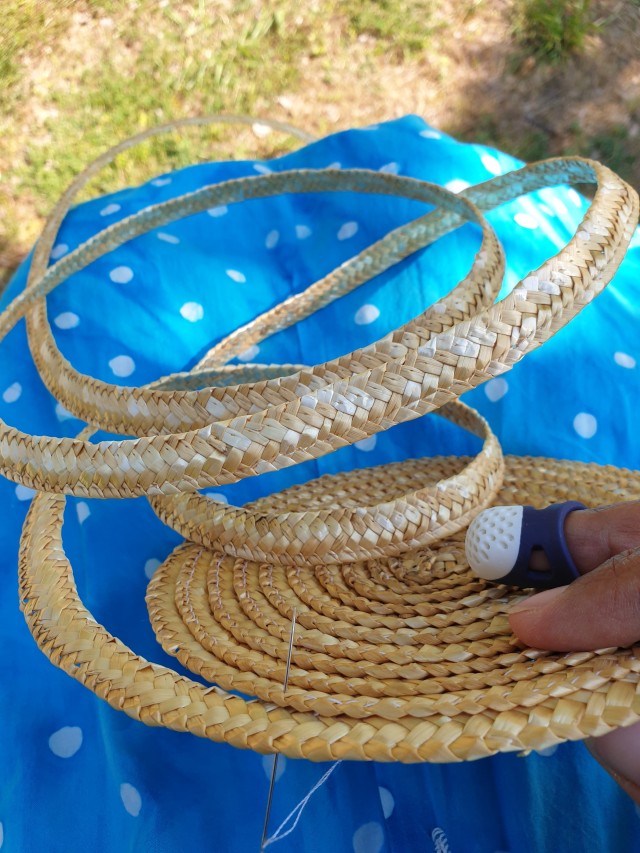 ALT
ALT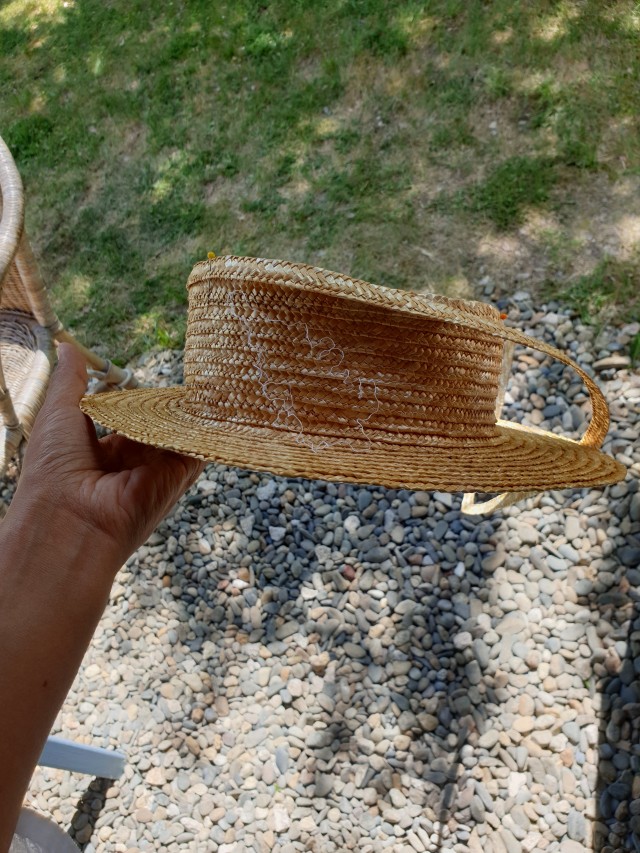 ALT
ALT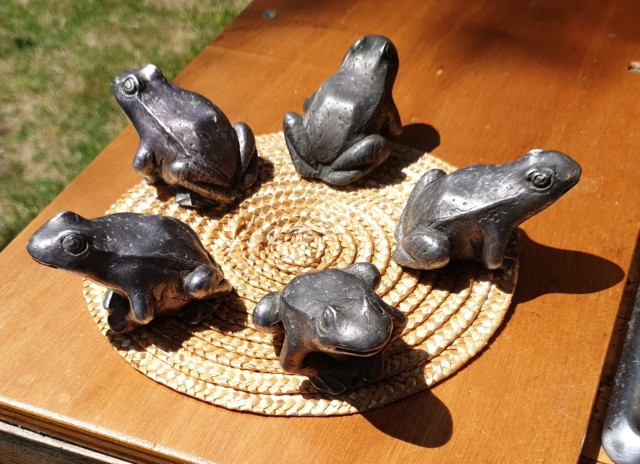 ALT
ALT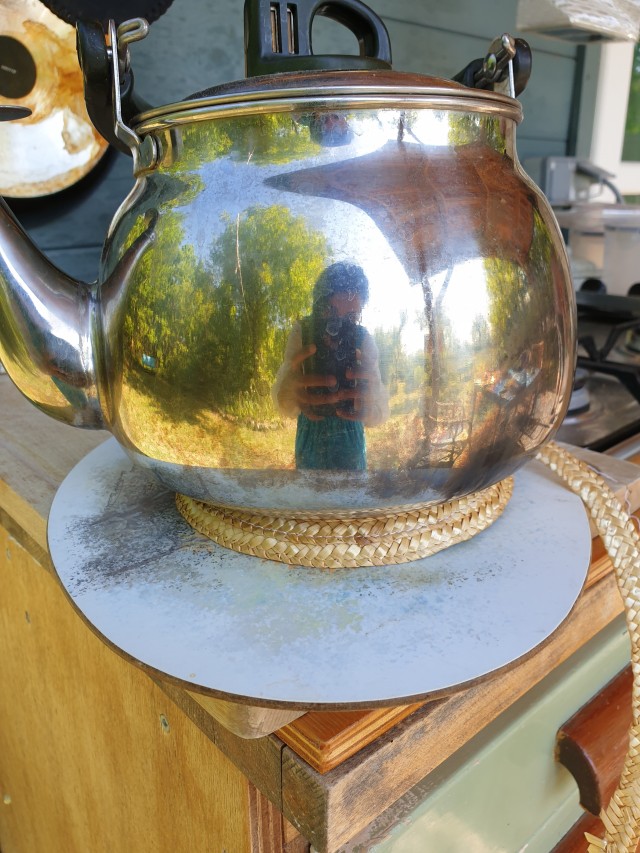 ALT
ALT ALT
ALT ALT
ALT ALT
ALT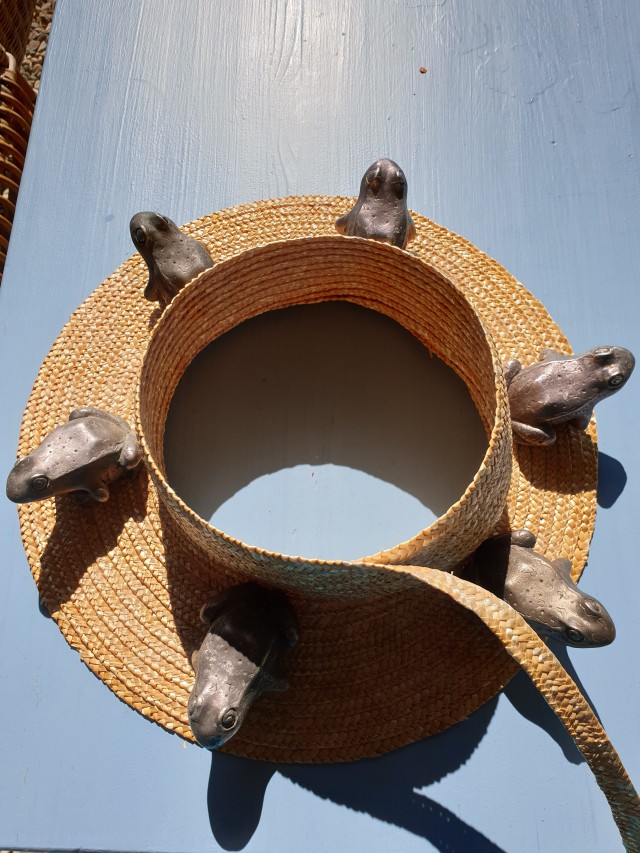 ALT
ALT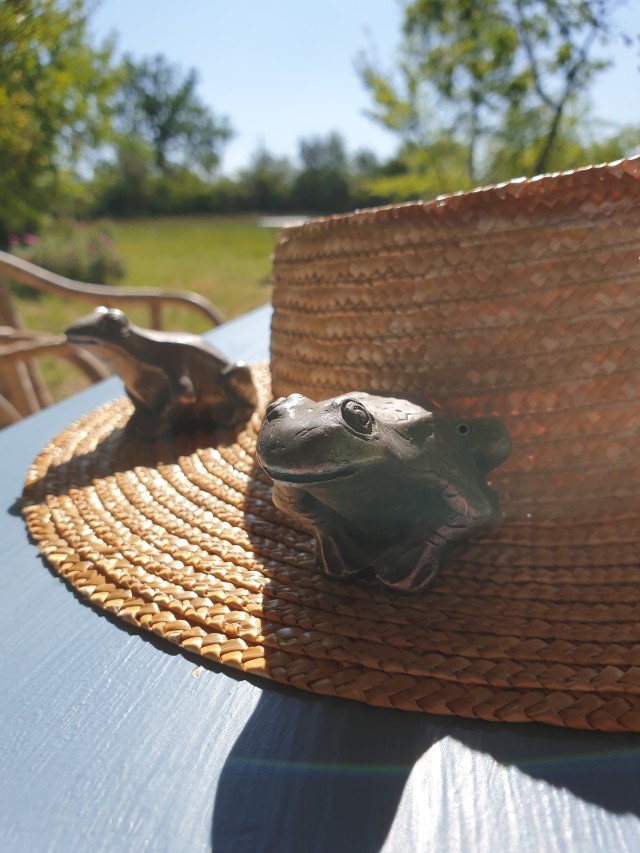 ALT
ALT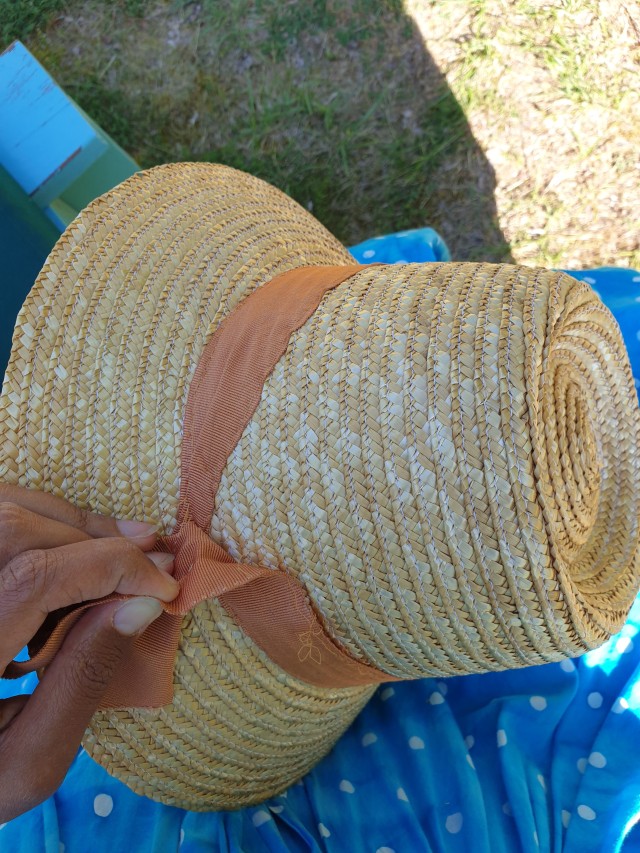 ALT
ALT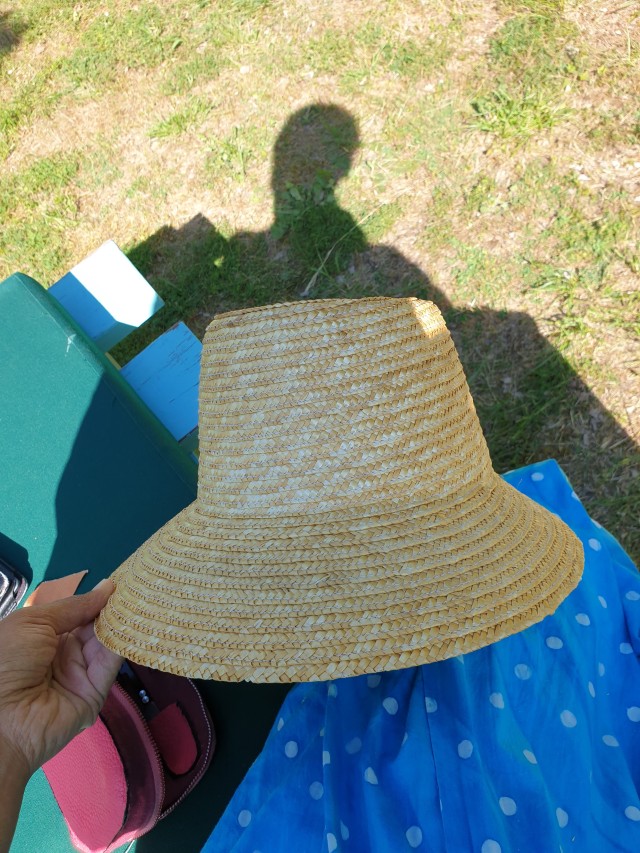 ALT
ALT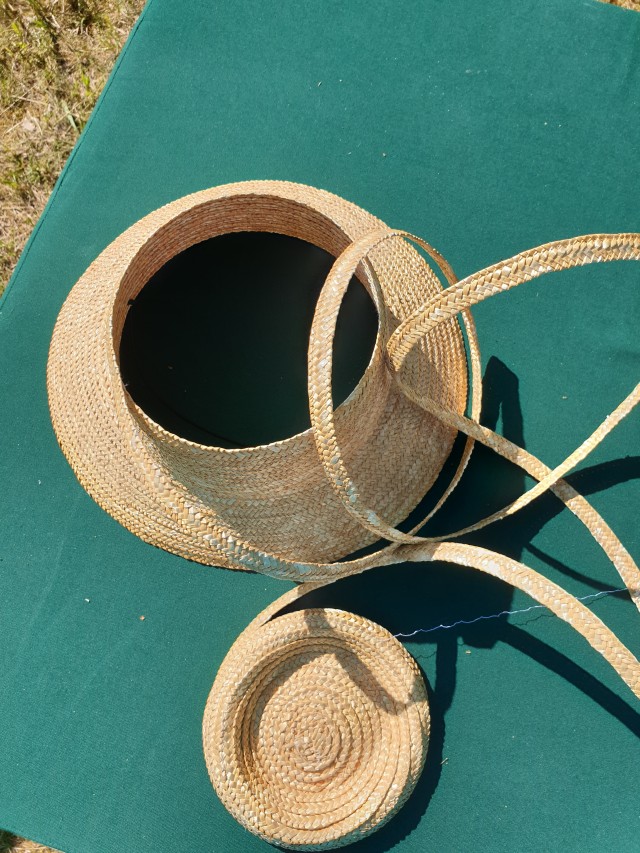 ALT
ALT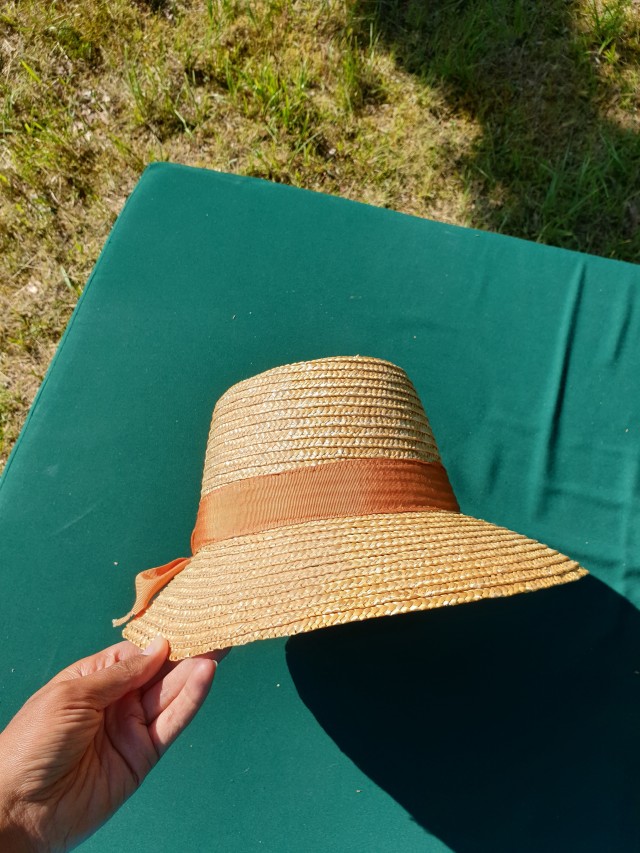 ALT
ALT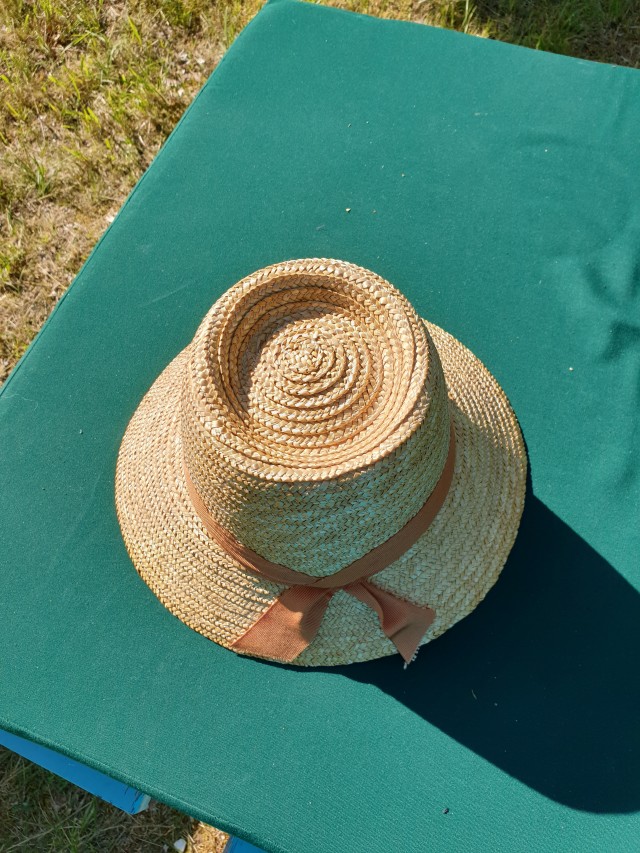 ALT
ALT
 ALT
ALT ALT
ALT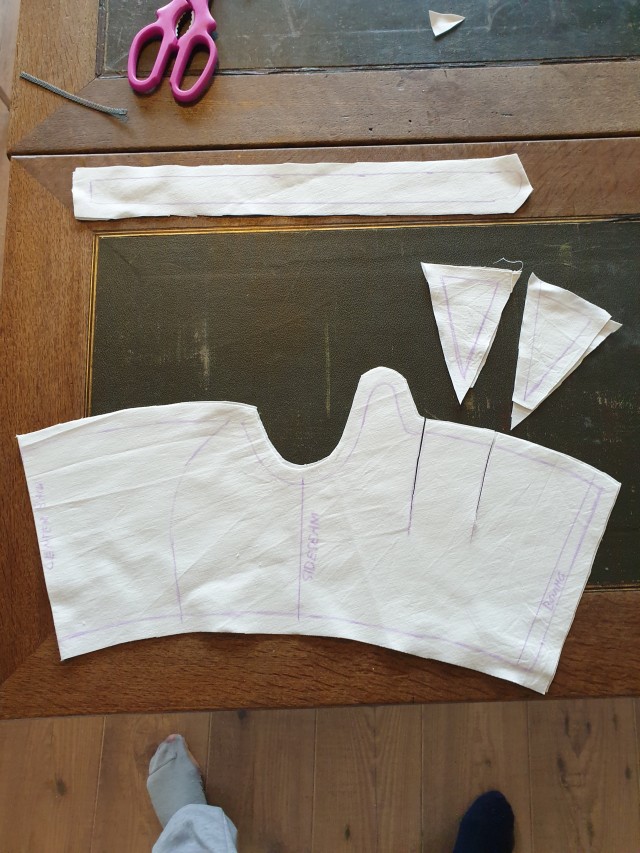 ALT
ALT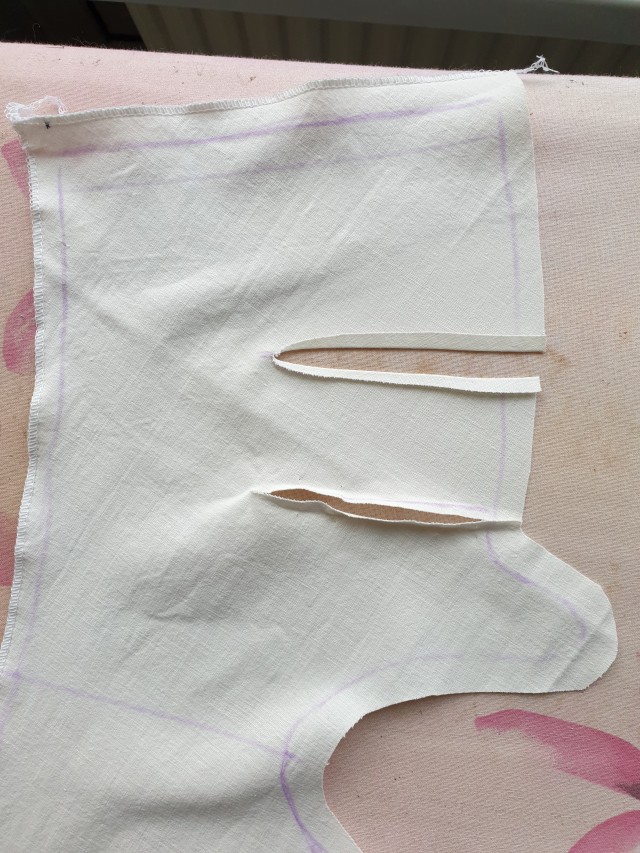 ALT
ALT ALT
ALT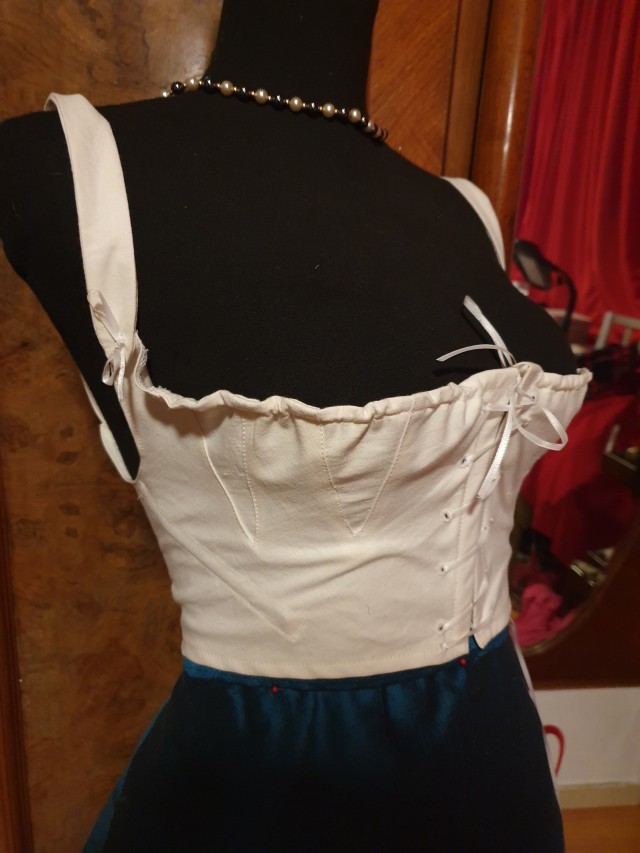 ALT
ALT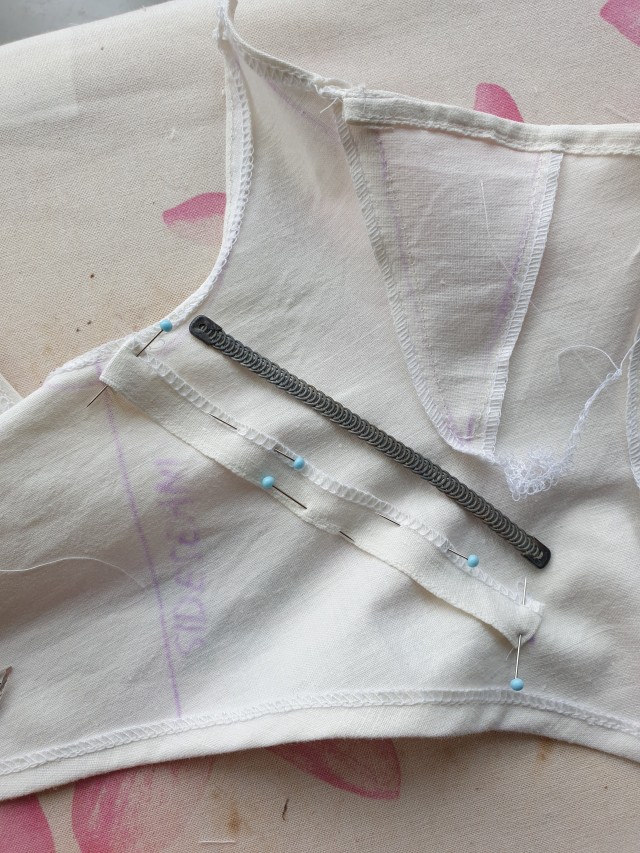 ALT
ALT ALT
ALT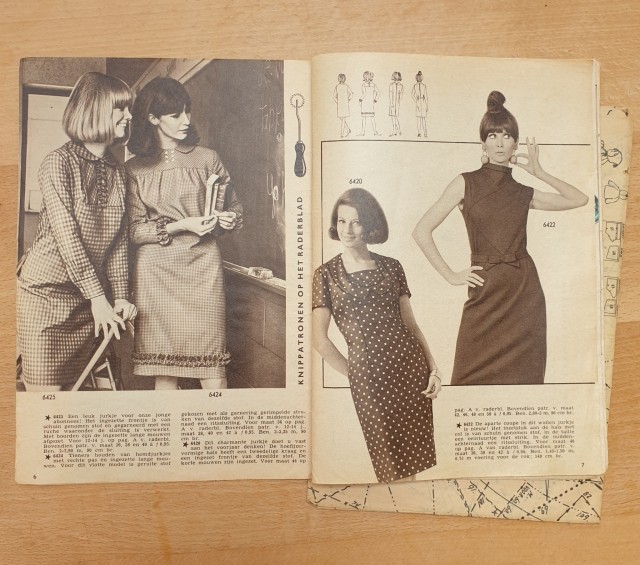 ALT
ALT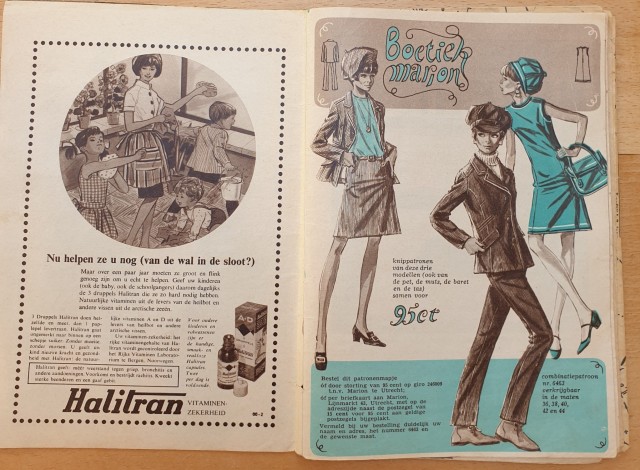 ALT
ALT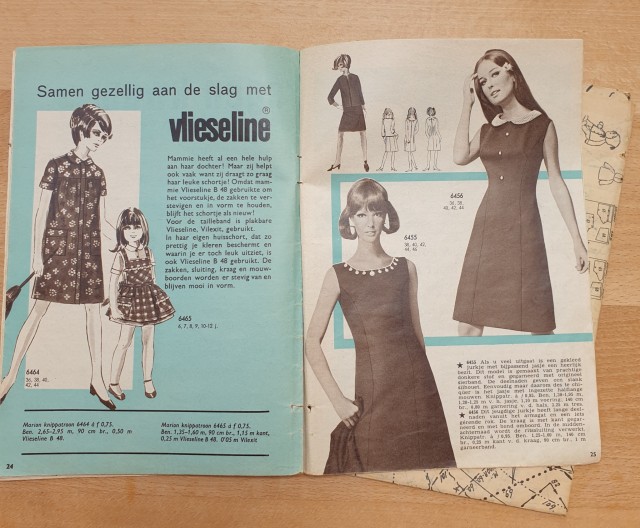 ALT
ALT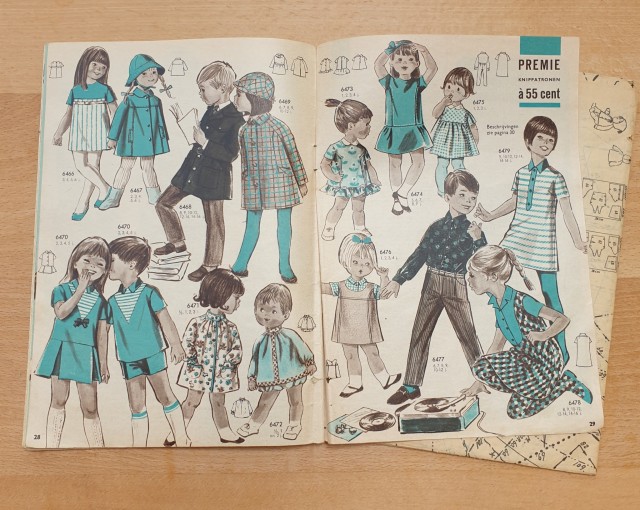 ALT
ALT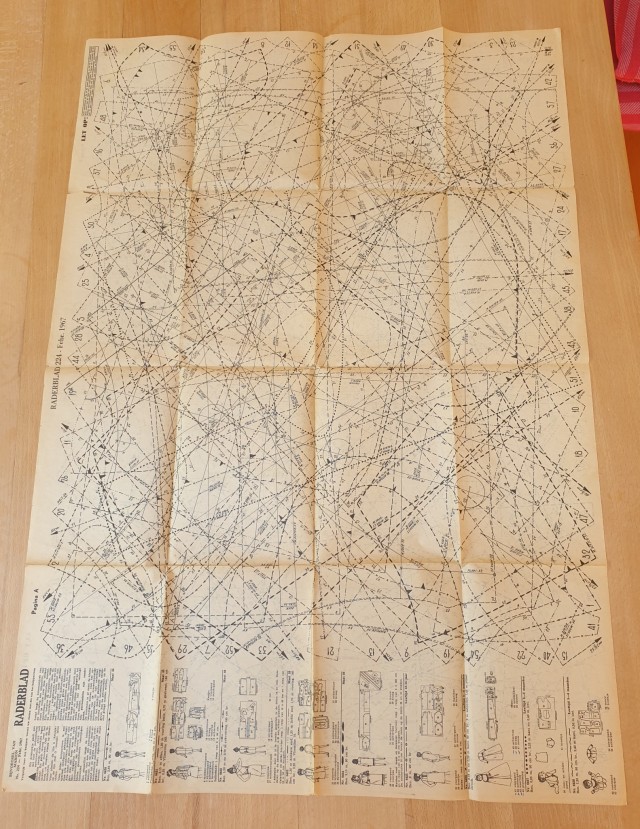
 ALT
ALT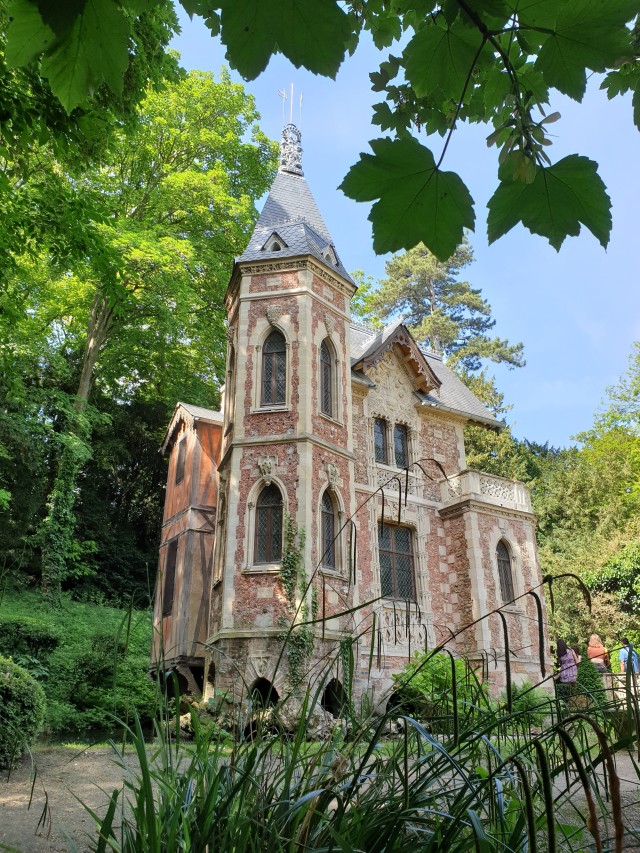 ALT
ALT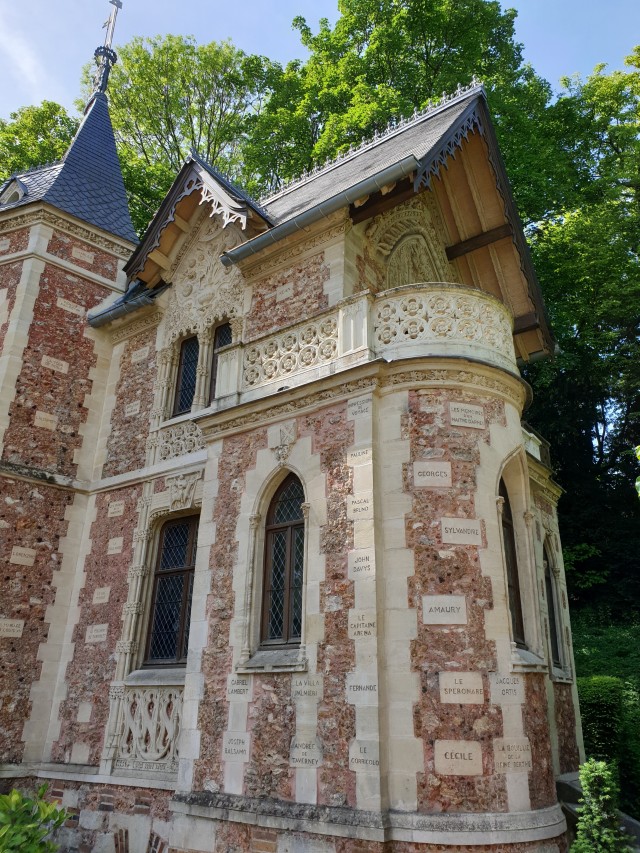 ALT
ALT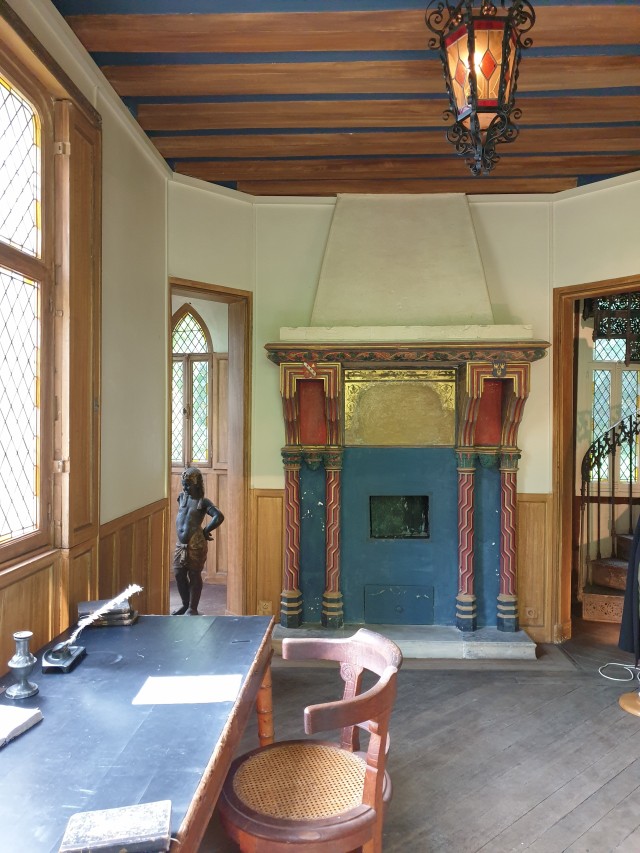 ALT
ALT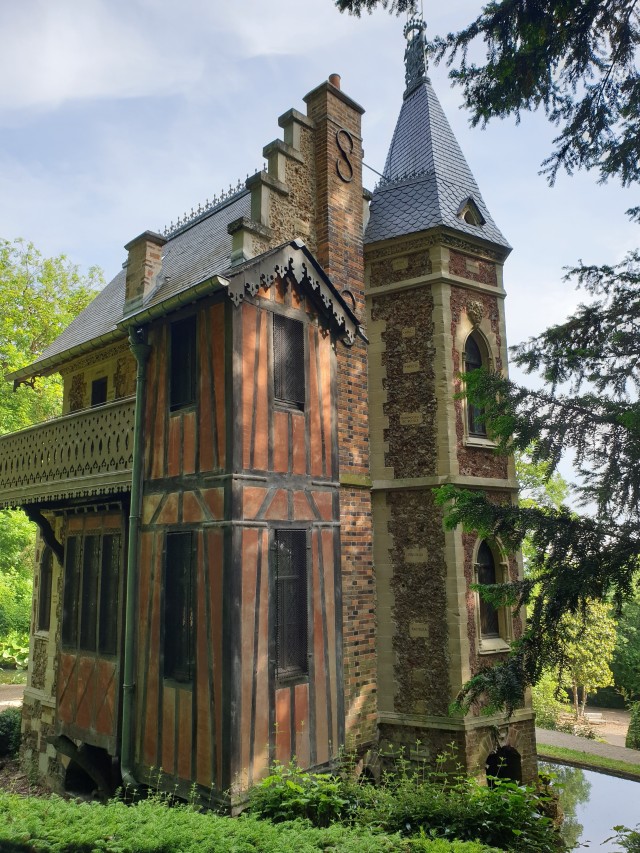 ALT
ALT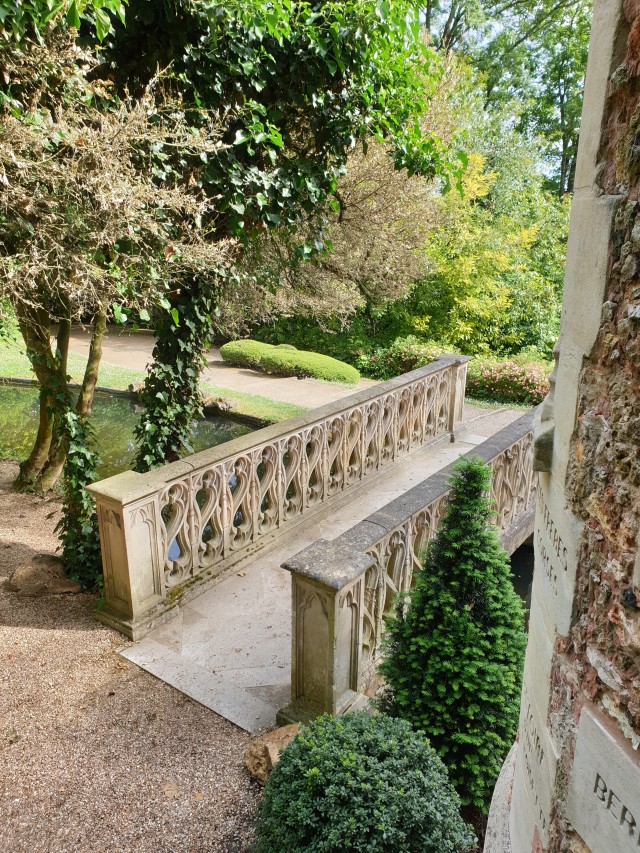 ALT
ALT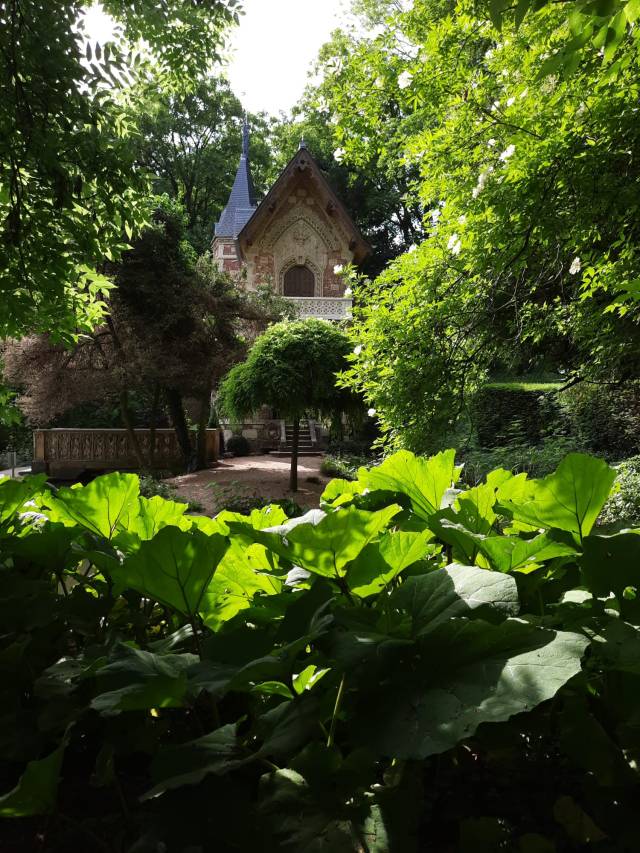 ALT
ALT ALT
ALT ALT
ALT