#bridges


January 05, 1933 - Golden Gate Bridge is born
“On January 5, 1933, construction begins on the Golden Gate Bridge, as workers began excavating 3.25 million cubic feet of dirt for the structure’s huge anchorages.
Following the Gold Rush boom that began in 1849, speculators realized the land north of San Francisco Bay would increase in value in direct proportion to its accessibility to the city. Soon, a plan was hatched to build a bridge that would span the Golden Gate, a narrow, 400-foot deep strait that serves as the mouth of the San Francisco Bay, connecting the San Francisco Peninsula with the southern end of Marin County.
Although the idea went back as far as 1869, the proposal took root in 1916. A former engineering student, James Wilkins, working as a journalist with the San Francisco Bulletin, called for a suspension bridge with a center span of 3,000 feet, nearly twice the length of any in existence. Wilkins’ idea was estimated to cost an astounding $100 million. So, San Francisco’s city engineer, Michael M. O’Shaughnessy (he’s also credited with coming up with the name Golden Gate Bridge), began asking bridge engineers whether they could do it for less.
Engineer and poet Joseph Strauss, a 5-foot tall Cincinnati-born Chicagoan, said he could.
Eventually, O’Shaughnessy and Strauss concluded they could build a pure suspension bridge within a practical range of $25-30 million with a main span at least 4,000 feet. The construction plan still faced opposition, including litigation, from many sources. By the time most of the obstacles were cleared, the Great Depression of 1929 had begun, limiting financing options, so officials convinced voters to support $35 million in bonded indebtedness, citing the jobs that would be created for the project. However, the bonds couldn’t be sold until 1932, when San-Francisco based Bank of America agreed to buy the entire project in order to help the local economy.
The Golden Gate Bridge officially opened on May 27, 1937, the longest bridge span in the world at the time. The first public crossing had taken place the day before, when 200,000 people walked, ran and even roller skated over the new bridge.
With its tall towers and famous trademarked "international orange” paint job, the bridge quickly became a famous American landmark, and a symbol of San Francisco.“
This month in History:
January 9, 1768 - First modern circus is staged
January 12, 1932 - Hattie Wyatt Caraway becomes first woman elected to U.S. Senate
January 19, 1809 - Edgar Allan Poe is born
January 27, 1945 - Auschwitz is liberated
Thiscolor postcard of the Golden Gate Bridge can be found in the online collection of the Marin History Museum.
Post link


Claude Monet in shades of purple | “Everyday I discover more and more beautiful things. I have such a desire to do everything, my head is bursting with it.” Claude Monet
Post link

Good Morning from Scotland
Queensferry Crossing from a 7 am flight leaving Edinburgh airport
suilven_731m on Instagram https://www.instagram.com/p/CdaZwvMqnUa/
Post link


Named after Giovanni da Verrazano, who, in 1524, was the first European explorer to sail into New York Harbor, the Verrazano-Narrows Bridge was the world’s longest suspension span when it opened in 1964. The bridge connects the boroughs of Brooklyn and Staten Island and provides the shortest route between the Middle Atlantic States and Long Island. [Photo: Julienne Schaer for NYCgo.com]
Post link


Bridges of New York City under construction. Each held the title of longest suspension bridge in the world when it was built.:
Brooklyn Bridge (1887)
Williamsburg Bridge (1903)
George Washington Bridge (1931)
Verrazano Bridge (1964)
Post link
A collection of photographs of Harpers Ferry, Virginia (now West Virginia), and the Potomac River taken between 1859 and 1861. These are some of the earliest photographs taken in Harpers Ferry. The photos were published by Edward Anthony and the New York Stereoscopic Company.

Pontcysyllte Aqueduct | by Tony Cowdrill


Not only do you have to be a bookbinder when you are a bookbinder, but also a graphic designer, craftsperson, leatherworker, printmaker, carpenter, jeweller, photographer and of course a miracle-maker!! My latest commission is finished and one more book has left the studio and is now happily with its new owner. Fortunately I didn’t have to trust the postal service for this one and was able to hand deliver it.
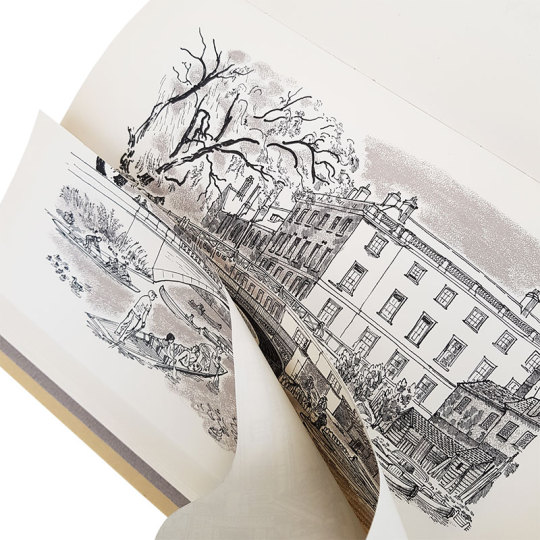
“Bridges on the Backs” was completed at the end of March. The book was printed in 1961 and formed part of a series of more than 34 books that were published by Brooke Crutchley at The University of Cambridge in between 1930 and 1958 as part of “A Printer’s Christmas Books” - the printing of these was the University Printer’s continued custom of giving a book to friends of the press at Christmas. The series was started by Walter Lewis and Stanley Morison in 1930. Brooke Crutchley was the University printer at Cambridge and oversaw the production of the Christmas Book series from its inception 1930 until its discontinuation in 1973. He gave a talk at St. Bride Printing Library in December 1975 at the opening of an exhibition of the Christmas books which ran from 10 December 1975 to 30 January 1976.
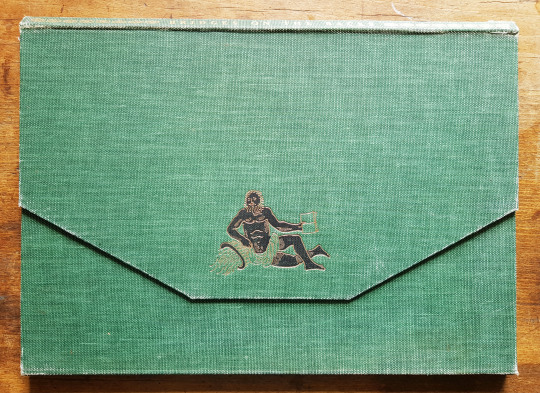
The book is a first edition, one of 500 copies printed in Monotype Times Wide on Spicer’s cartridge paper. Illustrated with 9 drawings, touched with colour, by David Gentleman, with another on the front endpaper and title-page. The original binding was a green canvas portfolio binding, lettered in gilt.
In the words of Brooke Crutchley, `”Bridges on the Backs is unique - it opens like a lady’s handbag; unique in other ways too and, I think, my favourite of the larger books, perhaps of them all. David Gentleman’s drawings are delightfully reminiscent of youthful Cambridge in summertime. Peter Eden in his text and captions carries his erudition with consummate grace, and the overlapping illustrations, a la Humphrey Repton, never fail to surprise.”
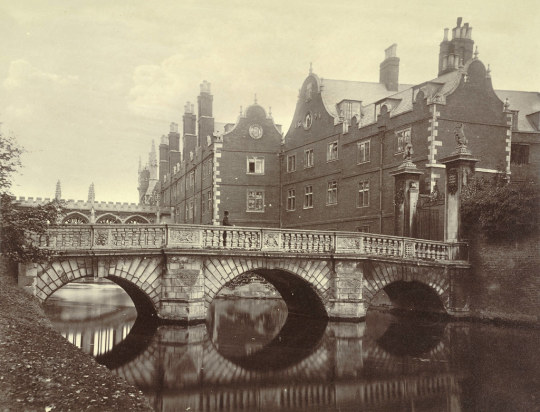
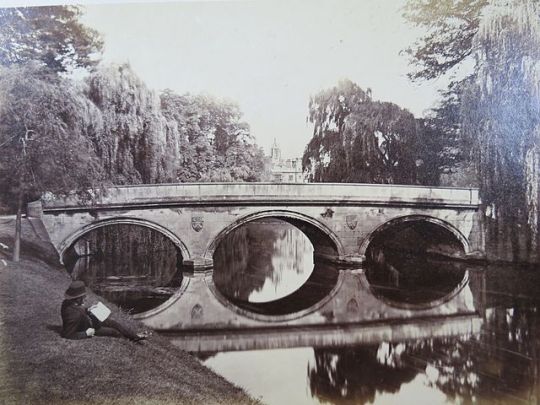
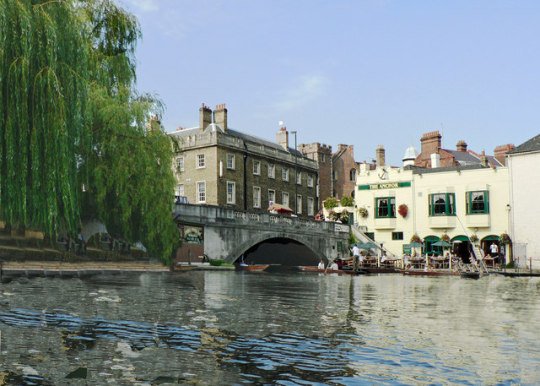
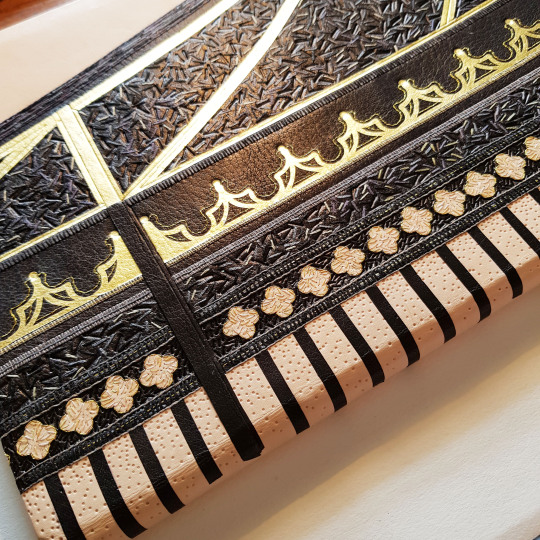
The nine illustrated drawings depict all the nine Bridges on The Backs, a picturesque area to the east of Queen’s Road in the city of Cambridge, England where several colleges of the University of Cambridge back onto the River Cam. The name “The Backs” refers to the backs of the colleges. Historically, much of the land was used by the colleges for grazing livestock or growing fruit. Cattle can still be found grazing behind King’s College. The river was also an important commercial thoroughfare to the mill at Silver Street.
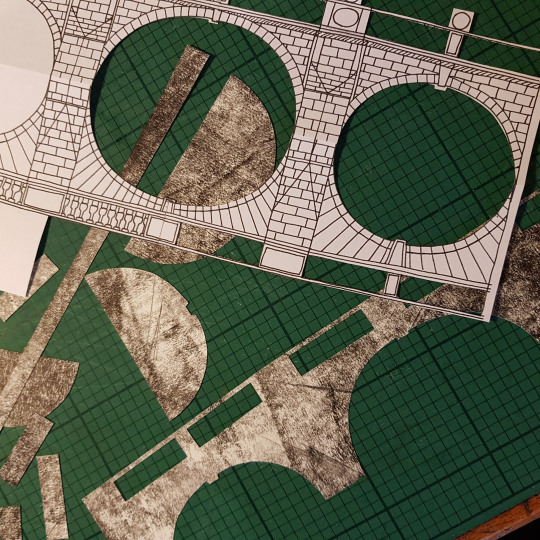
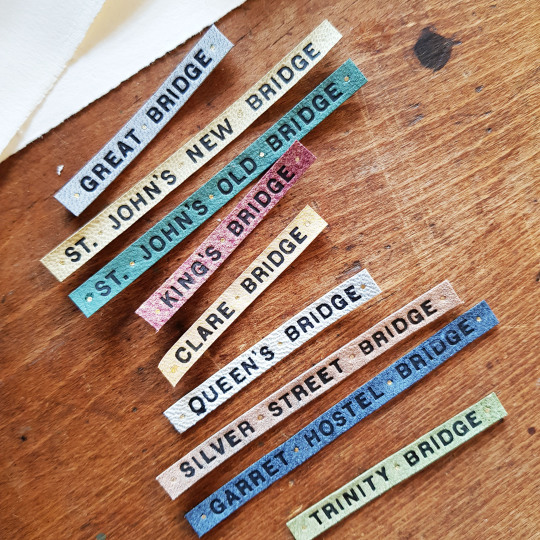
I wanted all of the bridges to appear in the binding and box in some way. I began by looking at images of each of the bridges online (unfortunately time didn’t permit me to visit Cambridge in person as I would have liked to do). The bridges are as follows:
Great Bridge (now known as “Magdalene Bridge”)
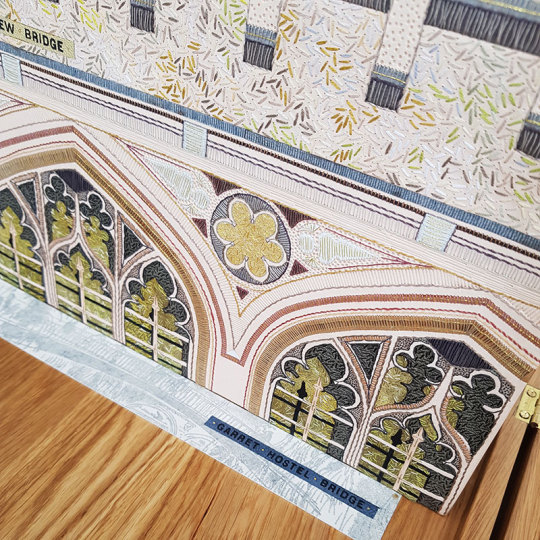
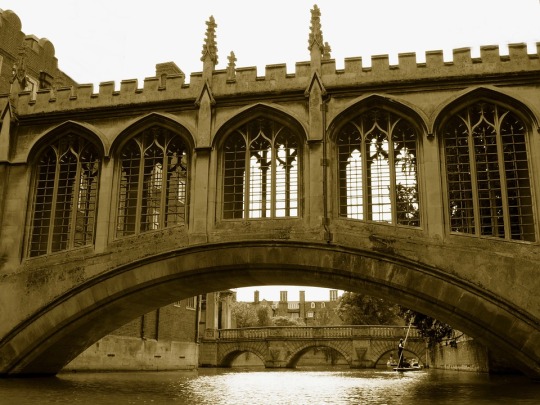
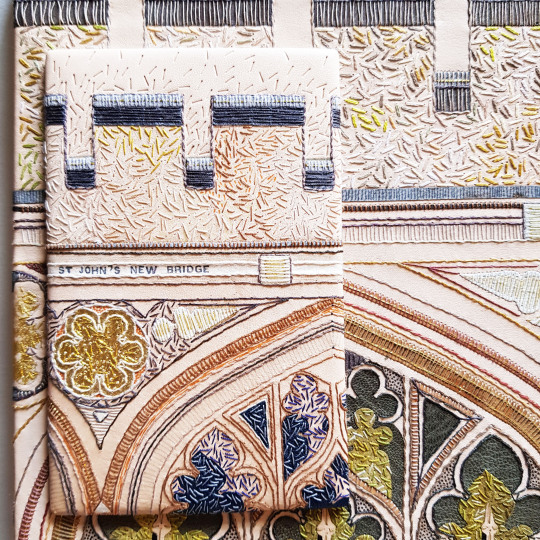
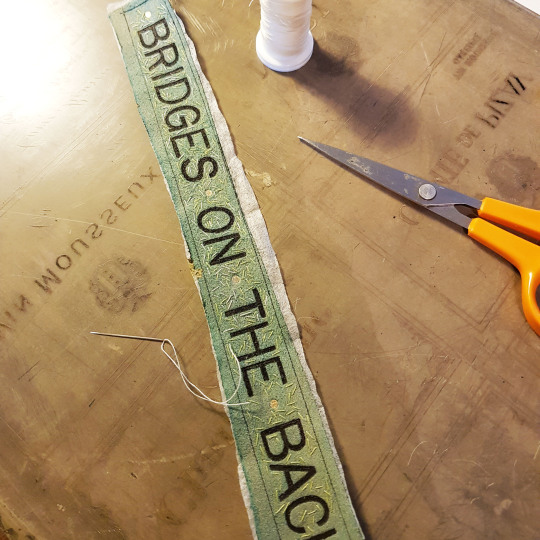
St Johns New Bridge (otherwise known as The Bridge of Sighs)
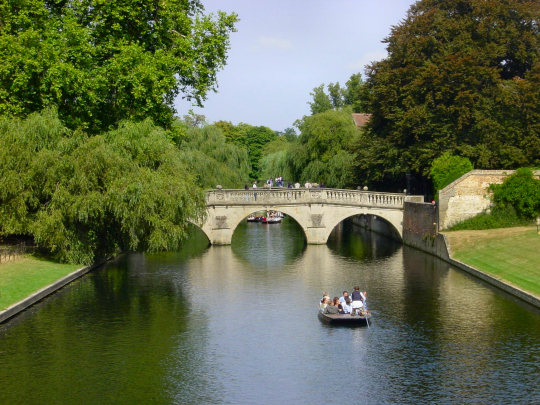
The beautiful bridge which crosses the River Cam at Trinity College dates from 1764 and was built by James Essex, a builder and architect who worked at many of the Cambridge colleges. It replaced a stone bridge built in 1651.
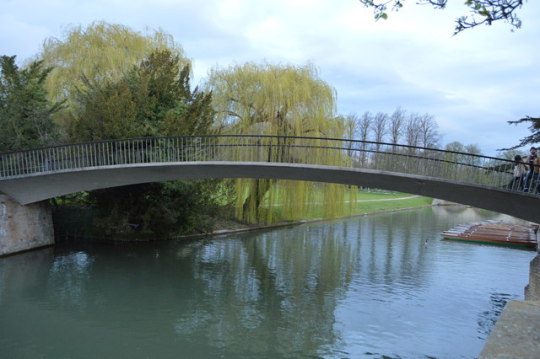
Garret Hostel Bridge

Queens Bridge (otherwise known at the “Mathematical Bridge)

Silver Street Bridge
The Silver Street bridge, designed by Sir Edwin Lutyens in 1932 built in 1958-9, it is an arch bridge that carries both vehicular and pedestrian traffic across the River Cam in Cambridge. It is a site of bridges dating back to the 14th century.
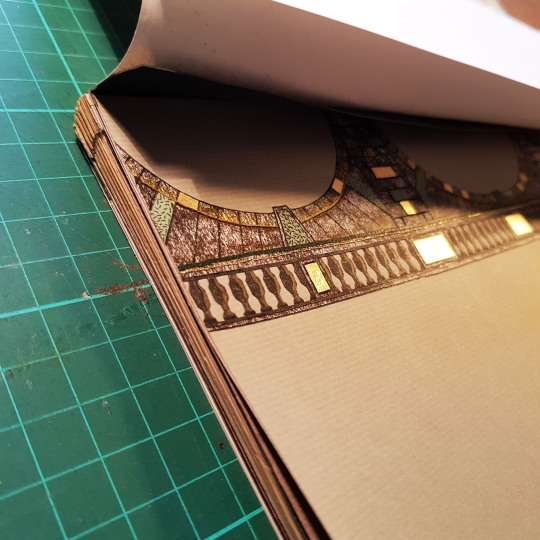
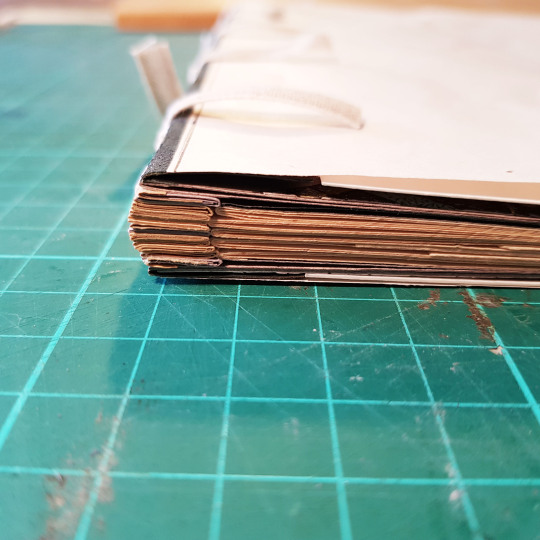
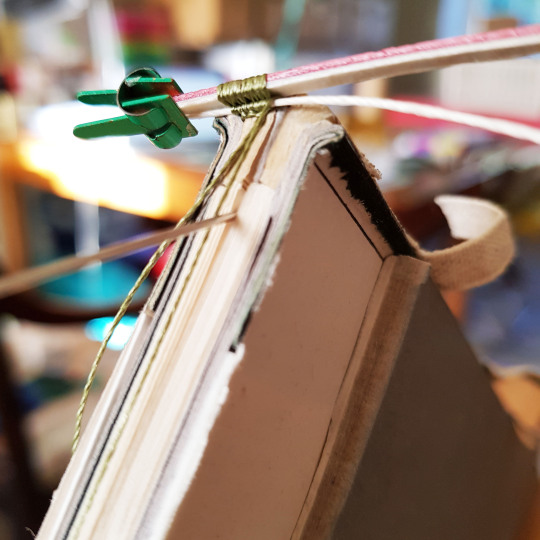
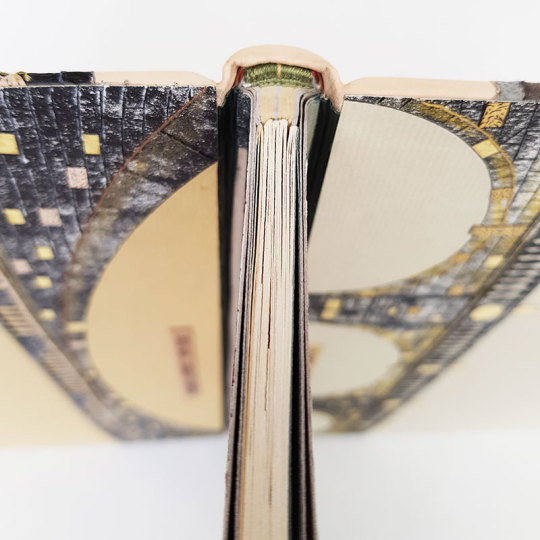
I had never bound a book in this format before, with the spine edge at the top of the text block - this led to some interesting design challenges. Because the book was an unusual structure, and the illustrated pages had additional flaps revealing how the bridges looked in previous incarnations behind each one, I wanted to make sure that the pages would open well to facilitate the opening of these flaps. I therefore chose to bind this as a stub binding.
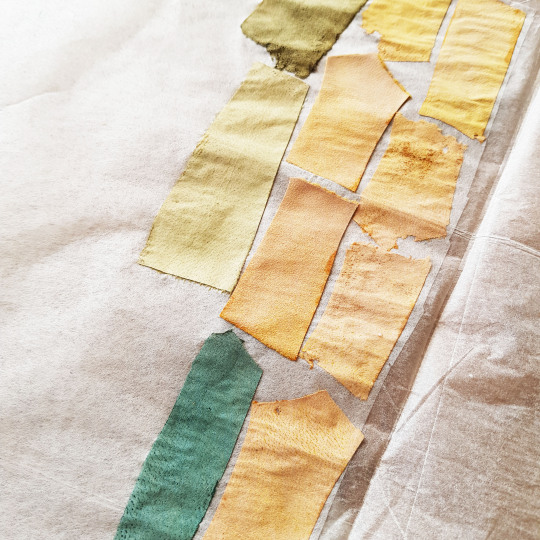
I chose papers to match the colours and tones of the illustrated drawings: grey and mustard yellow. As there was more bulk at the front edge of the book due to the tipped in flaps I had to compensate for this at the spine. I folded up stubs for each of the sections but also had extras in between these to make up for the difference in thickness. Initially the stubs were sewn to their relevant sections using linen thread.
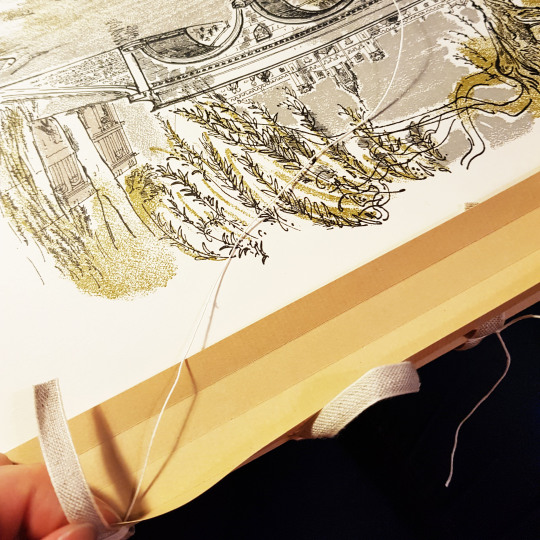

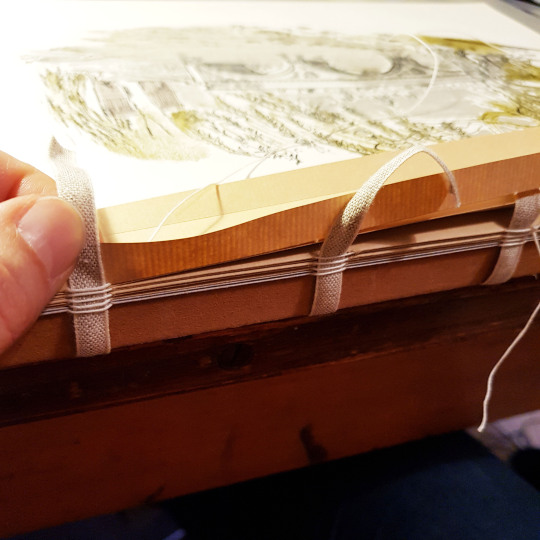
These stubs were then sewn together onto four tapes to create the text block.
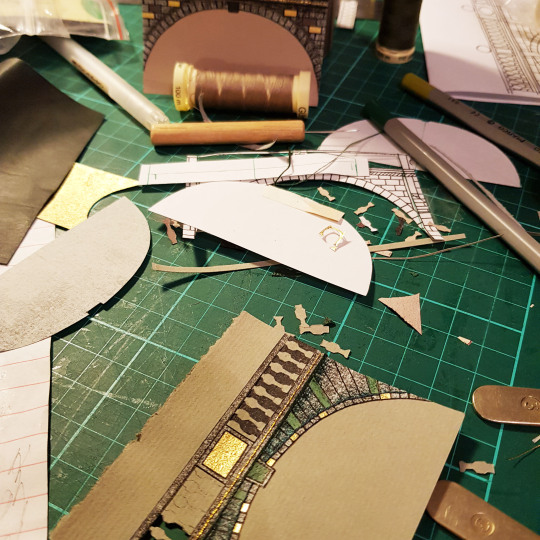
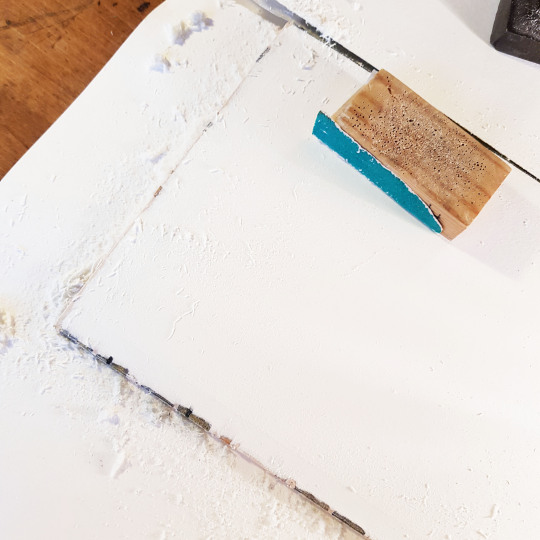
Once the text block was sewn up I started to work on my ideas for the cover design, endpapers and doublures. For each of my bindings I make a small sample board to test out ideas ahead of making the actual binding.
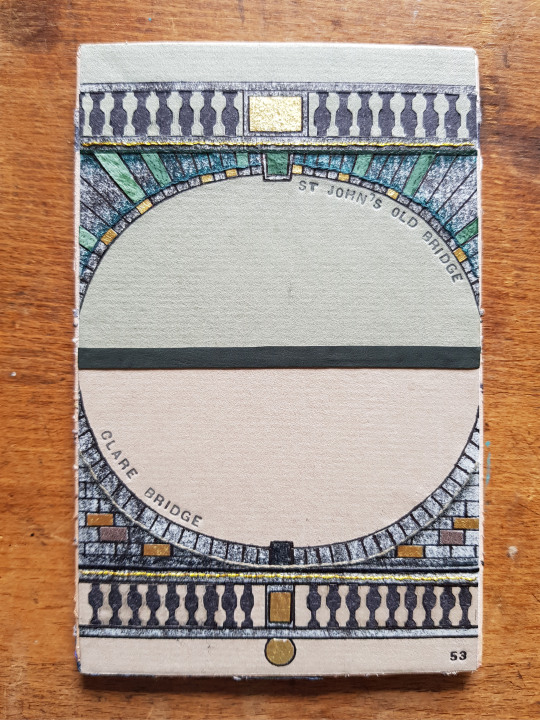
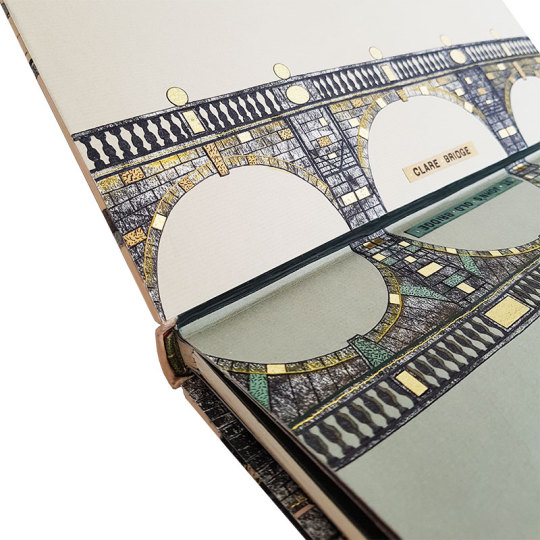
I looked at images of all the bridges, for the endpapers and doublures I wanted to “mirror” two bridges on each, so I paired up the bridges that best matched each other - for example Clare Bridge and St John’s Old Bridge each had three arches, and Silver Street Bridge and Kings College Bridge had one each so they were natural choices to go with one another.
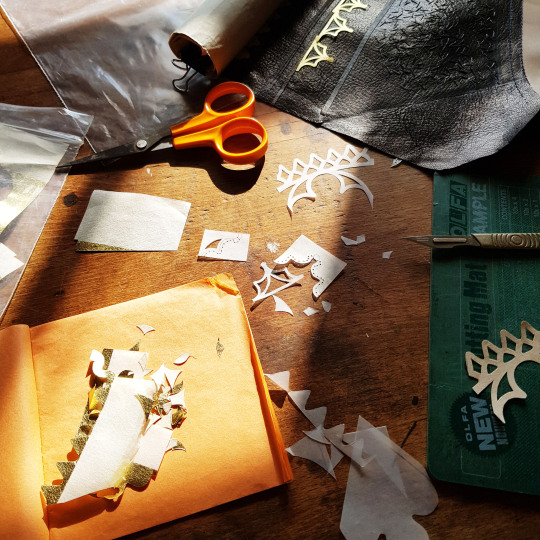
I drew line drawings of these bridges and then cut the silhouette of each out of paper that I had textured using a roller with black ink on top of a textured surface.
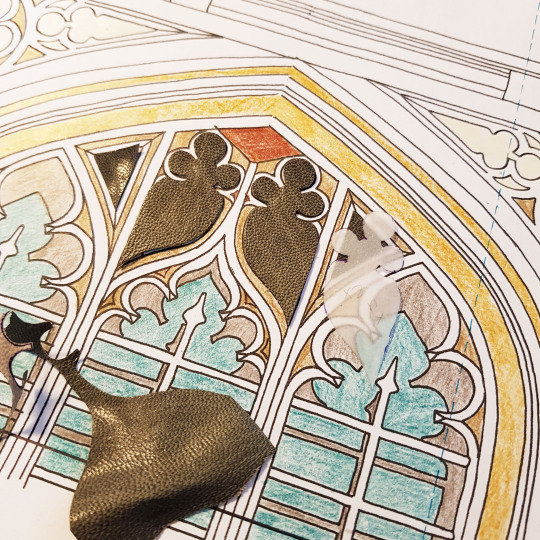
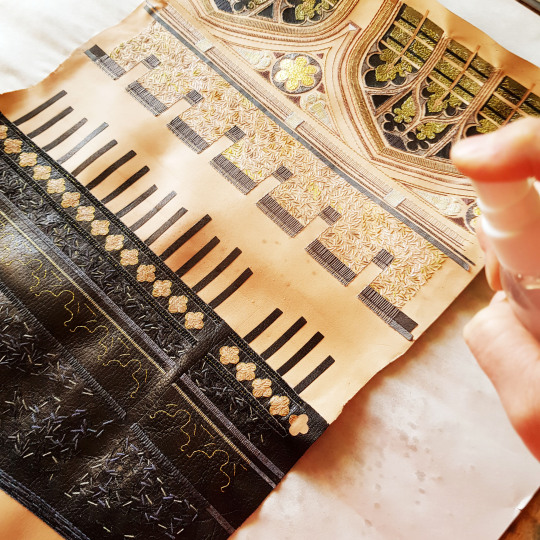
Further detail was added to these papers through the application of suede onlays, black paper cut-outs (for the pillars) and gold leaf that had been adhered to Japanese paper. In the below picture you see part of the doublure for the sample board being made.
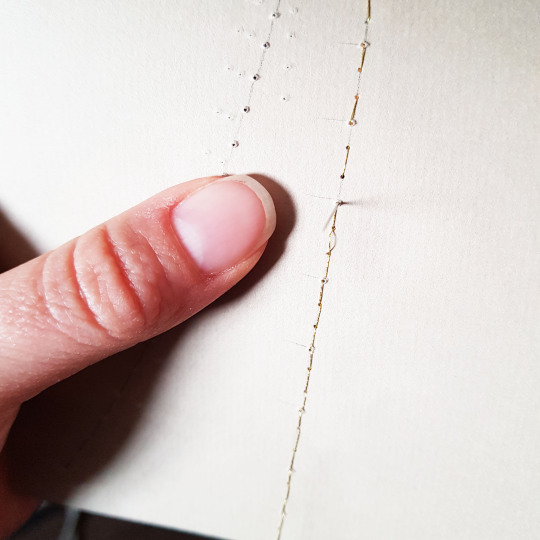
Lines were also embroidered through the paper. These holes were pre-pricked with a needle pricker through the front and then carefully embroidered using a running stitch. Care must always be taken when embroidering paper as it is prone to tearing. The thread was then whipped around with an additional thread on the front face of the doublure.
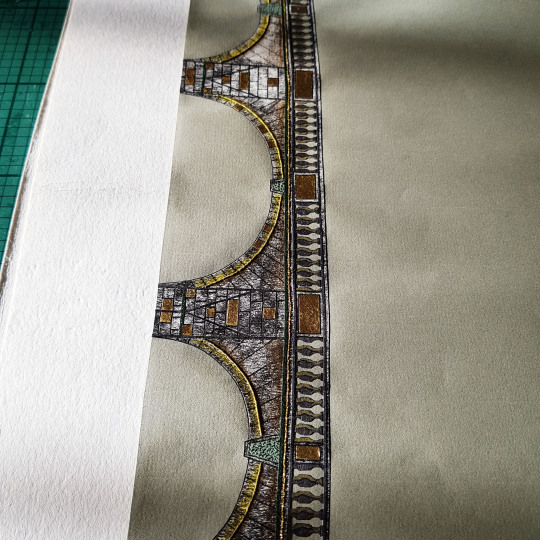
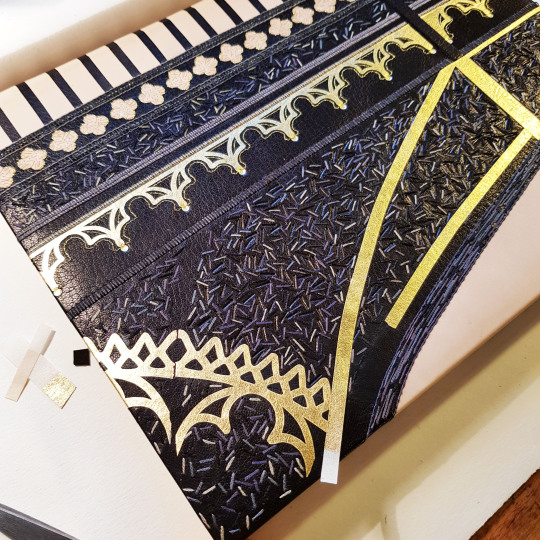
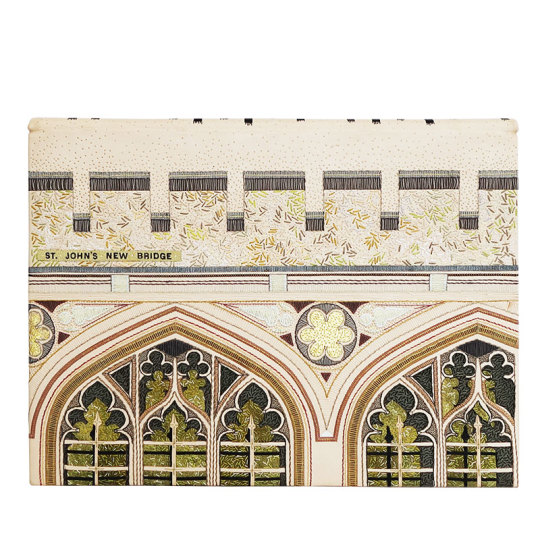
Once I had worked out which bridges to put on the endpapers and doublures I was able to choose which to have on the front and back covers of the binding. This was a binding of two halves, more so than any other I have ever done. The different format of this text block meant that the front and the back cover played different parts in the design, therefore I chose the two most contrasting bridges for on the front and back covers: St John’s New Bridge (The Bridge of Sighs) and The Great Bridge.
I thought that the Great Brdge would work well with the gold on black against the more ornate look The Bridge of Sighs. I started by using my light box to help draw the outline of the bridges.

I then pieced these together into a full cover design. At the time of drawing this design I wasn’t sure if I might want to join up the front and back covers across the spine in some way. With this in mind I scaled up the front and back images so that the lines of each, if carried across the spine, would meet with each other.
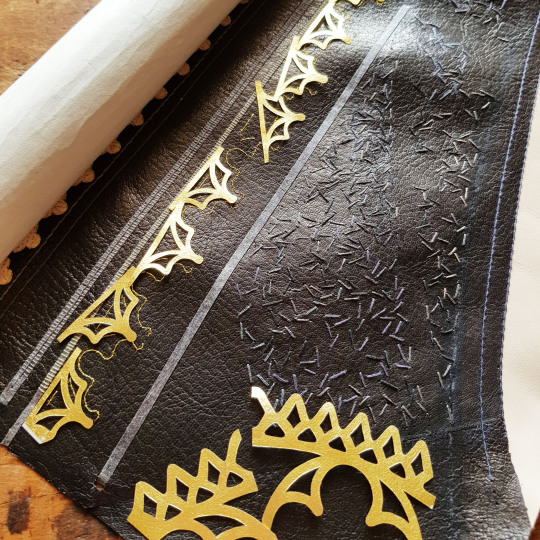
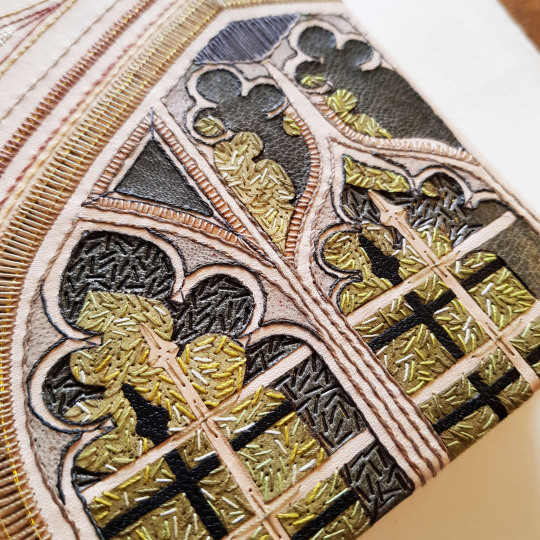
For the sample board I chose to trial the Bridge of Sighs part of the design. This particular bridge was built in 1831 and it named after the Bridge of Sighs in Venice. The design was built up using a variety of leather onlays, machine embroidery, hand embroidery and also onlays made by sticking gold leaf to Japanese paper.

This sample board is number 52 in my series.

Back to the text block, the endpapers were made up by laminating the illustrated bridge paper sheet to a plain bi-folded sheet, capturing a long, thinly pared, piece of leather (0.4mm) between the sheets at the edge - this would later get stuck down and become the leather joint.
A waste sheet and compensation guard were also added this endpaper unit to protect the endpapers during the rest of the forwarding and covering process. This endpaper could then be sewn to the text block.
The book block was then rounded with a backing hammer. I drew the thickness of the boards onto the outer waste sheet, plus a little extra (as seen below indicated by the thin black pen line). I then placed the book block into my backing boards to this line in order to make sure the shoulders were made at the correct place to allow the boards to sit perfectly within them.
The top and bottom text block edges were then sanded flat, and the foredge sanded into a round by wrapping some sandpaper around a piece of dowel of the correct diameter. Double-core end bands were sewn, the boards attached and bevelled at the edges. I was then ready to proceed with the leather work!
Given my choice of using two contrasting bridges on the cover design, this meant that I needed to scarf-joint two contrasting leathers together: black goat skin for The Great Bridge and fair calf for The Bridge of Sighs.
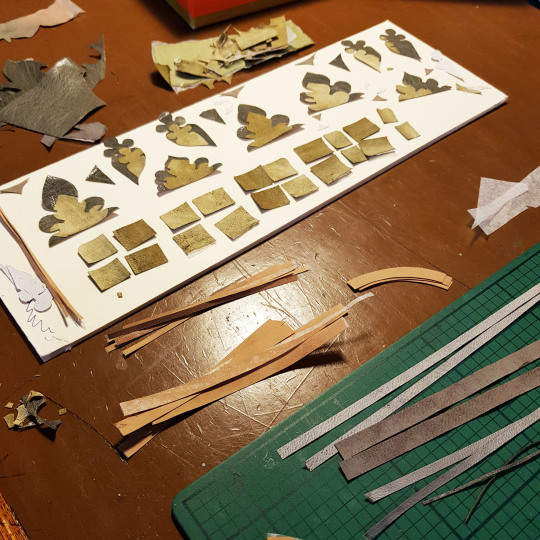
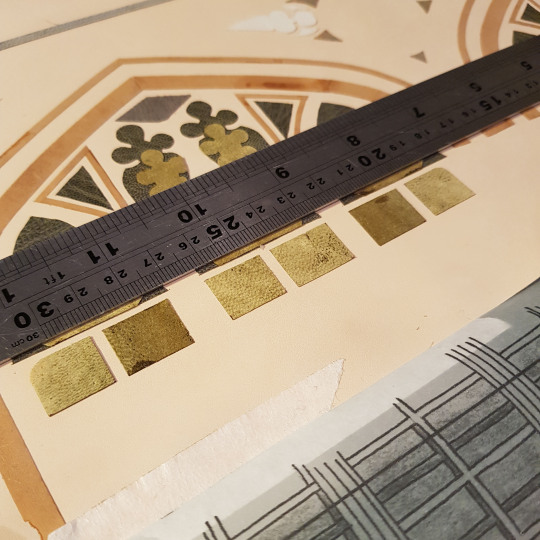
Onlays, and plenty of them! I don’t like to throw anything away so even the edge parings that come off the back of the leather after running it through my Brockman paring machine get kept. I back them into lens tissue and use them as onlays - it gives a whole new colour palette in addition to conventional onlays.

This book mainly used greens and greys, I adapted the colours I had used on the sample board (one reason i do the sample boards - to test colours out in advance!). I cut all of the shapes out using a scalpel and fine scissors.
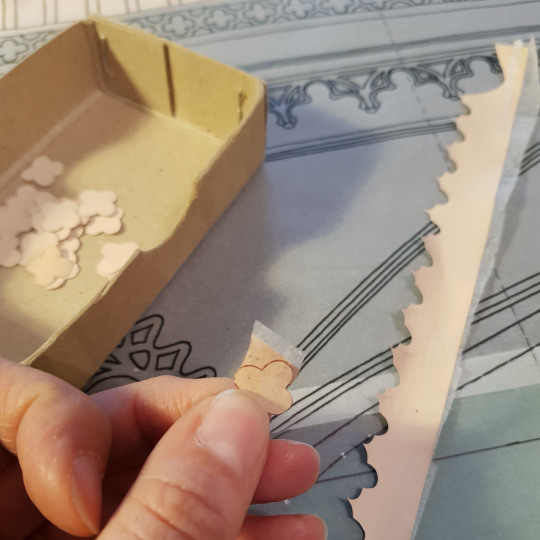
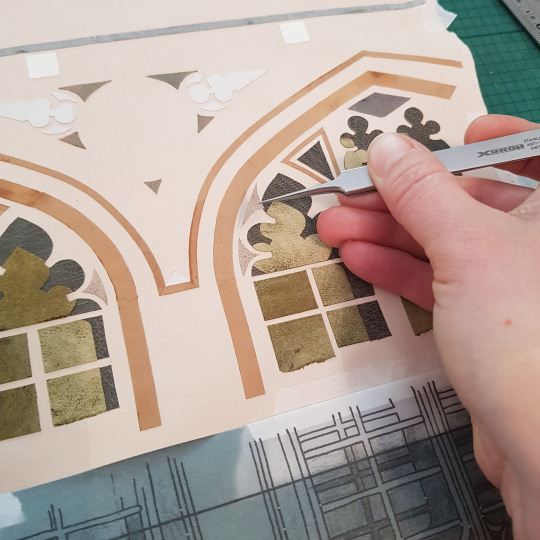
The onlays were glued down in place using PVA through a tracing paper template, using a ruler for extra accuracy.
I find my fine-pointed tweezers one of the most useful pieces of kit I own, perfect for picking up small pieces and getting then stuck down exactly where you need them to go!
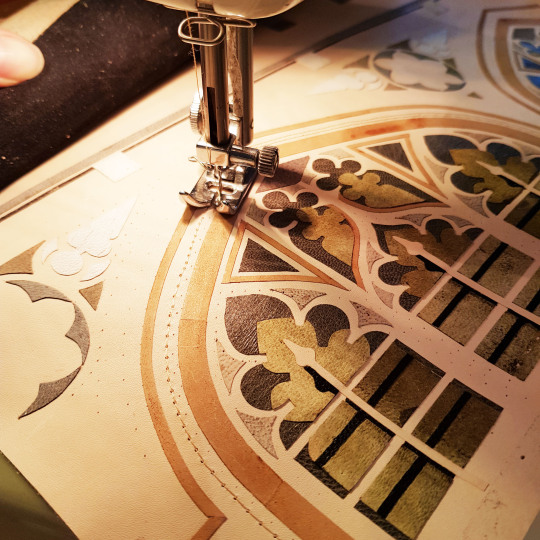
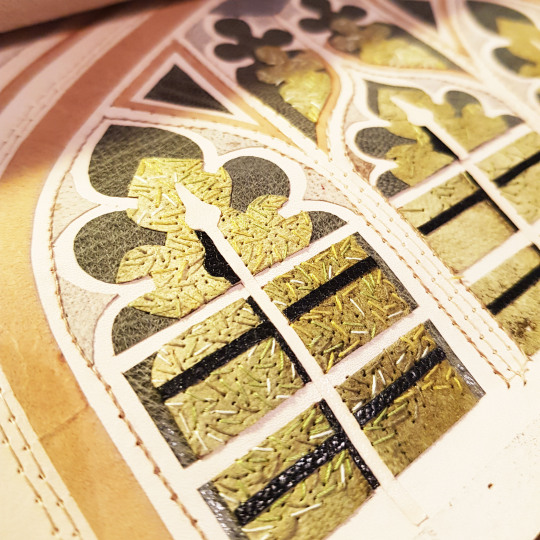
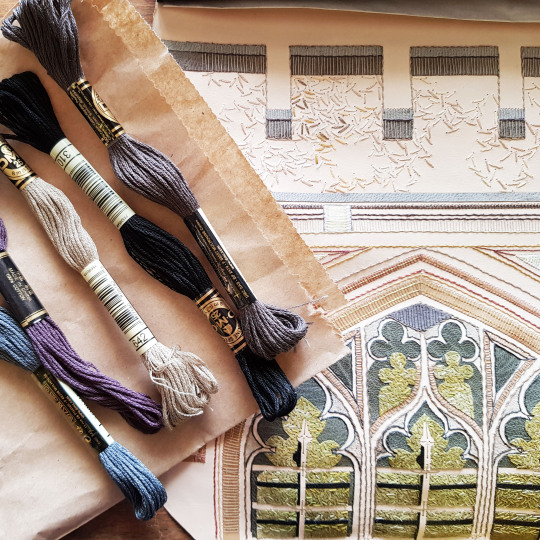
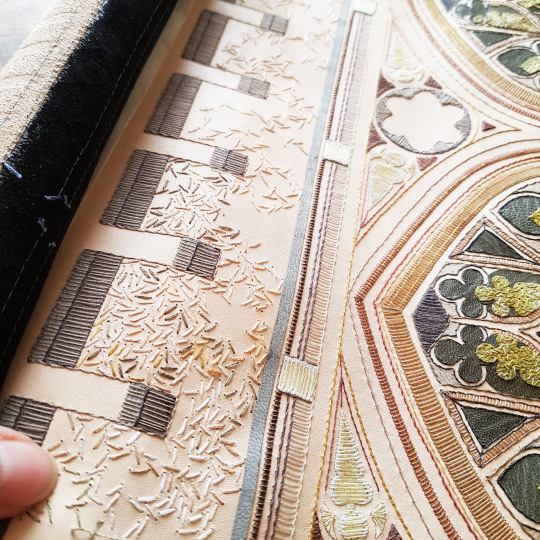
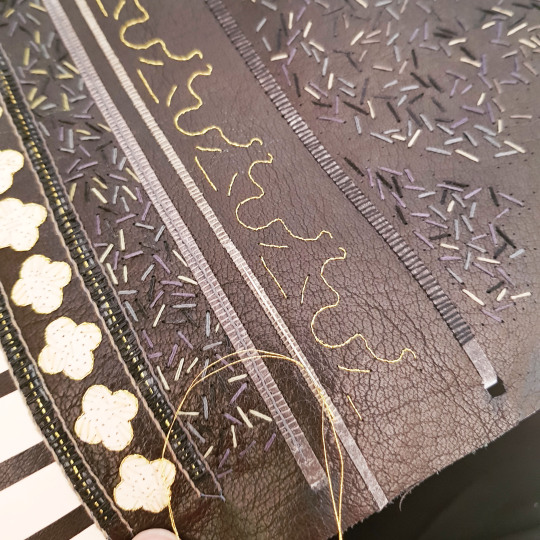
After the onlays and backparing came the embroidery, the bit I enjoy the most! For this binding I machine-stitched the multiple linear border lines to speed up the process and then whipped over the top of them with cotton threads.
Tiny flecks of different green threads were hand-sewn to break up the colour of the green onlays beneath.
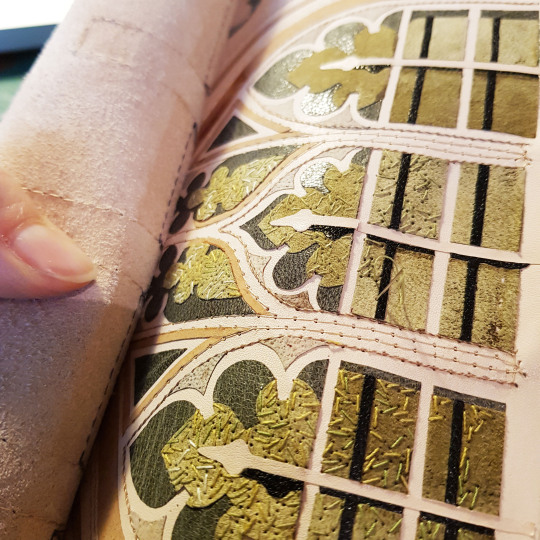
When embroidering a large piece of leather, it is not possible to use an embroidery hoop as the leather is too thick so I coil up the leather and hold it in place with bulldog clips at the top and bottom. This makes it much easier to handle.
As well as using cotton threads I also used slightly thicker skeins for the larger patches of detail.
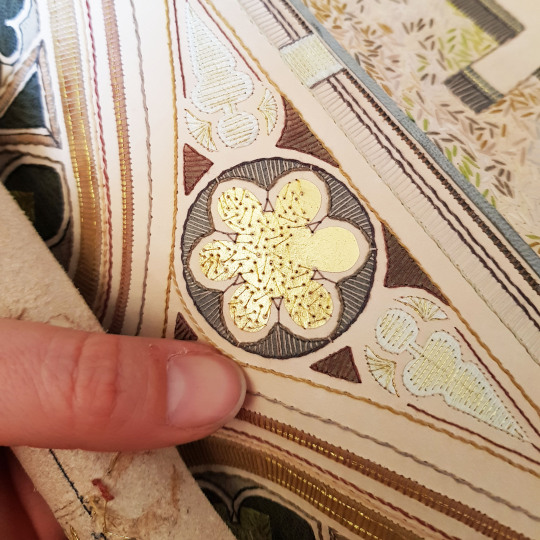
Plus you can’t beat a bit of metallic thread! This was embroidered over the onlays that were made from gold leaf stuck to Japanese paper.
I always love to capture what the back of the leather looks like post-embroidery, after all this won’t be seen ever again!

The same process applied to the Great Bridge side of the cover. The onlays were stuck down, back-pared and embroidered. I used a tracing paper template to prick where I needed to sew the metallic thread lines that would lie alongside the gold onlays - I was going to wait to glue these down once the book was covered (I will cover the reason for this later).
The actual Great Bridge has gold elements on a painted black behind so I naturally chose to depict these gold elements using gold leaf. The gold leaf was stuck to Japanese paper squares using PVA glue. I then cut out the required onlays and put them to one side until the book had been covered.
Because it is necessary to dampen the leather when covering the book, I decided to stick on the gold onlays after the book had been covered, to avoid damaging the gold.
So, with all of the embroidery complete it was time for covering!
The text block had been bevelled and back-cornered in preparation. The text block was capped up with paper and cling film to avoid moisture getting to the text block during the covering process.
The leather was dampened with a water atomiser ahead of pasting the back out with home made paste. The dampening was done to prevent any marks on the front of the leather due to the paste being drawn through unevenly.
The book was left to dry between blotters overnight, changing the blotters regularly to draw out the moisture. The following day I was able to open the book up and lay down the leather joints. Once these were down the back of the boards was infilled with watercolour paper, then a layer of Zerkall paper. This was then sanded flush. The surface was then ready to have the decorated paper doublures stuck down onto it.
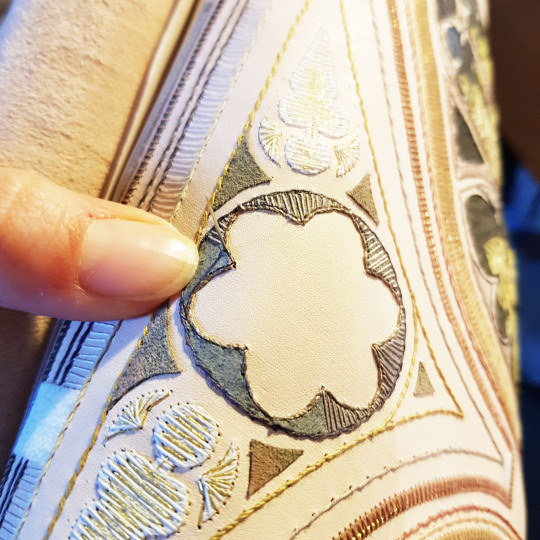
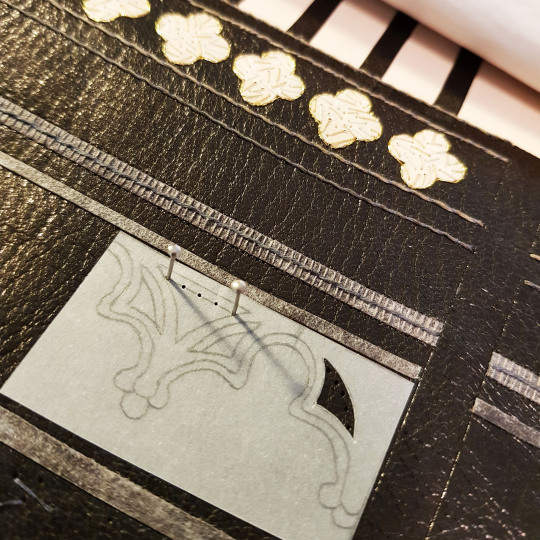
I then added some blind tooling detail in between the sewn lines using a hand-made finishing tools.

Plus I also added more detail using carbon tooling within the window spaces of The Bridge of Sighs.

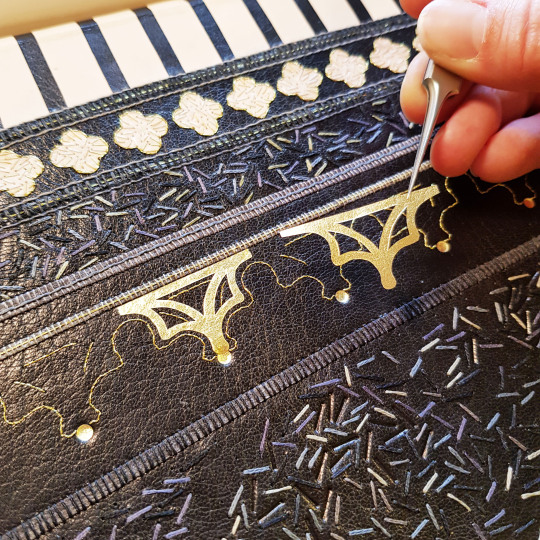
Once the binding was dry it was also time to add the gold detail onto the Great Bridge section of the book. I first gold-tooled some circles directly onto the leather. The decorative gold onlays were then stuck down within the metallic thread lines I had sewn previously before the book was covered.
Here shows the sample board on top of the covered book - the differences in the colour of the leather onlays and sewing threads are apparent.
The final part of the tooling process was to tool each of the bridges names on a coloured leather to correspond with the appropriate part of the book or box.
A title was also carbon tooled to go onto the lid of the oak box the book was to be housed in. This was then embroidered with small flecks of different green threads, like on the book cover.
It was then time for photography! I take all of my own photos now in the conservatory of our house as the light is by far the best there than anywhere else in the house.
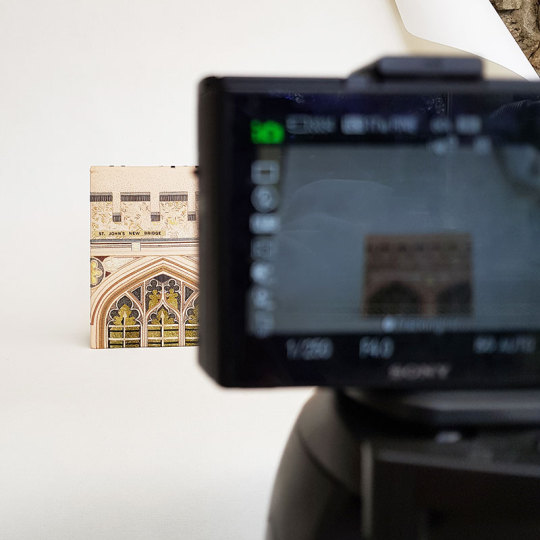
With a “standard” binding I would take a photo of the book with both covers open, however it doesn’t really work for this book as the orientation is wrong!

FRONT OF BOOK: St John’s New Bridge
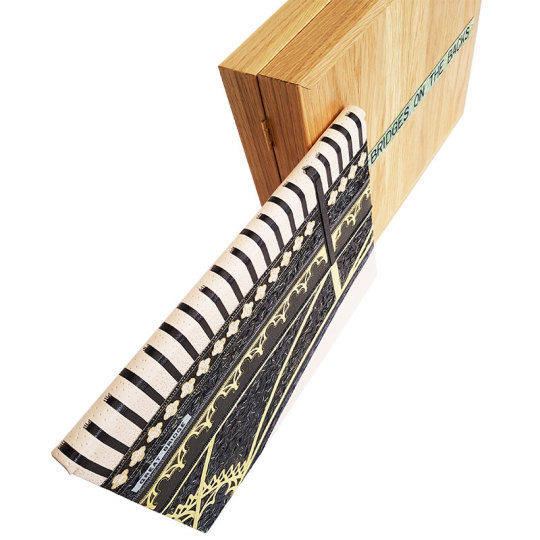
BACK OF BOOK ALONGSIDE OAK BOX: The railings of the Great Bridge were carried over onto the spine of the book, with the ends feathered out using little carbon-tooled lines. the box was made from oak with the title strip stuck to the front.
THE HEADBANDS:
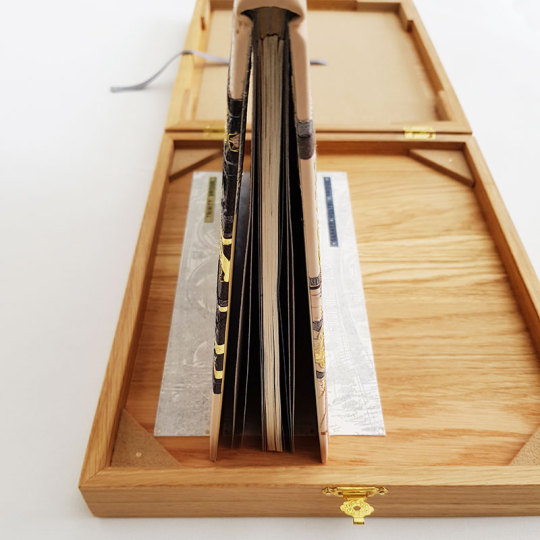
THE BOX: The box was made so that the book could sit open for display within grooves in the box lid. There are six of the nine bridges illustrated on the binding. Images of the three bridges I couldn’t fit in sit in the box creating the grooves for the book to stand upright in!
DETAIL OF THE FRONT ENDPAPERS AND DOUBURES: With rather unexpected luck, this commission was being gifted as a wedding present. The couple met at Cambridge University and so happened to be at Clare College and St John’s College respectively - the two bridges I had mirrored inside the front cover!!
To see these photos and more please visit my website here.
Book Review: Flash Evans Camera News Hawk
Book Review: Flash Evans Camera News Hawk
Book Review: Flash Evans Camera News Hawk by Frank Bell
Seventeen-year-old Jimmy “Flash” Evans is an ace photographer for the Brandale Ledger, his home town’s only daily newspaper. His new steady income has been a blessing to his family since his father died during the Depression. In fact, the Ledger’s management has been so impressed with his performance that they’ve offered him a full month’s…


Hi all! I’m selling prints of my photos now through Darkroom! Check me out at www.stacynetheryphotos.darkroom.tech/
.
.
.
#photo #photos #photography #photograph #photographs #darkroom #darkroomphotography #prints #buyprints #nature #city #bridges #sony #sonyalpha #sonyalpha6000 #sonya6000 #nikon #nikonD90 #D90 (at Morristown, New Jersey)
https://www.instagram.com/p/CAn3N8WpF8_/?igshid=fnqeas3g0yaz
Post link


It’s been a really long time since I’ve updated anything on this blog - I’ve been extremely busy since the summer doing freelance editing on top of my regular job and haven’t gotten a ton of chances to go out shooting or spend time on my own stuff.
Back in October, I was lucky enough to snag some time off and cheap tickets out west to visit friends in Oregon again! I didn’t take that many pictures this time around since it was mostly a chance to see friends, but I’m pretty happy with the ones I was able to get! We went to Silver Falls State Park and saw the waterfalls, and also went down to the shore at Newport for a day! It was a trip that was very much needed, but unfortunately I was chucked right back into the grind when I got back and haven’t had the time to properly go through the pictures I DID take until now.
Images taken with Canon 6D, 24-105mm lens, Rokinon 14mm lens.
Images © Joseph Fox, 2016.
Post link