#condiment
Last week’s voting products are now live! Comment on your favorite to get $10 in store credit. Vote here: Product Voting
—-
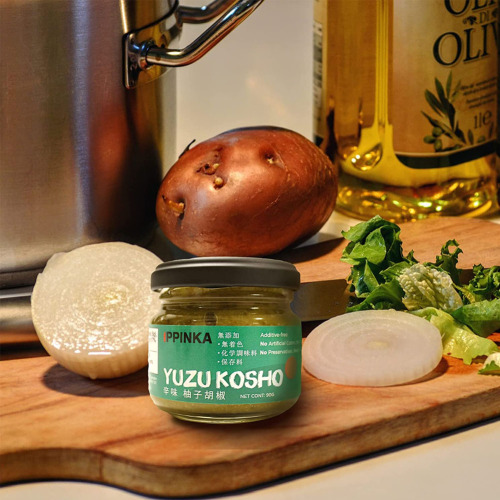
Spice up your meal with this amazing and perfect seasoning made by combining green yuzu rind, green chili peppers, and sea salt. This favorite toothsome Japanese condiment gives off a sublime aroma of both spice and yuzu. An all-natural and non-GMO condiment, it is carefully handmade in small batches to preserve its quality, producing the best taste and flavor.
Post link
MIXED BERRY JAM
(From StH)
https://www.suburbansimplicity.com/homemade-mixed-berry-jam/
Ingredients:
- 4 cups raspberries
- 4 cups blackberries
- 4 cups blueberries
- 3 cups sugar
- ¾ cup fresh lemon juice
Directions:
- Have ready 6 hot, sterilized half-pint jars and their lids.
- Place the berries and sugar in a large bowl. Gently stir together and let sit for 10-15 minutes.
- In a large nonreactive saucepan, gently stir together the berries and lemon juice. Bring to a boil over medium-high heat, reduce the heat to medium and cook, uncovered, stirring frequently and removing any foam, until the jam has thickened, about 15 minutes. It will continue to thicken as it cools.
- Ladle the hot jam into the jars, leaving ¼ inch of headspace. Remove any air bubbles. Wipe the rims clean and seal tightly with the lids.
- Put the jars in a boiling-water bath for 10 minutes. Make sure the jars are covered in water. The sealed jars can be stored in a cool, dark place for up to 1 year. If a sealed has failed, store the jar in the refrigerator for up to 1 month. Makes 6 half-pint jars.
Post link
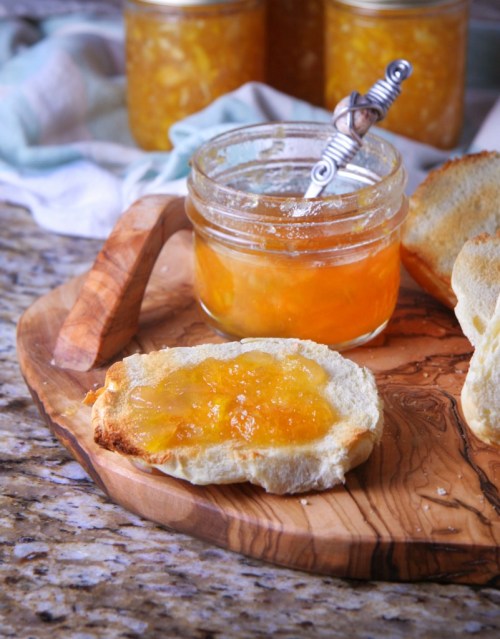
PEACH APPLE JAM (Phurum Jam)
(From AWL)
http://portandfin.com/heavenly-jam-peach-pear-apple-ginger/
Ingredients:
- 12 peaches, peeled and pitted (8 cups macerated)
- 12 apples, peeled and cored (8 cups macerated)
- 12 pears, peeled and cored (8 cups macerated)
- 24 cups sugar (1 cup of sugar for each cup of fruit)
- Fresh ginger- a knob the size of your thumb, grated
Equipment:
- 1 very large stainless steel pot
- 1 food processor
- 1 long stem stirring spoon
- Sanitized mason jars and lids
- Tongs
- Wide funnel
- Ladle
Directions:
- First, you will want to clean out your mason jars. There are several methods for doing this, but I like to take a short cut and run them through the dishwasher on the ultra-hot ‘sanitation’ setting, which also heat dries the jars. Do ensure your jars are dry before canning with them.
- To peel the peaches, bring a large pot of water to a boil. Slice a small 'X’ into the skin on the bottom of each peach. Place the scored peaches into boiling water for 30-40 seconds then shock them in a bath of very cold or ice water. The skins should peel off quickly and easily. Quarter the fruits, remove the pits and whiz them through the food processor. You should have roughly 8 cups of macerated fruit. Pour chopped peaches into your large jam pot.
- Peel apples and pears with a vegetable peeler. Quarter and core fruits and blitz through a food processor in batches, similar to how you cut the peaches- small chunks are okay but try and get any larger pieces broken up. You should have roughly 8 cups of chopped pear and 8 cups of chopped apple. Add both to the jam pot.
- Add 24 cups of sugar (1 cup for each cup of fruit) and grated ginger and stir well. On the stovetop, turn the heat on the jam pot up to high, stirring frequently to ensure the bottom doesn’t burn. Once the fruit has come to a boil, turn the heat down to med-low and simmer for 40 minutes or so.
- Using a spoon and a little bowl, skim the 'foam’ that forms on the top of the jam as it is simmering. This 'jam waste’ is cloudy but still delicious and is a great way to test for flavour and adjust the ginger to your palette!
- When the jam is ready, the colour will have darkened slightly to a beautiful gold and the bubbles coming to the surface with 'burp’ slowly, indicating a good thickness.
- Fill a small saucepan with water and bring the water to a boil. Place the center lids of your mason jars (with the rubber seal) in the boiling water to sanitize them.
- Using a ladle and a wide funnel, pour your jam into one of the sanitized mason jars. Using a moist cloth, wipe down the edge of the jar to ensure a tight seal. Using tongs, lift one of the mason jar lids out of the boiling water and place on top of the filled jar. Screw on the outer lid tightly and set aside. Repeat with the rest of the jars until all the jam has been canned. As you go through this process you will begin to hear a satisfying 'popping’ noise as the hot jars seal themselves- that’s a good thing! A 'pop’ means the jar is well sealed and the jam will keep well in a cool dark place for up to a year or two!
Post link
This question originally aired on December 29, 1989
Answer:Mango
http://www.triviabistro.com/JeopardyQuestionImage.aspx?QuestionID=28285
#
Post link

