Made some Eevee chocolate truffles, complete with fluffy tails and little toes! Filled with cappuccino white chocolate ganache, just because I like nicknaming my Eevees after foamy coffee drinks ☕
Bonus throwback to my first Eevee truffles from August 2018! Time really flies
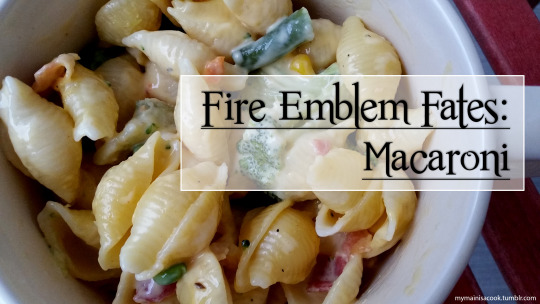
The weather has finally taken a turn for the colder in most places, so I think it’s right to share some warm comfort food today. To keep this from being a boring old recipe for macaroni, I combined the idea of veggie chowder (also a feature of Fate’s Mess Hall) with the mac and cheese (the daikon radish is optional, but if you’re feeling adventurous, go for it!) Gather around the Mess Hall for some stat boosting goodness!
~Ingredients~
1 cup Milk
8 - 12 oz. Melt-friendly Cheese
Spices, to taste: Salt, Pepper, Paprika, Cayenne (optional)
Mixed Veggies, fresh or frozen: Daikon Radish (optional), Broccoli, Carrots, Corn, Peas, String beans, Red Bell Pepper
2 cloves Garlic, minced
16 0z. Macaroni Pasta
Prep Time: <10 min. | Total Cook Time: ~30 min.
Makes: 4 - 6 servings
~Instructions~
Step 1.) Prep you veggies: If fresh, cut and dice your broccoli, carrots, bell pepper, and string beans to appropriate sizes. Whether or not you are using fresh or frozen, you will likely want to steam your veggies prior to adding them to the macaroni. Do so by bringing some water to a boil. Place a steamer or metal strainer over the water and add the veggies. Set the heat to medium and cover to steam for 6 - 8 minutes. Set aside.
Step 2.) Fill a pot with water and set on medium-high to bring to a boil. When the water is ready, cook the pasta as per instructions on the pasta packaging.
Step 3.) While the water is heating, start another pot on medium-low heat. Fill this pot with the milk and start with 8 oz. of cheese cut into small cubes. Stir occasionally and keep the pot covered until the cheese begins to melt. Add cheese as desired until optimal cheesiness is achieved (always err on the thinner side, since the cheese will thicken as it cools.) Whisk in the spices and minced garlic and keep warm until the pasta is ready.
Step 4.) When the pasta is cooked and the water drained, add the pasta and veggies to the cheese and mix to coat. Serve hot and enjoy!
~Results~
I mean, what’s not to love about cheesy comfort food? The addition of the veggies rounds it out very well as a meal (and if you have picky carnivores like my roommates, you can always add in a little extra something to entice them.)
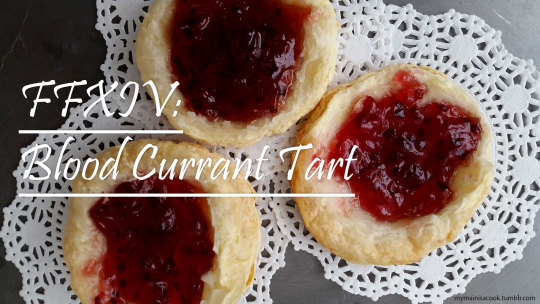
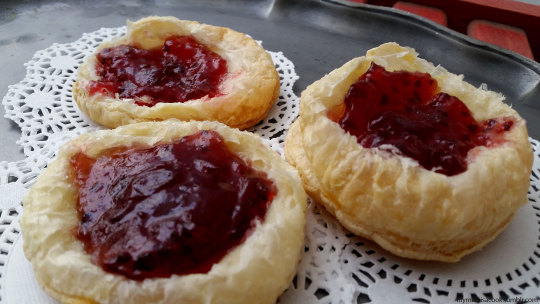
I waffled for waaaaaay too long on @salroase2 ‘s request, because I didn’t want to settle for a rolandberry cream cheese spread but fresh red currant berries are REALLY hard to come across. But then I looked closer at the recipe and realized the gelatin was likely to create jam or jelly from the currants and I felt stupid - mostly because currant jelly is so much easier to find. Once that was resolved I was able to get my hands on some and OFF WE WENT.
These particular tarts are something I like to call pull-apart tarts. Essentially, you bake the circles of puff pastry in the oven, allowing them to puff up tall. Then, you split the puffed bread into segments, resulting in a bunch of bite-size puff tarts.
Let’s go!
~Ingredients~
2 sheets Puff Pastry
1 jar Red Currant jam or jelly (~12 oz.)
1 Egg, beaten
(Optional) Powdered Sugar or Whipped Cream, for topping
Prep Time: <10 min. | Total Bake Time: ~ 30 min.
Makes: ~24
~Instructions~
Step 1.) Preheat the oven to 400°F. Beat the egg in a bowl and set aside.
Step 2.) Use a circular cookie cutter to cut the puff pastry into circles (I used a cookie cutter approx. 2.5-3″ in diameter.) Score the sides of the circles with a fork for maximum puffiness, if desired. Brush the tops of the circles with beaten egg and bake for about 15 - 20 min. or until the tops are a light to medium brown.
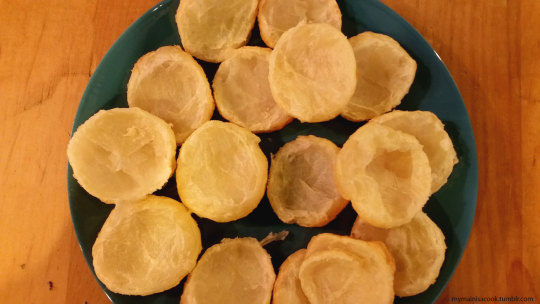
Step 3.) Allow the circles to cool for a couple of minutes, then comes the fun part! Each of the circles should have puffed up considerably, and should have some clear segmentation in the puffs. Target these segments and pull them apart horizontally so you have a bunch of thinner disks (I think the most segments I got out of a single circle was 4 segments). Don’t try to pull apart the puffs if they don’t look like they’ll give, I destroyed a few that way (they were delicious by themselves). When you’re done, you should have an ample number of puff disks like pictured below. Repeat steps 2 and 3 for any remaining batches of puff pastry.
Step 4.) Once the puff pastry has cooled a bit more, fill in the circles with spoonfuls of red currant jelly/jam. Don’t be surprised if you use up the entire jar. Top with powdered sugar or whipped cream if desired, and enjoy!
~Results~
Sweet, simple, delicious, and containing a very satisfying crunch! The roommates where chomping at the bit for me to photograph them so they could devour them all!
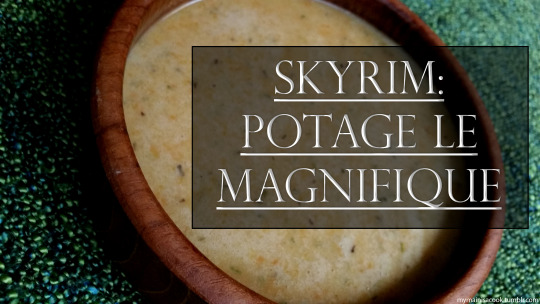
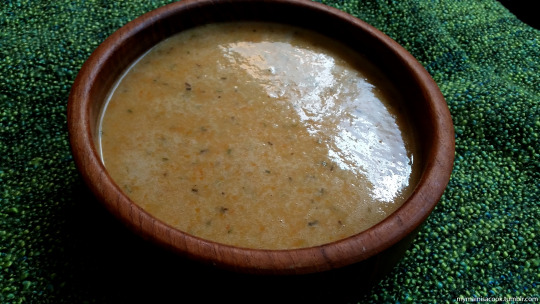
This request from @midasesquivel has given me the run around for far too long. I spent a while trying to find the right flavor mixture, starting to add more and more unnecessary ingredients. But one night I sat down and looked at everything again my epiphany came down to this: nothing beats roasted garlic (the only addition I decided worth keeping) and caramelized onions for feel-good flavors in a soup. And I’m glad I took my own advice because I can finally present Skyrim’s Potage Le Magnifique!
~Ingredients~
2 cups Chicken Broth
2 cups Beef Broth
1 small White Onion
1 bulb of Garlic
2 cups diced Carrots
4 tbsp. Butter, separated in half
2 tbsp. Flour or Cornstarch
Spices to taste: Black Pepper, Herbs de Provence or a mixture of rosemary, thyme, sage, and parsley.
Olive Oil, as needed
Prep Time: Up to 1 hr. | Total Cook Time: 30 - 40 min.
Serves: ~4 cups of soup
~Instructions~
Preparing the Roast Garlic
Step 1.) Preheat your oven to 400°F. Take the bulb of garlic and remove the outermost layers of the bulb (A few layers will come off easily in your hands. The result should be a bulb with fewer outer layers, but that is still in one piece)
Step 2.) Cut the top 1-2 inches of the bulb so that the sliced tops of the garlic cloves are showing.
Step 3.) Place aluminum on a baking sheet an put the garlic bulb in the center. Drizzle the bulb with a spoonful of olive oil and then seal the foil around the bulb. Bake for 40 minutes, then open the foil and allow to bake for 10 min. increments until the cloves are fork tender and their color is browned to your liking. Set aside to cool for at least 10 min. before handling.
Step 4.) When you go to remove the garlic, they are soft and should easily come out. You can either pull the cloves off and peel the casings open, or squeeze the cloves out of the bulb like a tube of toothpaste. Set aside.
Preparing the Soup
Step 1.) Take the onion and cut it into long, thin pieces. Melt 2 tbsp. of butter in the soup pot and add in the onions. Allow to cook over a medium heat for 10-15 min. or until the onions are soft and browned.
Step 2.) Once the onions are almost fully caramelized, add in the roast garlic and the spices and stir the mixture together.
Step 3.) Lower the heat and push the mixture to one side of the pot. Place the other 2 tbsp. of butter into the pot and allow it to melt. Add in the flour.cornstarch. Whisk the butter and flour together while slowly raising the heat back up to medium until you get a fully mixed roux.
Step 4.) Once you have the roux mixed, add in the chopped carrots and mix everything that is in the pot together. Slowly begin stirring in the chicken and beef broth. Allow everything to come to a bowl and then simmer until the carrots are soft. Taste the soup and adjust the spices as necessary.
Step 5.) As the soup has been simmering and then begins to cool, it will continue to thicken. If it does not seem thick enough for your potage, you can add another tbsp. of flour/cornstarch. At this point, you can serve the soup with the carrots still in cubes, or you can take a blender to the soup to make it completely smooth. Serve with bread of your choice! Enjoy!
~Results~
The roast garlic and caramelized onions bring a powerful base flavor to this soup, and I’ve begun to use it as a base for a lot of my soups, not just the potage! I recommend for any garlic lover, and those who aren’t feeling good and need a hot soup as a pick-me-up!
Aaaand here it is, the infamously late blog post. I didn’t manage to rescue my old pictures, but I was able to grab the ingredients yesterday and whip up a new batch (nobody was disappointed by this, let’s be honest) and got shiny new pictures taken, so here we go! Delicious and simple cherry tarts that your entire fellowship will enjoy!
~Ingredients~
~3 cups fresh Cherries, pitted and sliced in halves (I grabbed one of those bags of cherries at the grocery store and used almost half of them)
½ cup Sugar
1 Egg
1 box (2 sheets) of Puff Pastry
Prep Time: 20 - 30 min. | Total Bake Time: 15 min. per batch
Serves: Up to 18 tarts
~Instructions~
Step 1.) Prep the cherries: Rinse off the cherries and remove the stems. Take a knife and cut in a circle directly around the middle of the cherry (essentially cutting the cherry in half). Twist and pull apart the cherry and dig the pit out with your finger or with a knife. Rinse and repeat until you have about 3 cups of cherries.
Step 2.) Set the oven to 400°F. Beat the egg in a small bowl and set aside.
Step 3.) Your puff pastry may come in a tri-folded sheet or already in separate squares. If in the sheet, cut the pastry where the natural folds have been made, and then cut each strip into thirds. Once you have the squares made, use a knife to score a smaller square on the pastry square, about ¼-1/8 of an inch from the edge (this will help the pastry dough puff up more around the edges) Brush this outer margin with the egg and place on a lightly greased baking sheet.
Step 4.) Mix the sugar in with the cherries, and spoon this mixture within the scored lines of the pastry squares (the sugar and juices will inevitably run over the lines, but this is fine). Bake each batch for 15 min., and allow to cool a few minutes before eating. Enjoy!
~Results~
Light, sweet, with a flaky crust. They are addicting to eat and I had to send away the second batch to my SO’s workplace so I didn’t eat them all. I miss them already.
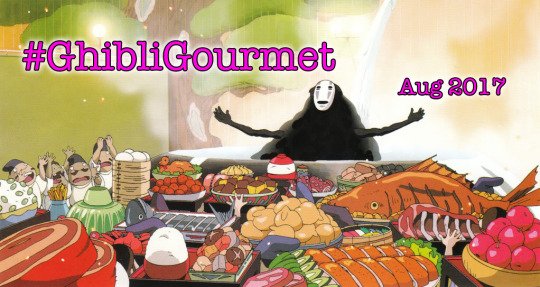
Follow these simple steps to share your #GhibliGourmet with the rest of the world!
Make an original recipe inspired by anything Ghibli. (You can create an adaption/attempt at a recipe from another source, just make sure you cite your source and add your post to the linkup. Please don’t link someone else’s post.)
Post it online and include the #GhibliGourmet hashtag, along with a link to the Fandom Foodies website, www.fandomfoodies.com!
Submit the post to the linkup below.
Enjoy delicious food made by fellow fans!
For more information on the Fandom Foodies, or if you’d like to host a future monthly theme, check out the guidelineshere!
*If you’re having trouble seeing the submit link below on your tumblr feed, please go to the actual blog page in a web browser and it should be visible. (WHYYTUMBLRWHYYY)
Hello everyone! Need something to perk you up? Make your mornings seem more special? Treat yourself to a Witch Parfait from Dark Clouds 2! This version is a decided breakfast-style parfait, in which yogurt is used instead of a rich cream, so you can enjoy it without the fuss of having to whip up the cream filling (especially early in the morning, because who wants to do that?).
~Ingredients~
1 cup Yogurt (chocolate, or plain or vanilla if chocolate yogurt isn’t available)
Honey or Agave Nectar, to taste (if using plain yogurt)
1 tbsp. Unsweetened Cocoa Powder (for plain or vanilla yogurt)
Granola or Oats, as needed
A mixture of the following fruits, as needed:
Strawberries
Raspberries
Blueberries
Cinnamon, to taste
Edible sparkles, for garnish
Prep Time: <15 min.
Makes: 1 parfait
~Instructions~
Step 1.) If using plain or vanilla yogurt, whisk cocoa powder and honey until thoroughly mixed. Use a rubber scraper to transfer the yogurt into a pastry bag or sandwich bag.
Step 2.) Cut a hole in the corner of the bag and squeeze about 1/3 of the yogurt into your serving cup. Layer your granola/oats, then your fruit.
Step 3.) Repeat the layers of yogurt, oats, and fruit, and then top off with the last 1/3 of the yogurt. Top with cinnamon and sprinkles to taste, and enjoy!
~Results~
It’s a magical way to start the morning! (sorry, couldn’t help myself XD )
Hello lovelies! If you’re like me, and have trouble bringing yourself to eat in the mornings due to a general lack of energy and motivation, look no further, because this quiche has you covered for at least 3-4 days worth of breakfast. Unless you have to share. Then you should just make two of these and have one all to yourself while the rest of your household fights over the other one. Breakfast and a show!
Are you ready!? Let’s go!
~Ingredients~
4 oz. Mushrooms
4 oz. Spinach
1 tbsp. Butter or Olive Oil
6 Eggs
2/3 cup Milk
½ cup shredded Cheese of choice (I chose a sharp white cheddar)
¼ - ½ tsp. Salt and Pepper, or to taste
1 Pie Crust
Prep Time: ~10 - 15 min. | Total Cook Time: 35 - 45 min.
Makes: 1 large quiche, 6-8 servings
~Instructions~
Step 1.) Lightly saute the spinach until just wilted and blot away as much excess moisture/grease as you can. Set aside.
Step 2.) Preheat the oven to 375°F. Lay your pie crust out into a pie dish and trim the edges. Roughly chop your mushrooms and set aside.
Step 3.) In a bowl, mix together your milk, eggs, and salt and pepper. Add in the cheese, mushrooms and spinach and stir until fully combined.
Step 4.) Pour the filling into the pie dish and bake for 35 - 45 min. or until a knife stuck into the middle of the quiche comes out clean. (for some ovens you may have to go slightly longer for the middle to completely firm up.)
Step 5.) Allow to cool for at least 10 min. before serving. Enjoy!
~Results~
I love this quiche- rather than some of the restaurant quiche I’ve encountered in the past, where the veggies or meats that they supposedly contain are few and far between. This quiche is packed full and my taste buds love it!
The second edition of THAT’S IT! The Unofficial FFXV Community Cookbook is out! This edition includes all of the recipes from the last iteration, plus a ton of brand new ones!
Usually when I create a recipe, I try to research several recipes that could be considered a real world equivalent. Then I make notes on what those recipes have in common, compare that to the original game recipe, and construct my own, unique recipe!
When it comes to this recipe, that was no different, except that, as I have done before, I avoided ice cream bases that require the use of the stove because I’m going to be honest- I’m kinda lazy in that respect. I’ll spend time making whipped cream and salad dressings by hand, but don’t ask me to make ice cream that requires the stove. I prefer the faster, minimal ingredients approach.
This is what happened with the first attempt at this recipe. I used the frozen bananas + coconut milk trick I have used (not necessarily on the blog but in other recipes) and unfortunately, that trick works better for milkshakes, not ice cream. The ice cream that resulted was so rock hard that by the time I remembered I’d set it out to thaw, it was completely melted and gross. I found a 3-ingredient variation on the no-stove ice cream theme and, using this recipe ratio as a base, gave it the Guild Wars 2 treatment!
Let’s go!
~Ingredients~
14 oz. Sweetened Condensed Milk
2 cups Heavy Whipping Cream
A large pinch of Saffron Threads
Up to 2 cups diced Mango, more for topping if desired
(Optional) ¼ tsp. Vanilla
Prep Time: 10 min. | Freeze time: 4 hours minimum
Makes: ~1.5 Quarts of Ice Cream
~Instructions~
Step 1.) Add the saffron to the heavy whipping cream and cold steep in the fridge for at least 30 min. (no need to strain the saffron threads later)
Step 2.) Prep the mango by dicing it or, if you want a smooth ice cream consistency, blend the mango to a puree and mix the condensed milk and mango together. Or do both the puree and diced mango- your preference!
Step 3.) Use a hand mixer to whip the heavy cream into whipped cream (this will take several minutes).
Step 4.) Gently fold the condensed milk mixture into the whipped cream and transfer to a freezer-friendly container.
Step 5.) Allow the ice cream to freeze for at least 4 hours- this will be a must softer consistency still- or overnight for a more traditional ice cream consistency. Enjoy!
~Results~
I need to be honest, the mango was delicious and the ice cream itself turned out amazing! But for whatever reason, the addition of saffron just didn’t do it for me. I know that’s my personal taste, so don’t let that discourage you from trying this, because this is my new favorite way to make ice cream!
Today we have another contribution to #MaytheFork Star Wars month! Crispic is a recipe from Star Wars Galaxies that, let’s be honest, is pretty much just taquitos. But rather than its classic fried version, I decided to make a baked version that is still super delicious and just as easy to make (if not easier!)
Let’s go!
~Ingredients~
1 lb. Lean Ground Beef (look for beef with <10% fat content on the package)
½ Yellow Onion, diced
Taco Seasoning (I like to eyeball my own mixture of Salt, Black Pepper, Cumin, Paprika, Cayenne, Ground Chili Pepper, and Cilantro)
(Optional) Shredded Cheese of choice
Salsa or Hot Sauce of choice
Fresh Cilantro, for garnish
~1 dozen 6″ Tortillas
Olive Oil or Cooking Spray, as needed
Prep Time: 10 - 15 min. | Total Cook Time: ~15 min.
Makes: Up to 1 dozen, depending on Tortilla size
~Instructions~
Step 1.) Preheat the oven to 425°F. Brown the beef with the onions and taco seasoning, drain any grease, and set aside.
Step 2.) Prep the tortillas by either microwaving them with a damp paper towel, or set them in the oven to warm for 1 minute (this will ensure they are easier to roll and handle without tearing.) Place in a contained or covered on a plate to keep soft.
Step 3.) Take each tortilla and place a few spoonfuls of the beef onto it (and cheese, if you want cheese in it). Roll carefully but firmly (don’t overfill the tortilla or you may lose some of it!) and then place seam side down on a lightly greased baking sheet. Repeat for all of the tortillas until you run out filling.
Step 4.) Before placing them in the oven, either lightly brush each tortilla with some olive oil, or spray the tortillas lightly with cooking spray. Bake for about 15 min., the edges of the tortillas will be crispy and browned. Serve immediately or freeze for later. Top with cilantro and salsa of choice and enjoy!
~Results~
I mean, it’s really hard to go wrong with these, which is probably why they are so popular among the Star Wars cantinas.
Staring transfixed into the indigo glow, you gain a deeper understanding of the universe.
An anonymous reader requested that I make something from Fable and after reading through all the hilarious flavor text, the thought of finding the abyss in the depths of a blueberry pie is what captured my fancy the most! So go find yourself the freshest, bluest blueberries you can muster and let’s get to baking!
~Ingredients~
2 pieces of pie crust (you can double my cooking staples recipe or use a recipe of your choosing)
Step 1.) Preheat your oven to 400°F. Wash and measure out your blueberries into a bowl and stir in the sugar, lemon juice, salt, cinnamon, and cornstarch. Set aside.
Step 2.) Roll out your pastry dough (if needed) and line your pie dish with one of the pieces of dough. Pour in the blueberry filling.
Step 3.) For the second piece of dough you can either roll it out into a circle (a looser lattice with the blueberries more visible) or into a square/rectangle (a tighter lattice, fewer blueberries visible) and then cut into strips. Line 4 or 5 (or roughly half the total strips you have) strips along one side of the pie dish. Alternate between placing every other strip across the pie and laying one of the other strips down across them. Then fold those back, place the previously folded back strips across the pie and repeat the process.
Step 4.) Press down on the edges of the crust to make sure the top and bottom pieces are sealed together, then take the beaten egg and brush it on top of the lattice crust.
Step 5.) Bake at 400°F for about 20 min. and then reduce to 350°F and bake for an additional 30 - 40 min. or until the crust is golden and the sugar and blueberries have completely bubbled together. Allow to cool for at least 1 hr. and serve with ice cream or whipped cream! Enjoy!
~Results~
Sweet, delicious, addicting. These are some of the words I would use to describe this pie. If I wasn’t busy stuffing my face with it, that is.
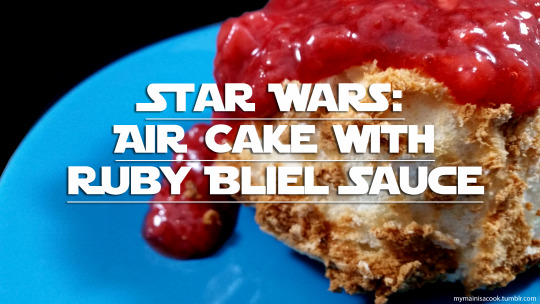
Hello everyone! In honor of not only #MaytheFourth, but #MaytheFork, I am presenting to you: Air Cake with Ruby Bliel Sauce! (also known as Angel Food Cake with red berry sauce!) Because Angel Food Cake has a pretty picky ingredient makeup, I did reference the recipe from my Big Red Cookbook.
I hope you enjoy the recipe, and if you’re interested in contributing to the Star Wars food month, you can visit the linkup page here, or go straight to the Fandom Foodies website and look at the How To Participate page.
~Ingredients~
Cake
¾ cup Powdered Sugar
½ cup Sugar
½ cup Cake Flour (or put 1 tbsp Cornstarch in the measuring cup and fill the rest of the way with normal flour)
6 egg Whites (roughly ¾ cup)
¾ tsp. Cream of Tartar
½ cup Sugar
¼ tsp. Vanilla
>¼ tsp. Salt
Ruby Bliel Sauce
~2.5 cups Strawberries and Raspberries combined
Juice from 1 small lemon
½-¾ cup sugar
1 tbsp. Cornstarch (optional)
Prep time: 15 - 20 min. | Total Cook and Cool time: 1.5 hours
Makes: 6 mini cakes or 1 small-medium cake
~Instructions~
Ruby Bliel Sauce
Step 1.) If using fresh strawberries, de-stem and slice them in half.
Step 2.) Combine the berries, sugar, and lemon just into a saucepan and bring to a boil. Allow to simmer for 5 - 10 min., then remove from heat and mash the berries into a pulp.
Step 3.) Depending on how you want the sauce, you can strain out the pulp and boil the sauce down further, or for a sauce with the pulp in it, stir in 1 tbsp. of cornstarch to thicken it.
Chill in the fridge until ready to use.
Cake
Step 1.) Preheat the oven to 375°F. Mix the cake flour and powdered sugar together in a bowl and set aside.
Step 2.) Using an electric mixer, beat the egg whites and cream of tartar until the egg whites are foamy. Add in the ½ cup of sugar a little at a time until fully incorporated. Add in the salt and vanilla and continue to beat the egg whites at high speed until stiff peaks form (this may take several minutes.)
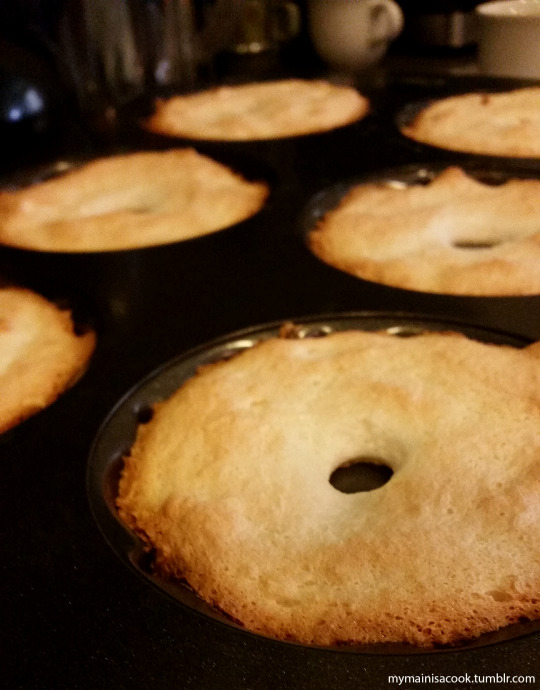
Step 3.) Once the egg whites form stiff peaks, fold in the sugar/flour mixture ¼ cup at a time, until everything is just combined. Transfer the batter into a small funnel cake pan or a mini funnel cake sheet (do not grease the cake pan!) either with a spoon/rubber scraper or by transfer the batter to an icing bag/sandwich bag and piping it in.
Step 4.) Run a knife through the batter to break up any larger air pockets, and then bake. For a tray of mini cakes, you will likely only need about 15 minutes. If you used the batter to make a single cake, you may need 20 - 30 min. Keep a close eye on them, and the cake is ready when the cake springs back after being pressed with a fork.
Step 5.) Turn the cake pan upside down and rest it on something (a bottle, a cup, etc.) for at least 1 hour or until it is completely cooled. Then use a knife to carefully remove the cake(s) from the pan.
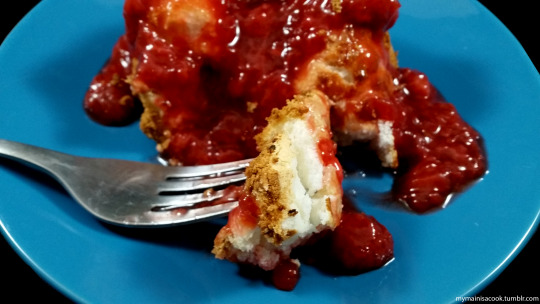
Serve with Ruby Bliel sauce (and whipped cream if you want it) and enjoy!
~Results~
So delicious, so light and fluffy! Not to mention I feel pretty accomplished for successfully putting angel food cake batter together! 10/10 would make again.
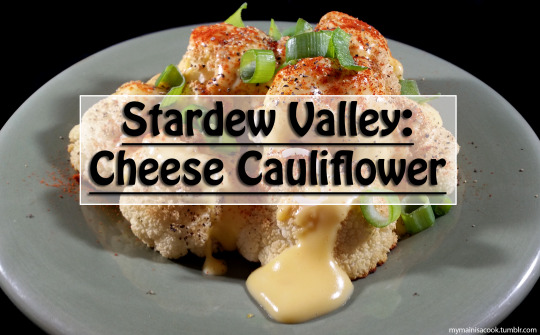
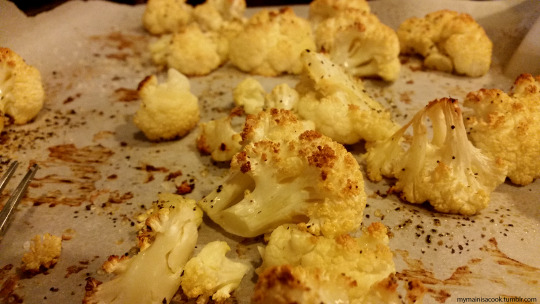
An anonymous reader requested that I make something from Stardew Valley, and cauliflower is one of my most favorite veggies ever (I once ordered a roast cauliflower appetizer and ate the whole thing by myself. Worth.) so how could I resist such a dish as this!? Spoiler alert: I couldn’t resist.
Let’s go!
~Ingredients~
1 large Cauliflower (if you like to go light on the cheese, use 2 cauliflower heads)
1 cup Milk
~1 cup shredded Cheddar Cheese or preferred melt-able cheese
2 tbsp. Cornstarch
Salt and Pepper, to taste
Paprika, to taste
Olive Oil, as needed
Green Onions for garnish
Prep Time: 5 - 10 min. | Total Cook Time: 40 min.
Makes: 2 - 4 servings
~Instructions~
Step 1.) Preheat the oven to 400°F. Prep your veggies by chopping the green onion and breaking the cauliflower into similar-sized pieces.
Step 2.) Place the cauliflower on a baking sheet lined with parchment paper. Dust lightly with salt and pepper and drizzle/spray olive oil onto the tops of the cauliflower. Bake for 40 min.
Step 3.) While the cauliflower is baking, mix the milk and cornstarch into a saucepan and slowly heat it until it is just simmering and begins to thicken.
Step 4.) Lower the heat and stir in the cheese a little bit at a time until it is fully melted in. Season with salt and pepper to taste.
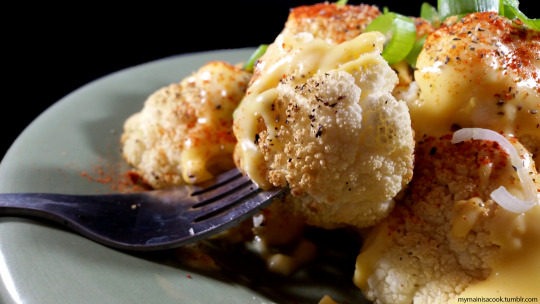
Step 5.) When the cauliflower is ready, serve hot with the cheese poured over it, topped with paprika, extra pepper if desired, and green onion. Enjoy!
~Results~
I ate the whole thing by myself. I feel no shame in this. It was delicious.
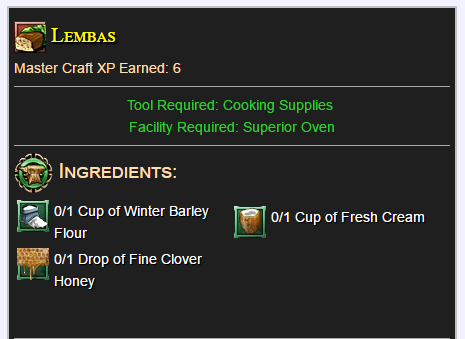
Yes, this post is a few days early. But that’s because it is LOTRO’s 10th birthday! I’ve missed out on a couple of game birthdays (Runescape, realized a year too late for a nice round birthday) but this time, I am prepared!
Lembas have always been thought to be a combination of shortbread and hardtack, and so shortbread is largely what this recipe is based on!
~Ingredients~
2 cups Flour + as needed
Up to 2 tbsp. Cream (or as needed to balance dough)
½ cup Honey
1/3 cup Chopped Nuts (I used walnuts)
1 cup (2 sticks) cold Unsalted Butter
½ tsp. Salt
½ tsp. each Allspice and Cinnamon
(optional) Herbs like Thyme, Sage, or Rosemary, to taste
Prep Time: ~10 min. | Bake time: ~45 min.
Makes: So many, for average size at least 2 dozen
~Instructions~
Step 1.) Preheat the oven to 300°F. Use a food processor or your hands to mix the flour, butter, honey, salt, and spices until they are just combined. Fold in the chopped nuts and add cream and extra flour as needed to get a workable dough.
Step 2.) Flour a clean surface and roll the dough out to between 1/8 and ¼ of an inch. Cut the dough into your preferred size and shape (I do not recommend a square larger than 3″ x 3″.)
Step 3.) Place on a baking sheet lined with parchment paper and bake in the oven for up to 45 min. or until the edges are nicely browned. Allow to cool on a rack. Enjoy hot or cold!
~Results~
They have a mild taste and honestly aren’t as sweet as I originally thought they would be (they are also shortbread-based so they are quite dry). But the moment my roommates came home they saw the lembas, made a pot of coffee, and chowed down on them, so I’d say they were a great success!
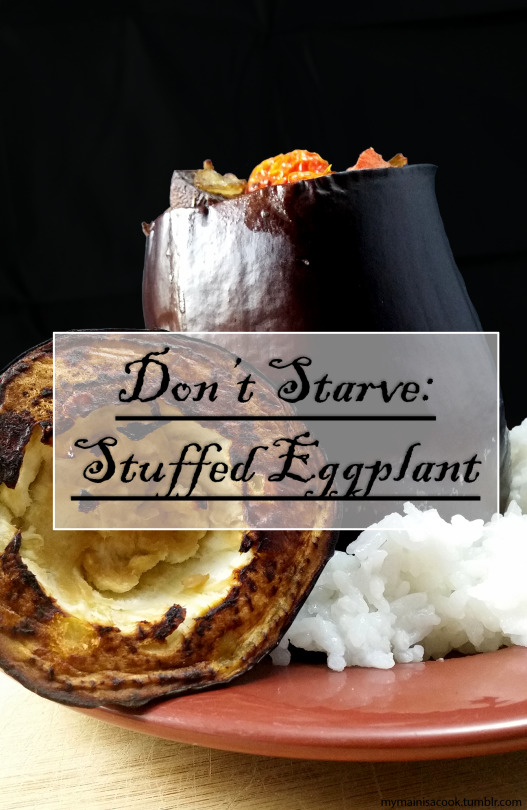
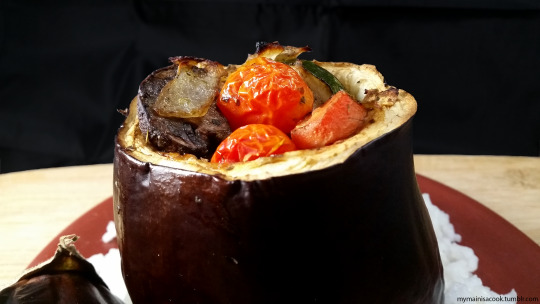
An anonymous reader requested that I make the Stuffed Eggplant from Don’t Starve, and they should be happy to know it set off a weekend of marathon playing the game over and over!….which is why this is being posted now and not this last weekend. I had forgotten how fun that game is! Anyway, let’s go!
~Ingredients~
8 oz. Mushrooms
1 - 2 Medium Sized Carrots
~1 cup Cherry Tomatoes, sliced in half
1 small White Onion
2 - 3 cloves Garlic, minced
Up to 4 evenly-sized Eggplants
Olive Oil, as needed
Cooking Spices:
1.5 tsp. Worcestershire Sauce or Liquid Smoke
½ tsp. Black Pepper
½ Paprika
Salt, to taste
Prep Time: ~20 min. |
Makes: ~4 stuffed eggplants (4 - 8 servings)
~Instructions~
Step 1.) Preheat the oven to 400°F. Prep your veggies: dice and mince the onion and garlic respectively. Roughly chop the mushrooms and slice the carrots into medallions. Slice the cherry tomatoes in half. Set all filler veggies aside for now.
Step 2.) For each eggplant: cut the top off of the eggplant and use a spoon to scoop out the insides as much as possible (you can chop it up and add it back into the veggie mix, if you want.) Slice a small amount off the bottom of the eggplant for a flat bottom and place both the eggplant and the top onto a baking sheet lined with parchment paper. Drizzle all the eggplants with olive oil and bake in the oven for 15 - 20 min.
Step 3.) While the eggplants are baking, saute the onion and garlic in olive oil under high heat until the onions begin to turn translucent. Add in the rest of the veggies (MINUS THE TOMATOES) and season with the cooking spices, adjusting their amount to taste. Allow to cook to reduce any liquid about 5 - 8 minutes.
Step 4.) When the eggplants are ready to be stuffed, remove the veggies from the heat and stir the sliced cherry tomatoes into the mix. Stuff the eggplants with as much veggie mix as possible (and don’t worry if you can’t use all of it - it makes a great omelet filling!)
Step 5.) Place the stuffed eggplants back into the oven and bake an additional 15 - 20 min. If the veggies on top aren’t looking as browned as you’d like, you can use the broiler for 1 min. (keep your eyes on the oven at all times, lest you be left with burnt food.) Allow to cool for a few minutes, then serve hot, either over a bed of rice or salad. Enjoy!
~Results~
Very yummy and can hold its own both as the meal centerpiece and as a side dish.
I’ve mentioned this a few times in the past, but I am a big fan of appetizers. Chips and dip, meat+cheese+veggie pinwheels, tea sandwiches, giant seasoned cheese balls, schmear on crackers, little smokies…..if I didn’t live with other people that required normal people food I’m sure 80% of my diet would consist of appetizer finger foods.
I’ve wanted to share a more casual recipe with everyone for a while now, so today I am sharing one of my favorite appetizer combos with you, fixed up special in honor of #MarioMonth !!! Play with the designs and send me any new ones that you come up with, I’d love to reblog them for everyone to see!
~Ingredients~
Crackers of choice (I chose a whole wheat cracker)
Cream Cheese or flavored schmear, as needed (allow to reach room temp. for best spread-ability)
Smoked Salmon
Fresh Parsley
White Cheese of choice, thinly sliced (I recommend sharp white cheddar or smoked gouda!)
Yellow Pepper (I used a yellow chili pepper, but you can use a yellow bell pepper for a less spicy alternative)
Prep and assembly: ~20 min.
Makes: AS MANY AS YOU WANT FOR REALS (or until you run out of ingredients)
~Instructions~
Time to make your snacks!
For Mushrooms:
Cut a circle out of the smoked salmon and then slice off the bottom portion to make a flat edge. Slice a smaller half circle out of the pepper to make the face. Make equal-sized circles for the polka dots out of cheese.
Spread cream cheese on a cracker and layer the salmon and pepper next to each other, with the cheese dots on top.
For Fire Flowers:
Cut an elongated oval out of the smoked salmon. Make progressively smaller ovals out of the pepper and cheese respectively. Prep a stem of parsley with two leaves for the base of the flower (most parsley has a group of about 3 leaves at the end of a stem. Just pinch the top/middle leaf off and cut the stem to an appropriate size.)
Spread cream cheese on a cracker and layer the salmon first, then pepper, then cheese. Arrange the parsley below it as a stem.
For Piranha Plants:
Cut a circle with a slice cut into it with the smoked salmon (like Pac Man!) Then cut a V shape out of the cheese to make the mouth (be very careful when cutting teeth into it, it’s delicate). Create a stem from the parsley following the same instructions for the fire flowers.
Spread cream cheese on a cracker and layer the salmon first, then the cheese, and the arrange the parsley below it as a stem.
The first outright mentions or variations of whipped cream can be found under the names “snow cream” or “milk snow” during the 15th and 16th centuries. Early versions of this include naturally separated cream (requiring a more involved whipping process) and eggs and sugar to help reach the desired consistency; these recipes often used such flavorings as rosewater, vanilla, cloves, etc. Creme Chantilly was another variant of whipped cream, and the terms were often used interchangeably.
Whipped Cream is a type of emulsion in that it’s a mixture of air into a liquid that is trapped and stabilized by the fat of the cream. In the same way that stirring a dough or batter creates glucose to trap air, beating/whipping the cream changes the way the fat is structured in the cream allowing for this air to be trapped. By this is account it is, in fact, possible to over-whip the cream and lose that much like over-stirring batter does the same for breads. But unlike bread where you get a dense, sad end-product, if you were to take whipped cream past the point when it is “ready”, you could, in fact, eventually get butter!
Having cold ingredients and tools also help in the whipping process in that bringing the cream to a whipped state does not take as long and there is less of a chance to over-whip the cream.
2 tbsp. Powdered Sugar (you can also use other sugar sources like honey or maple syrup!)
(optional) Up to 1 tbsp. flavoring (dry spices like cinnamon, cloves, chai, cocoa, citrus zest | liquid flavors like rosewater, vanilla extract, alcohol, coffee extract)
Total Cook Time: ~2 minutes
Makes: ~2 cups
~Instructions~
Step 1.) Combine the cold heavy whipping cream and powdered sugar into a chilled mixing bowl.
Step 2.) Use an electric mixer/whisk to whip the cream on high speed for about 1 min. (1:30 minutes max) until stiff peaks form.(You can also whip the cream by hand, just make sure you keep up the pace as much as you can!)
Step 3.) If adding a flavoring, mix the cream until just before it reaches the whipped cream consistency, add the flavoring, and whip it the rest of the way. (Many people add their flavorings at the beginning, but I like to incorporate mine toward the end, especially with liquid ingredients like extracts or alcohol.)
Enjoy and use with any recipe that involves whipped cream!


")