#tripple goddess


These quick little yule ornaments were inspired by a class project I did with my fifth graders. Simple, cute, and using materials you probably already have! Click “keep reading” below to see how to do these “stained glass” ornaments.

Materials:
*The picture has a stapler, but last-minute I decided a hot-glue gun would look nicer. Use what you have!
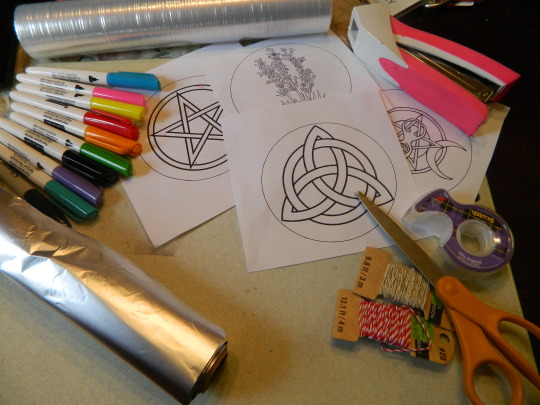
- Template. You can use any outline, really. Shrink them down to a nice size, and you are ready to go!
- Scissors, tape, stapler/hot glue
-Yarn, string, twine…anything you want to hang your ornament with.
-Posterboard, cardstock, cardboard…one or all (you will use this twice once to wrap in tinfoil and one for the back).
-Permanent Markers. I think sharpies are crazy expensive for no reason, so I used generic brand markers. Sharpies work too. But, keep in mind that when I did use Sharpies (because of the higher quality) the color came out darker, which didn’t work as well for the stained glass effect.
-Saran Wrap
-Tinfoil
What you need to do:
Step 1 – Tape your template down flat. Then cut a square of saran wrap to tape over it. Make sure the saran wrap is very tight with no wrinkles, and try not to tape too much. The saran wrap should be slightly bigger than your template.

Step 2- Color! Try to use a bunch of different colors. Keep in mind that dark colors won’t give the stained glass look. The colors will look slightly different against the tinfoil later on. A little tip one of my students discovered – orange makes a beautiful gold/copper color!
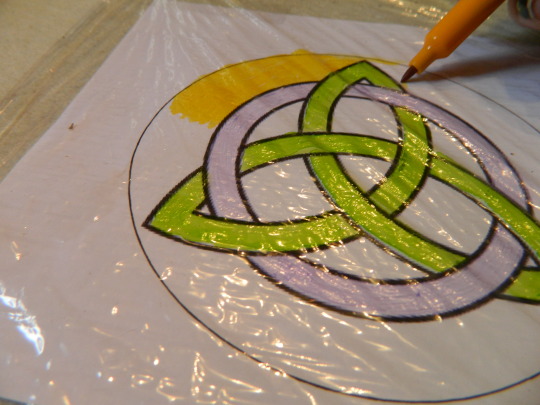
Step 3 – Very carefully trace the outline of your template in black. Try to make your lines nice and neat!

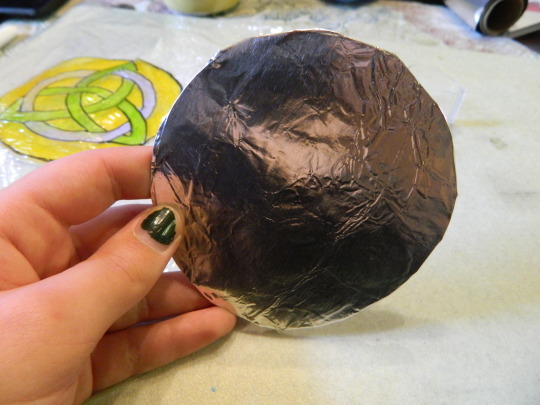
Step 4 – Leave your saran wrap aside to dry (it doesn’t take long, but better safe than sorry!). Take your cardboard/poster board (we used paper plates in the school) and cut a circle out. Try to make it as close to the same size as your template as possible! Cut out 2 circles, one for the tinfoil and one for the backing. I used poster board for the tinfoil and colored cardstock for the back.

Step 5 – Cut a square of tinfoil. Lightly crinkle it to give it texture. I gently clap with it between my hands, then smooth it out. There is a slight crinkle but not too much. Wrap your tinfoil around your circle and tape.
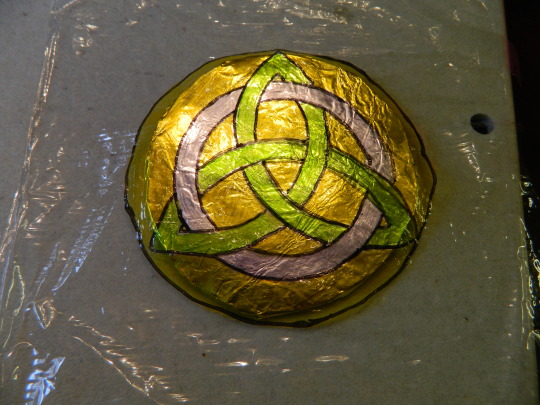
Step 6 – CAREFULLY take your saran off the template. Align it on your tinfoil circle. This is what your ornament will look like! Get it just right, then tightly tape it in the back.
Step 7 – This is where I opted for hot-glue instead of the stapler. I cut some twine and tied it in a loop, then glued it to the top of the ornament (you can use tape, too). The I put a circle of hot-glue around the edges of my ornament, and glued the second circle on. You can use a stapler instead, but this will not look as polished.


Step 8 – Carefully trim off any overlapping pieces, and you are done!
