#zero waste crafts

Project: ramie dress refashion
Introduction:
I’ve got this ramie dress that doesn’t really suit me. It fits, but the shouldersare too wide and the skirtpart looks weird on me. I usually wear skirts with a lot of volume because skirts without it look wonky because of my scoliosis.
The fabric’s lovely though, so I decided to rework it into a shirt.
The project:
The dress is made out of a woven fabric. It has no closures and is meant to slip over your head. The short sleevesand rounded collarhave been shaped with pleats. It came with a sashto be worn around the hips, which I forgot to photograph.

[ID: a light brown ramie dress hanging from a wooden hanger in front of a white background. The dress has short sleeves and a round pleated collar.]
I indicated my waistandhipson the dress with a chalk line, then drew a third line about 5cm below the hips to serve as seam allowance.
Icut off the bottom of the dress at the third line.

[ID: a light brown dress lying on a black and white chequered floor. Three horizontal pink lines have been drawn on it with chalk: one at the waist, one at the hips, and one 5cm below the hips.]
Theshoulderswere slightly too wide for me, so I used a small pleatsimilar to the ones used at the neckline and sleeves to make them smaller. This made the top much more flattering on me. I also hemmed the bottom edge.

[ID: a light brown dress lying on a black and white chequered floor. The skirt part has been cut off right below the hips.]
I put the project aside for a while to think about embellishmentsas the top was rather plain, and ended up settling for a lace trim at the neckline.
I recently received a parcel of leftover lace from a fellow sewist who was clearing out their stash, and found the perfect beige lace trim. The colourwas lighter than the original fabric, but complimentedit well. I had just the right amount for this project.
If you’re looking for cheap/free notions, do as I do and look around in buy-nothing groups and on second-hand sites. You’d be surprised what you’d find. This particular parcel cost me €15 and contained almost a kilo of high quality lace. It’s a win-win situation: the seller got some of their money back, I have enough lace to last me ages, and these trims actually get used instead of thrown away.

[ID: a light brown shirt lying on a wooden floor. The bottom edge has been hemmed, and beige pointy lace has been sewn around the rounded collar.]
I still had the original sash from the dress. I was considering sewing it onto the top at fist, but I decided to keep it separate. That way, I can both cinch the top at the waist or keep it loose and tuck it into high-waisted pants or a skirt.
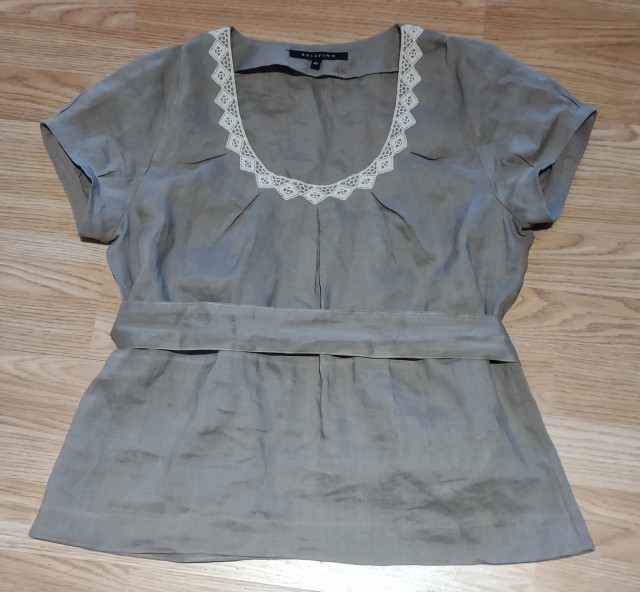
[ID: a light brown shirt lying on a wooden floor. The bottom edge has been hemmed, and beige pointy lace has been sewn around the rounded collar. A sash lies on top of the waist of the top and has been tucked underneath the top.]
All done! All it needs now is a good washto get rid of the chalk lines.
Theexcess fabric is now in my sewing stash: it’s great quality, so I’m sure I’ll find some use for it.
Conclusion:
There was nothing wrong with the original dress, but I just didn’t wear it because I didn’t like how it looked on me. Instead, I now have a topthat flatters me and goes well with the rest of my wardrobe. It’ll get much more use this way.
How to bind a neckline with bias tape : 6 methods - Sew Guide
How to bind a neckline with bias tape
One easy and neat way to bind a neckline when making your own clothes is by using bias tape.
This Sew Guide article will show you six different ways to bind a neckline with bias tape.
Don’t have any bias tape? Check out my bias tape 101 post to learn how to make your own. It’s a great way to reuse fabric scraps!