Since I’m close to reaching 500 followers and just had my birthday, I figured that I should give you guys a nice treat!
I think @dreadpirate‘s Fountain Eyes are really pretty, so I wanted to convert them to TS3. I had to learn how to make my own eyes, and it was a bit of a HECKING process (for some reason I kept having this issue with the alpha? I don’t know LOL)
But anyways, here you go! It’s a default, so it will show up in your game as a default. No plans for any contact / non-defaults right now, sorry :b
Hi! I came up to make my first CC post here (☆ω☆) I was thinking what I’m missing in my medieval TS3 save, created some things and decided to share them with you.
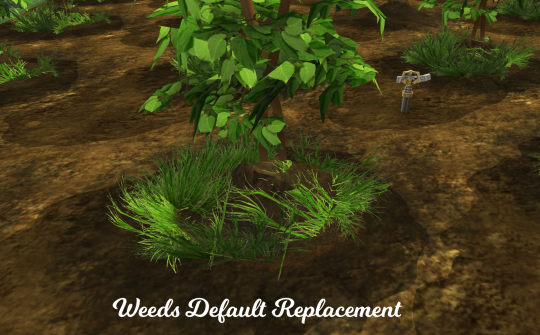
So meet a default replacement of guitar case when sim is playing guitar for money (or lute in my case)!
That’s a EA coffee cup mesh edit. Polycount: 475 for both LOD0 & LOD1
The Island Living mermaid eyes re-imagined in the style of my Clarity Eyes. There are two files available: a default replacement that replaces the ones that come with Island Living (requires the pack), and a non-default version which is base game compatible.
DO YOU WANT TO MAKE DEFAULTS THAT: - Allow you to have recolours of the original Maxis mesh even though you’ve replaced that outfit in the catalogue? - Are enabled for young adult AND adults if they aren’t already? - Replace an outfit with heels with an outfit with flats and want correct shoe sounds? - Allows you to be able to make recolours of a mesh you’re using for a defaulted outfit that you can upload and anyone can use them without having the same defaults as you? - Replace a single-group outfit with a multi-group outfit? - Only replace the exact outfit you want to replace (e.g. replace ONLY the blazer and pleated skirt outfit for children WITHOUT changing the private school mesh? Or replace the two medieval gowns without replacing the third Vampire one? etc) - Look like outerwear and you want them enabled for outerwear? Or formal? Or athletic? etc? - Has a lot of original colours and you want to use different meshes to give variety (e.g. there are at least ten different colours of ‘dresslongtrumpet’. Instead of using the exact same mesh ten times, you could use the same dress, with a bunch of shoe options?) - Or, you know, you just want to make a plain ol’ default replacement
I’d really appreciate anyone’s feedback on this, whether it makes sense, whether it works… is it easy to follow? Is there anything that needs more explaining or clearer pictures?
I just tried replacing the social bunnies. It seems to be working out alright! The different colours are represented by blue ties, red ties and black ties.
If anyone would like to try these out and let me know how they work for them, I’ve uploaded the replacement here. :)
I’ve finished replacing the gorilla masks (I need to take previews, which I kind of hate, so I’m procrastinating on posting them) and now I’m replacing ‘fhairponypoofs’ with Newsea’s Goldleaf. It’s a little out of place on sensible adult sims (so I’m disabling it from spawning on townies) but oh gosh it’s so pretty on child sims… :3
The ponypoofs replacement is here if anyone wants it. It replaces all ages and as I said, doesn’t spawn on adult/young adult townies. It’ll probably be a bit before I post it formally on my LJ as I like to have a group of three or four replacements at least to post together so that I don’t have a million separate entries.
I guess I should upload the things I mess around with once in a while. These are Rented Space’s dress conversions with Yuxi’s boots in some ridiculous colours. I’ve uploaded them to mediafire here. :)
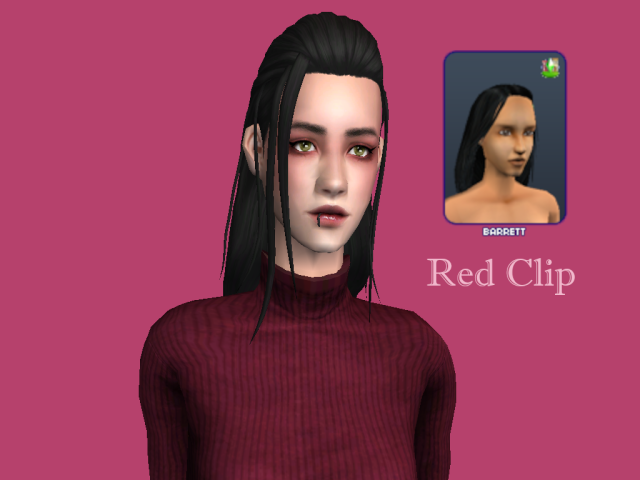
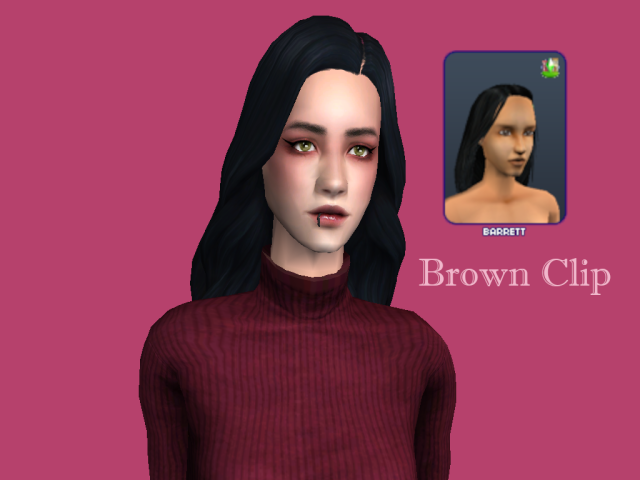
I apologise about the strange models. It’s the household I use to model my defaults so usually their faces are never seen.
(I do actually have the last four dresses as afbodygorillasuit defaults too if anyone wants them. They’re here, or a version that’s hidden in CAS here.)
Please let me know if there’s any issues. I’m pretty new to the whole shoe swapping meshing thing.
I’ve posted eighteen different defaults on my livejournal over the last week or so. A lot of them were things that I’d done a while back and just needed to take photos of, or edit a little in some way. Hopefully everything is all in working order. (Gotta stop posting after midnight, seriously.)
After I’ve done a couple more adult female clothing defaults, I think it’s back to trying things out for the mail/newspaper defaults, and trying to fix the glasses. Maybe. …I hate those glasses replacements. :(
Default replacing glasses is infuriating so I took a break from that and I spent today learning to edit meshes, combine meshes, adding parts and creating new material definitions… I know it’s silly, but am quite pleased with myself.
I’m using this outfit by Sanneke94 but I don’t think it’s quite right for a mail carrier… But I need something that: - Works for winter AND summer - Looks uniform-y - Has something similar for both genders and two ages!
(Also I need to replace the hair, but I think a cap is actually kind of appropriate, so I’m not sure what to do about that.)
University Life Athletic Hip Hoodie mesh edit for adult males
This is an edit similar to previous ones I’ve done, in which I’ve attempted to make this item into something more presentable-looking.
Default replacement, requires the University Life EP!
For YA/A males. Categories, textures and presets not changed. If you want a stencil-less version, see below.
The “with stencils” version is only a GEOM edit, so it doesn’t conflict with recategorizers (which edit the CASP resource) or texture edits (which edit _IMG resources).
The “without stencils” version is a GEOM and _IMG edit, so it will conflict with other stencil removal mods but not with recategorizers. However, this isn’t a serious conflict since it’s just replacing the stencil images with blank ones, which is most likely what the stencil removal mods are doing too, so you can ignore it. But if that’s a concern, just get the version with stencils. This version also replaces the default thumbnails with accurate, stencil-less ones.
There’s also a blue preset that pops up when you click the top in CAS, but isn’t present among the rest of the presets. This is standard EA behavior.
I’ve made a small contribution to grant a wish at GoS! University llama mascot outfit replaced with @mdpthatsme4t2 Athletic Mascot outfit. This is a mod that edits the llama mascot NPC outfit template (like this one). Only this one colour at the moment but it’s easy enough to swap it out or add other colours if anyone wants to.
It’s finally here! Completely remastered set of linden trees.
There are 2 (two) download links. Choose only one!
Features:
Better mesh. Trees look less lowpoly and more fluffy keeping polycount at low.
Appearance/texture size. This is the main feature of the redux. In the original set, every tree had a 2048x1024 texture making the whole set weight about 23Mb, compressorized. Obviously, it was filling up the game memory quite hard. In this redux, the size of the whole set of six trees is 4,5Mb! And that is uncompressorized. Does it still looks good on closeups or near lots? Yes. The quality is the same. I’ve just used completely different technique making over all the trees, to achieve this result.
Sub.. substitutat.. substitutability! Yes, the new trees override the old ones, so you don’t have to replace all the trees manually. Just delete the old files from your ‘Downloads’ folder and put the new ones there.
Default replacements
As you may know, @lowedeus did an amazing job providing a set of DRs for maxis Oak trees, trees row and clumps of trees, replacing them with lindens. This redux comes with all these default replacements option already and it works the same as the old one replacing Maxis’ oaks, row of trees and two clumps of trees.
How to use
First, backup your neighborhoods. Just in case you accidentally load your game right after removing old trees from ‘Downloads’ folder without putting the new ones in. Because once it happens, all the trees in your neighborhood will be gone forever once the hood is loaded.
Please scroll further down for alternative ‘Default Replacement only’ Install Option.
Remove these old files from your ‘Downloads’ folder:
crqtt_basic_linden_tree_01a.package
crqtt_basic_linden_tree_02a.package
crqtt_basic_linden_tree_03a.package
crqtt_basic_linden_tree_04a.package
crqtt_basic_linden_tree_05a.package
crqtt_basic_linden_tree_06a.package
Put these new files in:
crqtt_basic_linden_tree_01a_RDX.package
crqtt_basic_linden_tree_02a_RDX.package
crqtt_basic_linden_tree_03a_RDX.package
crqtt_basic_linden_tree_04a_RDX.package
crqtt_basic_linden_tree_05a_RDX.package
crqtt_basic_linden_tree_06a_RDX.package
There. You’re done!
If you’re using @lowedeus defaults, you have to remove these files from your ‘Downloads’ folder:
DEFAULT_lowedeus-CriquetteForest.package
DEFAULT_lowedeus-CriquetteRow.package
DEFAULT_lowedeus-CriquetteTrees.package
And then put these files in:
DEFAULT_MaxisOaks2CrqttLinden.package
DEFAULT_MaxisOaks2CrqttLindenForest.package
DEFAULT_MaxisOaks2CrqttLindenRow.package
Important:
the shadow fix you had to have in your ‘downloads’ folder in order to use Linden Trees DR must be also removed from your ‘Downloads’ folder, you don’t need it now.
Please note, that the only difference between this option from the previous one is that it only saves you from having maxis AND custom trees in your ‘Flora hood deco menu at the same time (i.e. same 6 trees twice) in case of using the default replacements. There will be only Maxis’ Oaks replaced by lindens.
First, remove these files from your ‘Downloads’ folder:
Signal boost! Look for a new shiny redux version of linden trees from Criquette - stand-alone, and default! So, my default replacement for maxis oaks has kinda outdated
As you know, the default the Sims 2 neighborhood camera is very limited. There are many different mods that expands its capabilities. I searched for the most convenient mod for a long time, but all of them had unpleasant bugs - for example, they got stuck on maps like Downtown, and none of them allowed changing the vertical angle of the camera as in lot view. Finally, I found a camera from The Jessa Channel. It is a really convenient mod which allow to rotate the camera in any direction, has a large zoom and comfortable movement around the NH map without “bouncing” at the borders. Moreover, there were several minor flaws I have fixed. Thus, in my edition of the Jessa NH camera mod, the zoom works smoothly with the + and - keys, and also the “clipping issues” (also known as z-fighting) are solved
Features: (default - fixed)
Distance:
Rotation:
Clipping:
Zoom (scroll)
Zoom (keys)
According to the text, the camera is based on a CTNutmegger’s file. Many thanks to Jessa for editing and publishing this camera. Since the original file is no longer available for download, I asked Jessa for permission to publish the edited mod in my blog, and she kindly allowed me to do this!
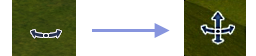
Also, due to the fact this mod allows to change the angle of rotation of the camera both horizontally and vertically, I made a small default replacement of the horizontal neighborhood rotation cursor, replacing it with the lot rotation cursor. It accordingly displays the rotation in any direction. You can download it here
If you are using the amazing Clean UI, you have to know optional horizontal & vertical cursor for the neighborhood camera is included. The file is called neighborhood-camera-cursor-horizontal-and-vertical.package and is located in the choose-one-clean-ui-neighborhood-camera-cursor folder. Thank you @greatcheesecakepersona for your attention to the idea!


")
")
")
")
")


")
")
ﻭFollow the link")
ﻭFollow the link")
ﻭFollow the link")
ﻭFollow the link")
ﻭFollow the link")
ﻭFollow the link")
ﻭFollow the link")
ﻭFollow the link")