a really nice anon requested a gif sharpening tutorial (referring to this gifset) and I’m only too happy to oblige! First off, I’d like to credit this tutorial for the base sharpen settings and PiXimperfect on YouTube for this sharpening tutorial and action - I can’t explain the principles as well as he does, so please do watch the video! For more gifsets from me, see my sideblog here.
You’ll need:
Any version of Photoshop with Timeline - I’m using CC 2018 (I’m currently exploring the version without timeline, send me an ask if you’re interested and I can update you).
As an aside, the best thing I’ve discovered through this is that you can make gifs out of higher-end 480p quality gifs. See this set from a bootl*g I got online. They won’t be as amazing as 4k or 1080p gifs, but they’re great for stuff where you really cannot get the best quality. This point clarifies that you do not need a 2160p or memory-heavy 1080p video in order to use this sharpening method.
Difficulty: ★ ★ ★ ☆ ☆ if doing manually, ★ ☆ ☆ ☆ ☆ if using the actions. This works best with portrait shots, i.e. a gif focusing on about one to three people as this sharpening tool really benefits the outline of the subjects more than anything else.
The rest of the tutorial is (very screenshot heavy and) under the cut!
The layout I used in this tutorial I got from here.
If you have any remaining questions about anything, my DM is always open! Either here or on @lizzies, just let me know what I can help you with and I’ll try my best!
as some of you may know, all of my resources and content are made for free, and i work with commissions. but if you feel like supporting a content creator, this is my ko-fi. all of my income comes from supporters so this is always extremely helpful. <3 let me know if this tutorial helped you, and if there’s any specific video tutorial you’d like to get from me, just let me know and i’ll try my best to deliver!
This is a comprehensive tutorial for how to make GIFs in Photoshop using the “Stack Method.” I use this method with my Core i5 laptop, and it works for me. The process seems complicated, but once you get the hang of it, you can easily make a GIF in under 5 minutes. If you find this helpful, please REBLOG / LIKE. Thank you! :-)
Hello! I had a request to show how I make gifs / color them. I made a basic photoshop steps page so that this isn’t any longer than it needs to be. Under the cut will be my coloring steps.
I will be turning this:
into this:
Disclaimer: This is just the steps that I made for this particular gif. The settings I used for this tutorial probably won’t work on a different scene but they are the steps/layers that I use regularly, so you can change up the settings if you like.
Disclaimer Part 2: This tutorial is super long, I apologize.
Using Photoshop CS6. Before beginning, you’ll need to know how to make a basic gif. Here’s a tutorial (if that one doesn’t help, just browse the “gif tutorial” tag to find more).
Using Photoshop CS6. Before beginning, you’ll need to know how to make a basic gif. Here’s a tutorial (if that one doesn’t help, just browse the “gif tutorial” tag to find more).
Download this gif right here (credit: dvdp) and open it with Photoshop (right click it > open with photoshop). Crop the section that you want and adjust the speed to your liking. Your window should look something like this:
In another window, open the picture you want to use and crop it. Here’s a tutorial on how to crop. Resize it so that it will fit on your swirly background.
Next, copy and paste your cropped image onto the background. Make sure that, on your timeline, the image is visible on all the frames.
Now the fun part — coloring! In order to color the black swirl, create a new layer underneath your image layer and above your swirly layers. Using the paint bucket tool, color that blank layer with the color of your choice and select “Screen.” Your swirls should now be colored.
Add your coloring layers on top, adjust the color of the swirls to your liking, and save it as a gif! Now you’re done!
Oops, I closed Photoshop before adding the white shadow thingy behind Korra. It’s very similar tothis.
today in ‘i can’t actually believe this works and it’s easy’ we’re learning to make a warped text animation like this onei made for @jatpwomen as per request of the members on the discord server <3
what do we need:
basic gif making skills <3
photoshop with timeline option
i’m working on photoshop cs6, i can’t remember if the option i’m using is available in earlier versions but from cs6 onwards you should be fine to make this.
Tutorial will be image heavy so i’ll put it under the cut!
and i was bored so here we are haha! the process is super simple and it makes a cute edit so like win-win situation here :D
what do you need:
Photoshop CS6 or higher (i was sad to find out this particular kind of animation didn’t work on my beloved CS5) It has to have the timeline option, otherwise this won’t work for you.
okay let’s do this! i’ll put it under a cut bc it has lots of screnshots and it makes the post too long
For@grayacejace - hope it will help you out a lil bit ! Graphic heavy because… Idk how to make tutorials. xD I’m using Photoshop CC but I think it should work on any version with timeline.
When making edits of characters of color, its imperative that the original skin tones be left as they are. In characters with brown skin tones, it can be all too easy to unintentionally lighten the skin and whitewash them or over saturate the skin and make it look orange or red.
In this tutorial, I will show you how to keep the original skin tone. This is not a tutorial on how to make a gif, but I will link mine at the bottom. This tutorial primarily focuses on Taika Waititi and his skin, but I do have a tutorial that focuses on black skin with the BBC Merlin fandom that will also be linked at the bottom. However, the process is pretty much the same.
This tutorial will work for Photoshop andPhotopea.
Step 1: Make your gif. Crop it, sharpen it, etc. This is my gif, which has only been sharpened.
Step 2: Basic recolor Here I’ve added Curves, Selective Color, Hue/Sat, and Vibrance. When setting your Curves layer, keep an eye on the character of color. Make sure you’re not overlightening the gif and washing the character out completely. It can be helpful to do your Curves layer last or edit it after you finish. In this one compared to the first, you can see how red and oversaturated he is and that’s not at all what we want. He can look better.
Step 3: Reduce redness To reduce the redness of his skin, we’re going to add another Hue/Saturation Layer. Set the Range to Red. Set the Saturation Bar to -30 and the Lightness to -5. This isn’t the hard and true way of reducing redness. There are other methods, but this is the one that I think looks best. Alternatively, you can play around with the amounts and duplicate as needed.
Step 4: Bring back warmth He no longer looks abrasively red, but he does look washed out and crusty. To fix this, we’re going to add a Vibrance Layer at 30. I oftentimes duplicate this layer once to make the colors richer, but use your best judgement.
This is what your gif should look like. Taika looks normal again, he doesn’t look washed out or red. From here you could add in whatever extra stuff you’d like to or post it as is.
Here’s another side by side of the original (left) and the edited version (right).
For@grayacejace - hope it will help you out a lil bit ! Graphic heavy because… Idk how to make tutorials. xD I’m using Photoshop CC but I think it should work on any version with timeline.
importing a video and using the timeline/smart object combination
importing your screencaps and using the timeline/smart object combination
I use Photoshop CC 2017.
IMPORTING A VIDEO
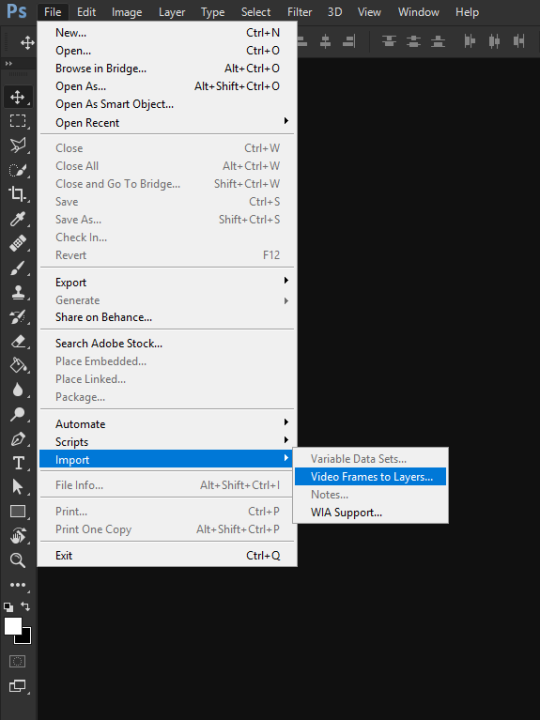
1. go to file>import>video frames to layers.
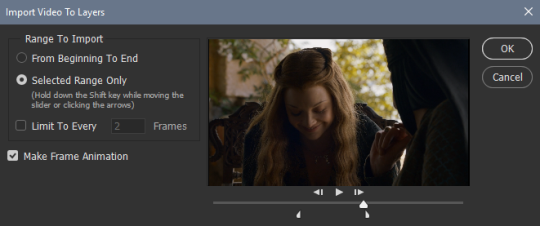
2. once you select your video, this dialogue box will pop up. use the left and right arrows to select the scene you wish to gif.
some people use the “limit to every x frames” but I personally don’t. if you do, I’ve seen people recommend using either 2 or 3.
make sure that “make frame animation” is checked.
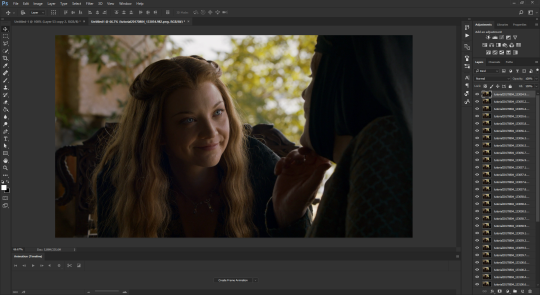
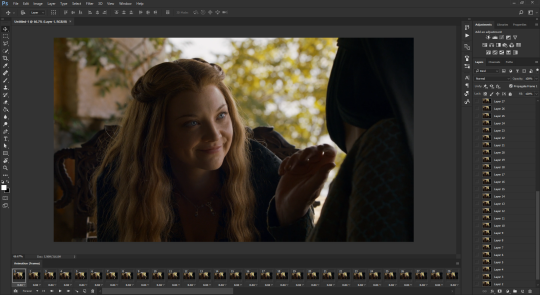
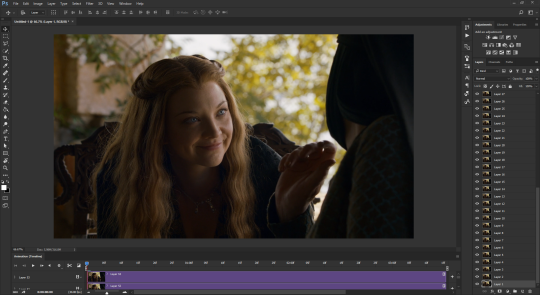
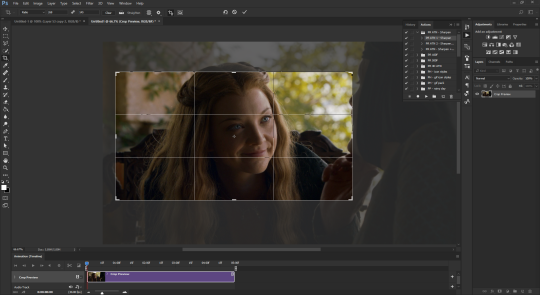
3. this is what your workspace will look like afterwards.
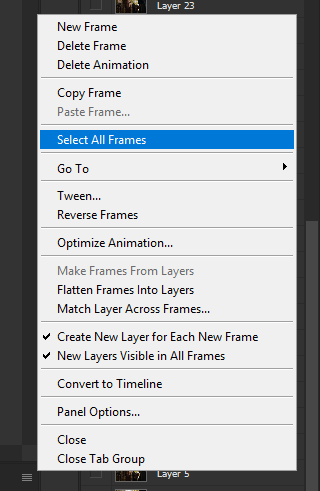
4. down the bottom in the animation window, in the top right corner will be an icon. click it and select “select all frames”.
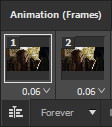
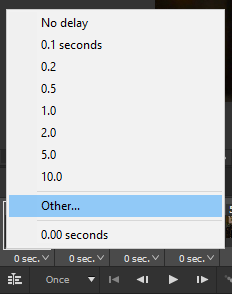
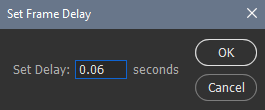
5. now all your frames are selected which means whatever you do to one frame will apply to the others. click on the number below the frame thumbnail. (e.g. 0.04) and select “other”. this is where you will change your frame delay which impacts the overall speed of your gif.
I generally use 0.05-0.07 seconds but it depends on your gif and how many frames it has. just play around with different delays til you find something to your liking.
6. there’s a small icon in the bottom left corner of the animation. click it and it will convert your frames to a timeline.
7. this is what your workspace should look like now. select all your layers in your layers panel and right click. select “convert to smart object”.
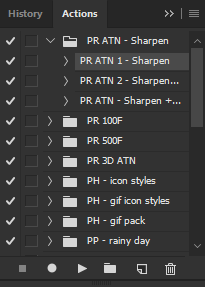
8. now that it’s a smart object, go ahead and use a sharpen action on it. I’m using my own sharpen action that I’ve uploaded here.
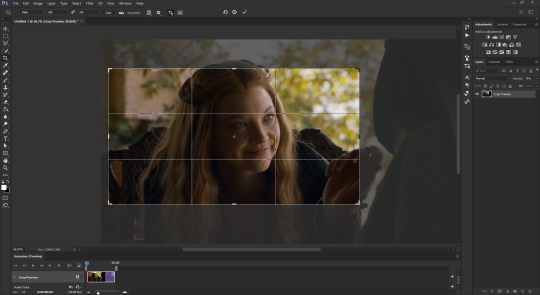
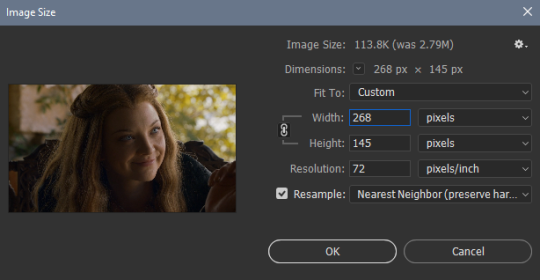
9. crop and resize your image to your desired dimensions. I’m using 268 x 145.
10. add your psd/colouring. I’m just using a very simple psd consisting of curves, brightness and contrast, levels, and a bit of colour balance and selective colouring.
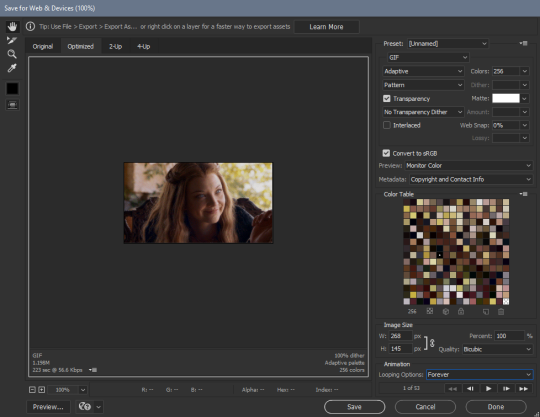
11. go to file>export>save for web (legacy). make sure the looping option is set to forever and just play around with adapative/selective and pattern/diffusion, see what looks best for your gif.
IMPORTING SCREENCAPS
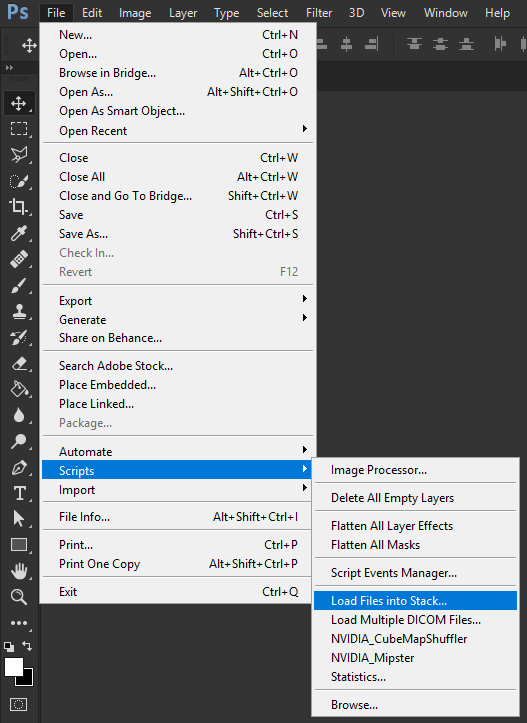
1. go to file>scripts> load files into stack.
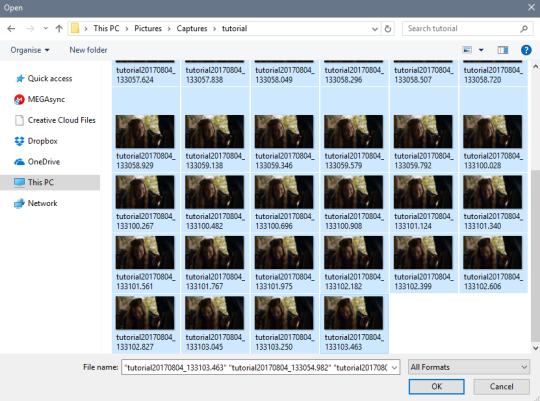
2. Select either file or folder from the drop down menu and click browse. Locate your screencaps and select them all and hit ok.
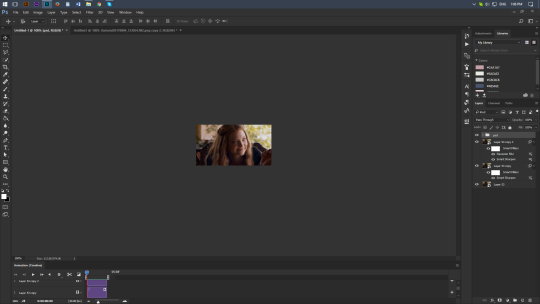
3. this is what it’ll look like when all your layers are loaded in.
4. in your animation window click “create frame animation”. if you don’t have your animation window open go to window>animation window.
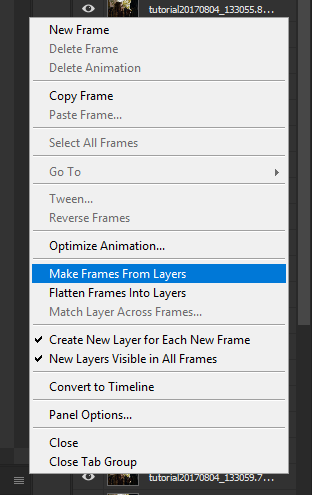
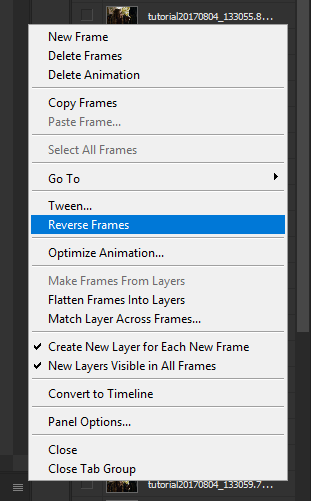
down the bottom in the animation window, in the top right corner will be an icon. click it and select “make frames from layers”.
5. click that same icon again and select “reverse frames”.
6. click that icon again and select “select all frames”. now all your frames are selected which means whatever you do to one frame will apply to the others. click on the number below the frame thumbnail. (e.g. 0 sec) and select “other”. this is where you will change your frame delay which impacts the overall speed of your gif. I generally use 0.05-0.07 seconds but it depends on your gif and how many frames it has. just play around with different delays til you find something to your liking.
7. there’s a small icon in the bottom left corner of the animation. click it and it will convert your frames to a timeline. after that select all your layers in your layers panel and right click. select “convert to smart object”.
8. now that it’s a smart object, go ahead and use a sharpen action on it. I’m using my own sharpen action that I’ve uploaded here.
9. crop and resize your image to your desired dimensions. I’m using 268 x 145.
10. add your psd/colouring. I’m just using a very simple psd consisting of curves, brightness and contrast, levels, and a bit of colour balance and selective colouring.
11. go to file>export>save for web (legacy). make sure the looping option is set to forever and just play around with adapative/selective and pattern/diffusion, see what looks best for your gif.