#star wars costume
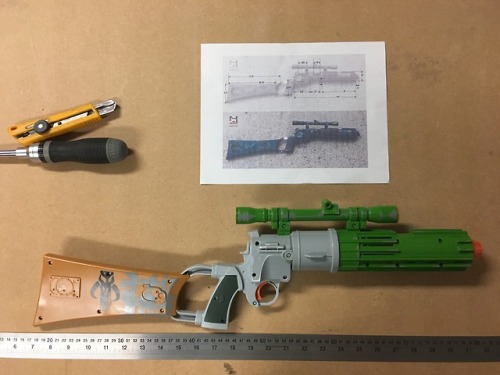
Hey and while we’re waiting, why don’t we see if we can make this toy look a little less like a toy, shall we? Find me on twitter for more regular process updates (@Nate_Bolton) or wait here for summary posts!
Post link
Alright, here’s a quick summary of the painting process for the rocket pack. First, primer. After primer, lay down some silver/aluminum wherever you think you’re going to want the fancy paint chip. I just do it for high-visibility areas, and anywhere where I need a lot of metal to show through. It’ll make more sense later. Read on!

Step 2: With the silver on, I use Crayola kids “Project Glue” as a masking substance. Just paint that stuff right onto the prop wherever you want your simulated paint chips and scratches to show the silver underneath. Definitely test whatever glue you use before you put it on your prop! I use kids glue because it peals off super easy.

Step 3: So once the masking is all done, it’s time to start laying down your base colours. Boba’s rocket pack in ROTJ actually has the most preschool color scheme you’ve ever seen. Thankfully, weathering is a beautiful thing.

Step 4: details, stencils, stuff. These are just made by verrry carefully cutting stencils out of painters tape–though there are a million ways to make stencils.

Step 5: The good stuff! I start with a “grunge” pass. I’ll do a wash with a sort of oily black-brown, and then airbrush on the accumulation of dirt, dust, carbon, etc. Remember, weathering tells the story of your prop, and it shows if you just put it on randomly. Story is king!

Step 6: last but certainly not least is the “scratches” pass. My favourite. This is where I use a fine pen-knife/exacto blade to peel off the kids glue and reveal the beautiful silver underneath. I ALSO do a fine detail pass with a brush and some Testors silver model paint to put in all the really fine scratches and worn corners and stuff. There are tons of techniques for weathering, and no rules, so have fun! Write your prop’s story. Hope some of this is useful!
Post link


DONE!! Very happy with the result. I was able to put a lot of what I learned with previous parts of the suit into this one, and even try out silicone mold making and resin casting, which was awesome. I’ll post a breakdown of the painting process next.
Sprayed a whole bunch of blue last night.
Also on the topic of airbrushes: thinners! A good thinner is a must if you want to use off-the-shelf acrylic craft paints (which I often do). While I have a lot to learn about airbrushing still, I have discovered a few thingsthat might be useful to you, too!
I haven’t fully tested these two thinners side by side (which I will do and post the results), but for now I’ll post the recipes and you can try them out for yourselves if you like.
Thinner option #1: Pledge Floor Care with Future Finish
Pros: This seems to give the paint a fairly hard and durable surface.
Cons: Have to test this further, but doesn’t seem to completely dissolve the acrylic paint, which has lead to a verrry slight orange peel texture, and adds a low level of satin/gloss to the paint.
How to make it: Go to a store that carries it (I got mine at Wal-Mart in Canada), buy it.
Notes:This seems to be more commonly used as a top coat, which it does very well. It will protect the paint beneath and gives a satin/low-gloss finish. Here’s a video on that and some other top-coat options.
Thinner option #2: Make your own
Pros:Crazy cheap, thins acrylic paints beautifully, can be used to flush your airbrush between colours. Seems to Retains original sheen level of paint (satin stays satin, matte stays matte–though more testing is needed on this).
Cons:Paint needs a topcoat, as this does not add strength to the finish.
How to make it: First off, this is not my recipe! I directly followed this video from Luke’s APS on Youtube. Go check it out!
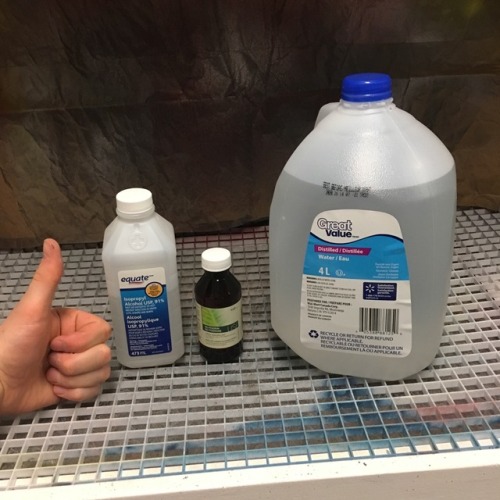
Ingredients: Distilled water, glycerin, 91% isopropyl alcohol, thumbs up.
Directions:In a vessel of your choice (I used a 500ml water bottle) mix 2/3 distilled water, 1/3 isopropyl alcohol, and 1ml glycerin (more/less if you’re making more/less than 500ml). Shake it up a bit and you’re done. Thumbs up!
Notes:So far, I love this mix. I want to test it on a few different brands of acrylic paints before I totally leave Pledge behind, but so far it seems to really do a great job of thinning the paint, and I love that I can use it to clean up afterwards. It’s so cheap that I don’t sweat using it to flush my brush frequently or clean out jars etc. You can also make a variation of this that includes ammonia-free glass cleaner to act as an airbrush cleaner.
Leave a comment if you end up trying either of these, I’m curious to know what you think!
Post link

So, I’ve wanted to a desert themed kit since finishing my initial loth-cat armor and I think the post-imperial style would fit well.
I’m in no rush to make this and might not go for MMCC approval right away, but I wanted to share what I’m dubbing the #cactuscatmandonow!

So my mom bought this sofa and now she’s very glad that I’m finally also look stylish

