#digivolution

, who made her debut in the Digimon Tamers series")
Renamon is a fan-favorite Digimon (digital monster), who made her debut in the Digimon Tamers series. She takes the appearance of a golden fox and is rather intelligent for an rookie level Digimon. Her partner is the hot-headed Rika Nonaka. Both she and Rika saw their partnership as a means to an end, looking to win battles, become stronger, and become the absolute best.
In time, they would learn to appreciate each other on a personal level and discover that there is much more to life than fighting, culminating in the merging of the two, the mega evolution as Sakuyamon.
Post link
Our precious boy Tokomon is growing up so fast
Oh. My. Angemon this is freaking cool!!
Digimon Adventure 2020
Digimon Adventure 2020 reboot is my therapy, and Digivolutions are what I live for.


I’m screaming like a giddy little schoolgirl.
THE DIGIVOLVING FIGURES OF MY CHILDHOOD ARE COMING BACK!!!
They look better than ever and you can bet I’m buying like three of each. Both are up for preorder now on Amazon, Ami Ami, and CDJapan to name a few!
Post link


Lopmon’s standard line… If I had a canon Digimon, this is probably what I would have. Classic yet predictable I suppose.

[video: Princess Tutu parody of the original digivolutions with spinning low-poly models of Ahiru as a duck, then as a girl, then as Princess Tutu. The Digi-vice has been replaced with her necklace. The background music is from the original english dub. end.]
me, attempting to explain Princess Tutu: so she’s a duck and she turns into a human girl, then a magical girl–
my friend: like a digimon??
me: I was literally about to say “like a digimon”, yes!!

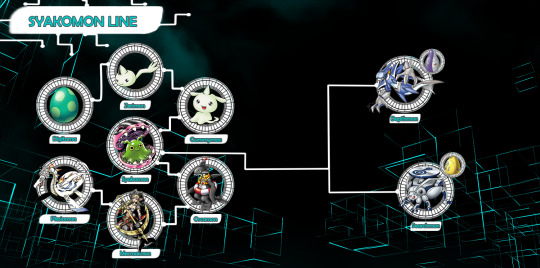
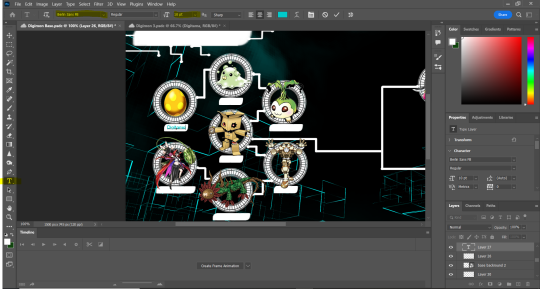
Syakomon Digivolution Line! + Armor Digivolutions
- Fresh: Zerimon
- In-Training: Zerimon
- Rookie: Syakomon
- Champion: Orcamon
- Ultimate: Mermaimon
- Mega: Plesiomon
- Digi-Egg of Reliability: Depthmon
- Digi-Egg of Knowledge: Searchmon
Inspired by Digimon DEX on Instagram
Post link
This is a guide to how to make a Digivolution Line Edit
@kingofcool21 originally asked for a base to make edits like this (I also wanna say I’m it took me this long to get back to you on this):
I’ll provide the base, but I also wanna walk though the whole edit process if anyone wants to try it.
(Note: I use photoshop to make the edit and the edits was inspired by this Insta user https://www.instagram.com/digimondex/?hl=en)
Find the guide under the cut:
1. The first thing you should do is think of what Digimon you want in the line. There are six main stages of a Digivolution.
- Fresh
- In-Training
- Rookie
- Champion
- Ultimate
- Mega
I like to name them like this so I don’t get confused over which stage is which

Then you have alternate stages like armor digivolutions.
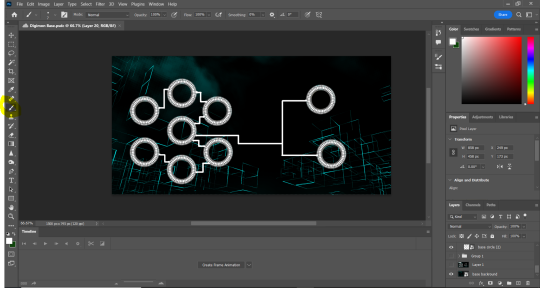
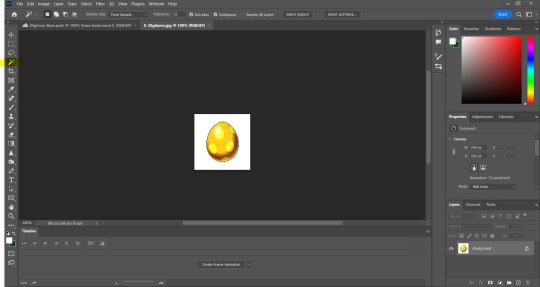
2. You start with this image (sized 1500 by 745)

3. Save this image so that you can paste it into the picture

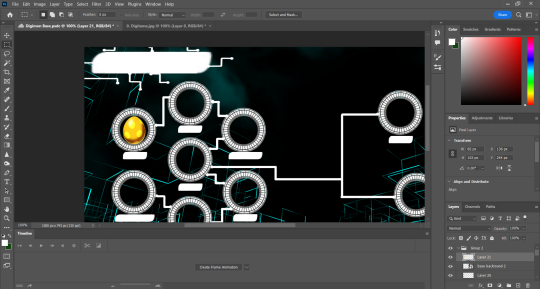
4. An important thing to do is to map out where you want the circles to be.

5. (Optional but you can add this dots to mark the lines)
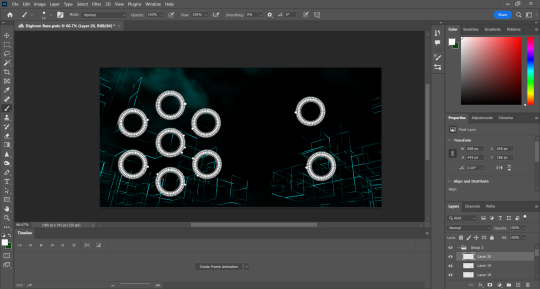
6. To draw lines select the paint tool and then then hold down the shift key and click where you want the line to end
7. I’m going to add a transparent pic of the layer used in the next image, so you be able to edit it into any position you want

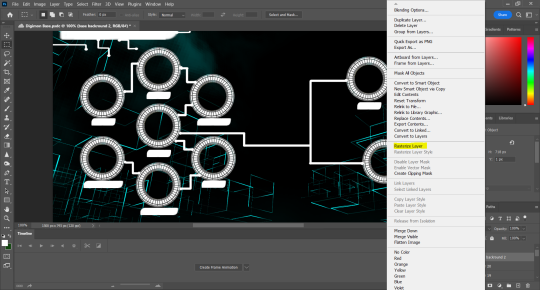
To edit the shape itself you have to right click on the layer and click radicalize layer (highlighted in yellow), then transform selection
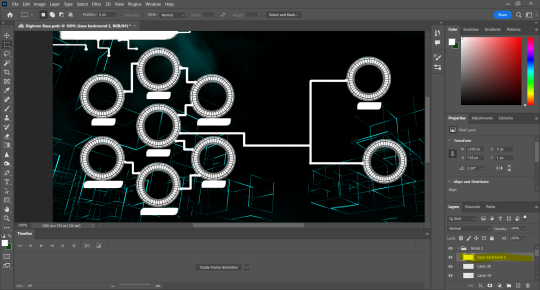
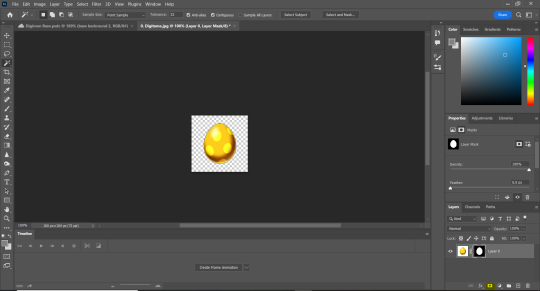
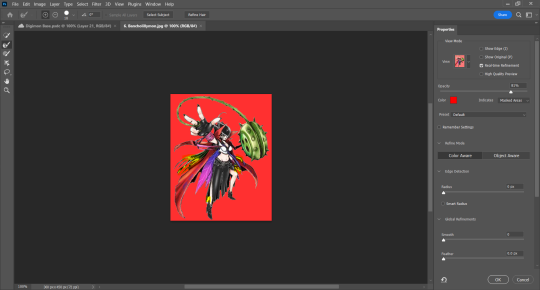
8. Now it’s time to edit the pics of the digimon!
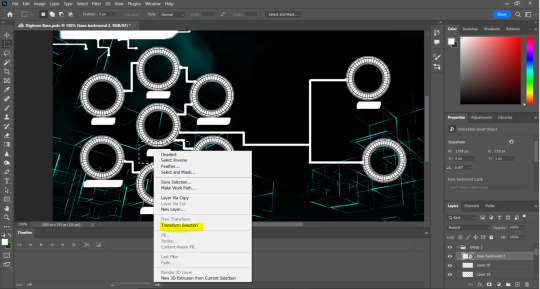
Open the image and pick the magic wand option.
You’ll then wanna select all of the white backround area and then click and select the select inverse option

Then you go down to the right hand corner and pick the vector mask option. This should give you a clear backround.
I would also recommend saving the image as it is in case you want to use it later. If you don’t feel like doing that just copy and paste the image into the original file.
ALSO if you’re going to save your images remember to save it as a PNG otherwise the background won’t be clear, it will just be a flat white
And one last thing for this step: You mind find with later stages you need to highlight extra places at once. Just hold down the shift button and you will be able to magic wand several areas at once.
You can also use the select and mask tool to make sure you haven’t missed anything.
9. Text Time!
Click the text tool and change the font to Berlin Sans FB and the size to about 10. I choose to make the text blue, but you can choose any colour you want (The title text should be around 24 size)
You can then select “add a layer style” and pick the Stroke option to give your text a bit of extra pop

10. Save your image as a png and you’re offically done with your Digivolution!


Lately,@sage-striaton and I have been talking a lot about Biomerging and how much we love and hate certain digivolutions. It was definitely time to draw some proper genderbent Jenruki power biomerge couple I based Jenny’s art on Sage’s design from a few days ago on instagram, cause it is so adorable! And I included a few elements from the Terriermon X Antibody version… cuuute! ENJOY and visit Sage’s Instagram page and her adorable Tamers OCs!
-
OurInstagramaccount where we share additionalcontent like sketches, WIPs and funny InstaStories:AskOlderTamers
Please do not repost my artwork without permission!
[Don’t forget to like, share, comment and follow this blog and show support to artists in general, this gives us the true energy to continue what we are doing ♥]
Post link

