holy fuck is right… but… does it work with legs???
yes !!
but how much extend
^^^^^^^^^^
I NEARLY CHOKED
ENJFDFNFATFVFDF
finally. i can be accurate
This is too fucking great to not reblog
I give it MASCLES
BIG MACHO
LMAOOOOOO
Okay but for anyone who legit wants to know how to calculate it correctly:
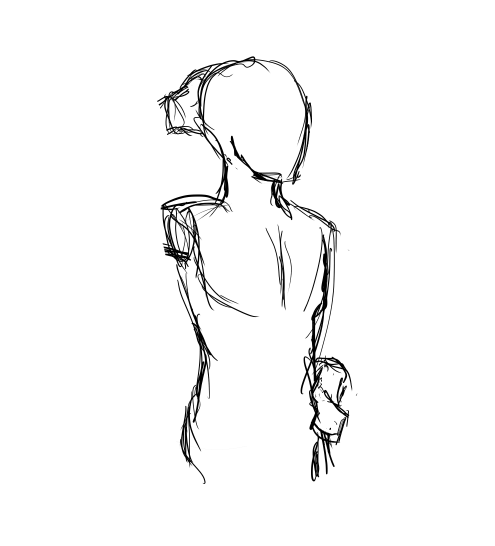
The elbow joint on average rests a couple inches higher than the navel, so if you measure how long the distance is from the middle of the shoulder to that point then you have the length of the upper and fore arms!
So if anyone’s wondering about legs too, the simplest rule of thumb is that the length from the top of the leg to the knee is equal to the distance between the top of the leg and the bottom of the pectorals:
And I wanna stress that when i say “top of the leg” i’m not talking about the crotch (please don’t flag me tumblr it’s an anatomical term) i’m talking about the point where the femur connects to the pelvis, which is higher up on the hips:
It’s easier to see what I’m talking about in this photo of a man squatting:
So yeah if you use that measurement when using this technique you should get fairly realistically proportioned legs:
But remember! messing with proportions is an important and fun part of character design! Know the rules first so you can then break them however you please!
HOW THE HELL DID I FIND THIS POST OMG
Licherally in the midst of drawing a guy and crying at how bad the arms are. Thanks Tumbles
I only ever saw the part where people started drawing the limbs outrageously long and genuinely wanted to know how to fix that, so I’m really thankful to see the rest.
being a self-taught artist with no formal training is having done art seriously since you were a young teenager and only finding out that you’re supposed to do warm up sketches every time you’re about to work on serious art when you’re fuckin twenty-five
someone: oh yeah, do this exercise during your warm ups! it’ll help
me: my what
What’s up I have an actual college degree in art and I was never ONCE taught to do warm ups.
when i was in undergrad, it was kind of mentioned in and offhand way that we should do warmups, but we were never shown what that meant. And, y’know, we were young so it didn’t matter so much.
Being older now and having an art job it’s…kind of essential.
So: a quick primer for those of you who are like ‘ok but how do i actually go about doing this warmup thing.’
1) you may be tempted to do ‘a warmup drawing’ which is just a drawing that will take longer than it needed to and probably be frustrating and kind of bad because you didn’t warm up first. It’s tempting but always a trick your brain is playing on you! Do not trust!
2) warmups will vary based on what feels good to you/what task you’re about to do/what motor skills you want to practice. That being said, some good standbys:
a) circles. Just a whole page of circles on whatever drawing surface you’re going to be using, whether that’s your tablet or your sketchbook or a drawing pad on an easel. For these circles you should make sure that you’re drawing from your shoulder and not your wrist. In fact, you want to be drawing from your shoulder rather than your wrist most of the time! forever! your wrist is delicate please preserve it!
In order to ensure that you’re drawing from your shoulder, when you’re holding your pencil or whatever drawing tool you’re using, the only part of your hand that should be touching the drawing surface is part of the last two fingers–some people prefer the finger tips, but I tend to favor the first knuckles. Either way, the fingers should really be ghosting over the surface, providing guidance rather than support.
I usually start with big circles and then go to smaller circles and lines of ellipses, and then try to fit circles and ellipses inside other shapes i’ve already drawn as a precision exercise, but i don’t do that unless i’m feeling loose
b) spirals! i don’t always do spirals, but if i’m stiff and the circles just aren’t cutting it, spirals are a good fall back. I start from the center and work outward, going both clockwise and counterclockwise until i feel comfortable with the whole range of motion. Some people really care about getting perfect spirals but for me it’s all about making sure i’m comfortable with how i’m moving so who really even cares about how the spirals look. Not me!
c) lines! straight lines! in parallel! i do a mix of vertical, horizontal, and diagonal. These are often more from the elbow than the shoulder, especially if I’m working on a smaller surface. For this exercise, I recommend holding the drawing tool perpendicular with the surface
d) connect the dots. This is a precision and accuracy exercise and takes two forms. The first is to draw two dots and then draw a straight line between them. The second is to draw three dots and draw the curve that connects them. This sounds a lot simpler than it is in practice. Take time to ghost over the line you plan to draw before actually committing to your line. (I don’t always remember where I picked up my warm up exercises, but I’m pretty sure I got this one from Scott Robertson. His how to draw and how to render books are very technical but also accessible and worth checking out)
e) cubes, spheres, cones, and cylinders. These help get your brain into a more volumetric space. I draw multiples of each, rotating the forms around, and I’ll often take the time to do some rough shading on at least a few of them
f) spidermans! This one is really good if you’re going to be storyboarding or working on dynamic poses. Just fill a page full of spidermans doing all sorts of acrobatics.
g) beans. I don’t do beans too much anymore, but I know a lot of people like it so I’m mentioning it here. Fill an area with different size bean shapes without lifting your pencil off the paper.
h) short medium and long line repetition. draw a short, medium, and long line on your page, and then draw directly on top of them 8 to 12 times, doing your best to exactly trace what you’ve already drawing. Repeat with a wavy line. I’m bad at this one, which means I probably need to do it more.
And there are lots more options too! Hit up youtube to see what other people recommend, put together your own go-to list, mix it up when you’re getting bored, etc.
This is a long list, I know, but I usually don’t take more than 10 to 15 minutes to warm up, and I can warm up one handed while I’m drinking coffee, so, multitasking hurrah.
Sometimes I’ll advance to a precision warmup and find that I haven’t loosened up enough yet; it’s totally ok to go back to an earlier exercise! Also, all of this has the added benefit of kind of ritualistically getting you into the drawing mode so even if I’m not feeling it before I start, by the time I’ve gotten to the end I’m usually Ready For Drawin’. Brain hacks.
so, yeah! that’s a lot of words, but! Warmups are important! Save your joints, take less advil, do better drawings!
How on earth are you supposed to draw from a sholder? might as well tell me to draw from the foot. It makes no sense
In uni they told us that animators working on a specific character will spend a half hour before starting the actual animation to just quickly sketch out that character in a bunch of different poses and faces. Like just super quick sketches. Gets you used to the character again even if it’s only been a day since you last drew them.
I started doing that and oh boy does it help significantly for keeping characters consistantl and also helping you draw them faster when it comes time for the actual piece
being a self-taught artist with no formal training is having done art seriously since you were a young teenager and only finding out that you’re supposed to do warm up sketches every time you’re about to work on serious art when you’re fuckin twenty-five
someone: oh yeah, do this exercise during your warm ups! it’ll help
me: my what
What’s up I have an actual college degree in art and I was never ONCE taught to do warm ups.
when i was in undergrad, it was kind of mentioned in and offhand way that we should do warmups, but we were never shown what that meant. And, y’know, we were young so it didn’t matter so much.
Being older now and having an art job it’s…kind of essential.
So: a quick primer for those of you who are like ‘ok but how do i actually go about doing this warmup thing.’
1) you may be tempted to do ‘a warmup drawing’ which is just a drawing that will take longer than it needed to and probably be frustrating and kind of bad because you didn’t warm up first. It’s tempting but always a trick your brain is playing on you! Do not trust!
2) warmups will vary based on what feels good to you/what task you’re about to do/what motor skills you want to practice. That being said, some good standbys:
a) circles. Just a whole page of circles on whatever drawing surface you’re going to be using, whether that’s your tablet or your sketchbook or a drawing pad on an easel. For these circles you should make sure that you’re drawing from your shoulder and not your wrist. In fact, you want to be drawing from your shoulder rather than your wrist most of the time! forever! your wrist is delicate please preserve it!
In order to ensure that you’re drawing from your shoulder, when you’re holding your pencil or whatever drawing tool you’re using, the only part of your hand that should be touching the drawing surface is part of the last two fingers–some people prefer the finger tips, but I tend to favor the first knuckles. Either way, the fingers should really be ghosting over the surface, providing guidance rather than support.
I usually start with big circles and then go to smaller circles and lines of ellipses, and then try to fit circles and ellipses inside other shapes i’ve already drawn as a precision exercise, but i don’t do that unless i’m feeling loose
b) spirals! i don’t always do spirals, but if i’m stiff and the circles just aren’t cutting it, spirals are a good fall back. I start from the center and work outward, going both clockwise and counterclockwise until i feel comfortable with the whole range of motion. Some people really care about getting perfect spirals but for me it’s all about making sure i’m comfortable with how i’m moving so who really even cares about how the spirals look. Not me!
c) lines! straight lines! in parallel! i do a mix of vertical, horizontal, and diagonal. These are often more from the elbow than the shoulder, especially if I’m working on a smaller surface. For this exercise, I recommend holding the drawing tool perpendicular with the surface
d) connect the dots. This is a precision and accuracy exercise and takes two forms. The first is to draw two dots and then draw a straight line between them. The second is to draw three dots and draw the curve that connects them. This sounds a lot simpler than it is in practice. Take time to ghost over the line you plan to draw before actually committing to your line. (I don’t always remember where I picked up my warm up exercises, but I’m pretty sure I got this one from Scott Robertson. His how to draw and how to render books are very technical but also accessible and worth checking out)
e) cubes, spheres, cones, and cylinders. These help get your brain into a more volumetric space. I draw multiples of each, rotating the forms around, and I’ll often take the time to do some rough shading on at least a few of them
f) spidermans! This one is really good if you’re going to be storyboarding or working on dynamic poses. Just fill a page full of spidermans doing all sorts of acrobatics.
g) beans. I don’t do beans too much anymore, but I know a lot of people like it so I’m mentioning it here. Fill an area with different size bean shapes without lifting your pencil off the paper.
h) short medium and long line repetition. draw a short, medium, and long line on your page, and then draw directly on top of them 8 to 12 times, doing your best to exactly trace what you’ve already drawing. Repeat with a wavy line. I’m bad at this one, which means I probably need to do it more.
And there are lots more options too! Hit up youtube to see what other people recommend, put together your own go-to list, mix it up when you’re getting bored, etc.
This is a long list, I know, but I usually don’t take more than 10 to 15 minutes to warm up, and I can warm up one handed while I’m drinking coffee, so, multitasking hurrah.
Sometimes I’ll advance to a precision warmup and find that I haven’t loosened up enough yet; it’s totally ok to go back to an earlier exercise! Also, all of this has the added benefit of kind of ritualistically getting you into the drawing mode so even if I’m not feeling it before I start, by the time I’ve gotten to the end I’m usually Ready For Drawin’. Brain hacks.
so, yeah! that’s a lot of words, but! Warmups are important! Save your joints, take less advil, do better drawings!
The creator of the original, the animal reference tool, made their own human reference tool which allows you to search based on different body parts and poses!
Forearms: Extensors Flexors and Ridge muscles. I’m not sure how they contract and relax, it may not be accurate but I think it was enough to learn them well


")
")
")
")
")


