Wig Styling: Working with Foam pt 3 - Wrapping Flat Objects and The Wonders of Clear Glue
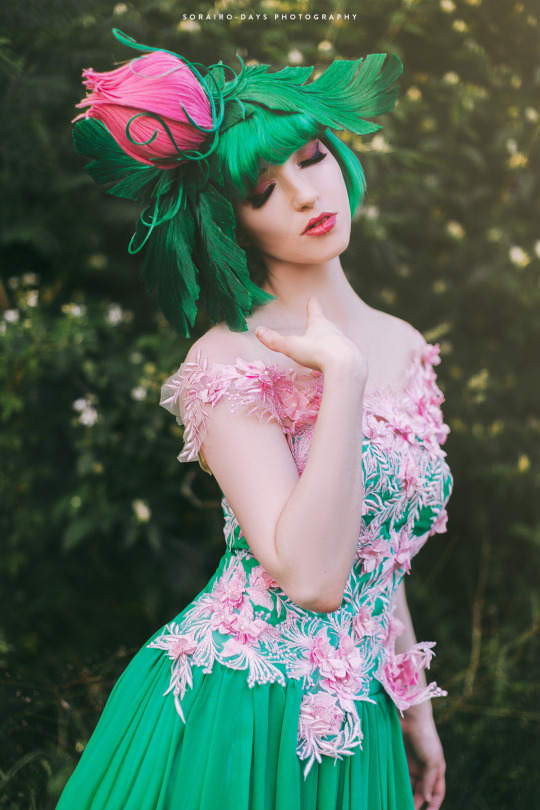
Wow I sure did forget to post this in a timely manner! This is the third part of our guide to working with wigs and foam, and lately it’s been my favorite! This is a great method to use on wigs like Ivysaur, which require a lot of clean, flat-ish shapes. While I could technically use the hot glue wrapping technique covered in part 2, this is a bad choice for a number of reasons. First, the edges of my object are not hidden, which means I’d have a big, visible hot glue mess at the edge of my weft. Second, it’s difficult to keep hair taut on a flat or gently curved object, so I’d have a hard time keeping the tension up while gluing the hair down. And third, this method is just plain nicer looking.
Instead I used 100% tacky glue on this wig. I recommend this method whenever possible because it is VERY clean, very secure, and mistakes are easily fixed. This is a difficult method to use on a bun or round object because you’re fighting against gravity, but you could always use tacky glue after hot gluing down your edges. Instructions under the cut:
Foam, stiffened felt, posterboard (or understructure material of choice)
Spare wefts
Tacky glue or other PVA-based glue (ie Elmers)
Water
Paintbrush
1) Begin by constructing your base shape from your understructure material. If your shape is curved, remember that any extreme bumps or ridges may be visible after laying your very flat layer of hair. Try to make your shape as smooth as possible.
2) Paint your shape to match your wefts and allow to dry.
3) Add a small amount of water to your glue until it’s around the viscosity of corn syrup or soft body paint - a very small amount should do. You want it to be easier to brush on, but not so runny that the glue flows through your wefts.
4) Spackle some glue onto your base, along where you will lay your first section of hair.
5) Grab your first section of hair. I HIGHLY recommend keeping the hair attached to your weft for now so that you can pull on the fibers without them tangling or pulling away. Comb the hair out so that it’s free of tangles and then paint a generous layer of glue onto either side.
6) Holding firmly onto the weft, run your fingers from the top of the hair to the bottom, smooshing the glue throughout the fiber. Make sure everything is well coated and repeat, squishing out any excess glue if you used too much. If you accidentally tangle your hair, comb it through with a fine-tooth comb.
NOTE: More glue is better than less glue. If you use too little, your glue may begin to dry before you are done coating the fibers, which will cause pilling and may also cause it to not dry clear.
7) Lay your hair onto your base. If the edge of your hair will be visible, take care to form it into a nice point.
8) Repeat the above steps, laying your next section of hair alongside your first. Continue until your entire base shape is completely covered.
9) If your hair is popping up from the base shape or not staying put in the direction you want it to, add a duckbill clip or bobby pin. Allow to completely dry for several hours.
10) Once dry, smooth down or trim away any stray hair you may have missed. Trim up any edges that will eventually be hidden in your finished style.


")


![[ 08 - Pumpkin ] You’re a fool to think I wasn’t going to draw Ivysaur at least once this month#ar](https://64.media.tumblr.com/b84b6b7cdc89f02a6d484f1dba900eb4/tumblr_pgbgheetIE1tii0zpo1_1280.jpg "[ 08 - Pumpkin ] You’re a fool to think I wasn’t going to draw Ivysaur at least once this month#ar")


