#roman archaeology

Io Saturnalia! The Roman celebration of the end of the year, Saturnalia, is next week! So celebrate another end of another year, I’m making a simple baked treat to serve for any saturnalia celebrations you have planned - a quick and easy Dulcia Piperata (as recorded by Apicius)
In any case, let’s now take a look at The World That Was! Follow along with my YouTube video, above! Check out my Patreon for more!
Ingredients
1 cup / 150g flour
2 eggs
½ tsp ground rosemary
75 g chopped almonds
2tsp ground pepper
100 ml sweet white wine (or grape juice)
2 tbsp honey
Milk
75g Chopped hazelnuts
Method:
1 - Mix Dry Ingredients
Toss about a cup of flour in a bowl. Add in some rosemary, a couple teaspoons of ground pepper, and about 75g of chopped almonds to the bowl. Mix everything together, just so it’s all evenly mixed. Rosemary is a commonly-found herb in the Mediterranean, and found it’s way into Roman cooking in a variety of dishes! I’m using plain white wheat flour, but wholemeal wheat or spelt would have also been used here.
2 - Mix the Other Ingredients
Next, crack two eggs into a measuring jugs, before adding your wine (or grape juice, if you’re not using alcohol), and milk. Add in enough milk to bring the total volume of liquid up to about 450ml. Pour the jug of liquid ingredients into the dry ingredients and mix well. The whole thing will be like a pancake batter. If it’s too thin, add a few more tablespoons of flour, and if it’s too thick, add a little more milk!
3 - Bake
Next, prepare a baking tin by wiping some olive oil over the sides and base of it! Pour the mixture into your tin. Bake at 190ºC / 375ºF for about 30 minutes. It should be done when a skewer comes out clean when the centre of it is poked. Take it out, and let the whole thing cool down in the baking dish. It may collapse a little, but this is totally fine and to be expected!
4 - Finish
When the cake is still warm, spread some honey over the top and sprinkle it with chopped hazelnuts and a few whole hazelnuts. The honey will caramelise a little at the edge of the dish, which adds a lovely deep flavour to the whole thing!
Serve up warm with another spoon of honey, and dig in!
The finished dish is super light and sweet, with a tangy undertone from the wine! The honey drizzled over the top infuses into the body of the cake, resulting in a springy, sponge-like cross-section! The rosemary adds a lovely woody kick to each slice, and pairs wonderfully with the taste of the white wine!
This week, I’m making some hard-boiled eggs in a pine nut sauce, as recorded by Apicius. This is a quick and easy recipe that would have served as a cheap but filling meal for many Romans in antiquity - requiring at least eggs, pine nuts, and garum. However, the recipe recorded by Apicius gives us a glimpse at a more middle-class meal!
In any case, let’s now take a look at The World That Was! Follow along with my YouTube video, above! If you like what you see, consider supporting me on Patreon!
Ingredients
200g pine nuts (soaked overnight in water)
4 eggs
1 tbsp honey
1 tbsp vinegar
1 tbsp garum (or fish sauce)
pepper
salt
dried lovage (or celery seeds, ground)
Method
1 - Prepare the Sauce
To begin making this recipe, we need to soak our pine nuts in some water overnight. So start making this the day before you want to eat it!
Place the soaked pine nuts into a mortar and pestle, and get to grinding. They should break down fairly easily. Grind this into a consistency you like - I enjoy a few whole pine nuts here, but you could of course make this entirely smooth!
Then, add in some pepper, and some dried lovage. This herb can be a little hard to come by, so you can of course use some celery seeds instead! They both have a similar taste profile.
On top of the seasonings, add a tablespoon of honey, a tablespoon of vinegar, and a tablespoon of garum - the staple of Roman cuisine! Garum is a fermented fish sauce, which appears frequently in Roman recipes, but is difficult to come by today - mainly because the method used to make it has been replaced by more sanitary methods - but Vietnamese fish sauce works well as a substitute! Mix everything together until it’s well combined. Don’t be dissuaded by the addition of fish sauce here! It won’t actually have a fishy taste!
2 - Boil Eggs
Next we need to do the most technically challenging part of this recipe: boiling some eggs. Place four eggs into a saucepan and fill it up with cold water until the eggs are just submerged. Place this pot over a high heat and let everything boil for 3-5 minutes.
When the eggs are cooked to your liking, shock them by dropping them into some very cold water, and peel them.
Cut the eggs in half and arrange them in a fancy pattern in a bowl. Onto these eggs, spoon a little bit of your sauce. Eat at room temperature and dig in!
The finished dish is a wonderfully savour treat! The sauce has a deep, meaty flavour thanks to the garum and pine nuts, with a warm background due to the addition of pepper!
Though I hard-boiled these eggs, it is likely that they were served soft-boiled as well - the yolk mixing with the sauce to form a rich luxurious sauce in the bowl!
Although I used chicken eggs here, the Romans would have most likely made use of pigeon/dove eggs, or other wildfowl (such as quail or duck). Ostrich eggs from North Africa may have also been used! Although these would have been reserved for only the most extravagant events in Rome - given the rarity of ostriches within the city normally.
Today, I’ll be taking a look at a Roman recipe, recorded by Apicius, which was likely eaten at contemporary roadside eateries in the Roman Empire - the simple isicia omentata - or what is basically a Roman burger patty! The end result is like a spiced and fragrant meatloaf!
In any case, lets now take a look at The World That Was! Follow along with my YouTube video above! If you like my recipes, consider checking out my Patreon!
Ingredients (for 5-6 burgers)
500g minced meat (beef, pork, lamb would be most fitting here)
100g breadcrumbs
2 cups wine (white or rose would work best)
100g pine nuts
50g black pepper
Method
1 - Soak the Breadcrumbs
To begin with, we need to soak 100g of breadcrumbs in a cup or two of wine. This is to add some moisture to the finished isicia, and to help pad out the meat. In antiquity, stale bread would have been used here, as it was a simple way to make the most out of every loaf of bread.
If your breadcrumbs look a little dry, add a bit more wine until it’s all damp.
2 - Mix the Ingredients
Now we need to place 500g of minced meat into a bowl, along with our soaked breadcrumbs. Keep in mind that the texture of minced meat today is more cohesive than what would have been made in antiquity! A mortar and pestle would have done the work on finely-chopped pieces of meat, becoming what’s known as “forcemeat”. But modern ground meat works well!
I used beef here, but ground pork or lamb (or even goat) would have been used in antiquity. The original recipe simply calls for “meat”, so to the readers of the time, the kind of meat would have been obvious! (such as hamburgers today being made from beef)
In any case, mix everything together in a bowl. Toss in about 100g of pine nuts, and 50g of whole black peppercorns, mixing to combine.
3 - Form the Isicia and cook
When your mixture is combined, take a small handful of it in your hands and form it into a patty. Each one should be about 1/5th of the mix (based on how I made them anyway, you can make them larger or smaller than mine). Place each one onto a frying pan with a little olive oil, and let it cook away over high heat for about 5-10 minutes, before flipping them over and letting the other side cook for the same amount of time. (The time it takes to cook them depends on how thick you make them)
When they’re done, serve up on a bed of arugula or rocket, or another edible green of your choice, and eat alongside a bit of bread!
The finished isicia are super light and flavourful! Each mouthful has a bite of heat from the peppercorns, along with a sweet, nutty flavour from the pine nuts! The breadcrumbs soaked in wine gives us a bit of sharpness, depending on the kind of wine you used.
While it’s unknown exactly how these were served in antiquity, it’s not unlikely that they were paired with bread and edible greens, as both of these would be readily available and filling sides for a meat dish like this! Based on earlier Italian cuisines (i.e. Etruscan), stale bread may have been used as a plate of sorts, which would then have been eaten after the main dish (the stale bread turning soft when soaked with the oils from the meat).
Today, I’ll be making a sweet dessert recorded by Apicius - the simple pear patina, which is kind of like a baked sponge in terms of texture. The original recipe requires some ingredients that are difficult to get a hold of today, so I’ve substituted some close modern approximations - which work just as well!
In any case, let’s now take a look at The World That Was! Follow along with my YouTube video, above!
Ingredients
5 pears
white wine (to cook the pears)
2 tbsp honey
pepper
cumin
½ cup sweet wine
4 eggs
1 tbsp olive oil
Method
1 - Poach pears
To begin with, we need to prepare our pears. Do this by pouring most of a bottle of wine into a pot large enough to accommodate your pears. You can also use water, if you’re not keen on using alcohol! Place this over a high heat, and bring it to a simmer.
When it’s simmering steadily, carefully place your pears into the liquid, before pouring a couple tablespoons of honey over this. Make sure the liquid covers the pears when they’re touching the bottom of the pot. Return to the heat, and let the pears poach partially for about 5 minutes, or until a knife, when inserted into the centre of one, comes out easily.
Drain your pears, and let them cool to room temperature, before you deal with them. Technically the leftover liquid doesn’t get used later on, but it’s perfectly drinkable as is! It’s a super sweet, mildly pear-tasting wine!
2 - Prepare Pear Mix
When your pears have cooled, divide each one into pairs of pears using a sharp knife. Then carefully cut the tough, fibre-filled core of the fruit. The skin of these should be practically falling off, but remove them anyway.
Place the softened fruit into a large bowl, and toss a tablespoon of ground cumin on top of this, along with a few twists of freshly ground black pepper! On top of this, add another squeeze of honey, and a little splash of olive oil. Also pour in a half a cup of a sweet wine into this - I used a bit of the poaching liquid, but passum (a raisin wine) is used in the original recipe, but any sweet wine is suitable. Mix all this with a mortar and pestle - or a fork, if you’re not from antiquity - until it’s just combined. When it’s mixed, crack four eggs into the bowl, and mix everything until there’s no more streaks of egg visible.
3 - Bake the Patina
When your mixture is done, go lightly oil a baking dish. It’s likely that a terracotta pot would have been used in antiquity, but an ovenproof baking dish works well today. Don’t over-oil the inside too much!
Gently pour in your pear mixture, and place the whole thing into the centre of an oven preheated to 180° C / 350° F for about 45 minutes, or until a skewer inserted into the centre of your patina comes out clean.
Let this cool to room temperature before digging in! Don’t worry if it deflates a little, this is to be expected and is completely fine!
The finished dish is very sweet, with only a very slight hint of pear. Although it seems a little plain, this pairs fantastically well with hard, salty cheeses, and sharp-tasting dishes (such as olives in vinegar) - as such, it’s unlikely that this was eaten alone as a dessert, more likely it was a companion dish that was intended to be a complimentary dish to others.
Today, I’ll be going back to the Hellenistic Period, to the Hasmonean dynasty of Judea. The recipe in question is a simple honeyed-hens, recorded by Seleucid accounts of a feast held by one of the ruling elite. Though the original recipe refers to it plainly as chicken with honey, I’m going to be recreating it today based on our knowledge of contemporary dining habits!
In any case, let’s now take a look at the World That Was! Follow along with my YouTube video above!
Ingredients
4 chicken thighs
salt (to taste)
pepper (to taste)
ground cumin
ground coriander
2 tbsp wholegrain mustard
2 tbsp olive oil
2 tbsp honey
2-4 cloves garlic
Method
1 - Prepare the Chicken
To begin with we need to season our chicken. Do this by sprinkling some salt, some freshly ground black pepper, some ground coriander, and some ground cumin on top of your chicken, before rubbing it in with your hands. In antiquity, chicken would have been eaten, along with wildfowl like duck, and even doves or pigeon. Any of these birds would work well here, but chicken would be the easiest meat to deal with today.
Leave your chicken aside while you go make the sauce.
2 - Prepare the Sauce
Next, we need to make a sauce to go with this. In antiquity, mustard seeds and vinegar would have been the base of several sauces or condiments. You can easily do this here, but a better solution would be to use pre-made wholegrain mustard, like I’m doing.
In any case, toss about a tablespoon or two of mustard into a bowl, along with a good glug of olive oil. On top of this, add an equal amount of honey, along with a few crushed cloves of garlic. Mix all this together into a fairly thick sauce. If you want, you can thicken this over a medium heat for a few minutes until it’s just about bubbling. I didn’t do this, but it turned out well!
3 - Assemble the Dish
Toss your seasoned chicken into a lightly oiled baking dish. Pour over your sauce, and try and spread it around evenly. If you want to, you could place the chicken into a Ziploc bag with the sauce and leave it to marinate overnight in the fridge.
Either way, place your prepared chicken into an oven preheated to 200° C / 400° F, and let it all bake away for 40 minutes, flipping them over halfway through so they cook evenly.
Take the chicken out when they’re browned and cooked through, serve up warm on a bed of edible greens like rocket, and dig in!
The finished dish is super succulent and flavourful. The spices were very floral and nutty, improved by the time spent baking. The mustard and honey mix caramelised at the bottom of the baking dish, which was a delicious bit of sweet heat when serving up!
The meat itself was very tender, with the skin on top crisping up significantly during the cooking process. In antiquity, it’s unknown if birds were divided up into legs, wings, thighs etc, before or after cooking. Though it’s likely that they may have been prepared both as a whole roasted chicken that was then divided up at the table, as well as pre-cut into more easy to manage pieces like I did here. It’s really a matter of personal preference today anyway.

“My thoughts and respect go out to Professor Grimes…, and to Audrey Williams, his unsung assistant in 1954 without whom he simply would not have been able to achieve as much as he did.”
That is John Shepherd summing up the work of Audrey Williams (1902-1978) in his publication on the Temple of Mithras. Audrey was a professional archaeologist who excavated and published sites throughout the Second World War and after. Although awarded much recognition during her working life, she is under-represented in today’s tales of archaeology from the era, and she is often only seen at the side-lines…
![Photo of Mithras Open Day. Photo courtesy of Ivor Noel Hume. Caption: Grimes seen to the left of the picture talking to the crowd. The woman at the far end hurrying past [centre] is believed to be Audrey.](http://trowelblazers.com/wp-content/uploads/2015/01/mithras_mol-580x400.jpg) Photo of Mithras Open Day. Photo courtesy of Ivor Noel Hume. Caption: Grimes seen to the left of the picture talking to the crowd. The woman at the far end hurrying past [centre] is believed to be Audrey.
Photo of Mithras Open Day. Photo courtesy of Ivor Noel Hume. Caption: Grimes seen to the left of the picture talking to the crowd. The woman at the far end hurrying past [centre] is believed to be Audrey.
Her CV is a glorious list of key sites still referred to today: Fairwood Common in Swansea, Rhosilli in Gower, Verulamium, Canterbury Roman Pavement, Barbican, Fleet Street, St Brides, and last but no means least the Temple of Mithras in London. And her colleagues and mentors were a reputable list of who’s who: Mortimer Wheeler, Sheppard Frere (cousin of Mary Leaky), Kathleen Kenyon and of course Professor William Grimes. Audrey Williams was born Audrey Davies in 1902 in Dinas Powys, South Wales. In 1920 she won a scholarship to Somerville College, Oxford. This was a notable year as on 9th October 1920 the Statue for Degrees for Women was enforced, finally allowing women to be awarded degrees. Prior to this women could study alongside men but not receive recognition. Audrey graduated in 1923 with a lower second class degree in English. After graduating she returned to Swansea and took a teaching position at a local school. She soon married her first husband Percy James Williams, and although in possession of a new degree she followed the norm of the 1920’s and resigned from her post, as very few married women continued in work. This did not last long… It was through her husband that she became involved with Swansea Museum and the Royal Institute of South Wales (RISW) , and also how she met Professor Grimes who at the time was Assistant Keeper of Archaeology at the National Museum. In the 1930’s Audrey helped her husband to reorganise and catalogue ceramic collections within Swansea Museum, and went on to complete work in her own right within the Department of Antiquities. She became the Honorary Curator of Antiquities, and in 1936 compiled an accession register of all the objects, information from which is still used today. This work, and her early excavations, gained her recognition within the RISW and she was elected as a representative on the Court of Governors of the National Museum. In 1939 she was invited to be on the local committee for the British Speleological Association, for whom she organised a special exhibition. She was also a section leader for archaeology at the Swansea Scientific and Field Naturalists Society. Between 1941 and 1944 she was appointed Assistant Inspector of Ancient Monuments by the Ministry of Works and Buildings. She was to excavate archaeological sites before they were developed for defences or military instillations, again working alongside Grimes. She excavated a number of sites, and in recognition of her work she was elected as a Fellow of the Society of Antiquaries. It was at this point she left Swansea, and moved to the Verulamium museum in St Albans. From there she began her excavation career in London and the South East. It was also during this period she divorced her first husband, and had a very short lived marriage to a second. The most notable site was that of the Temple of Mithras, which often only features the name of Grimes as the director; however Audrey was on site every day. Grimes was running another site in London at the same time, and in fact it is Audrey’s work that makes up much of the archive. After a career comparable to many modern archaeologists in 1959 she retired from professional archaeology and, having divorced her second husband, married none other than William Grimes… Many thanks to the RISW, particularly the editor and authors of “Audrey Williams (1902-1978)” Minerva Vol 10 Bernice Cardy, Jennifer Sabine and Gerald Gabb for their help and invaluable research. post by Jessica Bryan - an archaeologist following in Audrey's TrowelBlazing footsteps! Edited by Brenna
Sadly we can’t show you some really awesome images of Audrey from the excavations, because they are copyright of the Daily Mail. But if you have any great pictures, let us know… Actually - if you have any memories of the original excavation, Museum of London wants to hear from you! There is a fantastic oral history project going on RIGHT NOW, so get in touch - all them on 020 7410 2266, or email [email protected].
Read More: Shepherd, J. 1999 The Temple of Mithras, London: Excavations by W.F.Grimes and A.Williams at the Walbrook. Find out about the 60th anniversary of the excavations: http://www.mola.org.uk/blog/remembering-london%E2%80%99s-greatest-archaeological-discovery For more information on the Temple of Mithras and recent excavations: http://walbrookdiscovery.wordpress.com/


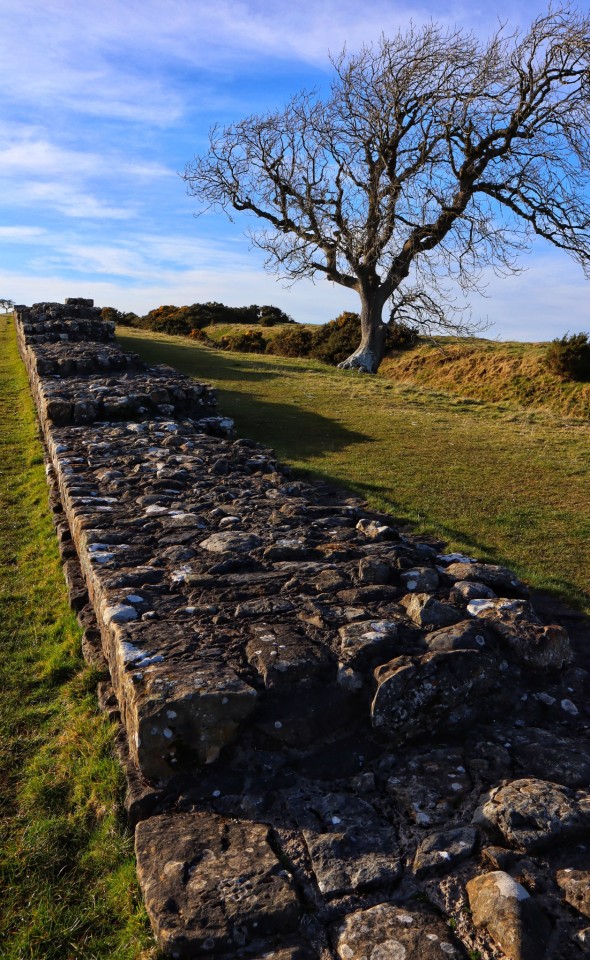


Black Carts Section of Hadrian’s Wall, Northumberland

Ares Borghese, imperial era marble, ca. 1st - 2nd century AD, Rome.
The Ares Borghese is a Roman marble statue of the imperial era. It is 2.11m high. It is identifiable as Ares by the helmet and by the ankle ring given to him by his lover Aphrodite. This statue possibly preserves some features of an original work in bronze, now lost, of the 5th century BC. - wikipedia
Post link

Limestone Etruscan funerary urn, 104 x 75 cm, late 3rd century B.C, Italy.
This object is one of five ash urns found in a tomb of the Velsi family of ancient Chiusi. This urn is the largest and best preserved of the group. Its inscription, “FASTIA VELSI LARZL, VELUS PUIA,” which extends across the front and part of the left end of the lid, identifies the cremated remains as those of “Fastia Velsi, wife of Larza Velu.” - mfa.org
Post link