#easy recipe

Today, I’m making a quick and easy accompaniment to any medieval Irish meals you have planned - a bowl of praiseach (pronounced: prashock)! The basis of this is a simple savour porridge, that’s then flavoured with some sautéed mustard greens! Although wild mustard (charlock) greens are usually used, any suitably pungent edible greens can be used!
In any case, let’s now take a look at The World That Was! Follow along with my YouTube video, above!
Ingredients (for 4 portions)
Mustard Greens / Turnip Greens
2 cups oatmeal (or oat groats)
2 cups milk (or water)
butter
Method
1 - Prepare the Greens
To begin with, we need to chop some greens. Though praiseach is normally made using wild mustard (charlock), you can also use normal mustard greens, or even turnip greens (like I’m using here). They all have similar taste profiles - being pungent, slightly spicy greens - that react similarly when being cooked.
In any case, chop your greens finely, removing any untoward-looking leaves that escaped your prep-work.
2 - Sautee the Greens
When your greens of choice have been chopped to your liking, toss a knob of Irish butter into a pan, and let it melt. You can of course use local butter, I’m just totally not biased. When the butter has melted, toss in your chopped greens, and let everything sauté away over a medium heat for only a couple of minutes. Your greens may shrivel up, but this is normal! Take them off the heat when they’ve been coated in butter, and are lovely and fragrant.
3 - Prepare Praiseach
When your greens are cooling off, go start making your porridge base. Toss equal parts of oats and water (or milk, if you want to be fancy) into a pot, and place this over a medium-high heat. Keep stirring this so it doesn’t stick to the bottom of your pot.
While I used rolled oats here, which may have had a similar analogue in antiquity, whole oat groats would have been more commonly used (i.e. the whole, unhusked grains themselves, as opposed to the modern rolled, husked, and crushed grains used here). This would have had a higher fibre content than this dish.
When your oats have been cooked, but are still about 10 minutes from being served, toss in your cooked greens. Stir all of this together, and let it infuse for ten more minutes.
Serve up warm, in a bowl of your choice, and dig in!
The finished dish is quite thin and easy-going. It’s not overly flavourful, but has a nice background heat thanks to the mustard greens. By sautéing them, you cut the edge off the taste, and let it mellow out among the oats.
Oats are a wild grain, and can be grown in relatively poor-quality soils - such as those in parts of the midlands and west of Ireland - and as a result were seen as a “peasant grain” for much of the medieval period. Porridge is one of these peasant dishes that persist into the modern day, as it’s still a simple yet filling dish that can be altered with the addition of different ingredients!
Today, I’ll be taking a look at medieval Ottoman cuisine - specifically the food seen in ottoman courts! The recipe in question is cılbır, or poached eggs with herbal yoghurt. This is a simple yet tasty recipe that is still eaten today in Turkey!
In any case, let’s now take a look at The World That Was! Follow along with my YouTube video, above! Consider checking out my Patreon if you like these recipes!
Ingredients (for 3 portions)
3 eggs
150g greek yoghurt
freshly chopped parsley (or dill, or cilantro)
2 cloves garlic
ground coriander
Method
1 - Make the Yoghurt
To begin with, we need to make a simple yoghurt for the eggs to sit on. Start this by finely chopping some fresh parsley - dill or cilantro would have also been used! Toss this into your yoghurt, along with a clove or two of crushed garlic. Mix all of this together, until it’s very well combined. Leave it to sit aside while you poach your eggs.
2 - Poach the eggs
Place a pot of hot water over a high heat until it boils. At a rolling boil, turn the heat down to low and let it simmer gently.
There’s a couple of methods of poaching eggs. I cracked an egg into a ramekin, and then dropped this into a ladle, before lowering into the water. Some of the whites of the egg became spidery and flyaway, but don’t worry! This will look amazing and silky when it’s out of the water.
Let the egg cook for a couple of minutes, before draining it and dunking it in cool water - to stop the yolk from becoming overcooked.
3 - Assemble the dish
Place a nice dollop of the herby yoghurt onto a plate, and place one of your poached eggs atop this. Sprinkle with a bit of freshly-ground coriander, and dig in with some fresh bread!
The finished dish is deliciously light yet filling. The herbs really pairs well with the texture of the egg. Although rather plain looking, it’s an easy yet luxurious way of presenting an otherwise simple dish in antiquity.
Çılbır is still eaten in turkey today, proving it’s role as a cheap yet filling meal for many throughout the centuries.
Ottoman cuisine formed as a fusion of Mediterranean, Near Eastern, and Central Turkic motifs in the early Medieval Period, which is exemplified here - using an array of culinary styles that are seen elsewhere in the region (such as Greek tzatziki being prepared in much the same way as this recipe, with the addition of mint and cucumber)
Today, I’ll be taking a look at a Roman recipe, recorded by Apicius, which was likely eaten at contemporary roadside eateries in the Roman Empire - the simple isicia omentata - or what is basically a Roman burger patty! The end result is like a spiced and fragrant meatloaf!
In any case, lets now take a look at The World That Was! Follow along with my YouTube video above! If you like my recipes, consider checking out my Patreon!
Ingredients (for 5-6 burgers)
500g minced meat (beef, pork, lamb would be most fitting here)
100g breadcrumbs
2 cups wine (white or rose would work best)
100g pine nuts
50g black pepper
Method
1 - Soak the Breadcrumbs
To begin with, we need to soak 100g of breadcrumbs in a cup or two of wine. This is to add some moisture to the finished isicia, and to help pad out the meat. In antiquity, stale bread would have been used here, as it was a simple way to make the most out of every loaf of bread.
If your breadcrumbs look a little dry, add a bit more wine until it’s all damp.
2 - Mix the Ingredients
Now we need to place 500g of minced meat into a bowl, along with our soaked breadcrumbs. Keep in mind that the texture of minced meat today is more cohesive than what would have been made in antiquity! A mortar and pestle would have done the work on finely-chopped pieces of meat, becoming what’s known as “forcemeat”. But modern ground meat works well!
I used beef here, but ground pork or lamb (or even goat) would have been used in antiquity. The original recipe simply calls for “meat”, so to the readers of the time, the kind of meat would have been obvious! (such as hamburgers today being made from beef)
In any case, mix everything together in a bowl. Toss in about 100g of pine nuts, and 50g of whole black peppercorns, mixing to combine.
3 - Form the Isicia and cook
When your mixture is combined, take a small handful of it in your hands and form it into a patty. Each one should be about 1/5th of the mix (based on how I made them anyway, you can make them larger or smaller than mine). Place each one onto a frying pan with a little olive oil, and let it cook away over high heat for about 5-10 minutes, before flipping them over and letting the other side cook for the same amount of time. (The time it takes to cook them depends on how thick you make them)
When they’re done, serve up on a bed of arugula or rocket, or another edible green of your choice, and eat alongside a bit of bread!
The finished isicia are super light and flavourful! Each mouthful has a bite of heat from the peppercorns, along with a sweet, nutty flavour from the pine nuts! The breadcrumbs soaked in wine gives us a bit of sharpness, depending on the kind of wine you used.
While it’s unknown exactly how these were served in antiquity, it’s not unlikely that they were paired with bread and edible greens, as both of these would be readily available and filling sides for a meat dish like this! Based on earlier Italian cuisines (i.e. Etruscan), stale bread may have been used as a plate of sorts, which would then have been eaten after the main dish (the stale bread turning soft when soaked with the oils from the meat).

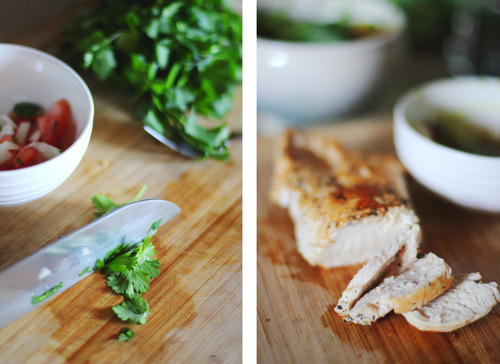
Lemon Garlic & Herb Chicken with Lemony Carrots and Potatoes
Hi Tumblrs! Happy Friday! I hope you are all having a fine summer and enjoying the start of Fall. Summer has been going by so fast! I’m shocked that the kids are back in school already. Is that just a California thing? The days are getting shorter, and nights are getting cooler. Yay, I love it. I’m still cooking, gardening and writing as much as I can. I have about 3 to 5 vegetable gardens I’m working on, in various stages of growth, harvest, demise, replanting, re-seeding, watering, weeding, fertilizing, pest and critter control etc. Anyway, all that work makes me hungry.
This is an easy dish to make if you have a busy schedule but still want some amazing home cooking. My husband and I always say “home food is best”. It’s true, not just because of price, going out to eat is expensive, but it’s way more cozy and relaxing at home. And you’ll always buy or grow better quality ingredients for yourself than a restaurant will, like free range organic chicken, the most flavorful olive oil, and organic vegetables.
Here is an easy dish perfect for chilly nights when you worked your ass off all day long and just want to throw everything in the oven and watch some smellovsision. This dish is lemony, garlicky, and deliciously savory. It’s addictive. You will find yourself eating the lemon slices from the top of the dish, they come out like tangy candy.
This is easy, the whole dish cooks in one pan. Here’s how: Wash and dry cut up chicken pieces, add to a large baking or roasting pan. Wash, clean and cut 2 to 4 potatoes into large 2 inch -ish cubes. Same with 3 or 4 carrots. Peel 1 onion and slice into large wedges. Crush and mince 5 to 8 garlic cloves. Chop fresh parsley, basil, cilantro, tarragon, dill, whatever you have, or all of them. Add all of these to a large baking dish, drizzle with about 4 tbsp olive oil, kosher salt and pepper, and 1 tablespoon palm sugar or brown sugar, optional. Cut a large lemon in half, squeeze the lemon juice on, straining out the seeds. Slice another small lemon into rounds, try to remove as many seeds as possible. Toss to coat everything. Arrange the pan with the chicken pieces on top of the vegetables, and lemon slices on top of the chicken. Add another grind of fresh ground pepper and another small pinch of kosher salt. Bake at 375 for about 45 min to 1 hour until cooked through and amazing. Yum! Home cooking is the best.
Post link

Chicken Tortilla Soup
This is delicious and so easy. I like to serve it with Nopales tortillas chips they sell on Saturdays at my farmers market. These green cactus paddle chips are yum! And the ladies who sell them always tell me how healthy they are. I love that they’ve convinced me to eat chips and salsa in order to get healthier.
I used leftover chicken on the bones to make this rich broth. I used 1 Breast and 1 leg and thigh piece. Place leftover roasted chicken in a soup pot, add water to cover along with chopped onions, carrots, celery, diced parsnips, red bell pepper, 4 peeled and smashed garlic cloves, chopped parsley, salt and pepper, 1 or 2 whole tomatoes, cored, a pinch of thyme or Italian seasoning, a small sprinkle of red pepper flakes and a big sprinkle of smoked paprika.
Simmer on low, you don’t want it to get foamy. Skim any fat that accumulates. After about 1 hour of simmering the broth is nice and rich. Remove the chicken and take the meat off the bones, chop or shred it, add the meat back to the pot. Remove the tomatoes, peel off the tomato skins, chop them up and add them back to the pot. Stir and taste for seasoning, Add salt and pepper if needed. Serve with organic corn tortilla chips (these add salt too, so season/ don’t over salt the broth, accordingly), a squeeze of fresh lemon, (our Meyer lemon tree is loaded with lemons, my favorite time of year!) chopped avocado, and grated cheese. Yum!
Post link


Hey! I made a really silly and dumb mini comic this week! It’s got a lot of dumb errors, but it was fun to just quickly put something together. Maybe I’ll make a sequel someday….(:
I also made an alternate version where the entire first page is colored…I’ll upload it later!
Post link
Ninmah’s Chocolate Chunk Cookies | Vegan & GF (Subtítulos en Español)
Fagioli Soup | Easy, Fast, Hearty & Delicious! Vegan & GF | Sopa de Fagioli
")
")
")
The “fiesta” part is probably not very pc of me.. but it was basically a party in a bowl, so I will stand by my title.

- ½ chipotle-lime chicken breast (from Central Market) // grilled
- guacamole // avocado + green salsa + diced onion + diced tomato + chopped cilantro
- ¼ cup corn // roasted in a hot pan for a couple minutes
- mixed greens // whatever floats your boat
** I later added more salsa because I used a kale mix and it needed a little extra something to hide the.. kaleness. to be perfectly honest
I have been complaining about being alone this weekend because everyone is out of town (and by everyone, I mean by roommate and my boyfriend). But really, it has been nice to have nothing to do except cook and workout and then blog about it. I guess it’s just weird not having homework to avoid - it’s making procrastinating less enjoyable since, well, it’s no longer procrastinating. You win, universe. You win.
But I won with this bowl. Because it’s awesome.
Thank goodness I already received my diploma. Based on this post it would be difficult to convince anyone I actually received a college degree.


I was not very active recently…not even somehow active. I didn’t feel to post anything and I didn’t have anything to post. I was not into cooking at all.
This simple meal with beans is the only meal I cooked last week. I am sharing this recipe because it is not necessary to cook complicated meals with various ingredients. Sometimes you need to make something very basic to come back to normal life. For me, it’s cooking because when I do not cook at all it’s the indicator for me that I have the lowest level of energy and I want to regain it.

1. What is required:
- 1 can of beans
- 2 tomatoes
- a big heap of spinach
- favourite spices the more the better. I used garlic powder, cumin, herbal pepper, chilli powder, the mix of Indian spices I needed to use up)

2. Rinse your beans. Cut tomatoes into cubes. Sauté tomatoes in a big pot. This time I added all spices in one go because I could not care less. I was just satisfied that I made myself cook.
I used up the Indian mixture, I don’t even remember what it was. Probably, coriander, cumin, clove… It can be omitted or replaced with what you have. I added 2 tsp garlic, 2 tsp chilli, 1 tsp cumin, and 2 tsp herbal pepper. Always adjust spices to your taste. If you don’t like fragrant food, don’t use cumin. Add less or omit chilli, if you are not a fan of hot spice food.

3. Cook tomatoes over medium heat with some water for 5-7 minutes. Add beans. Mix well to coat beans with spices. Cook for 15 minutes more.

4. Add spinach and mix well. Cook until spinach wilted.

I served it with rice, tofu, and micro greens. Simple meal is what I needed. I feel I am coming back

Please take care…Life is not meaningless I guarantee
CHICKEN AND WAFFLES ON A PRIVATE JET * JACQUELINE TRAVELS
WATCH HERE
Hi! Come fly to Atlanta with me on a Private Jet! I made chicken and waffles for my passengers and take you on a catering run to show you some of the work a private jet flight attendant job requires. Please leave me a thumbs up and don’t forget to subscribe to my channel so you don’t miss out on any future flight attendant vlogs. Thanks for watching!
WATCH NEXT:PRIVATE JETS, YOGA &…


Take a back seat, pie. Not interested in you, ice cream. The best comfort dessert may just be a classic Greek favorite: rice pudding, or rizogalo.
Post link
What To Do with Veggies You Hate

[This post is in collaboration with Behold! A Mythical Creature!]
Like a lot of you, we’re not big on vegetables. There’s some that are top tier, always the best no matter what you do, and then it kind of just trickles down from there.
So when my mum gave me a box of free vegetables, I placed them all out and stared at the disappointment, knowing these little parcels are good for…


Ghraybeh Cookies - Middle Eastern Shortbread Cookie
An easy cookie that’s sure to please! Makes 20-25 cookies
Ingredients:
1 cup Unsalted Butter
1 cup Powdered Sugar
2-2 ½ cup Flour
1 teaspoon Orange Blossom Water (optional)
½ cup shelled pistachios or blanched almonds
Recipe:
Beat butter, sugar, and orange blossom water thoroughly with a mixer. Add flour gradually and mix well.
Form small cookies into an S, ring or circle shape, with each cookie being about a couple inches in size, give or take
Press a pistachio or blanched almond in the center of each S cookie. Place on cookie sheets and bake at 300 degrees in a preheated oven for 15 to 25 minutes (depending on your oven). Avoid browning.
Let cookies cool fully & enjoy!
Post link