Heya ^_^ so a side from being trans, I make hip hop instrumentals, I’ve spent the last 4 months making this instrumentals album (beat tape) trying to convey the emotions of going from blocking the feelings out, to suicide attempts, to the point where I’m at now 10 months out and happier than ever before ♡♡. I wanted to share this because I know how isolating being trans can unfortunately be. Music has always been my best friend and I pray people like this as I have never worked so hard on anything before. We are all human and we all have so much to offer one another ♡♡♡♡
Haven’t done one these timelines for a while and possibly won’t for a long time again, since I’ve spent so long trying to outrun my past self and at this point really don’t want to be continually associated with the person I never wanted to be in the first place.
I’m still not to my final destination, but I’m getting closer and closer and am, at the very least, proud of myself for having the will power to blow up what many would consider a good life (though it was a hollow facade to me) and push through losing family, friends, work relationships, etc to find myself.
Over these last couple years I’ve cried a lot. And then cried some more. The feeling of having people hate you for no other reason than just that they do is tough, especially when nothing you do or say can change it. I’ve probably spent way too much time focusing on it in my posts, since I’m the type of person who can’t sleep when I ever feel like someone thinks I’ve somehow wronged them. But, at least for the moment, I’m more okay with what I can’t control. The hippie in me will always long for a kinder world, but the realist knows that many people can’t help how they feel due to how they were raised or media or politicians or whatever. So life’s too short to spend more time dwelling than need be.
I only ever took so long to start this journey because I was deathly afraid of facing that world and those people. And it wasn’t until suicide seemed like the better option than continuing my old life that I decided to at least try being me for once. Because death is permanent. And when it comes for us, none of that other shit matters anyway. So in the meantime I decided to fight with everything I’ve had to make who I’ve wanted to be a reality.
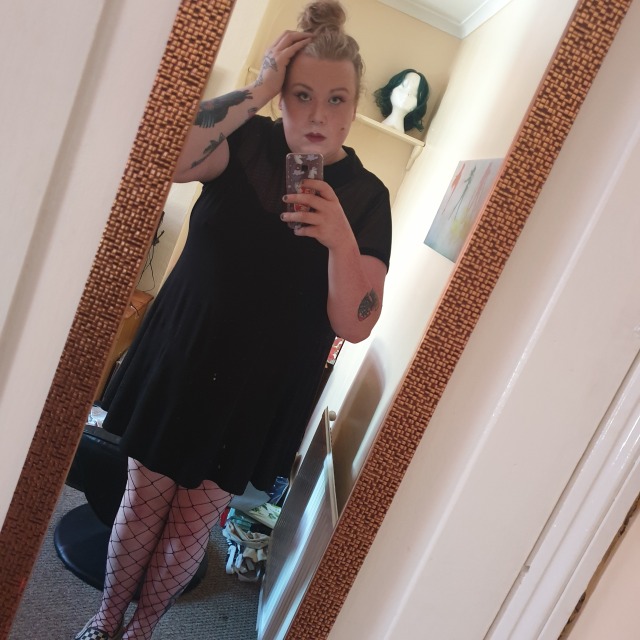
Honestly looking back at my old pics is almost surreal at this point. But getting to where I am seemed impossible before I started. And so just as I found many of these timelines from others inspirational at one point, I hope others in a similar position can realize they have one life and, as long as they are kind, can live it in a way that makes them happy. Fuck what others think. Be you.
I have been living an authentic life for nearly 3 years now. And I feel liberated, lighter.
Alive.
I was talking to a good friend this morning, when this fact dawned on me. It got me thinking… All the masks I once wore, have fallen away and I am left with the rawness of myself, exposed. Sure, I employ filters from time to time, because functional member of society, but no more masks. No more faking it. No more BULLSHIT.
There is exploration, play, and discovery, as I learn how to navigate the world from this new vantage point.
There are growing pains, to be sure, but also a growing sense of sure-footedness as I claw out of the brambles, and into the light.
And this is merely a signpost.
The road has been long, and the road ahead is longer still… but that’s ok.
Last night’s opening of Gabinetto Segreto at the FANTABULOUS Vanderelli Room in Columbus, OH., was AWESOME! It was so great to participate in such a beautifully body positive environment. The art was top notch and wonderfully cheeky! The performances, the music! AHH! SO GOOD.
If you are near or in or adjacent to CBUS – Go see it!
If you missed the opening, you can always check the website and swing by or come to the closing reception on August 31st, 7-10.
This show was a bit braver than I’ve been since transitioning. I’ve made a commitment to be visible and to fully embrace authenticity as a life path… The paintings were typical of what I usually show, but the sculptural piece, “Trigger Warning,” was very much outside my comfort zone. That USUALLy means it’s important, and that I need to do the thing. That said, I’m glad I was able to work through my personal discomfort to make the statement.
In essence, “Trigger Warning” is a comment on how people obsess over trans people’s genitals, and how we are fetishized, targeted, and otherwise singled out, and “othered.”
The “Guy Parts” were cast of me within a week of surgery, so showing them was also a type of eulogy for the boy. To that point, I now feel some good closure with my old life/body as I step ever forward into my truth.
[Image description: a 3 by 3 moodboard of pink and white. The top row is two close up photos of a pink dahlia around a photo of soft pink and white clouds. The middle row is a photo of untouched snow and a photo of the ocean horizon light white by a bright sun around the flag. It’s a five-striped flag with light pink stripes around dark pink stripes around a white middle stripe. The bottom row is pink photos of flowers like a pink rose, with a very light lit-up pink dahlia in the middle. End description.]
If you go to the drugstore and wander in the cosmetics section, you can be completely overwhelmed by the quantity of products and brands you will find. If you don’t know what you are looking for, it will be even worse.
So I decided to put together a little cheat sheet of what you should have in your makeup bag to cover all your needs. Keep in mind that I’m always trying to achieve a natural look, so I really go minimal here, but it’s a good base to build upon.
Skin preparation
Before we do anything on our face, it is important we prepare it properly. Here is what you will need:
Facial scrub: you know these facial soaps that used to have micro-beads and that got banned almost everywhere? Well now they make mother-earth friendly products! These will clear your pores from dirt and clear your face from all the dead skin. It’s important to have a clean face or else your makeup can look cakey and won’t stick as well.
Day cream: a good day cream and/or serum. Nivea does some very good stuff at decent prices. Usually a little goes a long way, so even the small pots give you a good run for the money. If you shop at Costco, they have very good products for very decent prices in their home brand too. Apply after cleaning your face.
Makeup base/primer: some daycream can double up as makeup bases. You can also use BB cream or primer to get some light coverage or color correction before you apply your makeup. There are lots of options here and you will learn what you need over time. For example, I use a yellow base to cancel some of the redness of my skin (I have rosacea) on top of an anti-redness face cream.
You can stick to a face scrub and a day cream, but the makeup base is a good extra to help your makeup stick better. I found a few amazing products that I will list in another post.
Tools, etc.
Before applying your makeup you will need tools to apply it, etc. I will break it down into a few categories:
Consumables: this is the part where you will spend a few bucks every now and then. Makeup sponges (the small disposable wedges), makeup remover pads, Q-Tips, facial tissues, etc.
Face tools: Blender sponges (the big egg shaped sponges), face brushes, etc. The blender sponges are kind of a must have, but I don’t use them that much. A good brush set should at least include: a foundation brush, a blending brush, a concealer/contour brush and a powder brush.
Eyes tools: forget about all the gadgets for now! You need 3 brushes to get started with your eyes: a blending brush, a flat shadow brush and a liner brush.
If you watch videos on youtube with 20 years old girl advertising big brands and you look up the price, be ready to cry. Brushes can cost a LOT! But I managed to find a few good deals on big brands at Winners and Marshall’s and also stumbled on some surprising brands that are really affordable. One of my best find so far is ecotools. I’m not affiliated with them in any way, but I got their « Daily Defined Eye Kit » at Winners the other day and the brushes are awesome and they sell for really cheap. I haven’t tried their face brushes, but I will definitely give them a run in the future. From what I can see on their website, their « Airbrush Complexion Kit » looks really good for the price.
Eventually we will get to the eyebrows and lashes and the tools that go with them, but that is for another day. Now it’s time to grt down to business.
Makeup
Now to the good part! Let’s keep it to the minimum because you could buy things forever. If you want to look more feminine, there is only a few things you need to do to. The main one is to erase the beard shadow. The second one is to make your skin look more feminine. I know some girls are happy with just some eyeliner and lipstick, but this is not the case for me. If, like me, you have to change that face of yours to feel good in your skin, then the following is for you.
Beard cover: this is not an official product name, because girls do not have beard. What you will be looking for is a product that will be either pink or orange and that will stain your skin. Usually you can find those shades in the color correctors. I tried many things and for my skintone, orange is what works best. You will also have the choice between liquid or cream. My personal choice there is cream because I find it sets better on my skin, and also because I find liquid ones tend to mess my foundation color after. NYX is making excellent full coverage concealers in peach and orange. But if you are in a pickle, a cheap lipstick of the appropriate color can do as well.
Loose powder: pick a pot of loose powder that roughly matches your skin tone. If you have redness problems, you can also go with a yellow powder. This powder is multi-use, but the main one is to set your makeup in place and bake the areas that are the most at risk of rubbing off, etc.
Setting spray: it’s like glue for your makeup. Not much to add there: spray it on your face to set your makeup. Some people also use it as a skin primer. It usually works both ways.
Matched concealer: a concealer that matches your skin tone. I like a liquid concealer for that application. You will put that in the T zone and in the under eye area. Some people also use a concealer as an eyeshadow base, but I personally don’t like it.
Foundation: your color matched foundation. As I always say, better go with something that has buildable coverage as it is more versatile.
Eye shadow base: makeup companies now make specialized products to prime your eye lids. I prefer those a lot as they can help the colors pop and keep your eye shadow from creasing much better than any concealer would. My absolute favorite is the MAC Painterly base, but it doesnt work well with everyone. My girlfriend, for example, cannot use it because it drags the skin of her eyelids. She needs something more liquid. There are a few good liquid and cream eyeshadow bases in the drugstores. Revlon makes a decent one that really helps with creasing.
Eye shadow palette: if you are not certain what to pick, I suggest you go with a « quad » or something similar. Quads are those small palettes that have 4 colors that go together. They are basically a look in a box. If you are not sure which colors to pick, nude shades are pretty much universal. Otherwise, stay tuned and I’ll cover eyeshadow in another post.
Contour/Highlight/Blush palette: you might not find it all in one palette. I try to avoid highlighters that have too much glitter (it’s a trend to look shiny it seems) but sometimes it does look good.
Mascara: everybody knows what that is. Maybelline’s Great Lash has been a reference in the drugstore brands for years. Cheap and effective!
Eyeliner: you need two black eyeliners. A black liquid liner pen and a black kajal liner pencil. NYX make some really good liner pens and pencils. Maybelline also has amazing liquid liners and pencils. Experiment with different products because most of the fun is in the eyes!
Lipstick: pick your color! I really love Maybelline’s matte lip ink. It’s a liquid lipstick with a built it applicator that lets you draw on your lips with precision and that turns, once set, practically indestructible.
Conclusion
This is what I put in my makeup bag. The full makeup routine take time to do and time to master. Your first attempts will be disappointing if not frustrating. Don’t worry: it’s part of the process! Before I end that post, a quick reminder: get some makeup remover. Fractionated coconut oil also works wonders!
You might all be tempted to use full coverage products right off the bat because you think it will hide your man’s face instantly. Well, take a minute before you buy and think about your skin and your intentions.
Coverage
First you have to understand that coverage is only in terms of color! It’s not some kind of putty that will fill up holes and erase your wrinkles! It can actually do the exact opposite and make any imperfection on your skin pop out! So if you have a baby’s skin, go crazy, but if you do not, then I suggest either a light to medium coverage foundation or, even better, a buildable coverage foundation (one you can layer until you reach the desired coverage).
You can also mix some of your foundation with your day cream or serum to give it some coverage. It’s surprising how it can actually help achieve a very natural look when you don’t feel like wearing a full makeup. It evens out and brighten the skin without hiding everything and making you look plastic.
Color
Then, you need to see your skin for what it is. Nobody has a perfectly even skin color. You have blood vessels, redness, etc. You have to pick a foundation that will match your general complexion. When in store, it is a good idea to try the samplers on the back of your hand and then compare in the mirror with your face! One step further would he to actually bring a mirror and go look at yourself in the sunlight. Don’t forget to blend the product on your skin!
In this picture you can see a lot of things I mentioned earlier. First, you can see that there is a slight different of shade between a fresh drop of foundation and a blended/dried foundation.
In the top picture, you can see how the skin color is not even: i have veins that show through, the redness of the skin is not even, etc.
In the bottom picture, you see the effect of a full coverage, matte foundation. It’s the back of my hand, but you can see that the skin texture is a lot more visible than in the top picture. Also, you can see that it litterally erases all the nuances in the skin tone: no more veins, no more uneven redness… personally, I think it doesn’t look very natural in person, but it looks good in pictures.
Concealer colors
I say colors (plural) because at some point, you will probably end up needing more than one concealer. If you had to get just one, ask yourself the question: do you have beard shadow to cover? If the answer is yes, well be patient because I will be covering (hahaha!) that topic in another post. Color correction is a topic on its own!
If the beard is not an issue (yet) and you simply want the basic concealer everyone need, it’s simple enough. Pick the color that is the closest to your skin tone as well! This will be used in the undereye area and the T-Zone (which is the nose and browbone area). You will be using it for a bunch of different things. It is your secret eraser. It helps you cleanup a messy eyeshadow job, etc.
Concealers usually come in cream or in liquid form. Depending on your skin type and the use, you might prefer one over the other. I personally love liquid concealers for most of the work, but for beard coverage, I prefer cream ones. If you go liquid, pick one with a built-in applicator as I find those are less wasteful. I have a MAC concealer, amazing product, but it’s a small pump and I never use a full pump. So every time, I waste a lot of product because it’s so stiff that it’s almost impossible not to do a full pump.
If you want to do contouring with your concealer, also get one that is two shades lighter than your skin and another one that is two or three shades darker as well. We will discuss contouring eventually, but this is just a hint if you plan on going on a shopping spree soon!
Thanks for reading! I hope this is helpful to some of you! My next post will be about color correction and beard cover! Stay tuned as this is a big one!
It might seem obvious, but you will need to pay a lot more attention to your shaving than you ever did. Be sure you use a brand new blade every time you start shaving your face. You don’t want to cut yourself and you want to avoid razor burns.
Never shave your face on dry skin and make sure you touch your face to make sue there is nothing left. If you stroke your cheek and think it’s smooth, run your hand in the opposite direction to make sure. Any slight hint of stubble will make your makeup look cakey and will make it easy to smudge.
If you are like me, your hair grows in every directions and you need to be especially careful around the jawline and the neck.
Once you are done shaving, wash your face with a gentle face cleaner. Leave your face alone for an hour, and then apply your makeup base/day cream.
Let that dry and you are ready to start your makeup!
Make up is one thing, but it’s like paint: you wont go far without a canvas! And you won’t get good results if you have a dirty or damaged canvas either.
So before you even start doing makeup, start by taking care of your skin! I still have a guy’s skin. Bigger pores, oily, thicker in general. I smoked cigarette for years (just quit 2 days ago, wish me luck!) while having irregular sleep patterns and drinking alchool regularly. On top of that I suffered from late chickenpox a few years ago and that left a few scars on my face. I already have wrinkles as well…
So with your skin type in mind (greasy? dry? redness?) go get some facial scrub and a soft facial cleaner as well. I usually use the scrub in the morning and the gentle cleanser before going to bed, doing my makeup or after shaving.
Then you need at least a day cream. Nivea does stuff that I really like, their products smell good and are perfect for sensitive skins without breaking the bank. They even make a day cream that doubles as a very decent makeup base. If you are not sure what you should use, ask someone at the cosmetics counter of your favorite drugstore. Remember that these products might come in a small pot, but a little usually goes a long way!
You do not really need to buy 40 different products (eye cream, serum, etc). Sometimes, too much product can cause irritation anyway. For example, I have rosacea, and before I realized it, I actually made my condition a little worse for a while because I was feeding my skin too much product. I now use a single cream that is made to treat that condition and doubles up as a makeup base as well.
I have never taught makeup to anyone. In fact I haven’t been doing it for such a long time, but everybody tells me I’m doing it right, so I thought I should share the tricks I developed over time.
DISCLAIMER: I’m not a pro! I don’t want to pretend I am! But I like makeup A LOT! I try to learn as much as I can on the subject and I like to try new techniques and products. Everything here is only my opinion, based on my experience! Some products might not work as well for you, it’s part of the game, sadly!
When I started doing makeup, I did not want to achieve big glamorous looks with crazy eyeshadow and glitter everywhere. My main goal was to feminize my face as much as possible so that I could pass in public. I never really wanted to draw attention to me, in fact I wanted to achieve quite the opposite. Look like the girl next door.
So, if you are here for flashy makeup, glam looks and the likes, you are not on the good blog!
Of course, makeup can be expensive. I’m not rich, so I try to find good stuff at reasonable prices, either online or in store. Don’t worry, no need to break the bank at Sephora or MAC!