#cambridge


![abandonedandurbex: Saint Leonard’s Crypt, Hythe [2048 x 2048]](https://64.media.tumblr.com/05480e71432d981209b3e83c6c6d8c3a/tumblr_pov9hmoGrp1uky4nio1_1280.jpg "abandonedandurbex: Saint Leonard’s Crypt, Hythe [2048 x 2048]")

Guess who got into Cambridge on Monday!!
To do Classics! - the subject I love SO SO much… oh my gosh…
I finally did it, I finally made my dreams come true. I can finally release all the excitement and all the want that I made myself hold in and suppress because I didn’t want to tempt fate. And after my interview experience I wouldn’t even dare think about a future where I went to Cambridge. I was dealing with a lot of family issues at the time and my second interview was just a slow and painful death by Latin grammar, I remember sitting in silence for what felt like forever after logging off of that final zoom, just thinking I had thrown it all away over the ablative case. And I spent weeks thinking that. And I was wrong. And I have never been more happy to be wrong in my life.


#america #northamerica #unitedstatesofamerica #usa #unitedstates #eastcoast #newengland #massachusetts #boston #cambridge #mit #university #college #school #architecture #city #cityscape #citycentre #downtown #instamerica #frenchigers #picoftheday #photooftheday #american #nikon (à Massachusetts Institute of Technology (MIT))
https://www.instagram.com/p/Bt5RGY2hwt7/?utm_source=ig_tumblr_share&igshid=17wl8hcfa3jcb
Post link

#america #northamerica #unitedstatesofamerica #usa #unitedstates #eastcoast #newengland #massachusetts #boston #cambridge #street #city #cityscape #downtown #citycentre #tower #windowcleaner #climbup #instamerica #frenchigers #picoftheday #photooftheday #american #nikon (à Cambridge, Massachusetts)
https://www.instagram.com/p/BtkkplbhMwE/?utm_source=ig_tumblr_share&igshid=1npcd3gixm73b
Post link

Harvard Campus #america #northamerica #unitedstatesofamerica #usa #unitedstates #eastcoast #newengland #massachusetts #boston #monument #street #city #cityscape #cambridge #harvard #harvarduniversity #university #college #instamerica #frenchigers #picoftheday #photooftheday #american #nikon (à Harvard University)
https://www.instagram.com/p/BtiAlmVhkoO/?utm_source=ig_tumblr_share&igshid=t040v5z0kdf0
Post link

When I met Fake Mr. Harvard #america #northamerica #unitedstatesofamerica #usa #unitedstates #eastcoast #newengland #massachusetts #boston #monument #street #city #cambridge #harvard #harvarduniversity #college #university #statue #instamerica #frenchigers #picoftheday #photooftheday #american #nikon (à Harvard University)
https://www.instagram.com/p/BtfU4o9lApY/?utm_source=ig_tumblr_share&igshid=des9e7n8bdew
Post link
Not only do you have to be a bookbinder when you are a bookbinder, but also a graphic designer, craftsperson, leatherworker, printmaker, carpenter, jeweller, photographer and of course a miracle-maker!! My latest commission is finished and one more book has left the studio and is now happily with its new owner. Fortunately I didn’t have to trust the postal service for this one and was able to hand deliver it.
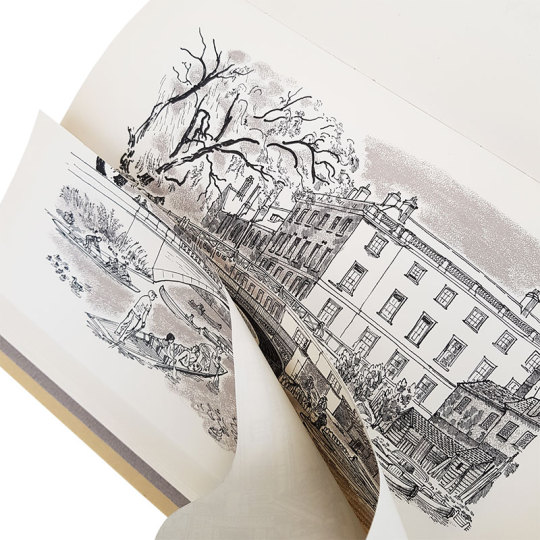
“Bridges on the Backs” was completed at the end of March. The book was printed in 1961 and formed part of a series of more than 34 books that were published by Brooke Crutchley at The University of Cambridge in between 1930 and 1958 as part of “A Printer’s Christmas Books” - the printing of these was the University Printer’s continued custom of giving a book to friends of the press at Christmas. The series was started by Walter Lewis and Stanley Morison in 1930. Brooke Crutchley was the University printer at Cambridge and oversaw the production of the Christmas Book series from its inception 1930 until its discontinuation in 1973. He gave a talk at St. Bride Printing Library in December 1975 at the opening of an exhibition of the Christmas books which ran from 10 December 1975 to 30 January 1976.
The book is a first edition, one of 500 copies printed in Monotype Times Wide on Spicer’s cartridge paper. Illustrated with 9 drawings, touched with colour, by David Gentleman, with another on the front endpaper and title-page. The original binding was a green canvas portfolio binding, lettered in gilt.
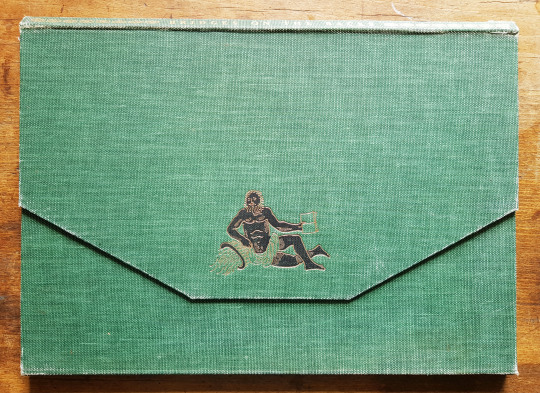
In the words of Brooke Crutchley, `”Bridges on the Backs is unique - it opens like a lady’s handbag; unique in other ways too and, I think, my favourite of the larger books, perhaps of them all. David Gentleman’s drawings are delightfully reminiscent of youthful Cambridge in summertime. Peter Eden in his text and captions carries his erudition with consummate grace, and the overlapping illustrations, a la Humphrey Repton, never fail to surprise.”
The nine illustrated drawings depict all the nine Bridges on The Backs, a picturesque area to the east of Queen’s Road in the city of Cambridge, England where several colleges of the University of Cambridge back onto the River Cam. The name “The Backs” refers to the backs of the colleges. Historically, much of the land was used by the colleges for grazing livestock or growing fruit. Cattle can still be found grazing behind King’s College. The river was also an important commercial thoroughfare to the mill at Silver Street.
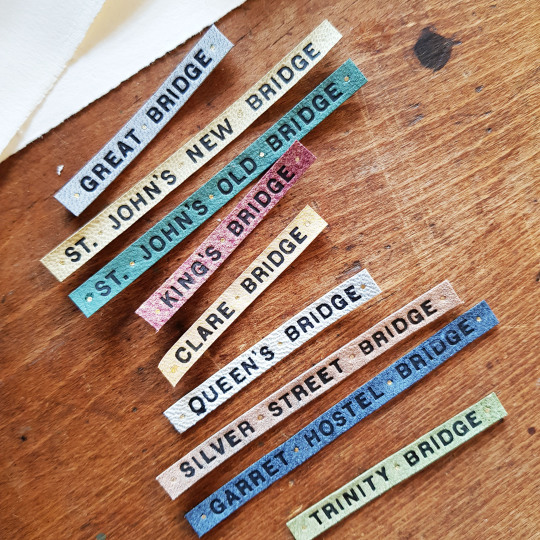
I wanted all of the bridges to appear in the binding and box in some way. I began by looking at images of each of the bridges online (unfortunately time didn’t permit me to visit Cambridge in person as I would have liked to do). The bridges are as follows:
Great Bridge (now known as “Magdalene Bridge”)
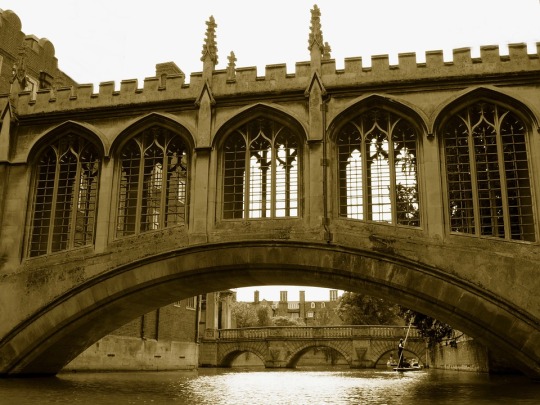
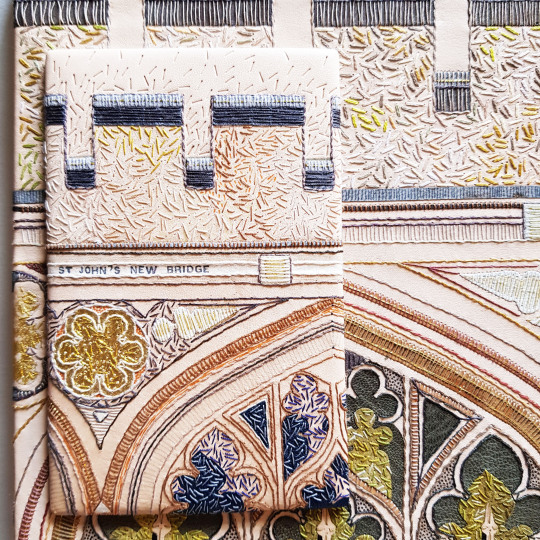
St Johns New Bridge (otherwise known as The Bridge of Sighs)
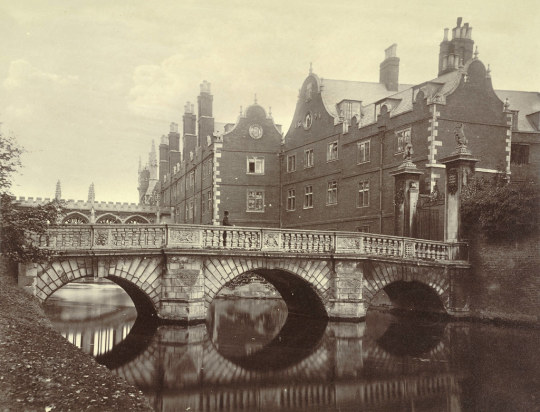
The beautiful bridge which crosses the River Cam at Trinity College dates from 1764 and was built by James Essex, a builder and architect who worked at many of the Cambridge colleges. It replaced a stone bridge built in 1651.
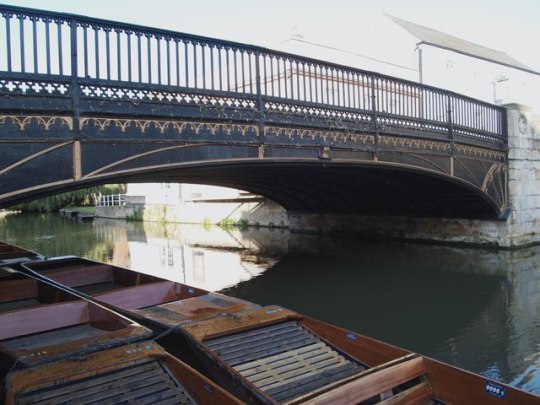
Garret Hostel Bridge

Queens Bridge (otherwise known at the “Mathematical Bridge)

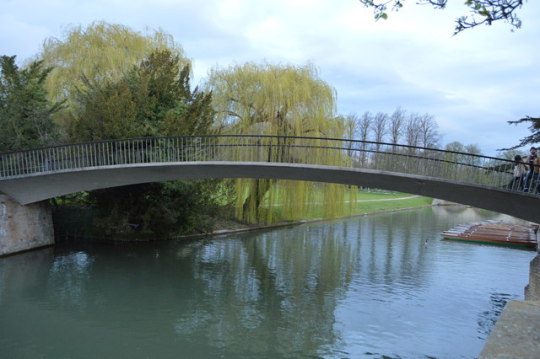
Silver Street Bridge
The Silver Street bridge, designed by Sir Edwin Lutyens in 1932 built in 1958-9, it is an arch bridge that carries both vehicular and pedestrian traffic across the River Cam in Cambridge. It is a site of bridges dating back to the 14th century.
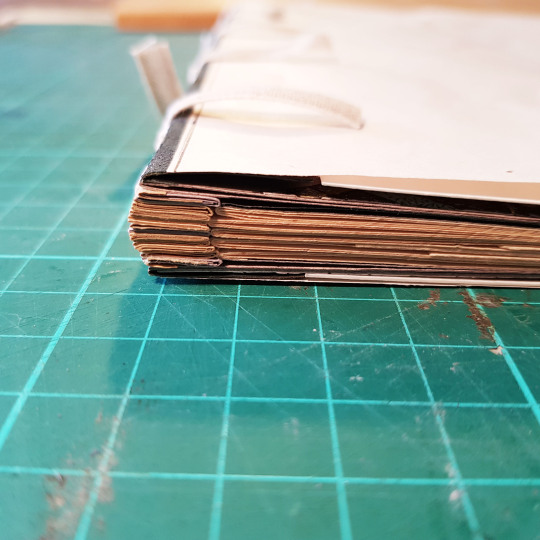
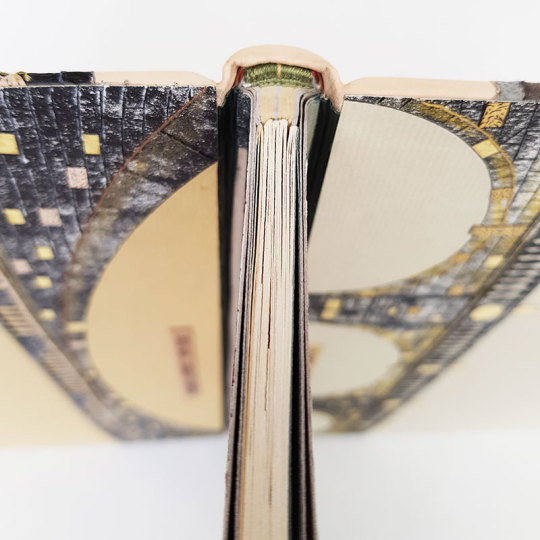
I had never bound a book in this format before, with the spine edge at the top of the text block - this led to some interesting design challenges. Because the book was an unusual structure, and the illustrated pages had additional flaps revealing how the bridges looked in previous incarnations behind each one, I wanted to make sure that the pages would open well to facilitate the opening of these flaps. I therefore chose to bind this as a stub binding.
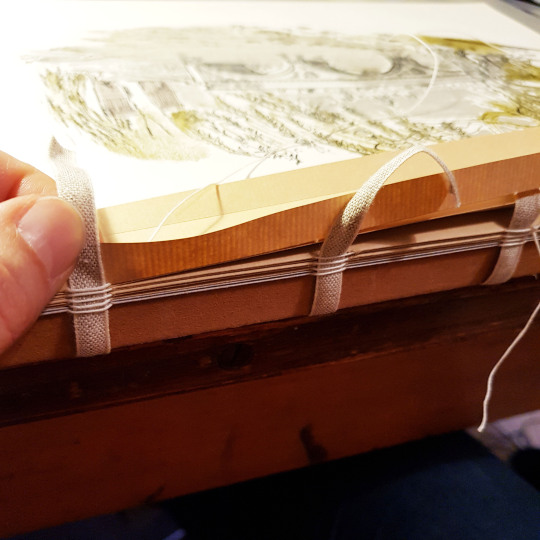
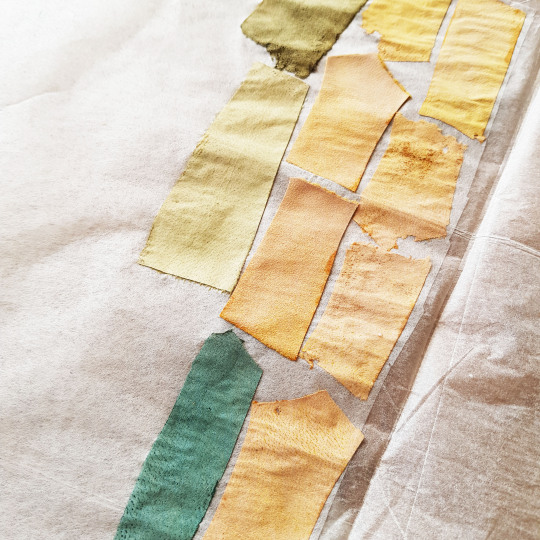
I chose papers to match the colours and tones of the illustrated drawings: grey and mustard yellow. As there was more bulk at the front edge of the book due to the tipped in flaps I had to compensate for this at the spine. I folded up stubs for each of the sections but also had extras in between these to make up for the difference in thickness. Initially the stubs were sewn to their relevant sections using linen thread.

These stubs were then sewn together onto four tapes to create the text block.
Once the text block was sewn up I started to work on my ideas for the cover design, endpapers and doublures. For each of my bindings I make a small sample board to test out ideas ahead of making the actual binding.
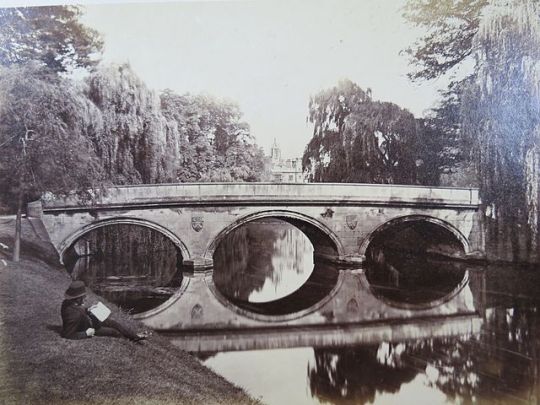
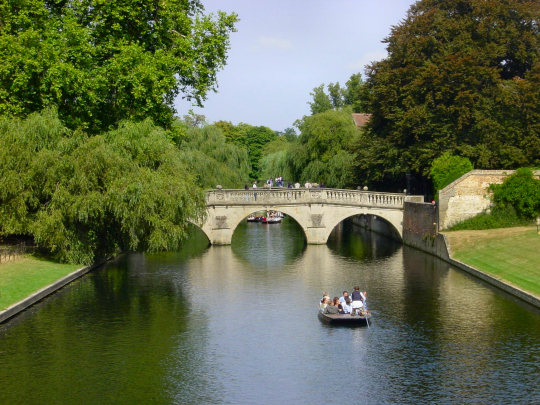
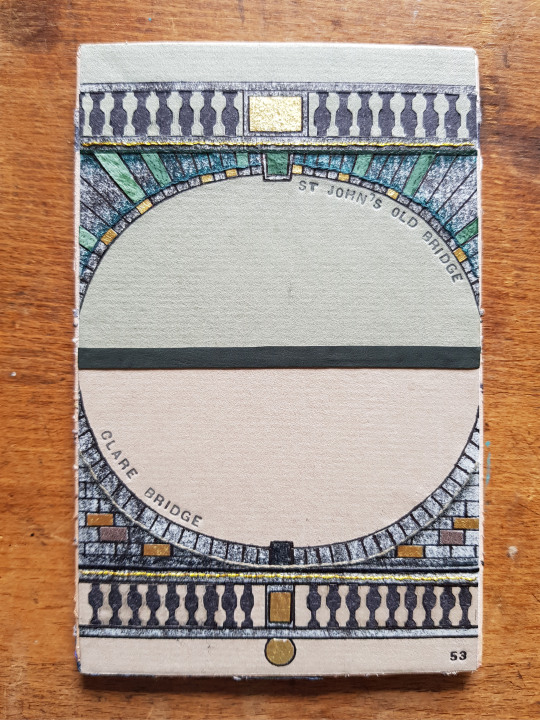
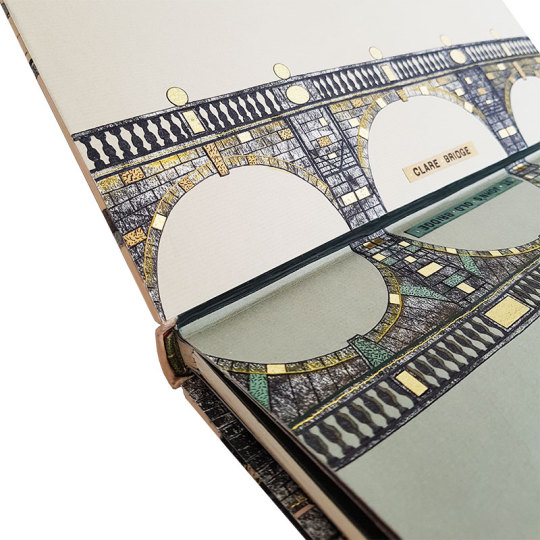
I looked at images of all the bridges, for the endpapers and doublures I wanted to “mirror” two bridges on each, so I paired up the bridges that best matched each other - for example Clare Bridge and St John’s Old Bridge each had three arches, and Silver Street Bridge and Kings College Bridge had one each so they were natural choices to go with one another.
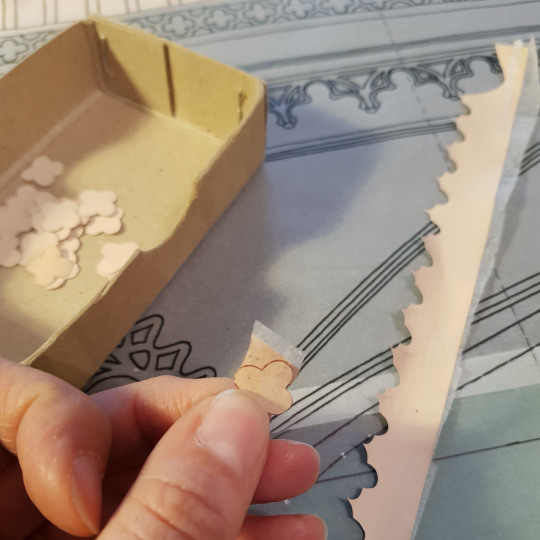
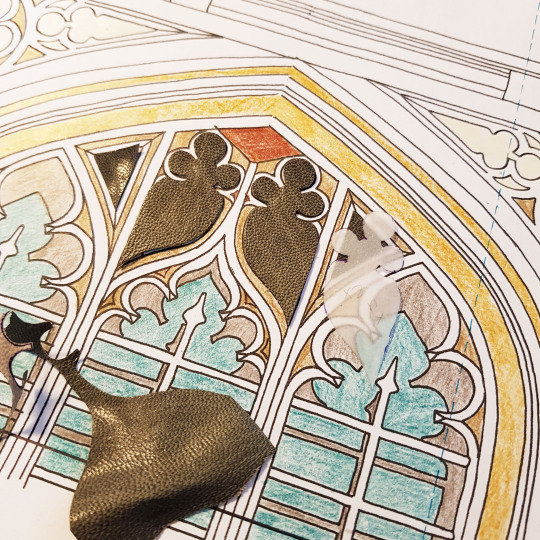
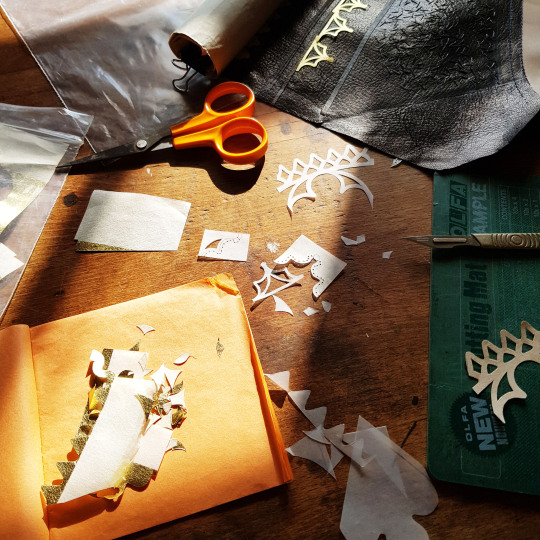
I drew line drawings of these bridges and then cut the silhouette of each out of paper that I had textured using a roller with black ink on top of a textured surface.
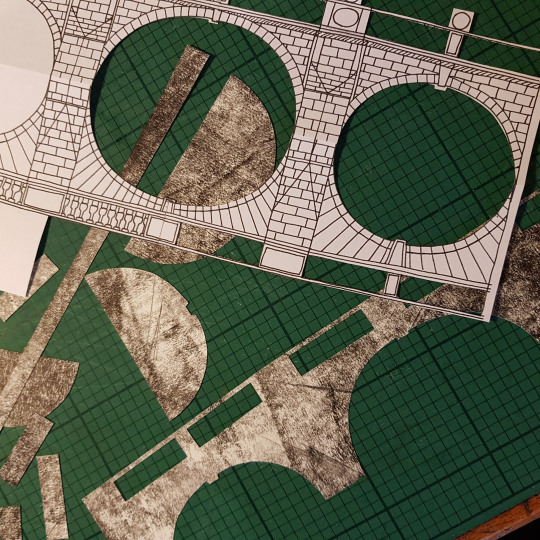
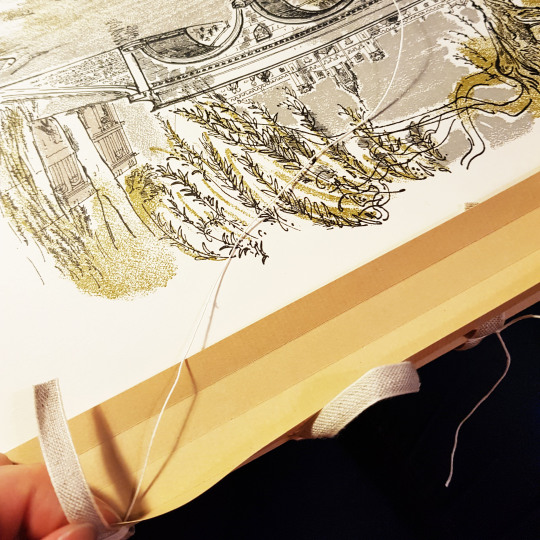
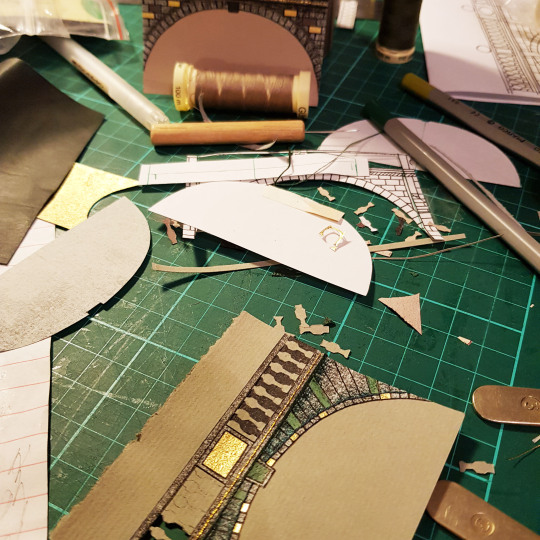
Further detail was added to these papers through the application of suede onlays, black paper cut-outs (for the pillars) and gold leaf that had been adhered to Japanese paper. In the below picture you see part of the doublure for the sample board being made.
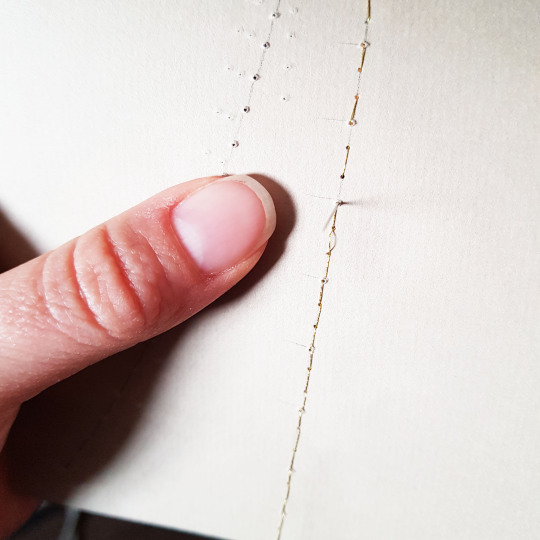
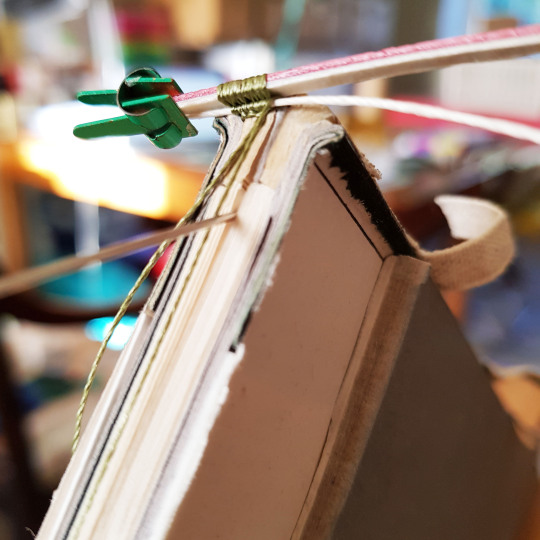
Lines were also embroidered through the paper. These holes were pre-pricked with a needle pricker through the front and then carefully embroidered using a running stitch. Care must always be taken when embroidering paper as it is prone to tearing. The thread was then whipped around with an additional thread on the front face of the doublure.
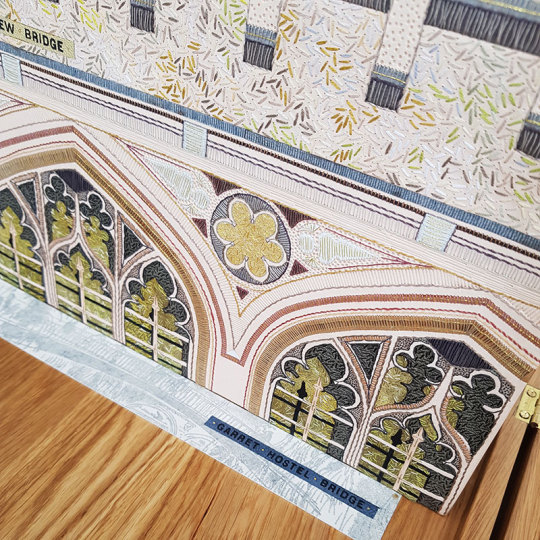
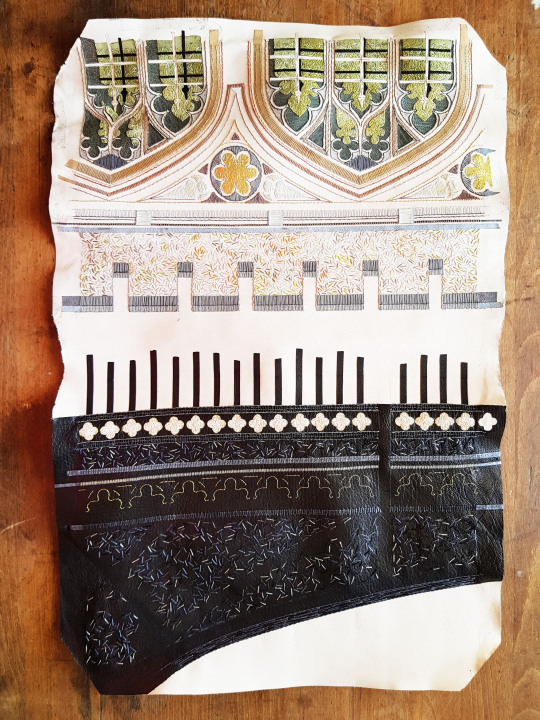
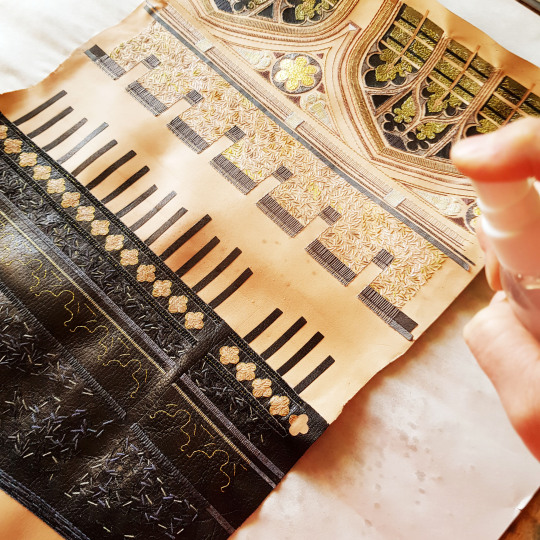
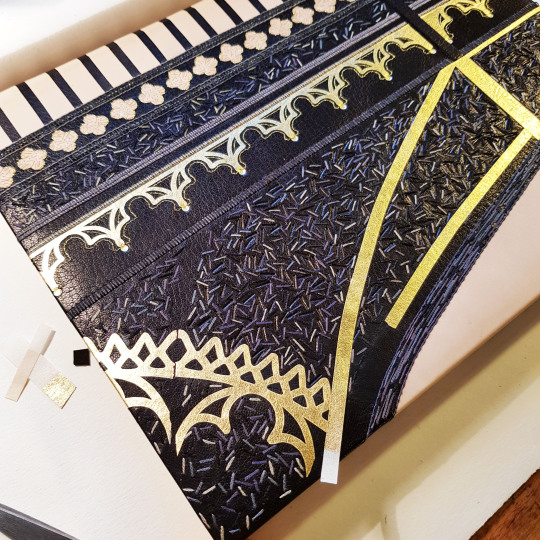
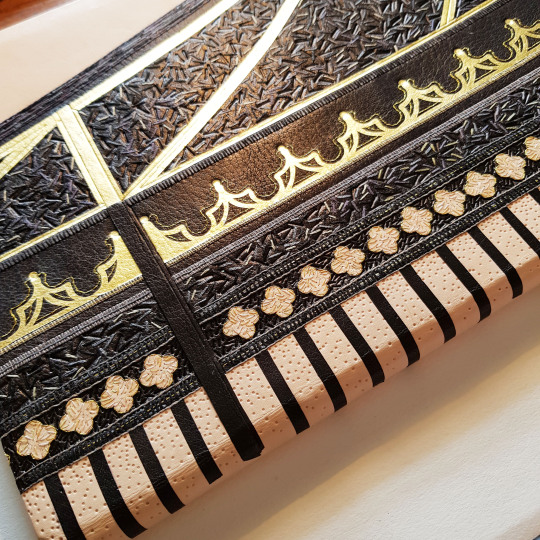
Once I had worked out which bridges to put on the endpapers and doublures I was able to choose which to have on the front and back covers of the binding. This was a binding of two halves, more so than any other I have ever done. The different format of this text block meant that the front and the back cover played different parts in the design, therefore I chose the two most contrasting bridges for on the front and back covers: St John’s New Bridge (The Bridge of Sighs) and The Great Bridge.
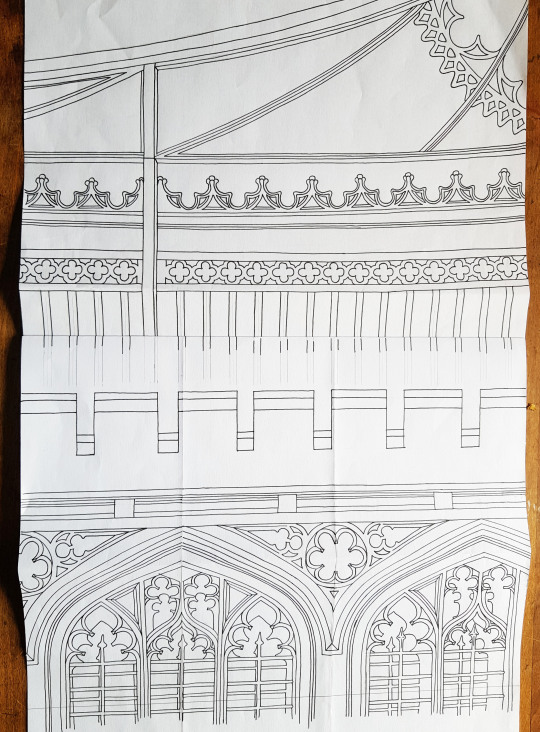
I thought that the Great Brdge would work well with the gold on black against the more ornate look The Bridge of Sighs. I started by using my light box to help draw the outline of the bridges.

I then pieced these together into a full cover design. At the time of drawing this design I wasn’t sure if I might want to join up the front and back covers across the spine in some way. With this in mind I scaled up the front and back images so that the lines of each, if carried across the spine, would meet with each other.
For the sample board I chose to trial the Bridge of Sighs part of the design. This particular bridge was built in 1831 and it named after the Bridge of Sighs in Venice. The design was built up using a variety of leather onlays, machine embroidery, hand embroidery and also onlays made by sticking gold leaf to Japanese paper.

This sample board is number 52 in my series.

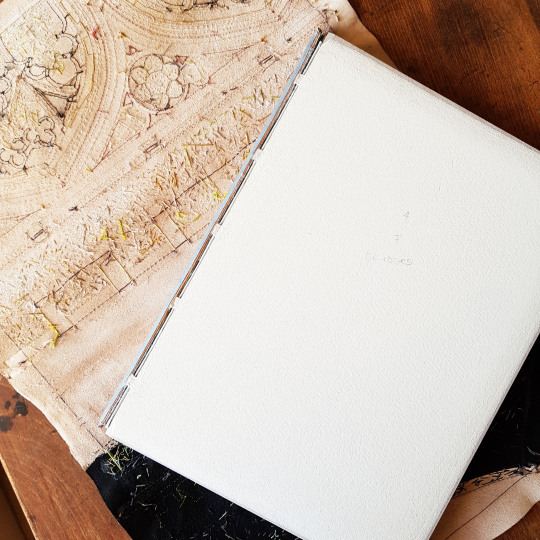
Back to the text block, the endpapers were made up by laminating the illustrated bridge paper sheet to a plain bi-folded sheet, capturing a long, thinly pared, piece of leather (0.4mm) between the sheets at the edge - this would later get stuck down and become the leather joint.
A waste sheet and compensation guard were also added this endpaper unit to protect the endpapers during the rest of the forwarding and covering process. This endpaper could then be sewn to the text block.
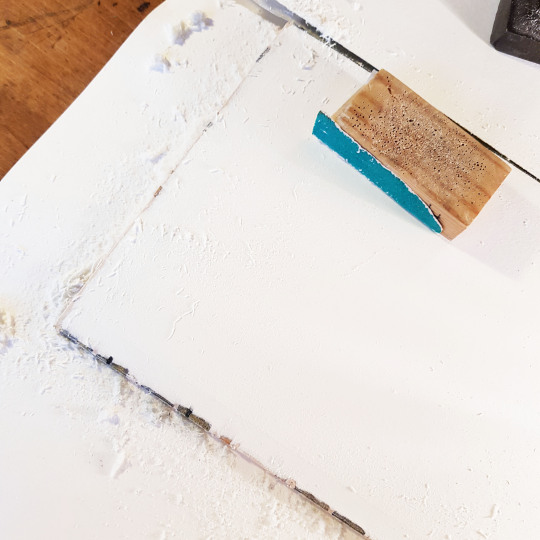
The book block was then rounded with a backing hammer. I drew the thickness of the boards onto the outer waste sheet, plus a little extra (as seen below indicated by the thin black pen line). I then placed the book block into my backing boards to this line in order to make sure the shoulders were made at the correct place to allow the boards to sit perfectly within them.
The top and bottom text block edges were then sanded flat, and the foredge sanded into a round by wrapping some sandpaper around a piece of dowel of the correct diameter. Double-core end bands were sewn, the boards attached and bevelled at the edges. I was then ready to proceed with the leather work!
Given my choice of using two contrasting bridges on the cover design, this meant that I needed to scarf-joint two contrasting leathers together: black goat skin for The Great Bridge and fair calf for The Bridge of Sighs.
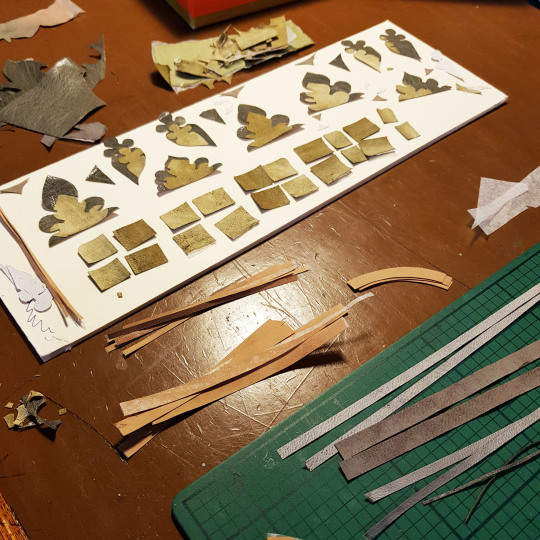
Onlays, and plenty of them! I don’t like to throw anything away so even the edge parings that come off the back of the leather after running it through my Brockman paring machine get kept. I back them into lens tissue and use them as onlays - it gives a whole new colour palette in addition to conventional onlays.

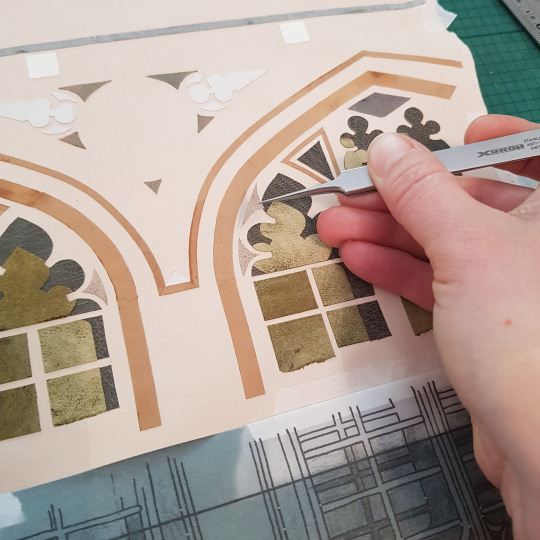
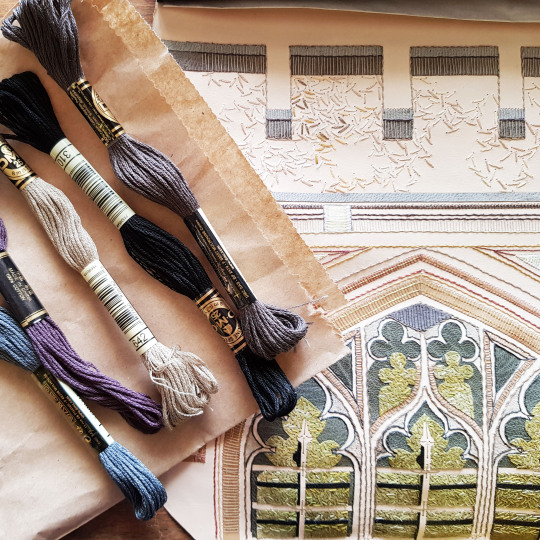
This book mainly used greens and greys, I adapted the colours I had used on the sample board (one reason i do the sample boards - to test colours out in advance!). I cut all of the shapes out using a scalpel and fine scissors.
The onlays were glued down in place using PVA through a tracing paper template, using a ruler for extra accuracy.
I find my fine-pointed tweezers one of the most useful pieces of kit I own, perfect for picking up small pieces and getting then stuck down exactly where you need them to go!
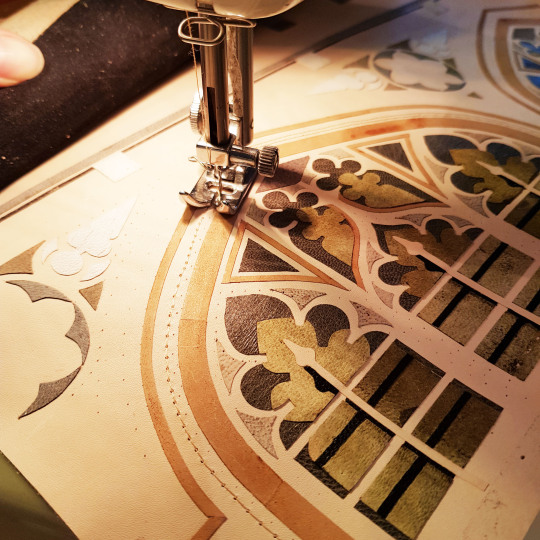
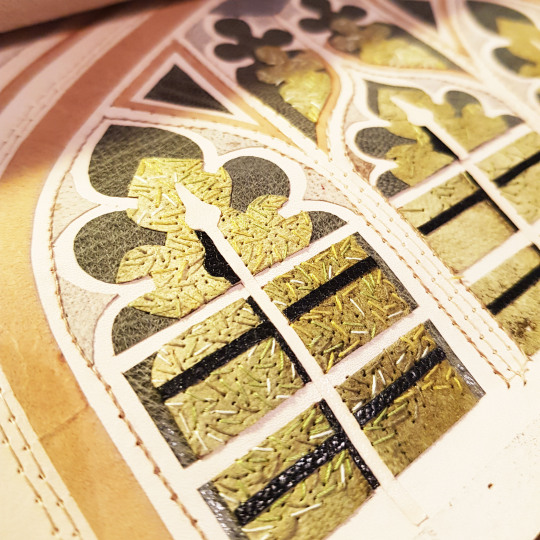
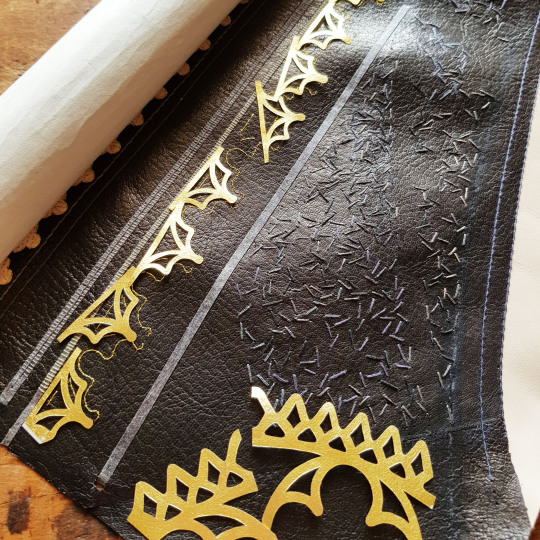
After the onlays and backparing came the embroidery, the bit I enjoy the most! For this binding I machine-stitched the multiple linear border lines to speed up the process and then whipped over the top of them with cotton threads.
Tiny flecks of different green threads were hand-sewn to break up the colour of the green onlays beneath.
When embroidering a large piece of leather, it is not possible to use an embroidery hoop as the leather is too thick so I coil up the leather and hold it in place with bulldog clips at the top and bottom. This makes it much easier to handle.
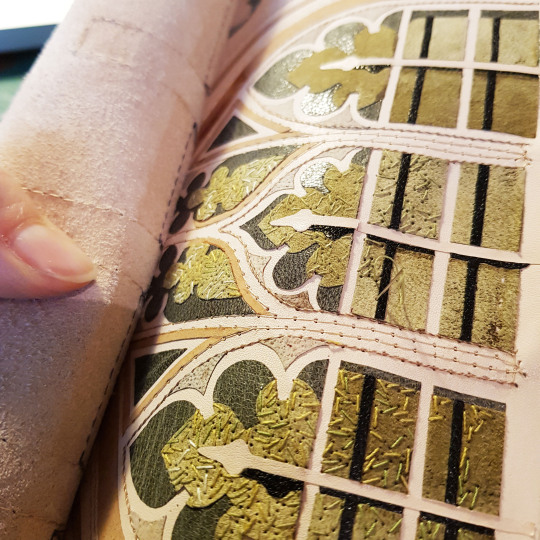
As well as using cotton threads I also used slightly thicker skeins for the larger patches of detail.
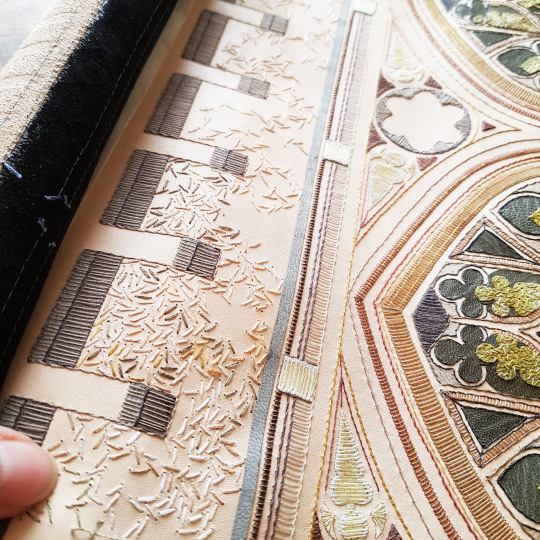
Plus you can’t beat a bit of metallic thread! This was embroidered over the onlays that were made from gold leaf stuck to Japanese paper.
I always love to capture what the back of the leather looks like post-embroidery, after all this won’t be seen ever again!

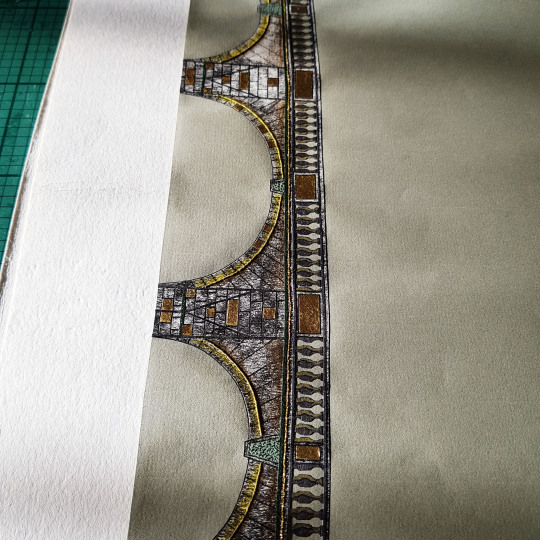
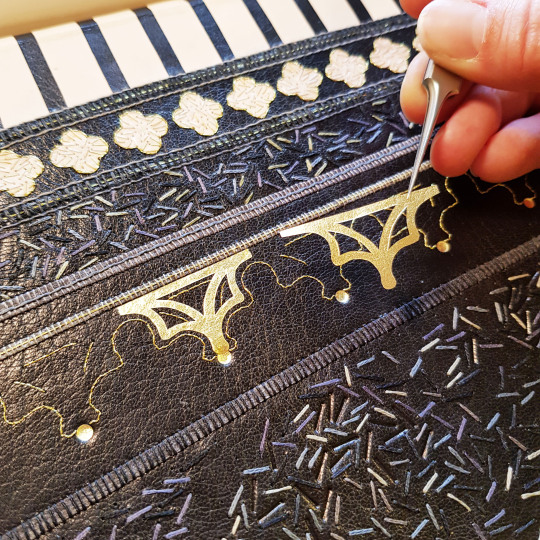
The same process applied to the Great Bridge side of the cover. The onlays were stuck down, back-pared and embroidered. I used a tracing paper template to prick where I needed to sew the metallic thread lines that would lie alongside the gold onlays - I was going to wait to glue these down once the book was covered (I will cover the reason for this later).
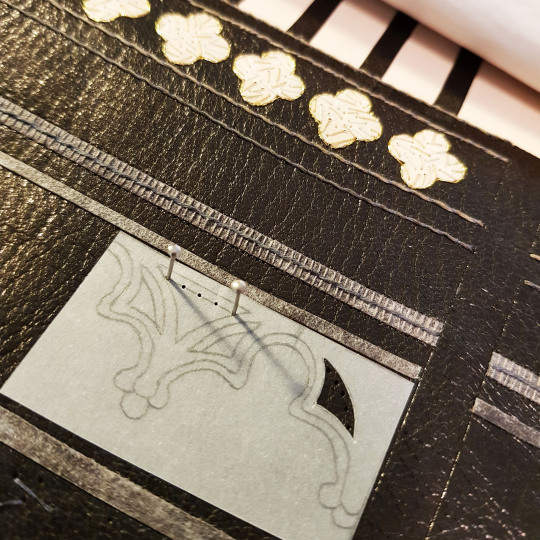
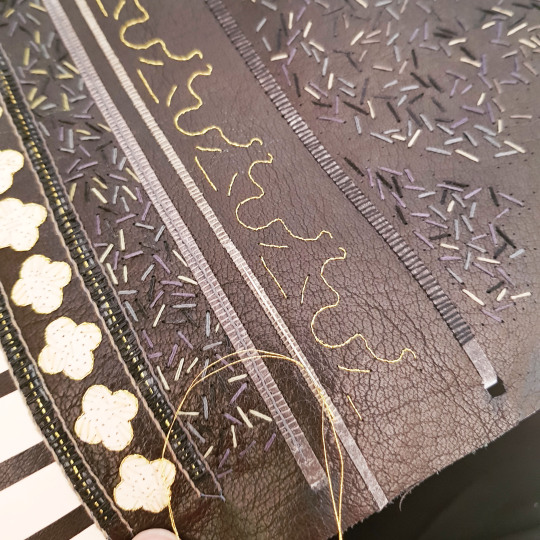
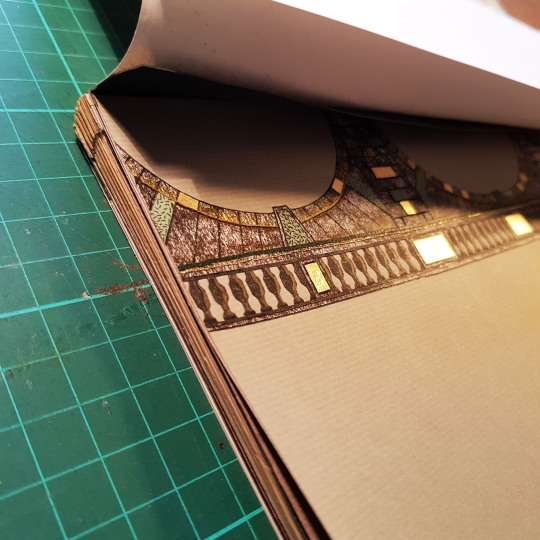
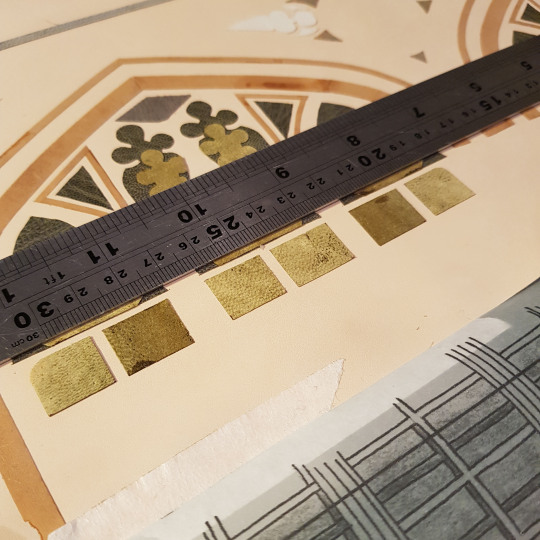
The actual Great Bridge has gold elements on a painted black behind so I naturally chose to depict these gold elements using gold leaf. The gold leaf was stuck to Japanese paper squares using PVA glue. I then cut out the required onlays and put them to one side until the book had been covered.
Because it is necessary to dampen the leather when covering the book, I decided to stick on the gold onlays after the book had been covered, to avoid damaging the gold.
So, with all of the embroidery complete it was time for covering!
The text block had been bevelled and back-cornered in preparation. The text block was capped up with paper and cling film to avoid moisture getting to the text block during the covering process.
The leather was dampened with a water atomiser ahead of pasting the back out with home made paste. The dampening was done to prevent any marks on the front of the leather due to the paste being drawn through unevenly.
The book was left to dry between blotters overnight, changing the blotters regularly to draw out the moisture. The following day I was able to open the book up and lay down the leather joints. Once these were down the back of the boards was infilled with watercolour paper, then a layer of Zerkall paper. This was then sanded flush. The surface was then ready to have the decorated paper doublures stuck down onto it.
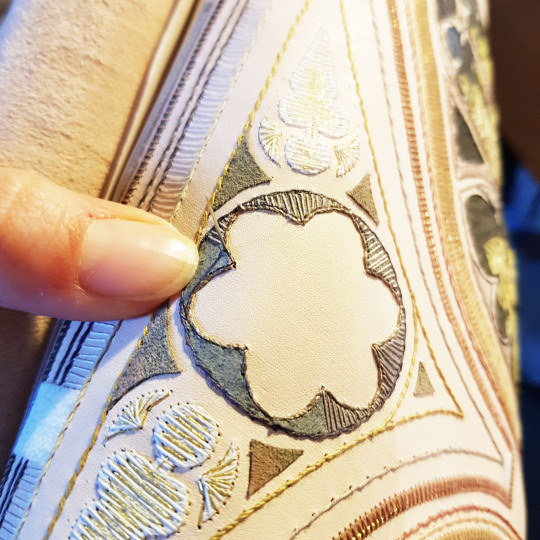
I then added some blind tooling detail in between the sewn lines using a hand-made finishing tools.

Plus I also added more detail using carbon tooling within the window spaces of The Bridge of Sighs.

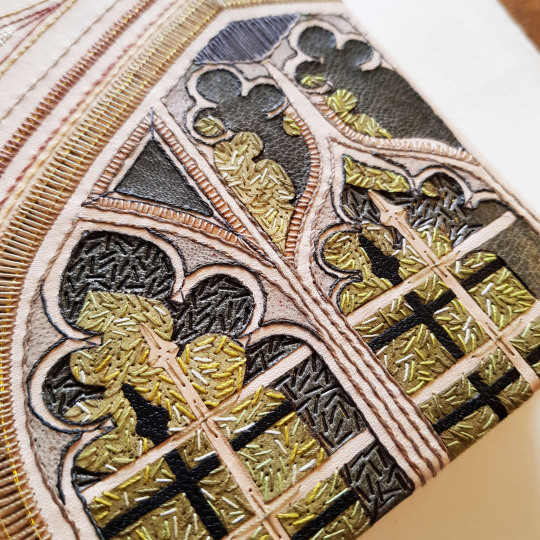
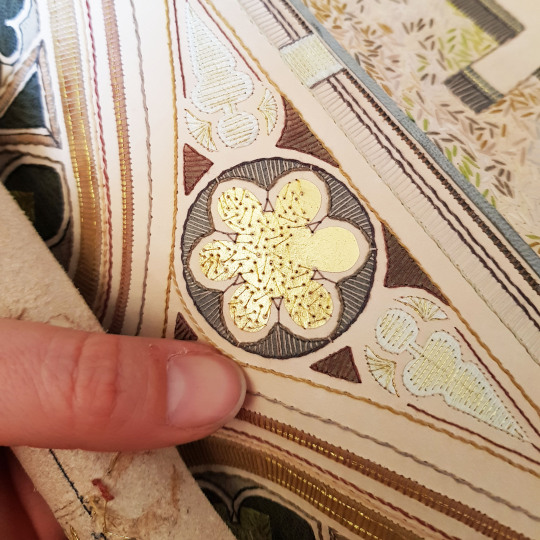
Once the binding was dry it was also time to add the gold detail onto the Great Bridge section of the book. I first gold-tooled some circles directly onto the leather. The decorative gold onlays were then stuck down within the metallic thread lines I had sewn previously before the book was covered.
Here shows the sample board on top of the covered book - the differences in the colour of the leather onlays and sewing threads are apparent.
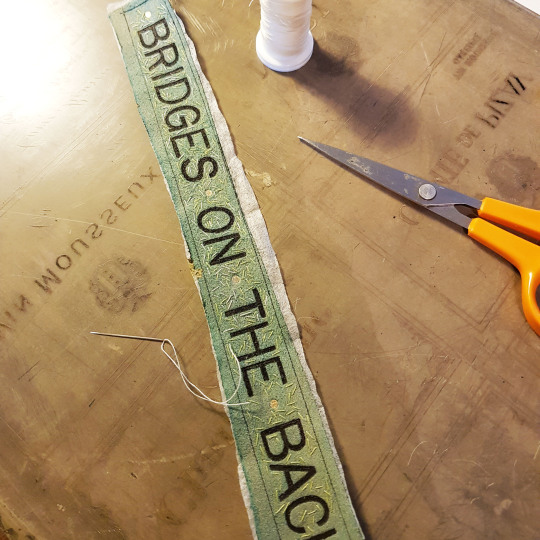
The final part of the tooling process was to tool each of the bridges names on a coloured leather to correspond with the appropriate part of the book or box.
A title was also carbon tooled to go onto the lid of the oak box the book was to be housed in. This was then embroidered with small flecks of different green threads, like on the book cover.
It was then time for photography! I take all of my own photos now in the conservatory of our house as the light is by far the best there than anywhere else in the house.
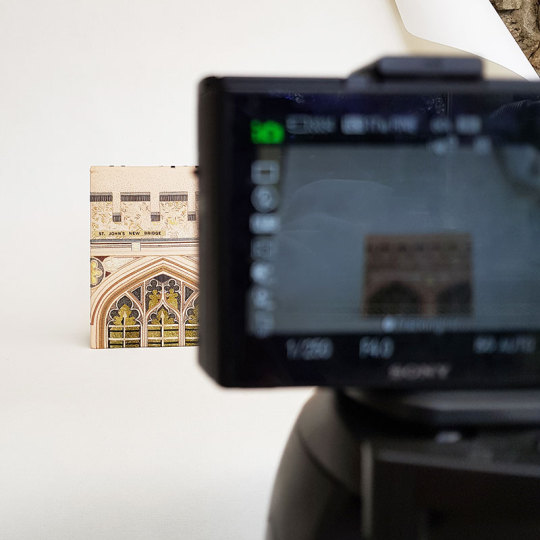
With a “standard” binding I would take a photo of the book with both covers open, however it doesn’t really work for this book as the orientation is wrong!

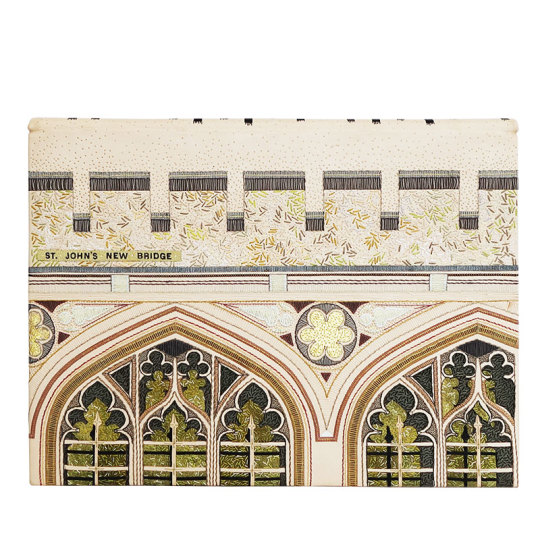
FRONT OF BOOK: St John’s New Bridge
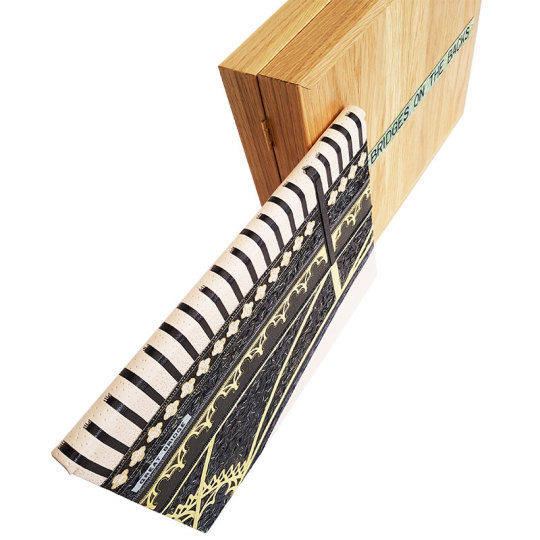
BACK OF BOOK ALONGSIDE OAK BOX: The railings of the Great Bridge were carried over onto the spine of the book, with the ends feathered out using little carbon-tooled lines. the box was made from oak with the title strip stuck to the front.
THE HEADBANDS:
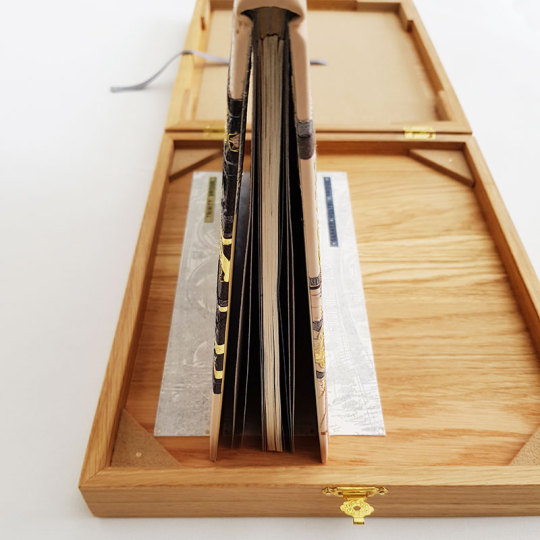
THE BOX: The box was made so that the book could sit open for display within grooves in the box lid. There are six of the nine bridges illustrated on the binding. Images of the three bridges I couldn’t fit in sit in the box creating the grooves for the book to stand upright in!
DETAIL OF THE FRONT ENDPAPERS AND DOUBURES: With rather unexpected luck, this commission was being gifted as a wedding present. The couple met at Cambridge University and so happened to be at Clare College and St John’s College respectively - the two bridges I had mirrored inside the front cover!!
To see these photos and more please visit my website here.

trying to use quarantine to get my life back on track, what better way to document it than tumblr! Haven’t been on in ages, but I’m excited to be back
Post link

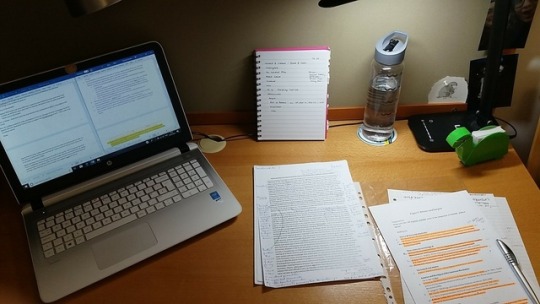
08.01.19 ~ 13/150 Days of Productivity
Second day back at Cam & a full day of revision to be done!
Honestly finding it quite hard to focus because it’s rather monotonous, but has to be done. Getting increasingly worried for mocks as I run out of time. But we struggle through!
Listening to London Grammar while working
~Scribbles x
07.01.19 ~ 12/150 Days of Productivity
First day back at Cam & gonna make it productive! Mocks are on the 14th and I have a lot of work to do (and I will push myself until I do!)
Today I’m working on the British Empire during the 18th Century. What are you working on today?
~ Scribbles x


Only had 2 panic attacks this week… Not bad at all ;D
On a brighter note…. I’ll be graduating (hopefully) very soon, so that makes up for all the uni meltdowns.
I’m pooped
Why am I so unbothered to do any work… While I know I’ll be graduating soon??? HEWLP


Beautiful day in Cambridge, however, my dissertation is due in two weeks so I won’t be able to enjoy the beautiful sunshine this week


July 14: Duchesses Meghan & Catherine attend the Wimbledon Ladies’ Final Event!
- Maison Michel “Virginie” Fedora hat
- Altuzarra Ghiandi Bag in Black
- Illesteva Leonard Sunglasses ($180)
- Ralph Lauren Collection Striped Cotton Shirt ($590)
- Ralph Lauren “Charmaine” Silk Wide Leg Trousers ($1690)
- Sarah Flint “Perfect” Pumps in Black Nappa ($355)
Catherine Wore:
- Jenny Packham Black Dot Ruffle Dress
- Gianvito Rossi ‘105′ Pumps in Praline ($675)
- Dolce & Gabbana Pink Medium Miss Sicily Bag ($1695)
- In2Design Baroque Pearl Earrings ($152)
- Cartier ‘Ballon Bleu de Cartier’ Stainless Steel Watch ($5750)
- Ray Ban New Rubber Youngster Sunglasses ($143)
Post link