#thread

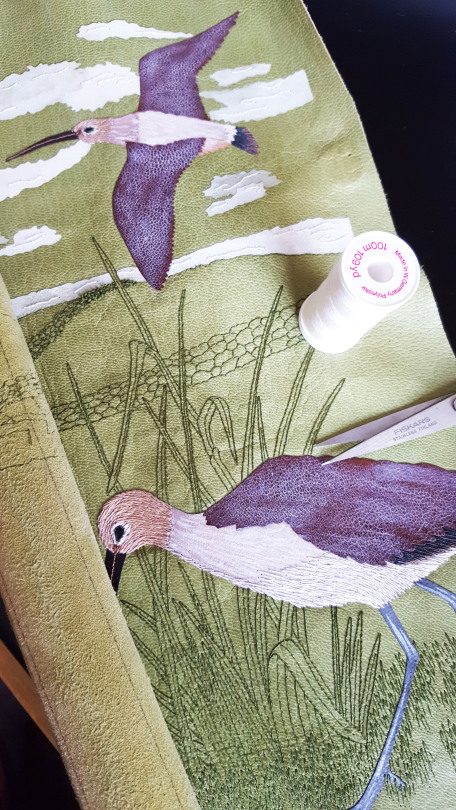
Part three of this blog post details the embroidery I did on the British Birds binding, the bit I always enjoy the most! As described in the pervious installment, I chose to keep the background detail behind the birds to simple lines embroidered in green to match the covering leather. This was to stay in keeping with the illustrations within the book.
The drystone wall ran across the design, changing in size for perspective. The larger part of the wall was detailed with outlines of individual stones and as the wall went into the distance this changed and each stone was represented by a small French knot.
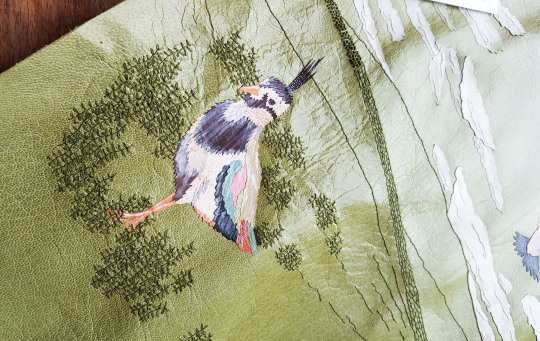
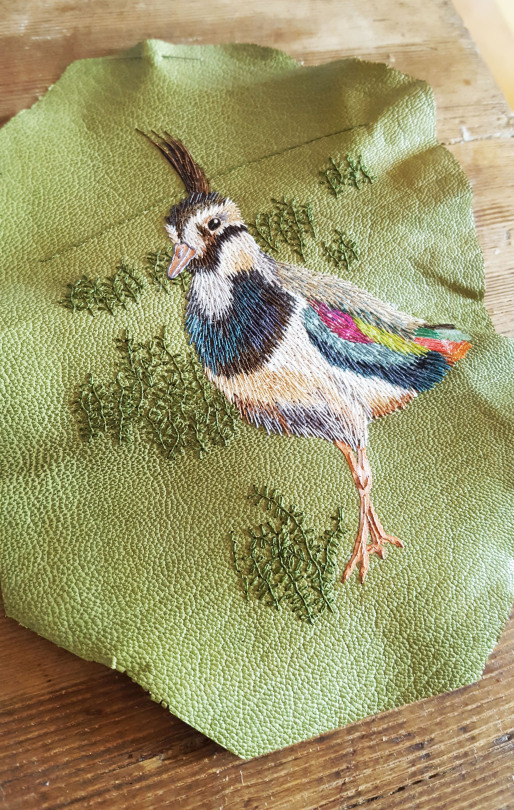
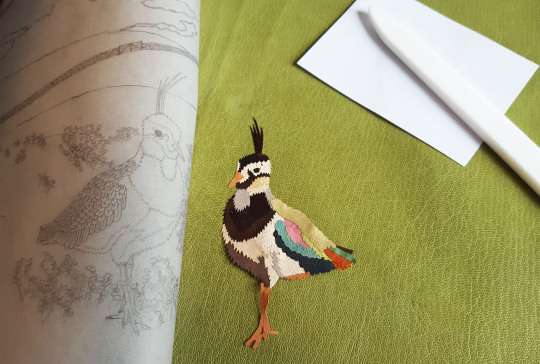
Behind the lapwing, as shown in the previous post through the work I did on the sample board, I added sprigs of heather.
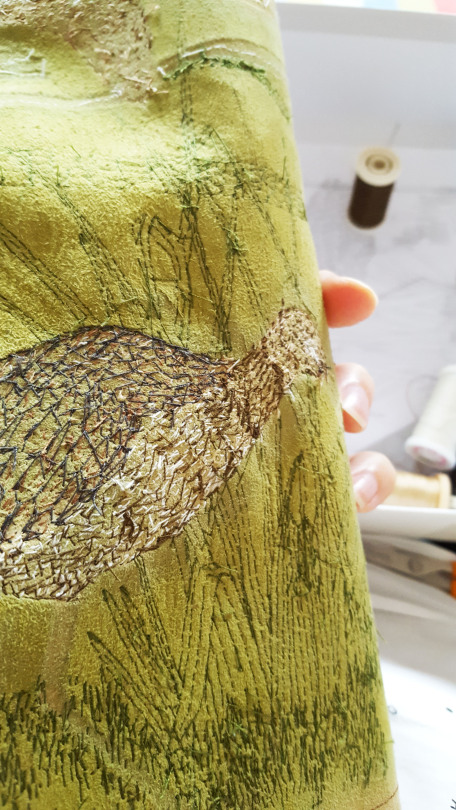
And behind the curlew I depicted the bird walking amongst some long grasses.
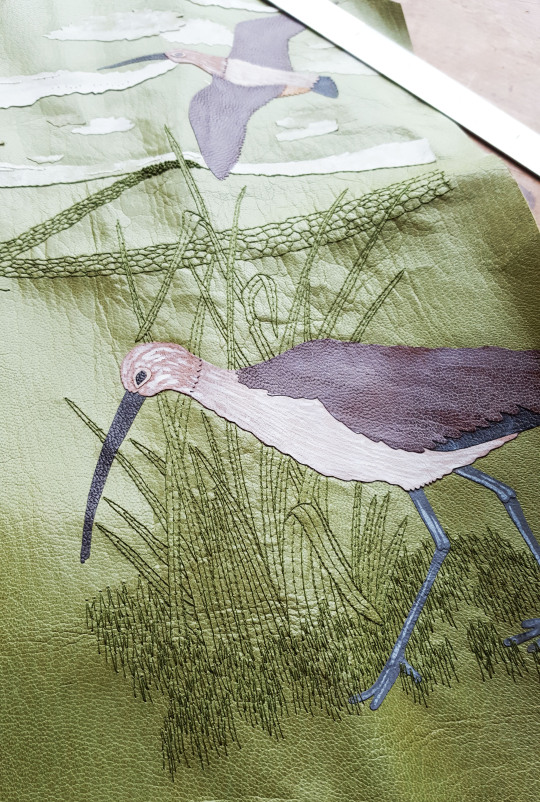
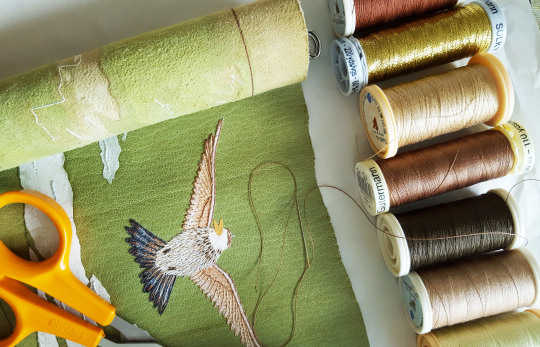
Once the background detail was complete it was time to work on the birds. Firstly, the large standing curlew got the embroidery treatment. I started by building up the colour with some small stem stitches with threads in colours to match the onlay behind.
Once these patches were blocked out with small stitches, I added some speckled detail on the head of the bird using a double length of machine cotton.
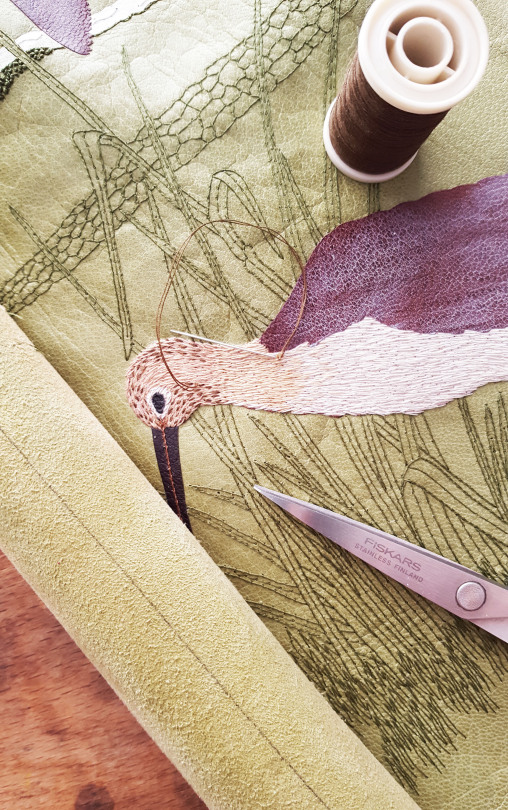
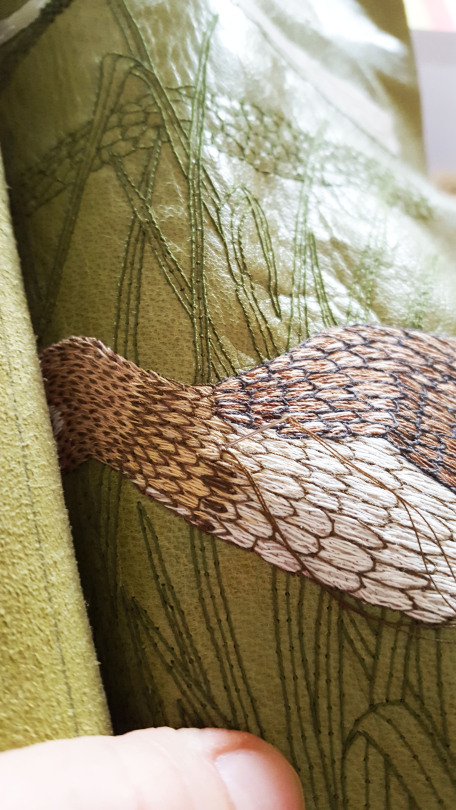
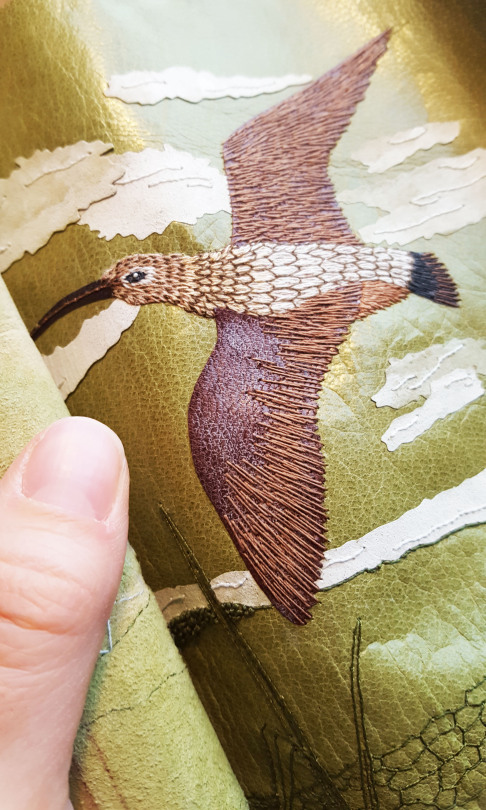
Once all of the colour block was done on the main body of the bird, I added feather outlines using a darker thread.
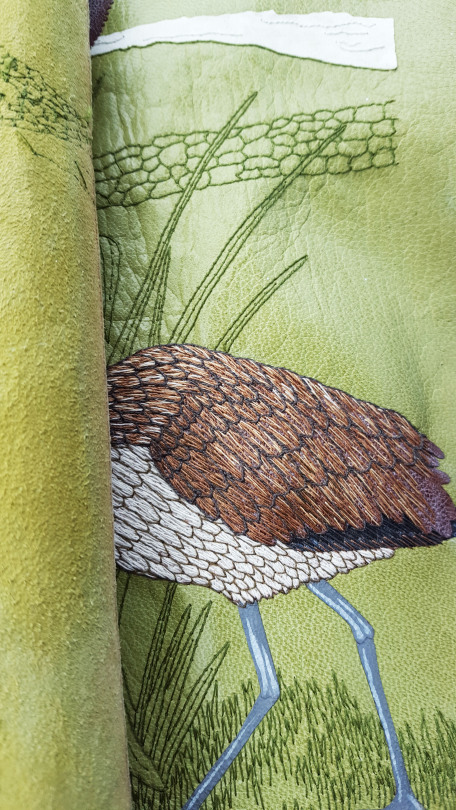
Within each of these outlined feathers I added further detail in the centre of each using a lazy daisy stitch.
More detail was added to the beak and legs, plus a small white French knot was sewn into the black of the bird’s eye to bring it to life!

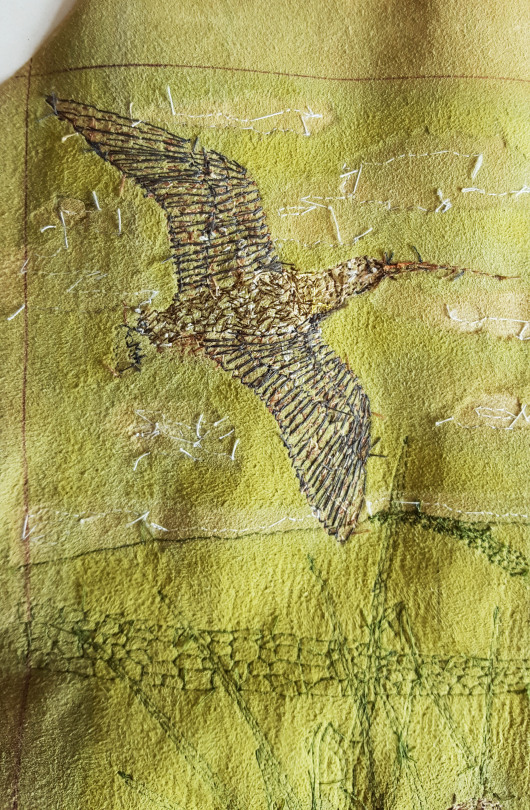
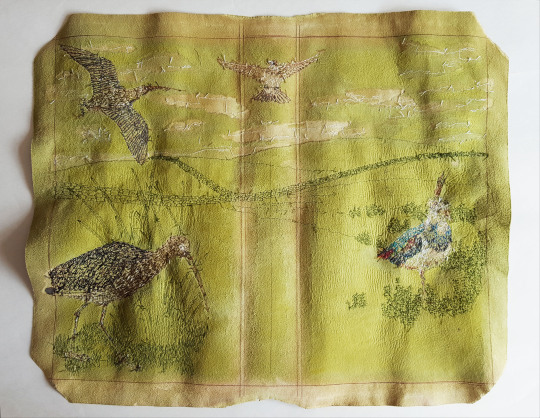
The back of the leather showed the number of stitches that went into creating his feathery look.
The same method was applied to the flying curlew, using smaller stitches on the base and building up detail on top.

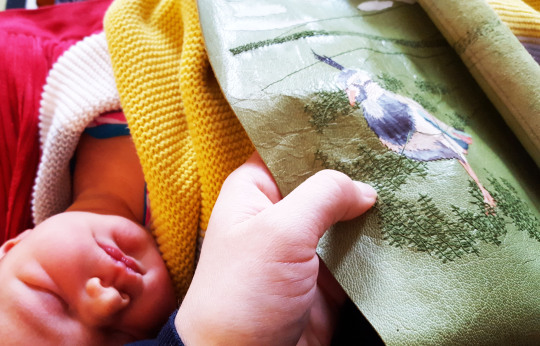
I had company in the form of a newborn baby throughout this process - thankfully at her early age she slept a lot and embroidering the leather was a pleasant task to do with a dozy baby on my lap!
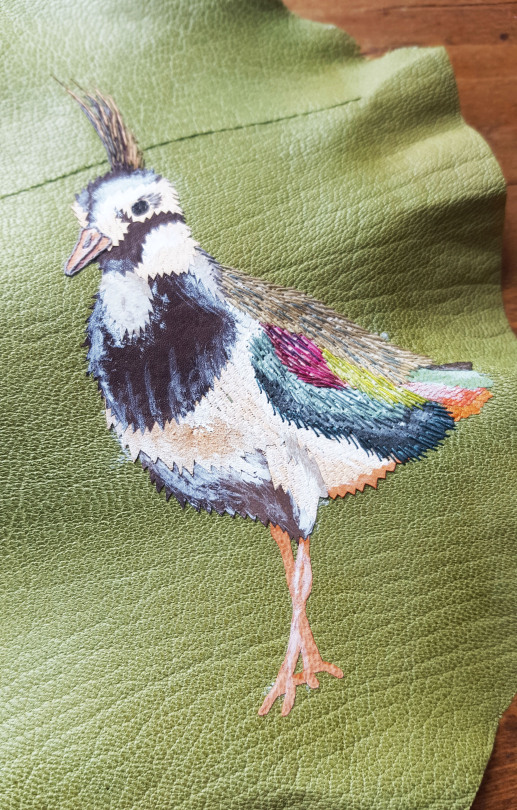
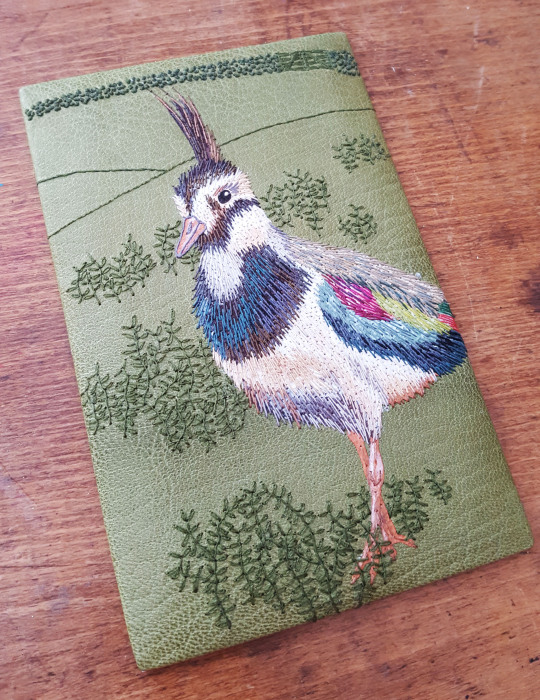
As with the curlews, the lapwing had his feathers built up in the same way. Having worked on a lapwing for the sample board, and therefore having had a “test-run”, I thought of improvements to the way I should embroider the second one. I was able to add finer detail and adapt the way I used the threads a bit on the actual book leather. For example, I used a larger variety of colours and added outlines for some of the feathers on the lapwing’s back.
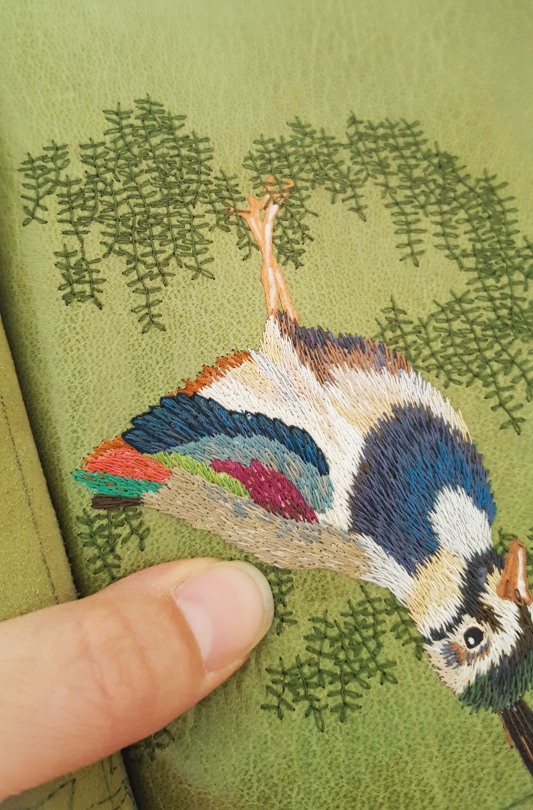
Metallic threads were also woven into each of the birds before completion to add a little sparkle to their feathers!
A little white thread was also added to the clouds to add a bit of textural detail to them too. And with this done the embroidery stage was complete!
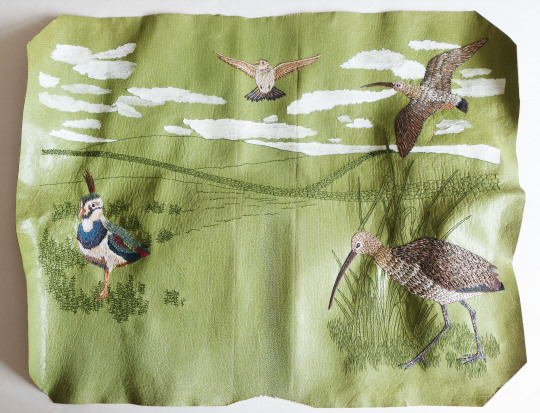
COMPLETED FRONT OF LEATHER:
COMPLETED BACK OF LEATHER:
The next, and final, installment sees the leather going onto the book and the end result…

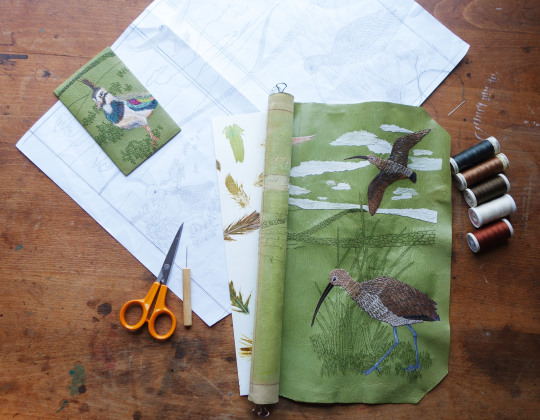
The curlews, skylark and lapwing were each broken down into block colours in order to plan out their onlays. I chose a lovely shade of green to have as the covering leather to compliment the birds and to achieve a background colour I was happy with.
For the sample board I chose to illustrate just the lapwing, so worked on two lapwing onlays simultaneously (one of the sample board and one for the book). The onlays were each cut out with a scalpel, giving each one a slight border so that it could be stuck to the next in a patchwork off the book.
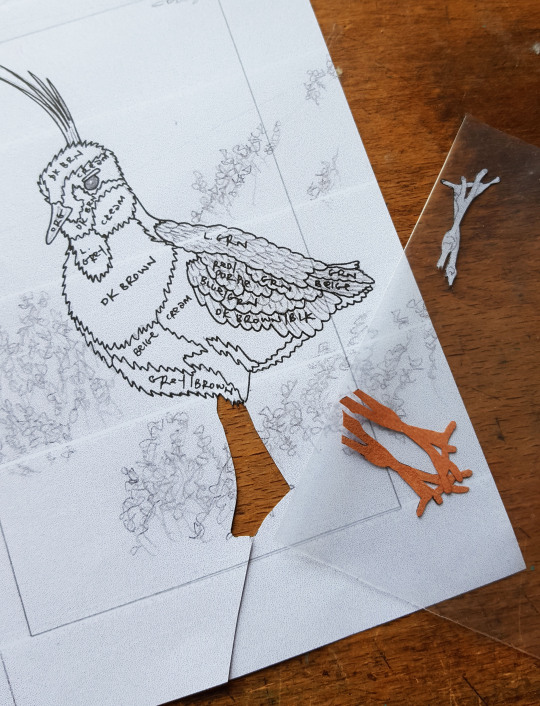
The small onlays were stuck together off of the book using a tracing paper template as a guide.
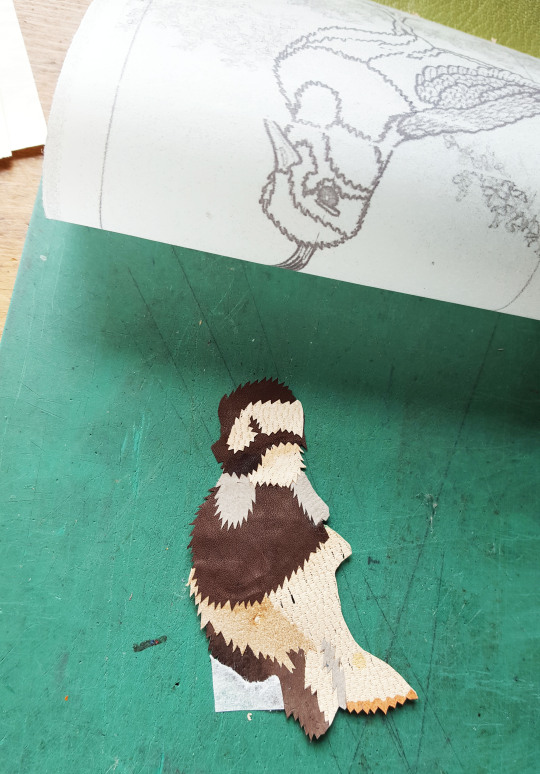
Finally producing two lapwings!

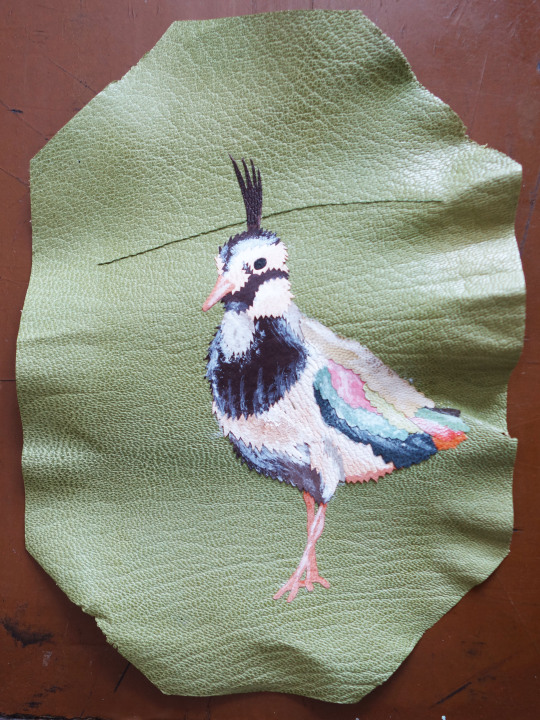
One of the birds was stuck down onto the sample board leather using PVA glue. The colours were then muted down using a very thin wash of white acrylic paint. Once this had been done I was able to back-pare and then embroider the leather.
I first worked on the background detail, in a green thread to match the colour of the leather. In the book all the full-colour illustrations of the birds were shown against a muted grey, line-drawn background so I wanted to compliment this on the cover design.
Stitches were gradually built up over the whole surface of the sample board leather including coloured stitches all over the bird to give it a more feathery look and feel.
‘Heather’ detail was also added around the lapwing.
A drystone wall was included in the design drawing (including a four-bar gate) using French knots to give the impressions of the stones. Once the embroidery was complete the leather was stuck onto the sample board with paste and the edges turned in.
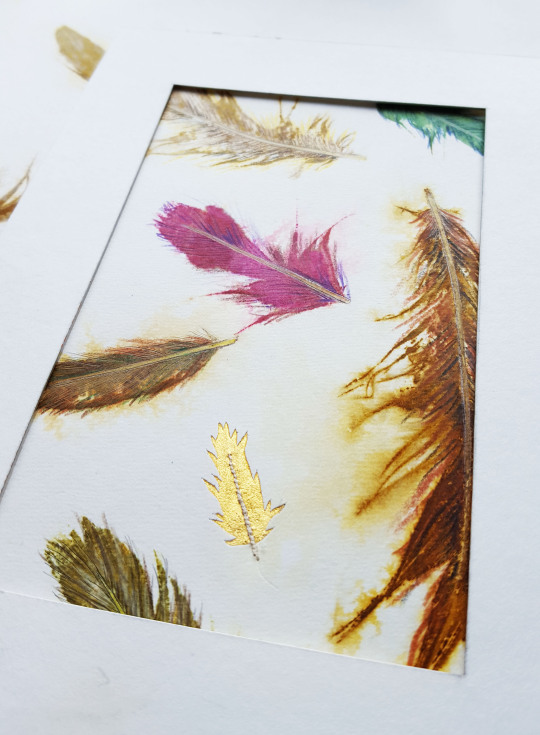
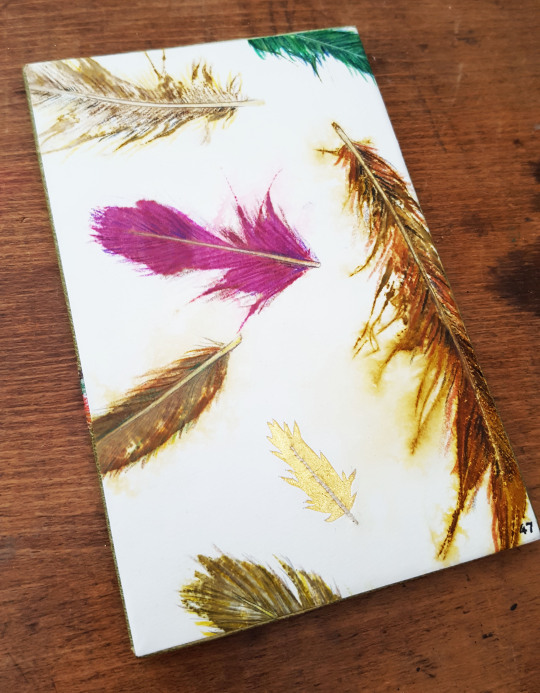
A section of the printed feather paper was selected to use on the sample board. In addition to the printed feathers, a single feather made from gold leaf was also added as a highlight. This was done by cutting out the feather shape from the endpaper and then backing the void with some gold leaf that had been adhered to Japanese paper. The shaft of the feather was embroidered with thread.
Once stuck down this board became number 47 in my sample board series!
And so once I was happy with the sample board I was able to move onto working on the book itself. In the way I had laid down the lapwing onto the sample board using my tracing paper guide, I did the same for on the covering leather, rubbing it down with a Teflon folder to ensure even adhesion.
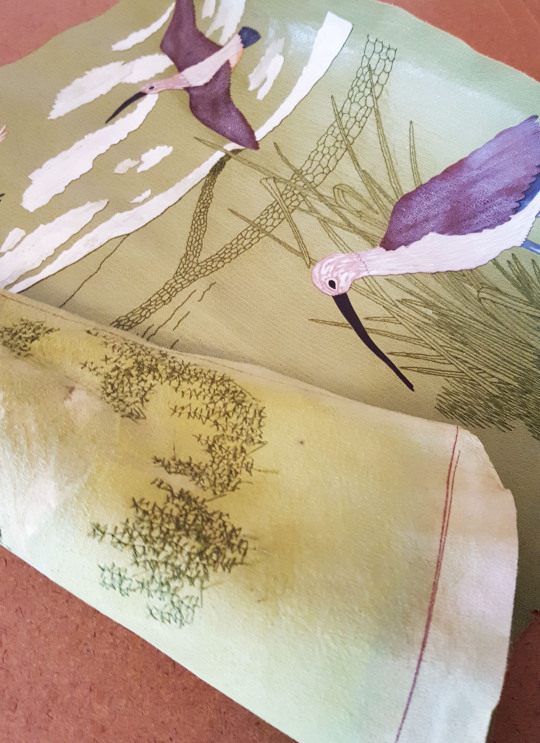
The two curlews and the skylark were also glued down in the correct positions.
I painted some strips of suede with white acrylic paint in a mottled pattern to use for clouds. These were also cut out and laid down in place.

The whole of the leather was then back-pared on the reverse in preparation for the next stage, the embroidery. This is detailed in the next blog post, part three.


Threads by @patternbase
A hand painted image, digitally rendered in Adobe Photoshop.
https://www.hicetnunc.xyz/objkt/59685
Post link
Necks below the heads of birds
tweet the marbled meat
Post de-heading
still are words
gargled
gasping for a treat
Against the solid wooden block
porcelain taffy glints
an odorous gander,
unfragrable cock
featherhead
poisoned ivy and lints
Poultry magnaminance
chickety-chick
chickety
the Underhouse carriage
looks rickety
up by the marquee,
aclicking his clock
The Craftsman sat spindling his loom
coarse is the grain
on a pinewooden frock
or the larktree
Buttoned
doom
—


I finished my ghost doily! Done with size 10 thread and a 7 steel hook. I think it pairs perfectly with my haunted house snow globe

Working on stuffs this Sunday
These photos sum it up perfectly!
I’m a multifaceted crafter so this donut serves a lot of necessary needs for #crochet #sewing #embroidery #crossstitch getting things made y'all!
.
.
.
#craftblogger #etsy #craftfairs #crafter #artist #fiberart #reality #verses #iger #truelife #sunday #yarn #thread #needle #etsyseller
https://www.instagram.com/p/Bny2q9ZBSwt/?utm_source=ig_tumblr_share&igshid=7diz29v5fu1l
Post link
")

“House,” 2013, by Julie Cockburn, is a found photograph that the artist hand-embroidered over. The piece will show at the Armory Show in New York.
Post link


EXHIBITION NATIONAL MUSEUM SLOVENIA / Presdelek Design Collective
For an exhibition at the National Museum of Slovenia in Ljubljana, Presledek Design Collective aimed to encourage visitors to actively participate in the viewing of the pieces by guiding them through a series of different ambiences. The layout plan was based on the delineation or creation of several smaller areas inside a big space. To access these new rooms you just have to follow a path, similar to the one we use when we move between larger rooms through narrow corridors in a residential apartment.
Para una exposición en el Museo Nacional de Eslovenia en Ljubljana, Presledek Design Collective decidió animar a los visitantes a participar activamente en el visionado de las piezas guiándolos a través de diferentes ambientes. El plan de diseño se basó en la delimitación o la creación de varias áreas más pequeñas dentro de un gran espacio. Para acceder a estas nuevas habitaciones sólo hay que seguir un camino, similar al que utilizamos cuando nos movemos entre las habitaciones más grandes a través de estrechos pasillos en un apartamento residencial.
Máster en Instalaciones y Arquitecturas Interactivas y Efímeras
más información en www.masterefimeras.com
Post link


Activity stimboard for Lamed in his café/bookstore!
Sources in reblog
, 2018 (quilted and appliquéd cotton, wool and chiffon")
Bisa Butler, Three Kings (close up for detail), 2018 (quilted and appliquéd cotton, wool and chiffon)
Post link
")


From day 11- till day 20
