Whenever I see a plant I like I just take a little cutting about 10 cm long with at least 2 eyes on it and stick it in a pot filled with loose soil. I make sure to keep the soil moist at all times.
The chances of rooting of the cutting will depend on the time of the year you take it. For trees and bushes the best time is when they go dormant. So when they wake up in spring they keep on with their natural rhythm of growing, no matter where they are!
For herbs like lavender,rosemary etc. spring is a good time.That’s when they have new growth which can root easily. But from experience, I can say that fall is a good time too. The only thing is that you have to take care of the rooted plants at home or a greenhouse until planting out in spring .
////
Ne zaman hoşuma giden bir bitki görsem hemen ondan yaklaşık 10 cm’lik bir çelik alırım ve geçirgen toprakla dolu bir saksıya batırırım.Çelik alırken dikkat edilecek şey dalın üzerinde birkaç göz olması, çünkü yeni yapraklar oradan çıkıyor.
Çeliklerin köklenme ihtimali çeliği aldığınız zamana göre değişiyor.Ağaçlar ve çalılar için en iyisi uykuya geçtikleri zaman. Böylelikle baharda uyandıklarında,sizin onların bir parçasını köklendirdiğinizden habersiz, kendi doğal ritimlerinde büyümeye başlıyorlar!
Lavanta ve biberiye gibi aromatik otlar içinse, yeni filizler verdikleri bahar daha iyi bir zaman. Ama tecrübeme dayanarak sonbaharın da uygun bir zaman olduğunu söyleyebilirim.Sadece köklendirdiğiniz bitkilere bütün kış, baharda dışarıya dikeceğiniz zamana kadar, evde ya da serada güzelce bakmanız lazım.
————————————————————————————————-
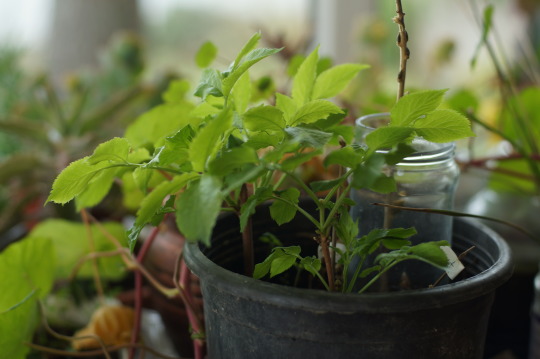
Sambucus Nigra (Elderberry) // Mürver
January 1 // 1 Ocak
January 30 // 30 Ocak
————————————————————————————————-
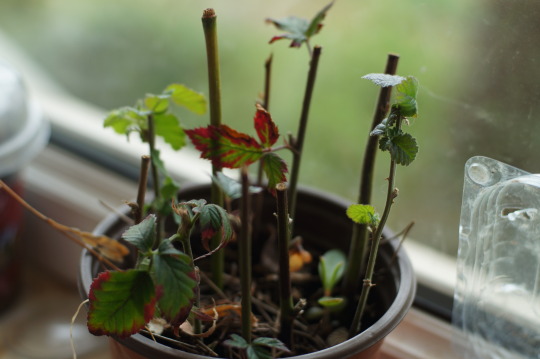
Blackberries // Böğürtlenler
These are a couple of different variety of blackberries.Some of them are the thorny wild ones, some of them are thornless ones that I took during my daily walks around the neighborhood.
They were all looking like pieces of sticks, but now they shot out some leaves!
It’s time to divide them in their own individual pots, because by the color of the leaves it looks like they have a bit of nutrition deficiency.
///
Fotoğtafta birkaç çeşit böğürtlen var.Bazıları dikenli yabani olanlardan, bazıları da dikensiz evlerin çitlerine sardırılmış olarak gördüklerimden.
Çelikler birkaç parça çubuk gibi görünüyorlardı, ama şimdi hepsi yapraklandı.Artık onları ayrı saksılara aktarma zamanı geldi.Çünkü yaprakların renginden besin yetersizliği çekiyorlar gibi görünüyor.
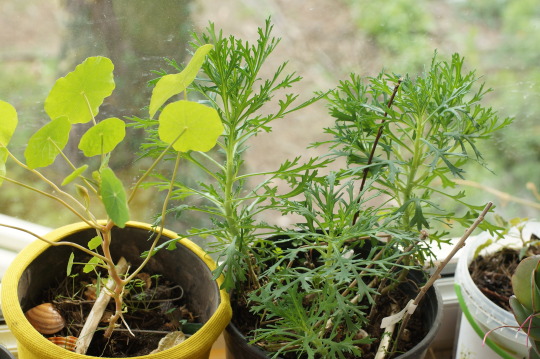
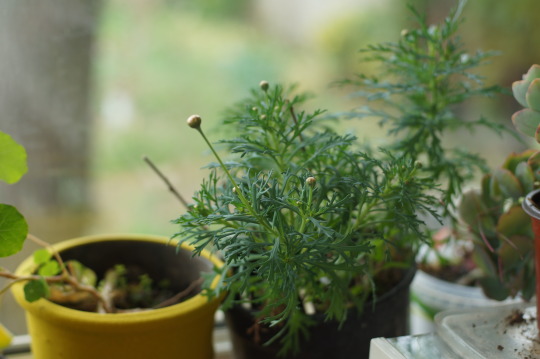
I took some cuttings of semi/hard shoots (woody on the bottom, green on top) which where growing from the bottom of the plant. They quickly grew larger and in a month or so started to flower at the same time as the mother plant. Now they are ready to plant out, but I rather wait for the weather to get a little warmer (it’s snowing now!).
///
Çalı papatyanın dibinden çıkan yarı odunsu (alt tarafı odunlaşmış,üst tarafı yeşil) filizlerden aldığım çelikler. Bir ayda çabucak büyüdüler ve ana bitkiyle aynı anda çiçek açmaya başladılar. Artık dışarıya ekilebilirler ama havanın biraz daha ısınmasını beklemek daha iyi olacak (şimdi kar yağıyor!)
January 30 // 30 Ocak
February 23 // 23 Şubat
If you liked what you read, you can support me by buying me a coffee here
Eğer okuduklarınız hoşunuza gittiyse buradan bana bir kahve alarak destek olabilirsiniz
Since I found out my grad program DOESN’T start today (they misprinted an updatedstart date — it actually begins the 25th), I unexpectedly have a little more time to enjoy myself before dipping into the full grad-grind!
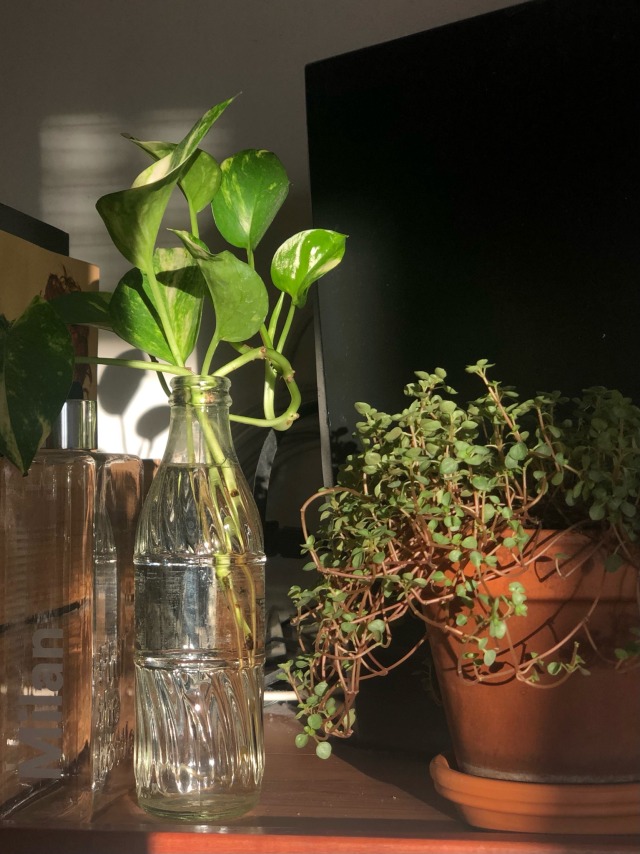
I have been spending some of my leisure time tending to numerous plants, including my new (and growing) propagation station, as featured above! Currently, I’m trying to establish 3 buddies. From left to right are mint (already planted), ??? (Truly, I’ve no idea what the buddy living in the syrup bottle is), Zamioculcas zamiifolia (“ZZ”), and… a green onion!
Delightfully, the green onion is already growing new roots. The ZZ I’m less sure of. In general, I don’t know how well ZZs take to water propagation, but so far it’s leaves are still supple. As for the ??? plant, it has been hanging in water for weeks without rooting! Even so, it also remains pretty supple. So I guess we’ll just see how it goes, huh?
Unfortunately, most of the extra time will be devoted to the work-grind instead. The following are on this week’s menu of To-Dos:
Finalize and publish the Spring tutoring schedule
Co-write the conclusion/analysis for a small research paper (So excited!!)
Finish developing “Welcome Back!” assignments
As much as I’m enjoying a break, COVID has me stir-crazy and I’m really looking forward to getting started on the next steps of my future career! As such, I cannot wait until I can get started with my program. By then, I should have more relevant and interesting content to share.
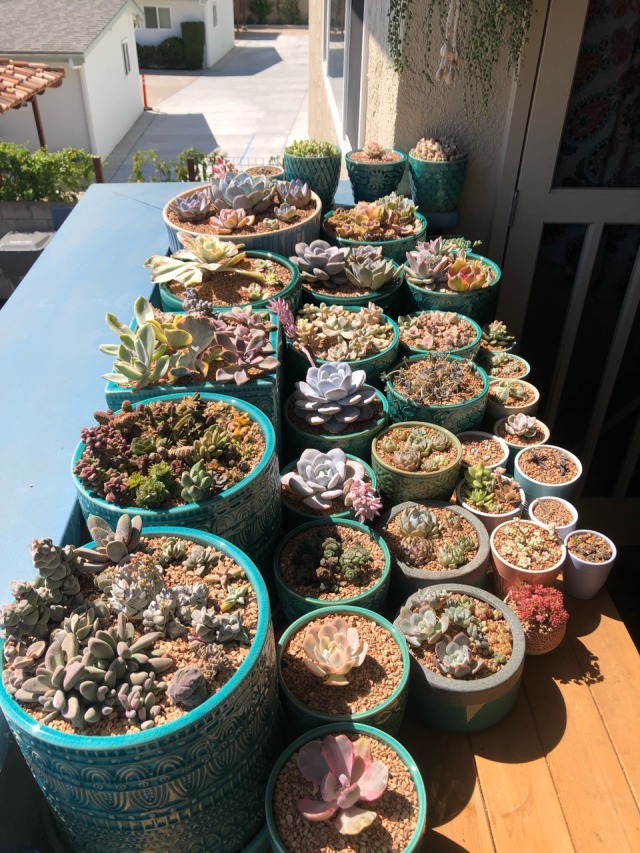
My collection is changed so much! My teal pot dream is becoming reality. Still have like 10 small pots that aren’t teal to replace. How have you guys been? Send me your questions and comments!
I was growing a bunch of little plants under a grow-light display at work, but we had to move the display so I got to take them all home :3 each plant in the box has a story and all of them were grown from clippings or saved from the compost
In the fall, my Tillandsia caput-medusae air plant flowered and now it has a pup growing from its base! It will be exciting to watch this tiny air plant grow.
So I found this cocoon unburied in one of the liner pots because (what I assume was) a deer got into the hoop house, tore a bunch of my cuttings out, ate the leaves and left the stems. A whole nursery of plants to munch on, and you go for my babies. Rude.
Knowing these guys like to pupate underground, I filled a smaller pot with soil and reburied it just under the surface, and literally the next day this guy emerges!
This is a Broad-Bordered Bee Hawkmoth (Hemaris fuciformis). It took a couple of hours to dry its wings and had taken off by the time I got back from my lunch break. What a treat!
Anyway here’s the aforementioned deer damage. I mean. Good to see they’re rooting.
I have no idea what this plant is called but look at the fuzzy leaves it’s so cute. I got this in the pot of another plant I bought and I didn’t even think it would propagate but I tried anyways and it grew so fast I am so happy.
I have a new thing for our native New Zealand flax (Phormium spp.), known as Harakeke in Maori. At the moment I’m starting to think about the plantings we will have for the small piece of “formal garden” we’re going to have out the back once the deck is finished and the trellis is up. I’m going to do something completely different to the “country cottage” feel out the front and the wildy forest garden at the very back. Yep, it’s gonna be a horribly architectural modern Aotearoa grass garden. With that in mind, I bought a single specimen of this flax called, pleasingly, Darkdelight. I tipped it out, split it up and hey presto! Now I have thirteen! I will do the same with a couple of other varieties, because people have been breeding some amazing coloured ones. As well as the harakeke, I will plant a bunch of New Zealand Blueberry (Dianella nigra,unfortunately poisonous to humans but so super cute), some black bamboo that I will “appropriate” from my parents’ large patch, as well as purple asparagus I will probably grow from seed, because I can’t help slipping some edibles in there. I have to say I feel very virtuous planting natives, especially as my interest in them - aesthetically and ecologically - is something of a new development!
The pineapple I propagated as part of the article on regrowing pineapple is somewhat out of control at this point. I can barely find a spot to place it!
So, you know those spindly basil plants you can get in the supermarket that are all leggy and pale, and you put them on the window-ledge and pick a few leaves from them and then they die?
Here is the hack for
turning it into a healthy plant and
making an army of clones from it so that all your friends can have one too
You will need
one parent plant
scissors for cutting the stalks
enough pots for however many seedlings you want to make
compost
one or two empty bottles
Method
Have a look at your parent plant. You’ll see that each bundle of leaves comes out from a knobbly bit in the stem. That knobbly bit is called a leaf node.
Gently take hold of the very top set of leaves and count the leaf nodes on that particular stalk, counting down from the top.
If there are more than three nodes, cut the stalk just below the second leaf node.
The bit that you have just cut off is called a cutting, and it will become a new plant. To do this, we have to get it to grow roots.
Take your cutting and remove all the leaves except the four at the very top.
Fill your bottle with water and insert the cutting into the top of the bottle, with the stem completely submerged in water, and the leaves outside in the air.
Now repeat until you’ve taken about six cuttings, or you’ve taken all the cuttings available. Put them all in water-filled bottles. (I use milk bottles which hold about four stems at once with enough space for their leaves to get the sunlight, but if you’re using wine bottles it might be fewer.)
Put the cuttings/bottles onto a sunny window-ledge and wait. Within about a week you should see roots beginning to grow. Keep the water topped up to the top, and let the roots grow until they are two or three inches long.
When the roots are 2-3 inches long, fill your pots with compost and water them well. Shove your fingers in the wet compost to make a space for the cutting’s new roots and gently insert the cutting into the hole. Put a little bit more compost on top and firm it down, move on to plant the next one.
Providing all your cuttings get over the shock of transfer (and they probably will) you will then have 8 little basil plants like the smallest ones in my picture.
Put them back on the sunny window-ledge to let them get established and begin to grow. Congrats, you now have 8 basil plants plus the parent plant.
The parent plant
When you’re taking the cuttings, you must leave at least one leaf node on every stalk. The plant can’t create leaves without the nodes, and if it has no leaves it’s basically going to die.
You want the plant to create new leaves and thicken up. If a stalk doesn’t have more than two nodes, don’t make cuttings from that stalk at all. Leave that stalk to grow.
Taking your cuttings will stimulate the plant to grow, and lower nodes which may not have had leaves on them when you got the plant, will now begin to produce them. This will make the plant bushier and stronger, but it will need a bit of extra food to help it put the extra effort in. So give it a new layer of compost on the top, water it, and put it back on the sunny window-ledge as well.
First batch cuttings
Let your first generation of cuttings grow undisturbed for a few weeks. (Water only when the soil feels dry.)
When they start looking long and thin, you want to encourage them to create side-shoots and begin bushing out. You don’t want a long thin plant. It will fall over in the wind.
Look at the very top of the plant where you will see two tiny baby leaves developing. If you let them develop, the plant will continue to grow long and thin, but if you take them out it will encourage the side shoots to grow. Pinch out the tiny baby leaves right at the top of the cuttings, and very soon you’ll see they start to grow outwards instead of upwards.
Second batch cuttings
After a few weeks your cuttings will look like the larger plants in my picture, and your parent plant will have grown enough to have added extra nodes. Which means that you can now take another batch of cuttings and start the process all over again.
You can pretty much keep this going all summer if you want.
Give plants away, eat fresh basil all summer and fill your freezer with bags of basil leaves for the winter :) Happy cloning!
Excuse the mess but this is just so beautiful . . . #sunset #autumn #herbs #succulents #plants #window #nature #beautiful #mess #propagation #springonions #rosemary #clouds


, known as Harakek")
, known as Harakek")
, known as Harakek")


