#reusable

According to @ellenmacarthurfoundation By 2050, there will be more plastic in the ocean than fish. Disturbing fact, we know. Before the pandemic it is estimated that 600 billion coffee cups are thrown away every year and about 120 billion come from Americans alone, says @foodprintorg. With their plastic lids, straws, and paper or plastic cups the “to-go” coffee culture is a big part of this problem. We are rethinking disposables. By emphasizing reusable drinkware we can make a dent in our consumption. Otherwise we aren’t leaving only footprints.
#ditchdisposables #stopdisposable #reusable #reuasblecup #ecofriendly #savetheplanet #disposablecoffeecupssuck #campmug #basecampmug #leavenotrace #ellanmacarthurfoundation #coffeeculture #leaveonlyfootprints #coffee
https://www.instagram.com/p/CL4NXurDHfQ/?igshid=p1uzrxbb8h6d

COFFEE FIRST, THEN ADVENTURE! ☕️
Ditch your single use coffee cups and upgrade to our reusable BASECAMP MUG on your next adventure. Mugs are coming soon so get thirsty.
BASECAMP MUG
Built For Adventure, Used Everyday
- 14oz
- Double wall vacuum insulated
- Easy-fit sealing lid
- Wide grip handle
- 18/8 high grade stainless steel
- BPA free
- Durable matte finish
#reusablecup #reusable #ecofriendly #coffee #zerowaste #savetheplanet #coffeelover #sustainability #earthday #choosetoreuse #reuse #campmugs #reusablecoffeecup #smallbusiness #onepercentfortheplanet #gogreen #sustainableliving #travelmug #sustainable #coffeeaddict #campmug
https://www.instagram.com/p/CLps3lxDRaR/?igshid=15xm45znyq5mb
Post link
If you follow me and read my post since last year you may know that I obtained a menstrual cup some time ago. The truth is I haven’t got an occasion to try it… until now, thanks to quarantine.
I needed some time to prepare the cup and of course also prepare myself for trying it. Living in a dormitory was an obstacle for me to do it, so when I started bleeding on quarantine at home I though it was a appropriate day to insert my menstrual cup.
Quick backstory: I got my first period when I was turning 10, so according to my calculations I have used about 3360 menstrual pads till today (for almost 10 years). So continuing counting I will use at least 10080 more until I stop menstruating.
“Tampons, pads and panty liners along with their packaging and individual wrapping generate more than 200,000 tonnes of waste per year, and they all contain plastic – in fact, pads are around 90% plastic!” - OrganiCup
One pad decompose in about 500 to 800 years! And burning them causes highly toxic emissions. So please consider switching to more sustainable menstrual products as:
- Cloth pads (watch this video!)
- Cup
- Periodproof underwear
My first period with menstrual cup:

Day 1 | Although I tried doing this before, it didn’t work out then. “Take your time” - I said to myself and began putting in right place. The first day of wearing a cup wasn’t the most comfortable and I wore a pad due to the insurance. I found very little blood inside the cup in the evening, which surprised me.
Articles and videos that helped me at the first day:
- 7 Things No One Tells You About Using Menstrual Cups
- How to use a Menstrual Cup – In-depth Instructional Video
- First Time Using A MENSTRUAL CUP During A HEAVY Period - Sarah Therese - I love her channel!
- The truth about menstrual cups TMI WARNING | I tried the diva cup - I completely love the girl’s energy :D
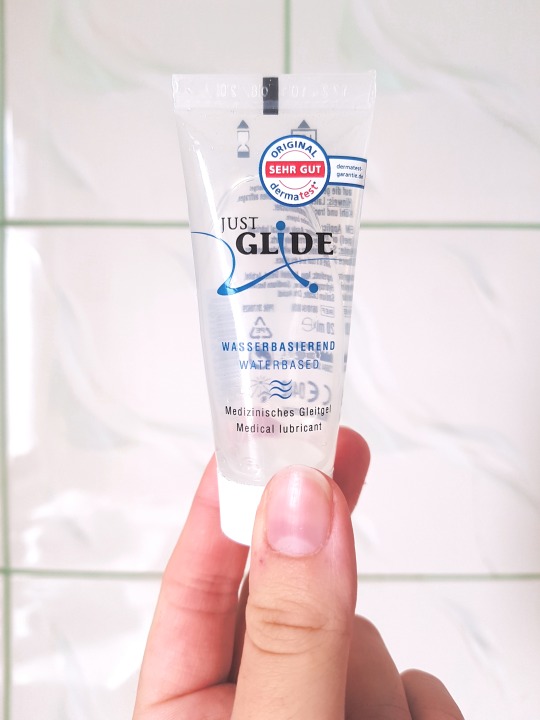
Also what I found helpful was medical lubricant, but to be honest I used it only at the first day. I didn’t mention it before but if you want to know, my cup is from the brand calledPerfect Cup;)
Day 2 | I felt really comfortable after wearing a cup at night. Also I didn’t notice any leakage. Although I think the ring was irritating me sometimes.
Day 3 | Again I felt very comfortable all day. I think the cup’s size is appropriate for me.

(sanitizing my cup in hot water while taking shower)
Day 4 | My bottom stomach hurt a bit, I think I put my cup a little too deep. But I reinserted it and then it was okay. In the evening I noticed that the amount of blood inside the cup was low so I decided to take a break of it and try on a cloth pad I sew before.

Day 5 | I stopped bleeding and after wearing a cloth pad for a night I felt a lot more pleased then after using a disposable pad.
Summing up: I loved it from the very first day! The feeling of not having a blood flood inside my pants and having any skin irritation caused by the chemicals inside the disposable pads… Absolutely stunning! Now I feel like: everyone who is menstruating should try that!
Also I have a story here: when I got my cup, I showed it to my boyfriend and he loved it and started playing with it, but when I showed it to my (women) roommates they were like “yuuuck!” and the situation was really shocking for me, because before I hadn’t met anyone who would react that way on a cup…
I’ve also asked some other people what they think about menstrual cups.
- “They are problematic and embarrassing in public toilets.”
- “I’m afraid I can stain something while putting it out.”
- “They are cool. Someday I’ll buy one!”
- “At least you don’t waste money on tampons and pads.”
- “I think it is a good way to reduce your waste.”
- “They seem to be more comfortable than tampons.”
- “In my point of view they aren’t made for me, but I’m not sure, because it seems to be better and more comfortable solution.”
And what is your opinion about menstrual cups?
I will finish with mentioning that there is nothing to be ashamed with talking about your period or using a menstrual cup! Love your body and accept everything about it! You are beautiful and worthy! ♥ ♥ ♥
Future Financial Sources for EKOSAK - reusable produce bags
Personal investment: I will invest make a personal (cash) investment in EKOSAK to purchase inventory (material, thread, rope). This will establish my commitment to this project, and that I am ready to take on the risk.
Love money: My mom is going to be providing two investment: financial services, as well as use of two of her assets
Use of assets:
1. Sewing Machine – this will be used to produce EKOSAK
2. Vehicle - Two day per week delivery will be made using her vehicle due to low gas mileage, and lower cost of insurance.
Future Financial Sources:
1. Funding for Northern Ontario Start-ups
Contribution of up to $200,000 to cover the costs to establish a new business in a priority sector of Northern Ontario.
Funded by the Government of Ontario, Northern Ontario Heritage Fund Corporation
2. Money and advice for Ontario small businesses
Advice and funding of up to $5,000 to help new or existing businesses fire, grow, plan, export and more
Attend an interview with a Small Business Centre Advisor. Can receive up to $5,000 in seed money
Government of Ontario, Ministry of Economic Development, Job Creation and Trade.
Reusable Produce Bags
Materials:

Total Costs:
Materials $44.47
Per Bag $3.14
Most of these materials take 2-4 weeks to arrive, but include free shipping. Due to the fact that materials can take upwards of a month to arrive, I would order a larger amount since I have an ample amount of storage space, and would not want to run out of supplies.
The peak demand times of the year are summer and early fall as most produce is in season and harvested during these months. Making sure there is enough inventory is definitely an important subject to address.
I will be working with my mom to create these bags and we will be manufacturing them between the hours of 7-9 Monday, Wednesday, and Friday. In two hours, we can produce 6 bags, or 18 bags per week together (6x3=18 bags per week). I will also manufacture bags from 12-4 Saturdays producing a total of 12 bags per week. This equals 30 bags per weekcombined.
The selling will initially take place online on local buy and sell sites, therefor licences and permits are not required. There are also no fees associated with selling on local buy and sell sites.
My vision is to sell these bags at the local farmers market (Mill Market) to target my key demographic. This is a busy market that “connects Northern Ontario farmer to local consumers strengthening the local food economy and nurturing healthy communities.” Their fee is:
Saturday Day Vendor: $50 + HST
Total: $60.50
This is over the budgeted start-up amount for this venture.
An advantage to selling at the local farmers market is the lack of competition. Currently there are no vendors that are selling reusable produce bags. By entering this market with my complementary product, I feel my business venture will be successful and a great addition to the local marketplace.

EKOSAK – reusable produce bags
What is working?
-a few weeks ago we were able to source a different supplier for the rope that is used to make an EKOSAK. This has had a considerable effect producing a bag.
What is not working?
-Trying to find the time in the future to sell the EKOSAK on a regular basis at the local farmers market will be a hassle. The market is open 8am to 3pm on Saturday. These hours are for normally allocated for manufacturing.
How do you feel the project if coming?
-I/We feel this project is more successful than we thought it would be.
What are you learning around running a business?
-Time management is clutch.
What are you learning about yourself?
-I enjoy being a small business owner and in charge of the decision making.
EKOSAK – reusable produce bags
What is working?
-this past week has been steady. We are still meeting our quota in the bag manufacturing department. Since the Spring Pop-Up shop, we have had a lot of interest in the bags and have fulfilled many orders and made a lot of new connections!
What is not working?
-Sourcing local made fabrics is still a struggle, as we cannot find a local supplier.
How do you feel the project if coming?
-This project is going better than we expected, and didn’t think we would sell as many bags as we have
What are you learning around running a business?
-Making connections (business or just friendly) whether they are local or not is a definite must.
What are you learning about yourself?
-I am learning that working with family is something I enjoy. Being in business with my mom gives us a lot of quality time together.
EKOSAK – reusable produce bags
What is working?
-This past weekend (March 31st) my mom I participated in our first vendor sale. We rented a table (approx. $40) at the Mill Market Spring Pop-up Shop. We sold many bags, and were able to market our product like one would at a trade show. Until now, all of our marketing has been Online and word-of-mouth.
What is not working?
-Sourcing lower cost but high-quality materials is an ongoing a struggle. We want to lower the costs of making an EKOSAK, without compromising the integrity of our brand and image.
How do you feel the project if coming?
-This venture is growing, and it was exciting to be at the local farmers market this weekend to showcase the EKOSAK.
What are you learning around running a business?
-Finding local textiles is difficult in this particular region (Northern Ontario, Canada). We would like to source local to reduce our carbon footprint and support small business in the region. Running a business that wants to be as close to 100% locally sourced as possible can be problematic.
What are you learning about yourself?
-I am learning that I enjoy being my own boss, and like (some of) the flexibility that goes along with running your own business.


EKOSAK – reusable produce bags
What is working?
-Producing the bags is still working, my mom and I are able to continue to produce supply to meet demand
What is not working?
-I have a new job, so my weekly schedule is going to change drastically. My bag producing times are not going to work with my new life change.
How do you feel the project if coming?
-There seems to be a lot of interest in eco-friendly products, with my produce bags being no exception. Many of my mom’s co-workers have made single and double orders, and the online feedback is positive.
What are you learning around running a business?
-I find that using my accounting skills has aided me in the financial part of my business. I have also experienced the power of social media, as I now have over 100 Tumblr followers since this venture started!
What are you learning about yourself?
-I enjoy learning about running a small business
EKOSAK - Online Showcase


Large cotton rounds for removing heavier makeup and light exfoliation Made from GOTS certified organic cotton and sewn with organic cotton thread~ HotaruOrganic on Etsy https://www.etsy.com/shop/HotaruOrganic hotaru.organic on instagram
Post link
Sustainable Spring Cleaning [Visual]
Sustainable Spring Cleaning [Visual]
by @hivebrands
#springcleaning #sustainableliving #ecofriendlytips #earthfriendly
The spirit behind green cleaning means to be cognizant of the cleaning products you buy and opting for sustainable alternatives that have non-toxic ingredient lists. Green cleaning practices are safer for you, your family (including furry friends), the planet, and in turn, the environment in your home.
To help, Hive created this guide that tackles the challenge of authentic sustainable cleaning…


Hi everyone! I know I literally never post on here but I wanted to share this with you. I recently wanted to make my own website and it’s up and running. I have so many great items that are great for all ages and gender. These pictures that are here is just some of the things that I have to offer on my website.Go check out my new website! www.eloiseexchange.com I’m just starting it off so don’t judge. I wanted to put this out there now and I will sure be adding so many more great products. If you do decide to check it and even decide to buy something please give me some feedback. I would love any type of feedback you have for me. It’s hard for me to see how it’s going to run on my end so your feedback would be appreciated very much.
Post link
So many things nowadays come in packages when they don’t have to, like spices, nuts, fruits, and vegetables. A lot of organic stores like Sprouts and Trader Joe’s offer some of these items in bulk, though they usually provide plastic bags for you to use when shopping there. A good way to reduce the amount of packing you have to throw away without limiting what you can eat is buying in bulk. You can go to these shops and bring your own reusable, resealable bags to use and then bring them back again when you need to purchase more. You could also bring the containers you store them in, but depending what you are using that might just be too heavy. If your local grocery stores don’t offer a lot in bulk and you are unsure where else you can go to purchase things in bulk, check out these websites below:
Litterless - allows you to search by state
Zero Waste Nerd - has a list of bulk stores organized by state
Confession: I Have A Stack Of Paper Plates …
Sitting in my pantry, because as a soon-to-be-mama of three I have no illusions about how far my super powers go. Sometimes victory looks like scrambled eggs for dinner, you know? Ain’t nobody got time to do a load of dishes just to have something to serve them on!
Ahem.
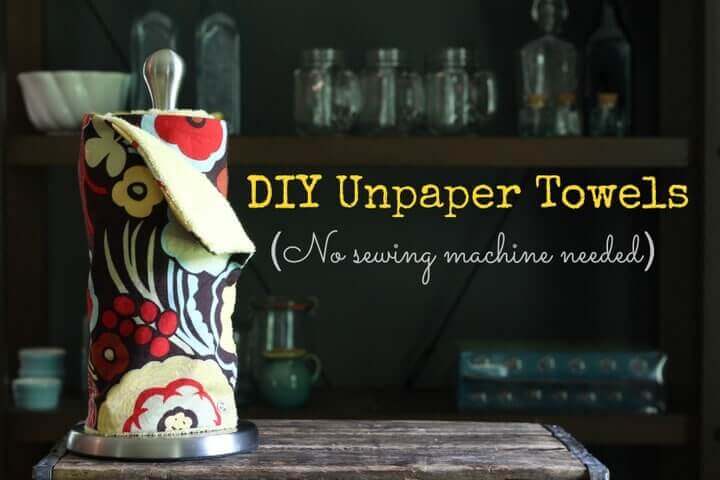
Most days, though, I try to make more eco-friendly choices: cloth diapering, composting, local food, using real dishes, and avoiding paper towels where possible. On that last one, my strategy until recently was to use old rags and tea towels while keeping out the real deal for guests. Truth be told, though, I missed the convenience of tearing a towel straight off the holder, so when I came across the unpaper towel concept I knew I had to try it!
Problem Is …
I don’t have a sewing machine. And unless you count homemade beauty products, my crafty score is 0. Fortunately, with a little help from Youtube I was able to straight stitch my way to unpaper bliss. (What, you DIDN’T learn how to sew on Youtube? Pshaw)
How To Make Unpaper Towels
Supplies/Equipment:
- 2 yards terry cloth/flannel (Note: Though the terry cloth pictured is light in color, I’m making some with chocolate terry for messes that are likely to stain)
- 2 yards cotton fabric of your choice
- sharp scissors
- needle
- thread (preferably something that matches your fabric)
- ruler or 12×12 stencil (I used a square book)
- 57-63 snaps (you might want a few extra to practice with)
- snap applicator (I used Babyville pliers, but the KAM applicator looks really good, too. Make sure you get one that is compatible with your snaps)
- plastic canvas (2-4 sheets of 12×6 sections)
- embroidery thread (optional)
- superglue (optional)
Makes about 18 unpaper towels
Step 1: Wash & Dry Both Fabrics
That way if one or both of them shrinks it happens before you sew the pieces together!
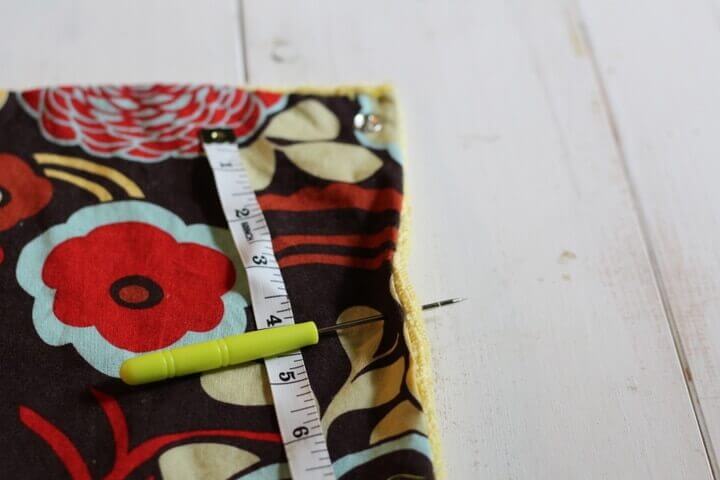
Step 2: Cut Cloth Into 12×12 Inch Pieces
I found it helpful to use a stencil and trace on the back of the fabric before cutting. On or our old vacation photobook was just the right size – scrapbook paper is usually 12×12 too!
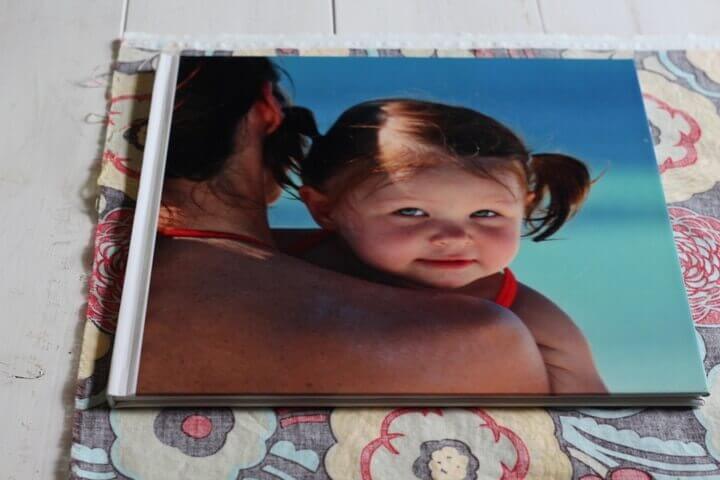
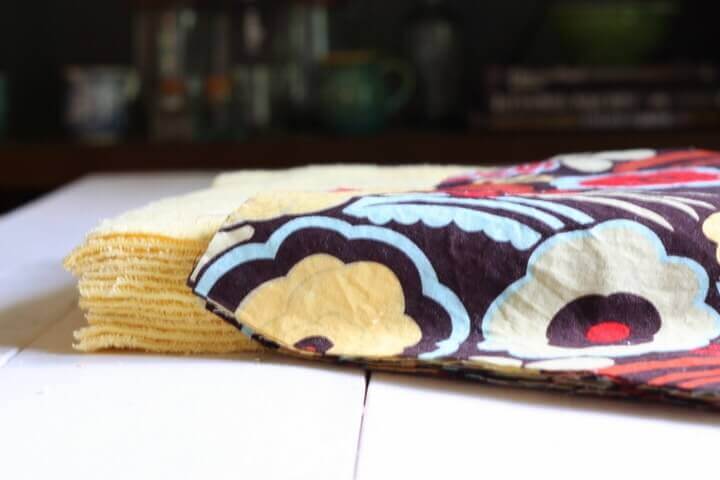
Note: You can adjust the size as needed, but keep in mind that the unpaper towels will be slightly smaller than the size you begin with.
Step 3: Sew A Straight Stitch
Lay the pieces together so that the fabric you want displayed is face down against the terry cloth/flannel and sew a straight stitch about 1/8- ¼ inches away from the edge. Leave a 2-3 inch gap on one side so you can turn your towel inside out. Don’t know how to sew a straight stitch? It’s really, really easy, just watch the tutorial below and you’re on your way.
Here’s how the last corner should look when you’re done.
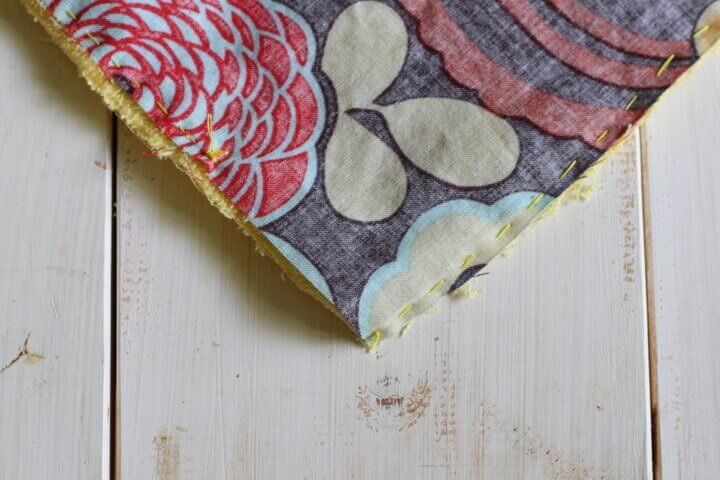

Optional Step: If you don’t feel quite confident that your stitches are super sturdy, you can apply a little liquid stitch around the seam. It’s not the “greenest” thing in the world, but I consider it a good tradeoff considering all the paper towels you’ll be saving.
Step 4: Turn Unpaper Towel Inside-Out
Trim any excess fabric that may create unwanted bulk, then pull your fabric through the gap you left so that the decorative part of the cloth is now facing out. Close up the remaining hole with a straight stitch.
If you would like, you can add a second later of stitching for decorative effect and to reinforce the edges. I chose not to, but this blanket stitch might be pretty with some embroidery thread.
Optional Step: Iron your towels so they will be nice and flat.
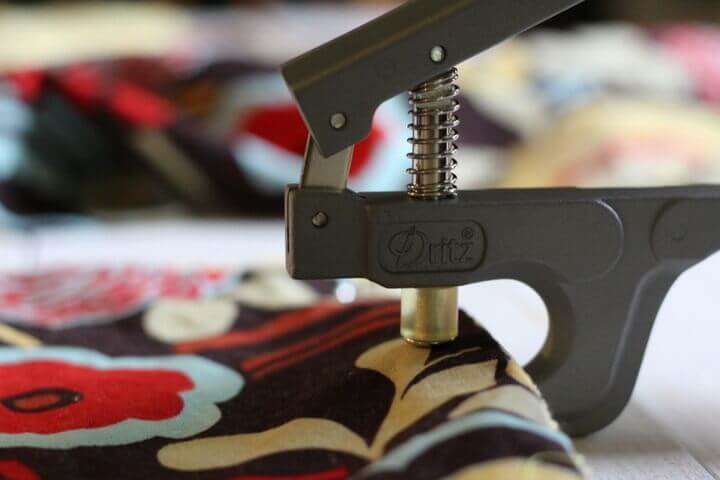
Step 6: Apply Snaps
Because it was cheaper, I started out using this snap applicator, but found that the unpaper towels were too thick for it to work properly. I ended up going with one like this. Though it was a bit tricky because my snaps were for a different applicator it was much easier to use! Here’s what you do:
Each unpaper towel will need 2-3 sockets on the right and 2-3 studs on the left so that each towel can attach to it’s neighbor. I chose to use three on each side.
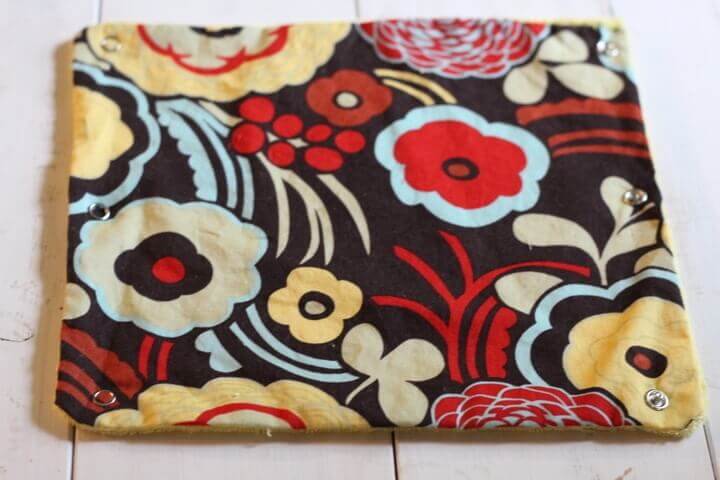
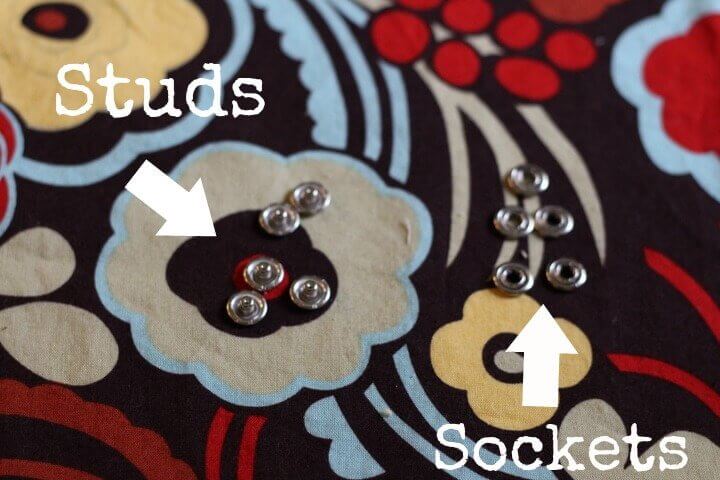
You want the holes evenly distributed, so measure where you want them to go and then poke a little hole with the awl (pointy thingy that came with your pliers) to mark your spot. Place the cap through the hole and – using the instructions that come with your pliers – secure the snaps in place. If you have the Babyville pliers you may find this video tutorial helpful.
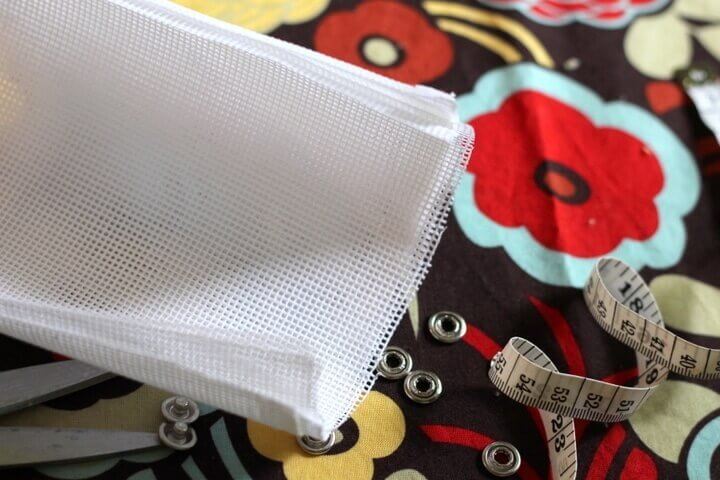
Step 7: Create Paper Towel Dowel
Now onto the last step: creating a sturdier version of the cardboard tube that holds paper towels in place. Some tutorials use PVC pipe, but when I went to my local hardware store to buy some I realized I had to buy an 8 foot pole and ask them to trim it into a 12 inch section for me. The rest would be thrown away, so I decided to try to find a less wasteful option and came across this tutorial, which uses plastic canvas.
Not only is this method easier, it saves you a trip! You can pick up plastic canvas at the fabric store while you’re picking out your fabrics. Here’s what to do:
Measure the height of your unpaper towels. Using that number, cut a section of plastic canvas that is (your unpaper towel height) x 6 inches. Mine was about 11.5×6.
There are several ways to attach the canvas so that it becomes a tube. There is this tutorial, which I planned to use until I realized that the snaps wouldn’t go through 4 sheets of canvas. Because I wanted a pretty sturdy dowel, I attached three studs to the outside sheet for the unpaper towels to connect to and then superglued the canvas together
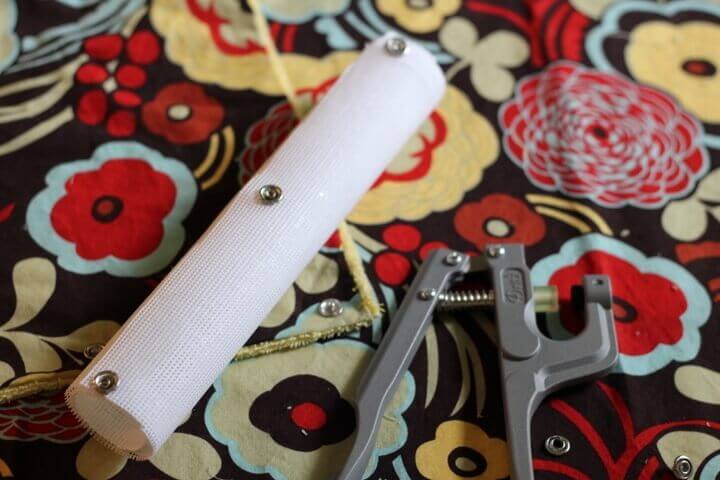
Now just put your unpaper towels on the dowel and you’re done!


HAPPI.EARTH
happi.earth is a certified organic laundry liquid based out of the gold coast that has the planet in mind. I got sent happi.earth to try and have been using it for the last 4 months. the laundry liquid came with a pump bottle and you only need 2 pumps per load which definitely does the job. if you like to get more bang for your bucks, one pouch is supposed to last 400 washes and you can can send the pouch back once you’re done to be sterilised and refilled which is pretty cool. previously I had been using soapberries (which is one of the main ingredients for happi.earth) for it’s multi-use and to reduce waste. and in no way is using soapberries any effort, but the pump bottle has made it simpler by not having to remember how many washes I’ve used the berries for, or dig around my wet clothes to find them. the only thing I’ve found is sometimes there can be a few drippy boys after pumping, and it can get a bit sticky so I’ve placed the bottle on a dish. another yay is that with each purchase, happi.earth plants a tree in their mangrove forest and right now for a limited time they are planting 5 trees. I learnt more about happi.earth from their chief entrepreneur alf orpen.
WHAT INSPIRED HAPPI.EARTH?
happi.earth has been brewing for several years. while we have been leaders in the organic industry, we knew we needed to be better, much better. happi.earth is the result of pursuing several goals.:
- let’s produce a product that no one else is making with all ingredients being grown organically?
- let’s create a price point that will create a happi.earth movement to enable us to plant a tree with every purchase yet still save money for the purchaser.
- let’s design packaging that will reduce the need for plastic. (the inspiration came from a kraft paper coffee pouch with the question arising, how do we put a handle and a spout of such a packaging).
- let’s produce a “green” product that at very least performs as good, if not better as one made from toxic synthetic chemicals?
WHERE IS HAPPI.EARTH MADE AND WHO MAKES IT?
happi.earth is made in our certified organic factory in molendinar on the gold coast, australia. ONEgroup (organic & natural enterprise group) make it and our origins stem back to the creation of the world’s first certified organic skin and personal care products under the brand miessence.
WHAT ORGANIC INGREDIENTS ARE IN HAPPI.EARTH?
all ingredients are certified organic: organic soapberry nut concentrate. organic bean glycerine. organic ethanol from sugarcane. organic eucalyptus & organic orange essential oils. nothing else.
WHAT MAKES HAPPI.EARTH PACKAGING ENVIRONMENTALLY CONSCIOUS?
happi.earth packaging is not perfect. it is however so much better than the usual because it is made from kraft paper with a fine BPA free plastic lining so that it does not leak. with the capacity to hold enough laundry liquid for 400 loads of washing it replaces annually 13 plastic bottles from being produced and discarded into the environment.
WHERE DOES HAPPI.EARTH PLANT MANGROVE TREES?
we are proud to be collaborating with arne fjortoft and his team at the worldview international foundation with whom we have named a previously damaged mangrove area in myanmar the happi forest, where we have commenced its regeneration by planting mangrove trees.
WHAT’S NEXT OR IN THE WORKS FOR HAPPI.EARTH?
our current goal is to plant 1 million trees. we also have several exciting revolutionary products in the pipeline (sorry cannot expose them yet!)
WHAT IS YOUR FAVOURITE TIP OR PIECE OF ADVICE FOR GREENER LIVING?
it’s the responsibility of all humans to create our preferred future by deciding to act on a scale possible for us, small or large.
SAVE 15% OFF YOUR ORDER BY USING THIS LINK: WWW.HAPPI.EARTH/BRANDPARTNER/GREENERLIVING
you can connect and find out more about happi.earth through their website,email,facebook,instagramandyoutube.
Post link