#scallion


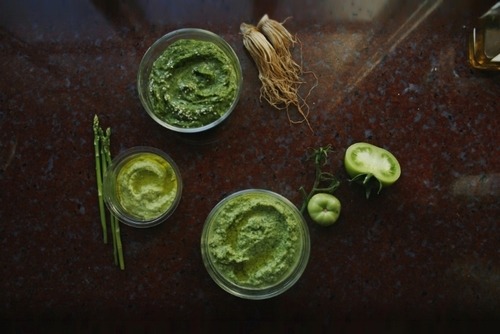
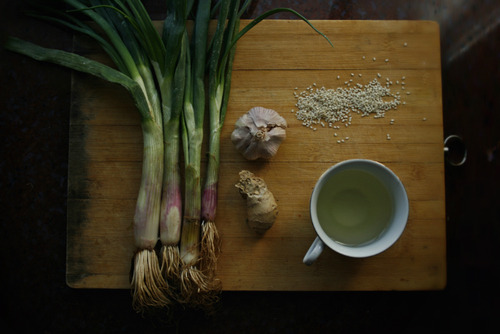
Here are the facts: I bought some green goods that I intended to use for recipes to post, but having your nose rubbed raw in revision books tend to chase away ideas and then slam you into a brick-wall that is writer’s block. So here I am, a day before my [meticulously scheduled] 13-day trip to Saudi Arabia (holla!), brushing up my Arabic mainly in preparation to place an order on the very, very delicious food they have over there (srsly guise) when an inner gong resonates and I realize I have a fridge-full of asparagus, parsley, scallions and a few green tomatoes that the gardeners unearthed from a tomato vine hidden behind the bushy terrains that is our back garden.

Shite. What to do, what to do?? I have to be honest, at first I thought of making a pot of kalgooksoo and then just slice the green onions to sprinkle on top. The asparagus I can just blanch and eat with eggs. The tomatoes for a salad - it is springtime after all, isn’t it? It was a sound idea, except that 5 stalks of green onion will make more than just a sprinkle, I hate the taste of blanched asparagus and…I’m just not in the springtime state of mind yet! I’d rather turn the tomatoes into hearty soups than eat them raw but time is running short. So I gave them all a whazzy whaz in the blender (ideally you should use a food processor) and made three pesto, all without pine nuts or basil. Is that sacrilege? Oh, I hope so. You can store these in the fridge for a few days or freeze them up to a couple of months. What I like to do is refrigerate them for a few hours to let the flavors marry, and then stick em in the fridge for an eternal union. All in all, pesto-fying saved the day and I can’t wait to smear some under the skin of a chicken and bake it to crispy oblivions when I get back. Toodles!
GREEN TOMATO PESTO:
[ 4 medium green tomatoes + ½ cup packed parsley leaves + 1/3 cup salted almonds + 2 cloves roasted garlic if you have them, or 1 clove of fresh garlic + ½ cup olive oil + salt and pepper to taste, but start with 1 teaspoon ]


Throw everything in the food processor and pulse until the ingredients achieve a uniform consistency, then whiz it until it reaches your preferred smoothness. This can be stored in the fridge for a couple of days or in the freezer for up to 6 months.
Great as: Dips, spreads for pizza and sammiches.
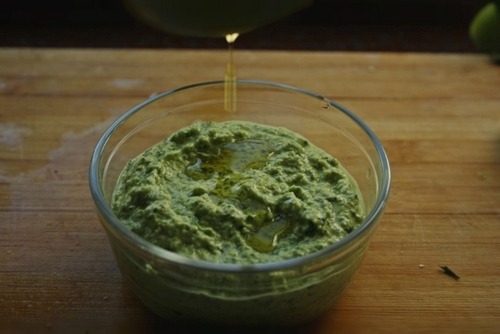
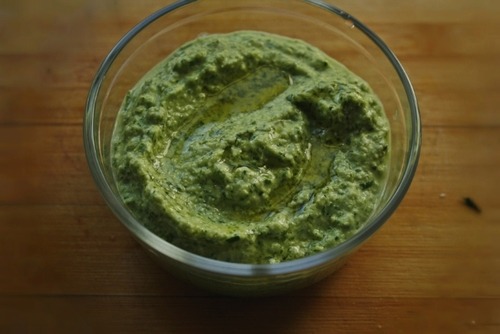
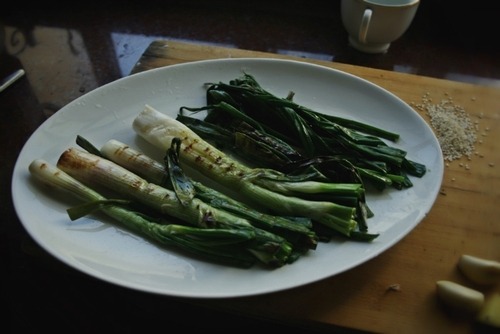
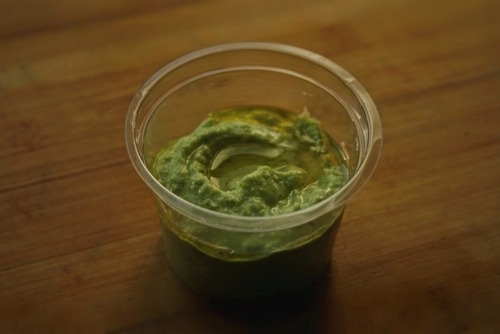
CHARRED SCALLION AND GINGER PESTO:
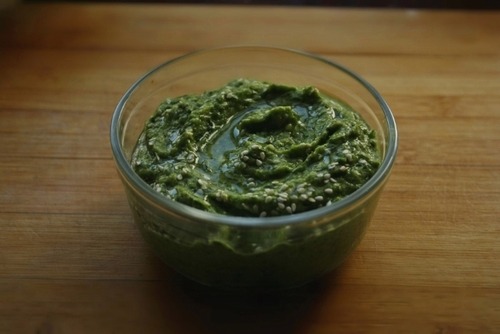
[ 5 bunches of scallion, trimmed and cut in half + 2 garlic cloves + 1 tablespoon fresh ginger, peeled + ½ cup olive oil + 1 teaspoon sesame oil + ¼ cup sesame seeds ]
Heat a skillet or grill pan on medium-high. In a bowl, drizzle the scallions with 1 tablespoon of the olive oil. Season the scallions with sea salt and pepper, then sear or char until lightly caramelized at the edges and blackened in a few spots, about 3 minutes. Set aside to cool for 5-10 minutes.
Combine all of the ingredients in a food processor and and pulse until the ingredients achieve a uniform consistency, then whiz it until it reaches your preferred smoothness. Use immediately or store in the fridge for a couple of day or in the freezer up to 6 months.
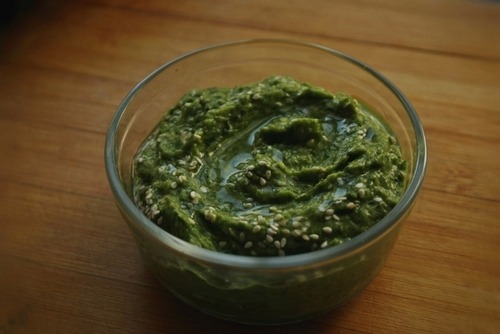
Great with: Fish, chicken, rice, mashed tate'orrs.
LEMON-ASPARAGUS PESTO (recipe by Mark Bittman):
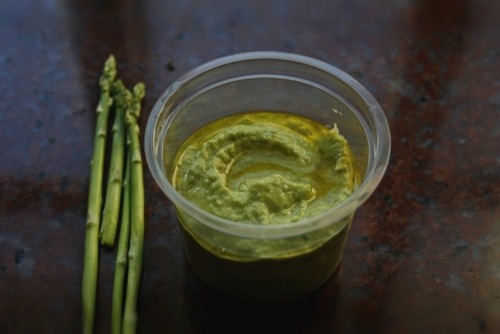
[ 1 pound asparagus, trimmed and cut into 2-inch segments + ¼ cup almonds + 1 clove garlic + 1/4 cup olive oil + 3/4 cup grated Parmesan cheese + juice of ½ lemon ]

Bring a large pot of salted water to a boil. Add the asparagus and cook until fully tender but not mushy, 8 to 10 minutes. Drain well, reserving some of the cooking liquid, and let the asparagus cool slightly.

Transfer the asparagus to a food processor and add the garlic, almonds, 2 tablespoons of the oil, parmesan, a pinch of salt and a couple of tablespoons of the cooking liquid. Process the mixture, stopping to scrape down the sides of the container if necessary, and gradually add the remaining oil and a bit more of the reserved cooking liquid to moisten if necessary. Add the lemon juice and season with salt and pepper to taste and pulse again until it reaches the consistency you prefer.
Great with: Pasta, fish, chicken - pretty much anything you can spread with pesto.
Enjoy!


(From M/FoMT)https://www.justonecookbook")
TEMPURASOBA(Soba Noodle Soup, Tempura Buckwheat Noodles)
(From M/FoMT)
https://www.justonecookbook.com/soba-noodle-soup/
Ingredients:
- 4 cups water
- 1 piece kombu (dried kelp) (4" x 3” = 10 cm x 8 cm)
- 1 cup katsuobushi (dried bonito flakes) (1 cup = 10 g)
- 2 Tbsp mirin
- 1 Tbsp sake
- 2 Tbsp soy sauce
- 1 tsp kosher/sea salt
- 7 oz dried soba noodles (buckwheat noodles) (7 oz = 200 g)
Toppings:
- 1 Kamaboko (fish cake)
- 2 frozen shrimp tempura
- 1 bunch komatsuna (or spinach)
- 1 green onion/scallion (or Tokyo negi) (1 scallion = 3" Tokyo negi)
- Shichimi Togarashi (Japanese seven spice) (or Ichimi Togarashi) (See Notes)
Directions:
- [Optional] Soak kombu in water overnight (if you have time).
- Transfer kombu and water into a saucepan. Bring the water to a boil. When it’s almost boiling, remove kombu from water and discard.
- Add katsuobushi and simmer for 30 seconds. Then turn off the heat and let katsuobushi sink to the bottom of pan. Let Katsuobushi steep for about 10 minutes.
- Strain the dashi over a large strainer lined with a paper towel set over another saucepan. Gently twist and squeeze the paper towel to release any remaining dashi into the saucepan.
- Add mirin, sake, soy sauce, and salt in the dashi and bring the soup to a boil. Set aside until warming up later.
- Insert a knife at the bottom of kamaboko to separate it from the wooden board. Then cut the kamaboko into ¼ inch slices.
- Slice green onion thinly and cut komatsuna into 2 inch pieces.
- Boil the komatsuna in salted water. I first boil the hard bottom parts of komatsuna since they take longer to cook. Then add the leafy part later. Once they are tender, take them out and soak in ice water to stop cooking. Drain well.
- Bake shrimp tempura at 400F (200C) for 15 minutes, or according to the package instructions.
- Meanwhile boil two large pots of water (See Note). One for cooking soba noodles and the other pot for warming up the noodles after washing them. Cook soba according to the package instructions less 30 seconds*. Mine says cook for 4 minutes, so I cook 3 minutes and 30 seconds. Unlike pasta, you do not need to add salt to the water.
- Drain the soba noodles and wash the noodles with hand under cold water to get rid of slimy texture.
- Then transfer the soba noodles into the other pot of boiling water to warm up the noodles again. Once they are warm, drain and place them into a serving bowl.
- Pour hot soup over the noodles and place toppings. Sprinkle shichimi togarashi or ichimi togarashi if you like it spicy. Serve immediately.
Notes:
You can use Ichimi Togarashi or Shichimi Togarashi (Japanese seven spice)
If you want to save time, just boil one pot of water, cook according to the package instructions (4 minutes), rinse under cold water, and then put the noodles directly into a bowl.
If you have Mentsuyu, you can dilute it with hot water to make a soup broth.
Adjust the seasoning as you like - to make it saltier or sweeter. I intended to bring out good dashi flavor so my seasonings may be too light for some of you.
Post link
https://www.seriouseats.com/recipes/2010/12/roasted-rice-cake-recipe.")
ROASTED RICE CAKES
(From M/FoMT)
https://www.seriouseats.com/recipes/2010/12/roasted-rice-cake-recipe.html
Ingredients:
For the roasted onions:
- 1 teaspoon canola oil
- 1 medium white onion, thinly sliced
- Kosher salt
For the roasted rice cakes:
- ¼ cup mirin
- ¼ cup chicken broth
- 2 tablespoons canola oil
- 1 pound rice cake sticks
- 1 tablespoon sesame seeds
- 2 scallions, ends trimmed, green parts thinly sliced
For the Korean Red Dragon Sauce:
- ¼ cup water
- ¼ cup sugar
- ⅓ cup ssamjang (fermented bean and chile sauce)
- 1 tablespoon light soy sauce
- ½ teaspoon sherry vinegar
- ½ teaspoon sesame oil
Directions:
- Heat oil in 12-inch cast-ion skillet over medium-high heat until lightly smoking. Add onions and cook, stirring occasionally until onions begin to brown, about 10 minutes. Season with salt and reduce heat to medium-low. Continue cooking, stirring occasionally until richly caramelized, about 30 minutes longer. Adjust heat as needed to prevent burning. Transfer cooked onions to bowl.
- Meanwhile, make the dragon sauce. Combine water and sugar in medium saucepan and bring to a boil over high heat. Stir constantly until sugar is dissolved then remove from heat. Let cool for one minute, then stir in ssamjang until dissolved. Add soy, sherry vinegar, and sesame oil.
- For the rice cakes, pour mirin and broth into a large heavy-bottomed saucepan and bring to a boil over high heat. Reduce to medium-high and cook until lightly thickened, about two minutes. Add red dragon sauce, reduce heat to medium, and cook until glossy and thick, about six minutes. Add roasted onions and stir well.
- Meanwhile, clean out iron skillet, and return to stove. Add two tablespoons canola oil and heat over medium-high heat until just starting to smoke. Add rice cakes and reduce heat to medium. Cook until light brown on all sides, about 3 minutes per side.
- Toss rice cakes with sauce. Garnish with sesame seeds and scallions.
Post link

A mobile wallpaper I designed for Toasty, a free SFW digital zine that revolves around bread! Feel free to use forpersonaluse.
I drew some of my favorite things to eat from Chinese bakeries: Mantou, Custard bun, Hot dog bun, Scallion bun, and Pineapple bread. I remember growing up with these simple breads and have fond memories of them.
Be sure to check out the other pieces from the zine here: http://cmykae.itch.io/toasty
Post link

My full piece for Toasty, a free SFW digital zine that revolves around bread! I drew Milk Bread. One of my favorite things to eat from Chinese bakeries.
Be sure to check out the other pieces from the zine here: http://cmykae.itch.io/toasty
Post link
