I’ve been using it for six months and things are both good and bad about it.
Good;
Wear all of the time. To bed, as a just in case before my period officially starts, for all activities (swimming and exercise).
My period has shortened from seven days to five.
Nothing to throw out.
Bad;
I do leak on my first two days (the heaviest). Have started emptying it more frequently because of it.
It needs to be boiled for four to five minutes before the first use (just wash with soapy water when emptying and reinsert during the period). This meant I had to buy a separate pot to boil it.
It is made from silicone which cannot be recycled at the end. My fault, should have gone for the rubber one (even if it was in a yucky brown colour).
Side notes;
At first it felt like I was being penetrated when I inserted. Now, it doesn’t feel like that and in fact, my vagina feels tighter. Perhaps the cup has been helping to train my muscles.
TMI I know, but I am really happy with it. If you’re in Australia look up menstrual cups Australia and find the website. They have different options available and all for the same price (at least they were when I purchased) and free national shipping if your order is over fifty dollars. Have a look there first before checking other places. Or if inserting isn’t for you, period panties or reusable pads are out there. Which I am looking into the panties so I can wear them with the cup on my heavy days and not fear the leak.
OK so for the next month I am going to attempt to be zero waste and I am posting this here so I actually feel accountable There are actually so many packaged goods at the supermarket that can be made at home for a quarter of the price (talk about that student life) and without all the unnecessary packing and weird numbers in the ingredients list. Like granola holy heck there is no way I am paying $16 for a packet This is currently my favourite INGREDIENTS 1 ½ cups (135 g) gluten-free rolled oats ½ cup (40 g) unsweetened coconut flake (large flakes are best) ½ cup (54 g) slivered raw almonds (or raw almonds, chopped) ½ cup (50 g) raw pecan halves 1 Tbsp (12 g) sugar ¼ tsp sea salt 3 Tbsp (45 ml) coconut oil 1/3 cup (80 ml) maple syrup 1 tsp pure vanilla extract
Mix in a large bowl and bake for 25 minutes at 160C. They key is to leave it to cool for a good 10 minutes before transferring to a container so it can get super chunky And yes that is a turmeric latte what am I turning into
Weird sustainability hack: collect pumpkins after Halloween and roast them! Thousands (if not millions) of tons of pumpkins go into landfills every year after spooky season
While I didn’t purchase any for myself, I put out a message on my local buy-nothing group and was amazed at the number of responses - way more than I could ever use. I ended up with eight, which I’m working on processing: roast the flesh, keep the guts for broth, and roast the seeds
Planning on lots of baked goods (breads, muffins, squares etc), soup, pumpkin butter… I think when people think pumpkin they think pie and that’s it. The possibilities are endless!
Visible mending is a decorativeway to fix up an item. Instead of trying to make your mend as invisible as possible, the idea is to make it part of the garment’s design.
Visual mending is not a single technique: it’s more of a mindset. If you’ve got an item you love, it deserves to be mended, and if you’re going to put that love into stitches, why not show them off?
That being said, there are some specific techniques that are popularwith visible menders. Let’s take a look!
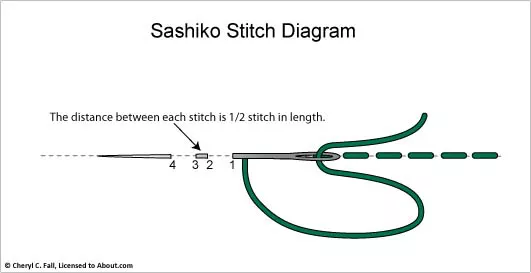
Sashiko:
Sashiko is a type of traditional Japanese embroidery that is used to both decorateandreinforcefabric. In visible mending, sashiko is often used to cover up holes with patches or to reinforce thinning fabric. This technique uses a variation on the running stitch.
(Image source) [ID: sashiko stitch diagram: the distance between each stitch is ½ stitch in length.]
Someresourceson sashiko:
SashiCo on YouTube: sashiko livestreams and information on the cultural aspect of sashiko.
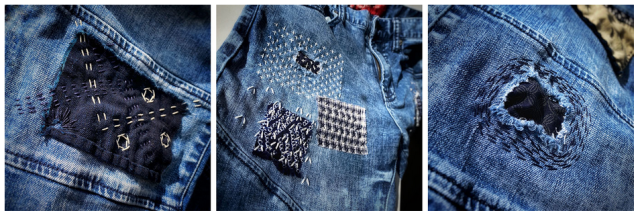
(Image source) [ID: three examples of sashiko embroidery on jeans fabric.]
(Image source) [ID: sashiko embroidery with white thread on blue jeans fabric.]
Embroidery:
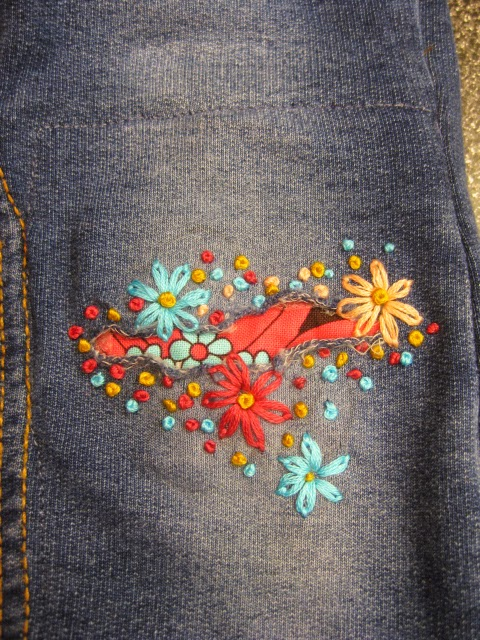
Regularembroideryis also a popular technique to accentuateyour mends. Check out my embroidery 101 post to learn how to get started. You can embroider patches, or use embroidery to hide or accentuateany stitches you’ve made to fix holes. Embroidery’s also a great way to cover up stains.
(Image source) [ID: colourful embroidery floss covers a worn sleeve edge of a jeans jacket]
(Image source) [ID: colourful flower embroidery surrounds a hole in a pair of dark gray jeans. Fabric with a red and black flower print peaks out of the hole.]
Patches:
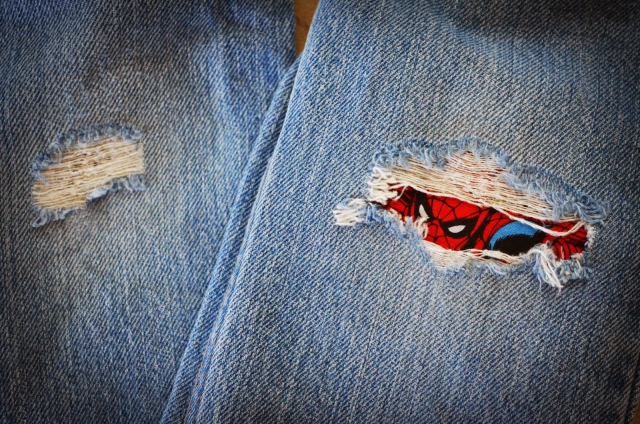
There are many ways to add patchesto a garment. My tutorial on patches is a good place to start if you want to make custom-shapedpatches to sew on top of your fabric. You can also sew your patch on the insideof your garment and have it peek out from beneath the hole you’re trying to fix. Fun ideas for this are laceorsuperheroes.
(Image source) [ID: Spiderman peaking out of a rip in a pair of blue jeans.]
(Source) [ID: a red flannel heart-shaped elbow patch on a gray knitted sweater.]
Darning:
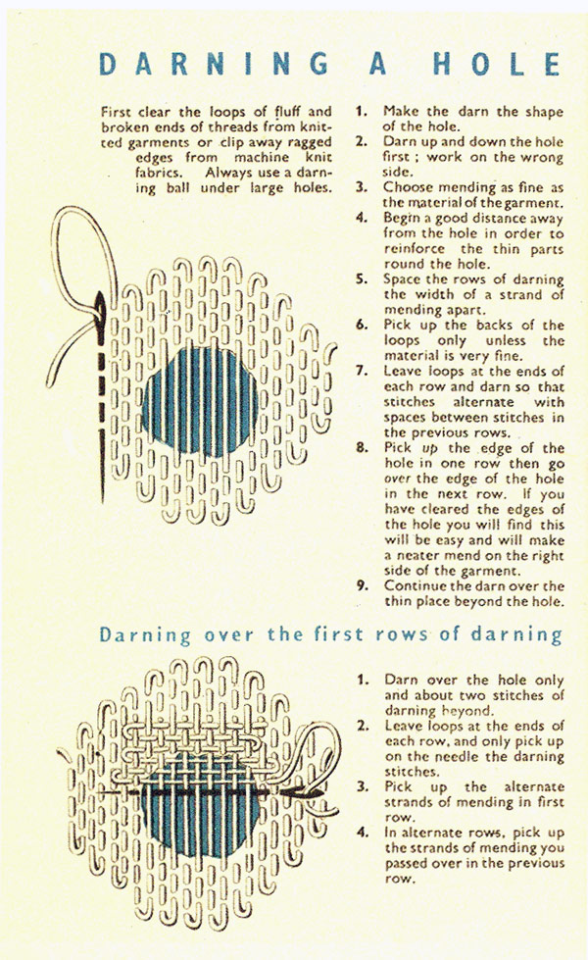
Darning is a technique used to repair holes in fabric by using running stitchestoweaveextra fabric over the hole as to fill it up again. While traditionally darning is done in an invisibleway by using the same colour of thread as your fabric, you can also use contrastingcolours to accentuate your fix. Check out this written tutorial on darning by TheSpruceCrafts.
(Image source) [ID: vintage instructions on how to darn a hole.]
(Image source) [ID: four examples of darning on blue fabric with colourful contrasting thread.]
Conclusion:
Visible mending is a creative way to fix up your clothes and give them some personality at the same time.
You should be proudof the fact that you took the time and learned the necessary skills needed to mend your clothes! Show off what you did!
A fun side effect of wearing these obvious mends is that people will notice them. They’ll remember your fixes the next time they’re faced with a hole in their wardrobe, and it will make them more likely to try it for themselves.
These are just a few ways to visibly mend your garments. Want more inspiration? Check out Pinterestorr/Visiblemending on Reddit.
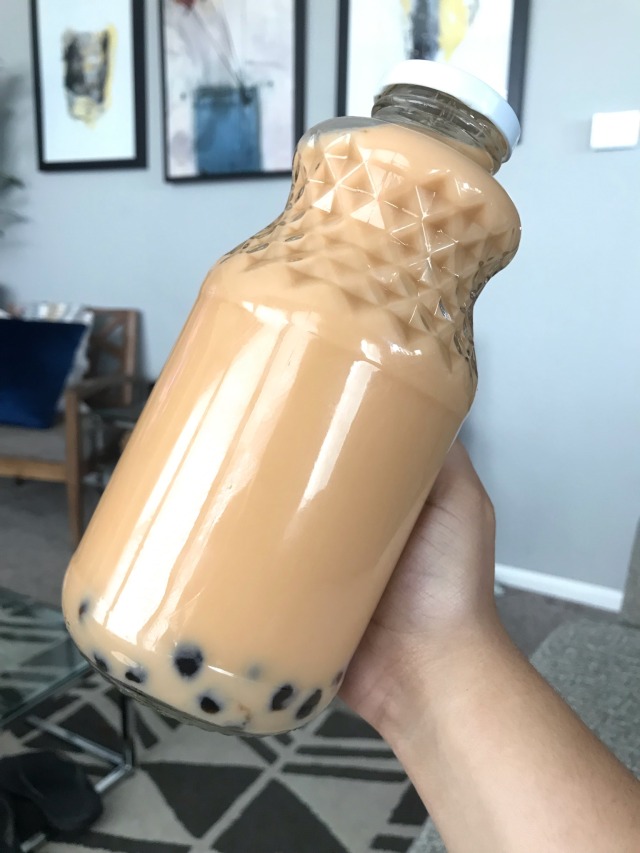
Buying boba at tea houses has got to be one of the biggest ways I use plastic. Between the cups and extra large straws it adds up quickly. Finally they had boba in bulk at my local Asian market after not having it for months. They’re still packaged in plastic but one bag is still less than the waste I’d make from buying it at the tea house. Now I can get back to making them at home in glass with a reusable straw using other ingredients I buy in bulk and plastic free!
I recently made some liquid soap for myself to refill my soap pumps! I used a soap bar I had been gifted for the holidays that wasn’t something I was interested for in the shower. I grated it on my box grater on one of the finer sides so the soap flakes would be smaller. The smaller ones seem to dissolve better when the hot water is added. I put the flakes in a bowl with a spout and added some boiling water. I mixed it until there wasn’t anymore discernable bits in the mixture. I then poured it into this growler I thrifted recently. Overnight it’ll set into a pourable liquid soap. This way I can refill any of my soap pumps as I need them. If you can’t get liquid refills that aren’t plastic free it’s a great option. You can make as much or little as you want. My favorite part is that you can use any bar soap to make any scent you’d like. This process also gives good perspective into how much water goes into liquid products. Being able to add the water yourself saves money as you are avoiding paying for all the water weight. Has anyone else tried this? I want to try it with a solid conditioner soon as I couldn’t get it to run through my hair effectively. Send me any tips y’all got!