Happy Friday everyone. So, I’m doing a 3-day 30% off on all of my drawing reference compilation books except my new one Vol. 6. Just use code JAN30 at checkout on http://www.gumroad.com/posemuse
My drawing references are free for you to use for your art at www.posemuse.com. I’ve compiled them into books in multiple formats. pdf, zip, paperback, kindle, epub, mobi, lrf, pdb, and html.
When classes get overwhelming, I get into the kitchen to whip up something fun. This week was nothing short of tasty. Experimenting in the kitchen is so therapeutic.
How to make Spiced Thai Coconut (Chicken) Soup ft voiceovers from Brown Sugar Doc, The Podcast - episode Inhale…
Every year at Coachella I suffer with the same dilemma, no electricity at the campsites means no hair straightener! I wanted to create a hair accessory that would accommodate my hair situation for this upcoming weekend. This lovely layered chain provides some bedazzle to an otherwise boring bun.
MATERIALS:
3-4 Different Types of Chains
2 Small Jump rings
2 Metal Cord Tips
2 Thick Bobby Pins
E - 6000 Glue
Measuring Tape
Pliers
1. Begin my setting up the template of how you want your chains to layer down. Using your measuring tape, measure each chain one inch longer as you layer down, and trim. I started with 8 inches, then 9, 10, and finally the rhinestone chain at 11 inches long.
2. Next, take one of your jump rings and begin to insert the chains in the order of your template. Repeat with opposite end of your chains. Then using your pliers close off hoop.
3. Now that you have a semi looking necklace, take one of your bobby pins and insert the jump hoop through it. Repeat this with second bobby pin on opposite end.
4. Now taking one of your metal cord tips, secure around the bobby pin and close shut. This will secure the chain in place. Repeat with opposite bobby pin and you are all done.
Because who doesn’t love watermelon, specially on shorts! I had an absolute blast putting this tutorial together. These shorts are perfect for any music festival, because as we all know, anything goes at these events. I found a dope pair of watermelon shorts on NastyGal.com, but I figured I would just make my own for a fraction of the price. $85 vs. $15 bucks, I’ll take the DIY version any day.
MATERIALS:
High waisted shorts
Green Fabric Paint
Black Fabric Paint
White Fabric Paint
Fuchsia Rit Fabric Dye
Paint Brushes
Bucket
HOW TO:
1) Begin by prepping your bucket with hot water over a sink or outdoor surface.
2) Follow the instructions on the Rit fabric dye package label and dye your shorts accordingly.
3) After your shorts have been dyed, washed, and dried, you can begin by painting the green bottom trim of your shorts. I would begin by finishing the front of your shorts, allow to dry, then move onto the back.
4) Now move onto your black fabric paint and begin to paint round watermelon seeds throughout your shorts. Allow to dry.
5) Once your green trim and black seeds are dry, finish off by painting the top of the trim with your white fabric paint. Allow to dry, and you’re set!
XOXO - Drea
PS. Please allow the shorts 72 hours to dry before putting them through the wash.
PSS. You can apply this tutorial and make strawberry shorts instead too! Just substitute the fuchsia dye with red fabric dye.
i really didn’t know how to follow up that whole beer / wine table post, so i thought to myself, “self? what do people who drink beer and / or wine do?” and the answer was : who the hell knows. but these are cute. and i want one. see kate sew has made a clutch that i would absolutely carry around, and i would be proud to answer “it was meeeeeeeeee!” when i get out of the elevator because i can’t tell a lie!
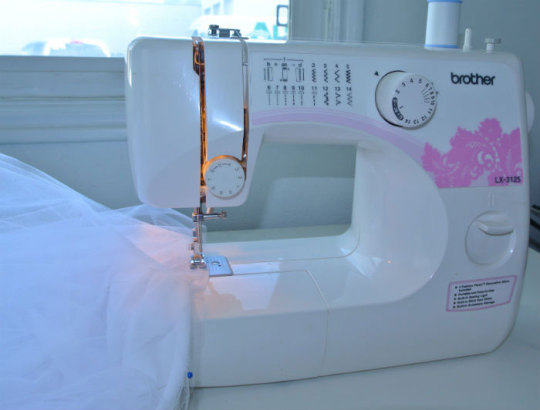
Tulle (pronounced “tool”) is a very lightweight, sheer woven mesh fabric, generally nylon or polyester. It is used in a single layer to create bridal veils and in many layers to construct skirts that are opaque and stiff enough to stand away from the body. Elegant African prints fabrics and exotic colours of tulle/mesh would be a killer princess-like combo for a dress or skirt. A glamorous idea (don’t you think?), guaranteed to turn heads. For posher parties, nothing speaks glamour like the tulle dress or skirt. You too can style your tulle dress/skirt to suit you; The full tulle, the pleated, or underneath an already made Ankara dress/skirt. Whatever rocks your boat this DIY project is prepared specially to create a new style for you and guess what? it’s a great style for the kids too (your little girl can step out looking like a princess too)
For this DIY Tulle Skirt, you will need: • Tulle (see below to calculate how much) • Lining fabric ( I recommend knit so it can stretch over your hips and so you don’t have to hem it. (Be “efficient.”) • Elastic band ( I love the black one) • Thread • Sewing machine • Measuring tape • Rotary Cutter (seriously makes it soooo much easier than scissors) • Cutting mat • Paper/butcher paper to create a pattern. The Sewing Basics: The first thing that really confuses you is that a lot of tutorials say to measure where you want the skirt to sit on your waist and use that as the circumference. We think that using this measurement would make it impossible to pull the skirt over my hips as your hip circumference is larger. Even though we’re not exactly sure why it’s not a problem, but Kara was able to pull the skirt easily over my hips even though the circumference was technically smaller than my hip circumference. This is probably due to the give the tulle has, and the fact that our bodies is not a perfect circles. Knowing this, you can go ahead and cut your tulle out to match your natural waist. You will want to make sure your lining is a little stretchy too so it can easily glide past your hips. Don’t be discouraged if after you cut your skirt, it seems too big. The elastic band will take care of that for you.
If you are worried and would prefer the mathematical details, brace yourselves as Kara give you details in full.
The math: I don’t want to overwhelm you with math, but using the equation Circumference = 2 x pi x radius, we can pretty much figure out everything we need to. Basically, you just need to divide your waist by 6.28. So if your waist is 28 inches (this is a random number), your radius would be 4.45 inches, or I would round to 4 and a half inches.
How much fabric do you need for the tulle skirt and what bolt width?
Add your desired length to your radius and multiply by 2. This is how wide you’ll need to get your fabric, and how many yards you’ll need for each layer.
Let’s say your waist is 28 inches, and you want your skirt to be 22 inches long. You’re waist radius is 4.5.
22 (length) +4.5 (radius) = 26.5 inches
Multiply by 2 (to get circle diameter)
26.5 x 2 = 53 inches
You’ll tulle will need to be at least 53 inches wide. You’ll need just over a yard and a half of it for each layer. So if you wanted 3 layers of tulle, you would most likely buy from the 54 inch wide bolt and get about 4 and a half yards. (One yard is 36 inches)
If your diameter is more than 54 inches, buy from a 108 inch wide bolt.
Note: Multiply your diameter by the number of layers you want, then divide it by 36 to get how many yards you’ll need. I like buying by the bolt because it’s significantly cheaper per a yard and gives you room for error.
Use your radius, we’ll use 4.5 inches for an example, to create a pattern for cutting your center circle. Place a measuring tape on the corner of a piece of paper and mark 4 and a half inches all the way around. The dots below show the markings if you were doing 6 and a half inches around.
Cut along your dots and use this as the pattern for cutting out your fabric. Be sure to double fold your fabric so you cut a complete circle each time.
Decide what length you want the skirt to be. Use this number and measure from the inside circle out, marking around the fabric so you know where to cut. This will be similar to how you measured and cut the inside circle, except that you’ll need to move you measuring tape along to curve of the inside circle instead of keeping it fixed in the corner.
Once your lining and all your tulle has been cut, carefully stack and pin them. You’ll now baste them together at the waist. I recommend doing between 3-5 layers of tulle. I only did three and it was a little difficult to keep them lined up properly when you baste them, so you may want to do two layers at a time, then baste them all together.
Now wear and enjoy it!
NOTE: The second time Kara made this skirt she basted one layer of tulle to the lining at a time. There will likely be discrepancies in the sizing. By doing one layer at a time, you can add a pleat to the layer of tulle if it ends up wider than the lining. This is nearly impossible to do if you do more than one layer at once.
This site makes it super easy: http://byhandlondon.com/pages/circle-skirt-app
Below is a video following a similar format for the ankara tulle skirt.
When classes get overwhelming, I get into the kitchen to whip up something fun. This week was nothing short of tasty. Experimenting in the kitchen is so therapeutic.
How to make Spiced Thai Coconut (Chicken) Soup ft voiceovers from Brown Sugar Doc, The Podcast - episode Inhale…
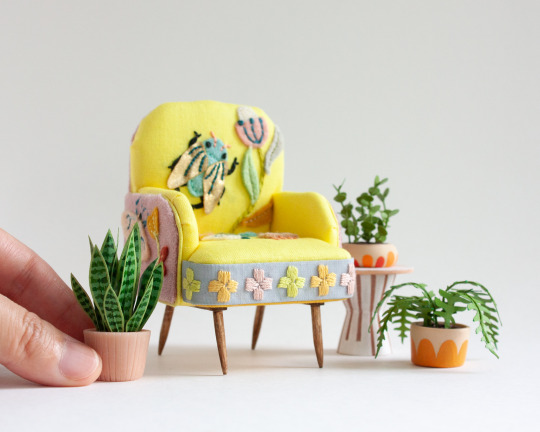
Hi peeps, I recently took a little detour into tutorial-writing-land to create a PDF tutorial for these mini embroidered chairs that I started making earlier this year. Sooo if you want to try creating one of these for yourself (good as tiny shelf decor or perhaps a seat for your resident hamster?) you can check out my tutorial on my website here, or in my etsy shop.
Also, you don’t have to be an experienced crafter to make this! If you can cut out a template cleanly with a pair of scissors, you can do this! What is required is a lot of patience though, because each chair could take days to make…
ALSO, I will be auctioning off one of these chairs (a blue one) on my instagram this coming weekend (Sep 4, 2021) with all proceeds going to a local Toronto non-profit (details will be provided in the insta post ^_^) so if you’d like to have one, but don’t want to make it yourself… that’s your chance!
Ok that’s all, good night/day/dusk wherever you are!
DIY Miniature Embroidered Chairs on Etsy by HoneyThistleDesigns
Hi peeps, I recently took a little detour into tutorial-writing-land to create a PDF tutorial for these mini embroidered chairs that I started making earlier this year. Sooo if you want to try creating one of these for yourself (good as tiny shelf decor or perhaps a seat for your resident hamster?) you can check out my tutorial on my website here, or in my etsy shop.
Also, you don’t have to be an experienced crafter to make this! If you can cut out a template cleanly with a pair of scissors, you can do this! What is required is a lot of patience though, because each chair could take days to make…
ALSO, I will be auctioning off one of these chairs (a blue one) on my instagram this coming weekend (Sep 4, 2021) with all proceeds going to a local Toronto non-profit (details will be provided in the insta post ^_^) so if you’d like to have one, but don’t want to make it yourself… that’s your chance!
Ok that’s all, good night/day/dusk wherever you are!


")