#ledlights
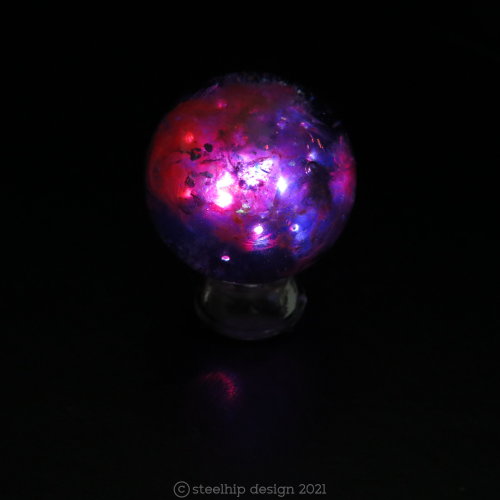
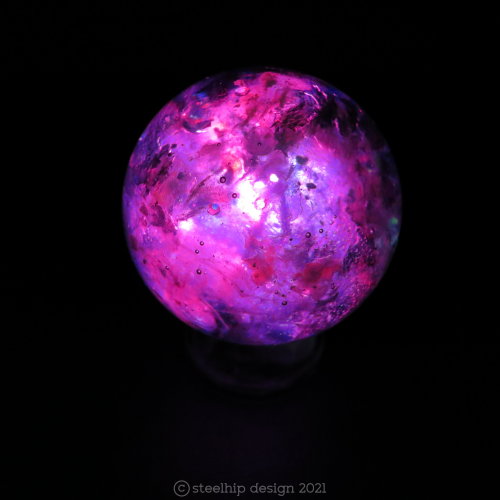
So I’ve been seduced by resin and watching far too many space videos and Hubble images of nebula. I already love using light in my work so I wanted to produce something that looked like a cloud of gas creating new stars within. A star nursery. It’s taken me months of trial and error.
At first glance it may seem like I’ve just dumped a ton of glitter and pigment powder into resin and given it a stir. I wish it was that easy. These have to be made in layers but hard level lines look artificial. So I swish and swirl the resin around until it cures chaotically adding tiny amounts of powder and glitter teasing out tendrils of colour and flashes of iridescence. I use a flattened toothpicks for the job.
The next step was creating the look of stars forming within the cloud. Enter fibre optics. I cut and bundle the strands sealing them together with resin. I then bend them out into all directions. Finally I cut them down to fit into the mold. At some point I insert them into the resin being careful to set the main bunch into the central point of the mold. In some designs the threads are obvious - in others I’ve hidden the bunch using dark pigments.
At this point I have a sphere of resin with a fiber optic “stalk” sticking out. I paint the last layer black and wait for it to dry. I then cut down the stalk and drill it down flush to the resin. The light is produced by a tiny LED widget. Some pieces have static white light that I’ve dyed. In others I’ve used a rotating RGB colour LEDs. I seal the end and set it in another layer of resin. Fortunately they have a handy ring that also makes it easy to turn on and off with a simple twist. It takes three LR621 batteries equivalent to 364, AG1, SR621SW.
I’ve had trouble uploading the videos so I’ll re-shoot tonight for an acceptable file size and format for Tumblr. Unfortunately trying to photograph these spheres is very difficult. They are glass and very shiny. You can’t see the depth and complexity in a photo. Maybe I need a new camera with a good macro setting.
It’s terrifying releasing a new product so different from my normal work. Are these steampunk? Not really but I hope my work transcends a genre. I want to take light from tacky novelty jewellery into an art product for adults to wear that will amaze and wonder. That is my goal with these. I’ve made several of them so they will dominate my feed in the next weeks. I hope you don’t get sick of seeing them. It’s fantastic using colour again but it’s been a serious financial investment in resin, pigments, equipment, exotic glitters/sequins/foils, molds and LED lights. Some I had to buy in serious bulk. It’s impossible to calculate the hours I’ve spent creating and perfecting these.
I’ve used three different width sizes: 20mm (0.86in), 25mm (1in) and 30mm (1.2in). I haven’t put a chain on some of them. I will give options in type of chain or cord and drop length to buyers. Some may prefer no chain. I’m also thinking about creating a stand turning it into a unique ornament when not being worn. I’m also hoping, as my technique improves, to replicate specific nebula like the famous “Pillars of Creation” image captured by Hubble.
Some may not see any “space” reference. Friends have called certain pieces “an ice cave”, “underwater scene” and “storm clouds with lightening”.
They will be available soon in my Etsy shop. Depending on the covid situation I’m hoping the big music festivals in spring and summer will be happening. It would be the perfect accessory for those day/night events.
Post link
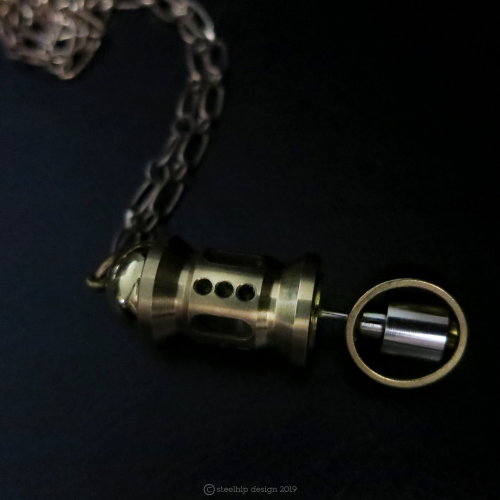
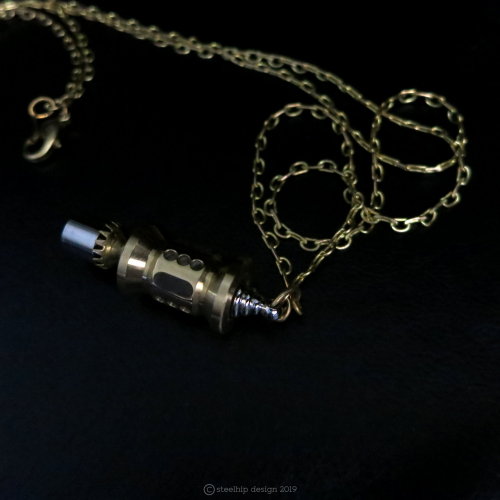
Still playing with my little LED lights and tritium. I found these great paracord beads - expensive but totally worth the money. Beautifully turned brass with “windows” - three vertical holes interspersed with a long window around the whole bead. I sealed the holes and poured resin into the center and embedded the LED leaving the connector post exposed so the battery pack “clutch” can turn on the light.
The top photos are “BlueBot” with a domed cap making him look a little like a certain famous robot that I can’t mention because I don’t want a trademark strike. It can be worn without the battery pack and brass ring. Unfortunately the photos make the light seem much brighter than it is in reality. It just gives off a blue glow.
The middle photos are a design I wanted to revisit with a blue tritium stick in a glass vial and silver tone sleeve. Very cyberpunk. I combined it with a horizontal post hanger with mechanical bits and pieces.
Final piece is a little “Green rocket”. The top has a small silver tone stepped cap on top and serrated exhaust funnel over the battery pack. It can also be worn without the battery pack. Again, the photos don’t convey the light well. It gives off more of a green glow and isn’t that bright in reality.
The LED necklaces are on long chains to be worn mid length. The battery packs are very secure and the batteries can be replaced easily. I’ll list them in my Etsy shop. Etsy doesn’t let me sell tritium (I don’t agree with it but their sandpit - their rules) so if you are interested buying it - drop me a PM. It’s US$125 including shipping/tracking from Australia.
Post link
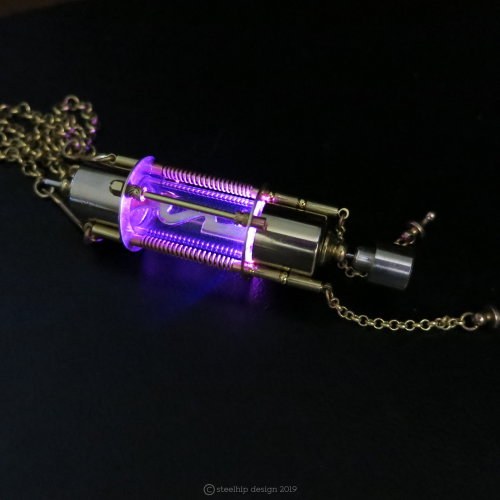
Yes, another gold audio fuse but this one has a pink LED and a bit more embellishment - four struts connected to two bracket rings. It does remind me of an old valve. It has very thin gold plate on the caps and central fuse - apparently it doesn’t degrade which effects sound quality in high end audio equipment. On this one I used a pink LED. The photo does make it look more purple but in reality it is more pink. I don’t like altering product photos too much.
As you can see the light is on when the post is inserted into the silver battery pack. The batteries can be replaced by screwing the top off. When I build these it’s so exciting turning it on for the first time - I was thrilled when I saw this one light up. Perfect for that theatrical costume or just that night out. It will certainly grab attention.
Post link
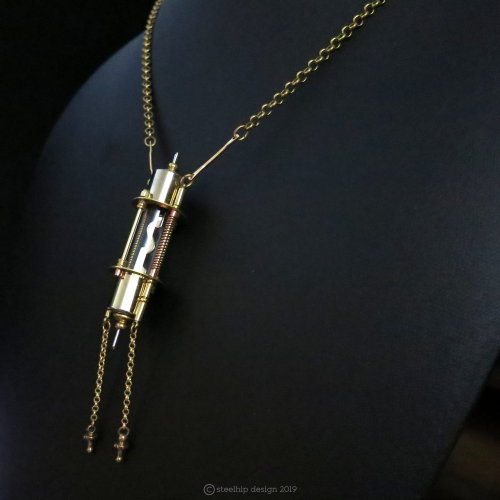
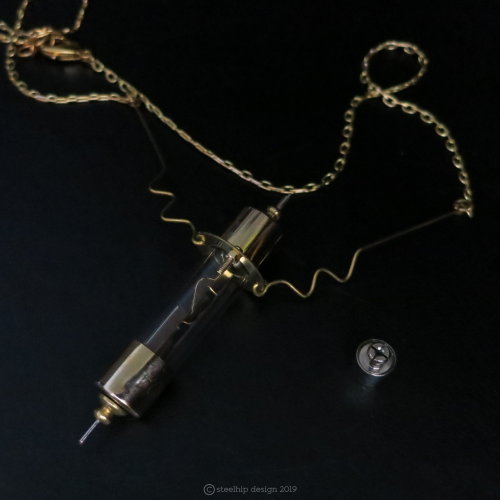
This is made from a gold plated fuse, used in high end stereo for superior sound quality. They have such a great look - atompunk/mid century - I didn’t want to really alter the look. The internal gold plate “S” connection has such great form I couldn’t improve on it. I’ve sold several attached horizontally on a cord for men’s jewellery. Audiophiles love them.
But I wanted to highlight it with light. On the bottom of the fuse I’ve installed an LED with a connection post running through the base cap. The light is turned on by plugging that pin into a small silver tone battery pack. It holds tight to the pin. The battery pack unscrews at the top so batteries can be replaced. The bracket holding the fuse is not fixed so you could turn it up the other way and have the battery pack on the top of the fuse. To balance the piece without the battery I created a similar post on the other end.
Why should fun jewellery, brave jewellery design using light be the domain of gaudy kitsch - plastic flashing Christmas earrings, disposable dance/rave accessories and cheap novelty toys for kids? Why can’t it be used in high quality unique design? Yes, it’s a bit mad scientist and will certainly attract attention whether the light is on or off.
Post link
The Detector
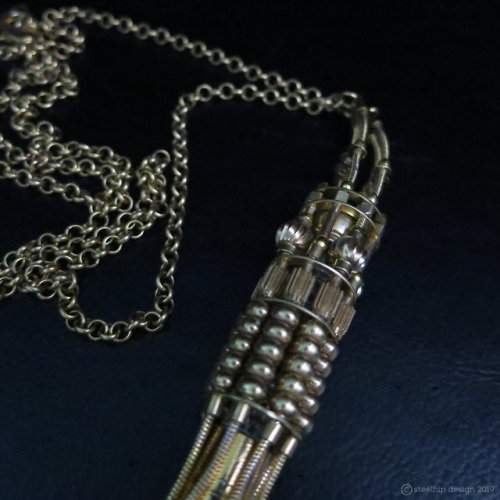
I’ve been overdosing on documentaries about CERN, the Large Hadron Collider, quantum physics/mechanics and proof of the Higgs Boson. As a science illiterate it fascinates me. That massive tube full of magnets, cameras, detectors and liquid nitrogen is an incredible instrument. Simply awe inspiring. These docos play in the background in my studio and I would occasionally look up to see the massive size and complexity of the machine.
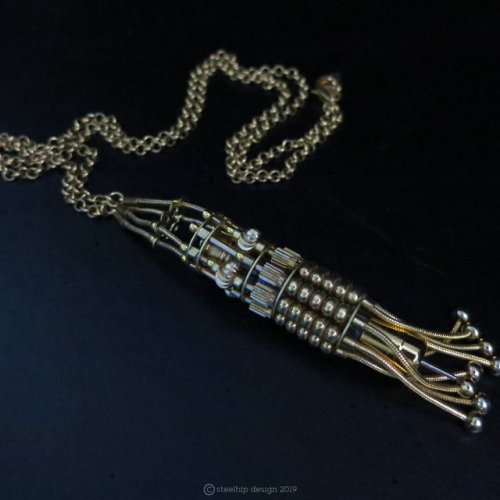
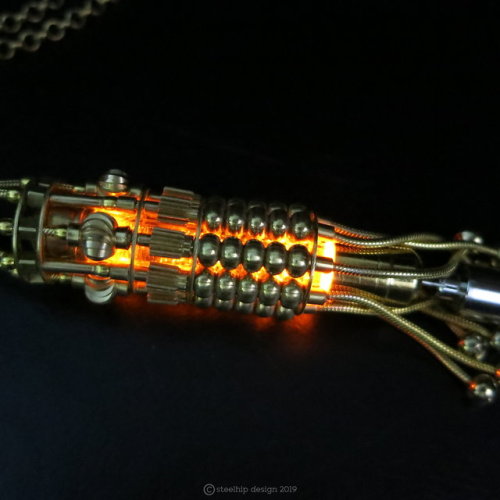
This started with simple flat brass rings with eight holes and some rescued snake chain I cut into eight lengths. This design wasn’t thought out - I just had to wing it. I vaguely wanted a “cage” to hold a glass vial with a Tritium vial in it. Etsy doesn’t like Tritium (their sandpit - their rules) so I sell those pieces off Etsy. It basically glows without the need for a charge - it glows constantly for 10 to 15 years. But I’ve been working with UV resin and recently purchased some tiny LEDS. So I set an orange LED into a gold tone cord cap with UV resin. Then I put a glass tube into the cap and slowly poured resin into the tube stirring it frantically to produce air bubbles. Normally I’m fighting against air bubbles in resin so trying to form and quickly cure them was surprisingly difficult. I didn’t even know if the LED and electronics was going to work after pouring resin on them. The light refracts and diffuses on the bubbles. I was thrilled when it all worked.
Once I had brass beads on the end of each chain length I threaded a range of beads, pinions, tubing and 5 brass rings to stabilize the tube. I still had no idea if the vial would fit through the middle and how I was going to attach it to the structure. This is where the magic often happens - it fit like it was designed with precision. To fasten it within the tube all I had to do was slide another cap on the top of the glass vial and seal it with a screw.
As you can see - when unlit there is a small silver tube, slightly hidden by the brass tassel. To turn the light on - insert that tube into the battery pack - a tiny silver tone tube with a central hole (3/8 x ¼ inch). Once inserted it turns the LED on. Batteries can be replaced easily by unscrewing the cap.
During the day - it’s an unusual mecha deco design - at night with the light - the wow factor.
It sort of looks like a little mechanical cephalopod with those 8 tassel “legs”. I’ve designed this to be worn low on the body - Gatsby length with a long chain. It’s hitched high on the display bust just to show scale and fit it into the photo. If you want it to be higher - I’m happy to alter the chain length.
Post link
Light Spider
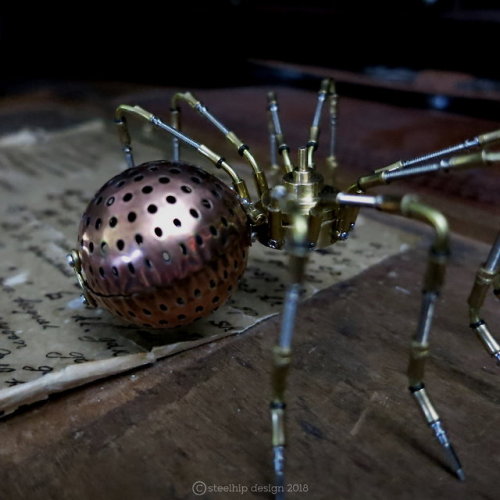
This has been a long time in the making. The parts have literally been sitting on my work desk all year. First problem was creating the abdomen from two perforated domes - something that could be opened and closed. So I found a tiny little hinge and fashioned a swing hook latch. Next major problem was the legs. Another artist who I admire greatly solders watch winding stems for insect legs. I wanted to use the same materials but I don’t copy. So I used sleeves, cord end tubes with loops, tiny rubber rings and brass rods. They are screwed to a brass ring. I did want a lot more detail in the cephalothorax but decided to go simple with a stepped brass finding with brass rings attached underneath for the central screw. It’s more wild wild west than a real representation of a spider.
The glow is from the innards of a LED “fairy globe” sold on one of the big wholesale sites for party decoration. I took it out of the plastic ball and put it in the spider’s abdomen. The light pulses slowly on and off. Batteries can easily be replaced. It doesn’t have a switch so I just break the circuit with a toothpick between the battery and terminal to turn it off.
It’s 3 inches wide, 2 ½ inches long and 1 ½ inches high.
Thanks to all my followers - I really appreciate all of you. I hope you have a wonderful New Year and fantastic 2019!
Post link
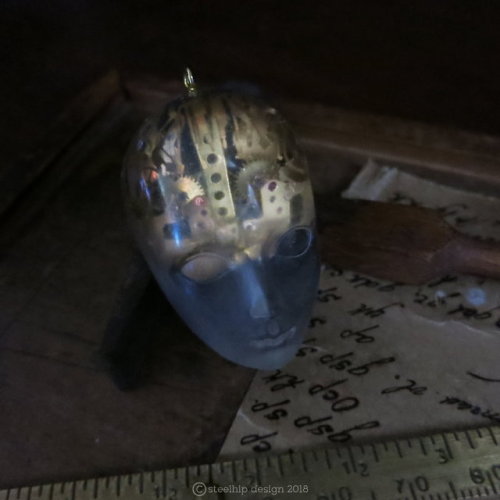
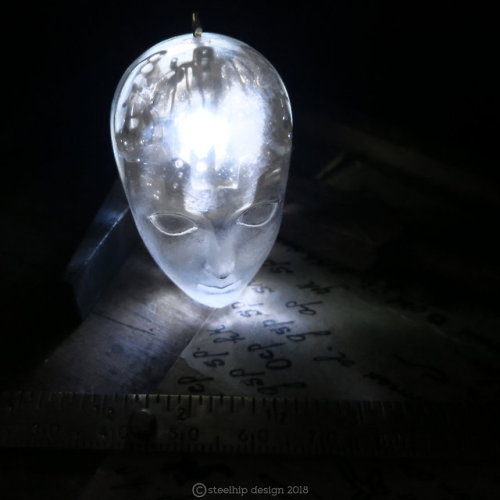
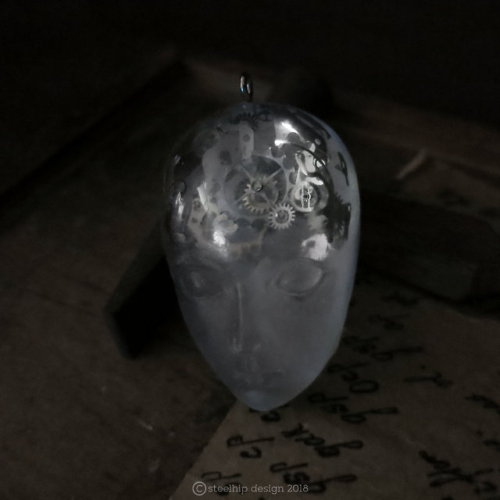
These are just a proof of concept. I wanted to include light in my resin heads to highlight layers of mechanical parts. I was partly inspired by the movies Ex Machina and the classic Metropolis. Trying to find an LED small enough was the first problem - the second problem was making the batteries accessible so they could be changed. A few years ago I found LED earrings - the LED is on the pad and the batteries are in the back. They switch on by inserting the post into the back.
These heads all have five layers of mechanical watch parts suspended in resin. It’s a very slow process with each layer needing to cure 24 hours before the next one can be poured. Some of the pieces have symmetrical parts - others are just random parts. The LEDs were set in the last pour leaving the post exposed so it could be inserted into the battery pack.
There are other problems that I still have to address - the original head mold has been taken from a clay form. It has left a rough texture on the head that looks like it’s been scratched all over. I’m happy that the face comes out “frosted” but I have to polish the forehead so the mechanics can be seen. Resin is very soft - so the polishing has to be manual and it takes a long time. Even after hours of polishing it still looks like the piece has been scratched in close up photos. It’s barely noticeable in real life. I’ve come to the realisation that the texture must be sanded down before polishing. It may be a good idea to use a polished form to make my own mold.
They don’t photograph well and the light complicates it. The magnification and refraction of the internal parts is frustrating. I spend a lot of time positioning each piece for symmetry but it looks like a mess in the photos. If I can’t take great photos - they can’t be sold online. But it’s early days in this artistic tangent. I initially bought the molds to make a head for a static miniature reproduction of a Hugo like automata. Unfortunately they are too big for that purpose.
Post link
Fj loves snow
#couldntgetenough #fj #fjinthesnow #fjcruiser #toyotafj #toyotafjcruiser #snow #wrightwood #night #ledlights #led #hid #ice #offroad #4wdadventures #4x4 #4wd #thisislife
Post link


sol blume 2022
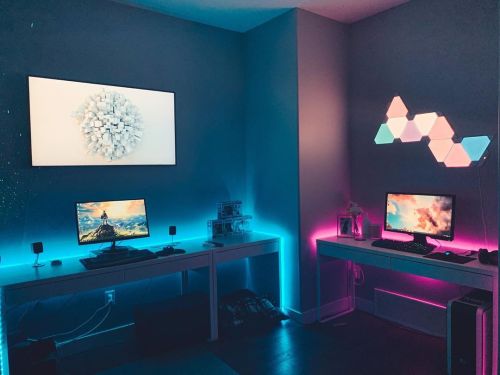
+ gaming den +
•
•
•
•
•
| #gaming #gamingroom #pcgaming #hisandhers #nerds #gamers #ledlights #theframetv #nanoleaf |
https://www.instagram.com/p/CCQOTxrAwxH/?igshid=1gmgbix14114k
Post link
Big thanks to all who came to @flyhk for my launch! “Lost” can be downloaded on iTunes, Amazon, Beatport, Juno etc… Thank you to @toomuchdjs & @dj_cyrus for playing great sets that night too! Big love! #flyhk #hkclubbing #pioneerdj #toomuchdjs #djcyrus #djane #basshouse #bassmusic #lkf #eurasian #ledlights #blackandyellow #itunes #beatport #juno #hkdj #hkgirl #hkboy (at FLY Hong Kong)
Post link
As a birthday present to myself… Introducing Seo, Nao’s cousin
#doll #ledlights #birthday
https://www.instagram.com/p/B6L3XLwJnfk/?igshid=zt62w09iektw
Post link
Nao and all his clothes are finally, finally done!
I tried something new and added *lights*
And yes! I’m on Instagram now, hi!
#doll #sewing #ledlights
https://www.instagram.com/p/B2TC9m2Bqz-/?igshid=vj509sdnvxw4
Post link

levent metro m6


