Heyy lovely people! So I’ve been receiving a lot of ask on how I made all these Lyric Wallpapers that I’ve posted here. So this post will answer briefly how I make my edits! [ might be a little long]
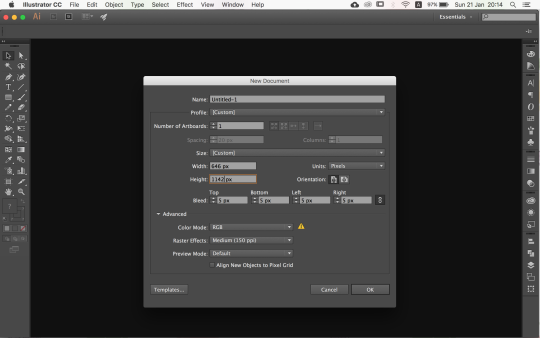
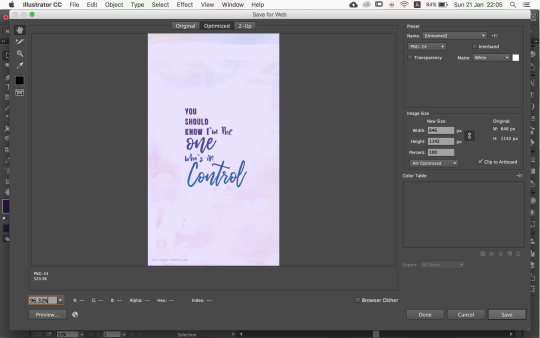
I am using Adobe illustrator on my laptop. It is somehow similar to Adobe Photoshop with some major differences. You can actually use photoshop to do these edit too. Point is, I prefer using illustrator. In the pic above, is the document settings that I use.
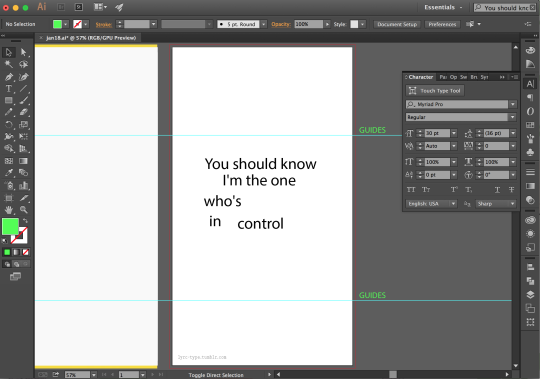
once I have my artboard, I place the lyrics that I’ll be working on. I used to put in ruled guides so the words won’t intercept with the digital clock on the phone’s lockscreen.
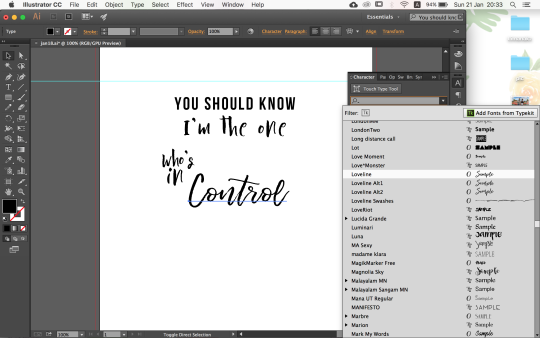
Next, the step that consumed 90% of my editing time; choosing the FONTS!I spent most of the time trying to find the right fonts so it’ll fits my desired layout. Most of the fonts I have were from dafont.com& other free downloads sites. Other times, I make brush lettering, scan it and vector it out to be used as the lyric type.
Once I finally choose the fonts, I’ll make several changes to the type characters so it’ll fits and make it look Awesome!I wasn’t too used to this step when I first started out but after a period of timeexperimentingI got used to the software’s tools. Well, at least the ones I need for the edits! hehehe
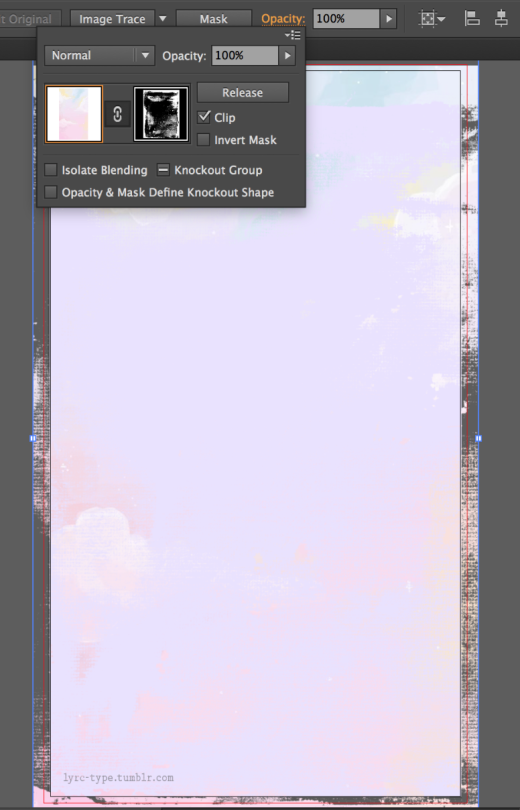
Here’s the fun part; Making the background! It’s simple actually. Most of the time I find relevant photos & textures on the net. Other times I used the photos I took. I am BIG & CrazyaboutTEXTURES.I LOVE putting in textures for my backgrounds. Not sure why but I just do!
So, for a simple edit, you can find one photo you like and put it as a background. However, what I like to do, is to combine and layer a few images because I’m just that extra… Anyway, when I first discover how to make mask on illustrator I was super amazed. I didn’t knew I could do something like that on illustrator & not just photoshop. Made my editing easier cos I didn’t have to edit the images on photoshop and import it back to illustrator. [ I might not makes sense to you now am I?]
Finally! Once I’m satisfied with the design, I’ll export out my work through ‘save for Web…’ in.png With that, we’ve completed one lyric type wallpaper!
I hope I’ve answered to most of you curious users. This is how I make MY edits.There are many other ways on how you can make yours. If you are looking for a very simple way to make your own wallpaper, you can try outCanva on desktop or Mobile [ requires Sign Up but the basic stuff are still free ] or you can download mobile photo editing apps such as April - Layouts Photo Collage,Snapseed , Pixlr - Free Photo Editor [available for iOS & androids] There are many more but those are few of my favs.
That’s it then! If you need any help in making your own wallpaper or have any editing questions just slide into my ask, message & replies. Just no more request please. Hahaha. Have a good day my good people xX
How to video is live~ https://www.patreon.com/posts/video-large-14020515 If you’ve ever wanted to see how I make these big necklaces now’s your chance! Support my patreon page and get access to behind the scenes and in progress photos as well as my first ever full on tutorials. For this video you must be in the $10 tier, but I will also be adding a short tutorial with photos in the $4 tier~ Thank you for your support and happy sculpting!
There is a $4 image only one and a $10 video one with timelapses of me working and some real time video of how I shape the crystals. If you pledge now you also unlock my previous tutorials on how I make my large tentacle necklace pieces!
Thanks to everyone’s support so far, it’s been great to be making these how to videos.
Hey y'all! Here’s part 2 of the making of my White Lotus Pai Sho Piece!
In this video, I fill in more of the details of the White Lotus flower and it’s petals. Mostly just freehanded and with acrylic paints. Stay tuned to part 3 to see the finished piece!
Welcome, and Thank You so much for your interest in my posts @manifestationispowerful Please follow me and help this profile grow in Instagram and Tumblr. I hope you enjoy the contents Here you will find inspirational and motivational quotes and affirmation everyday. Learn How Manifestation Can Change Your Life!❤️ ❤️ ❤️ ➖➖➖➖➖ Get your Soul Reading Report for free Now. Click the link in the bio in IG ❤️ ❤️ ➖➖➖➖➖ Sending you LOVE & LIGHT.. Have a great day! ❤️ ❤️ ➖➖➖➖➖ Save this post and share it with a friend who might need it. ❤️ ❤️
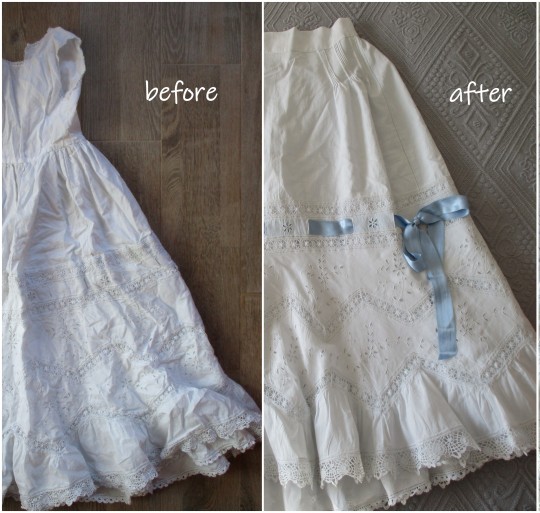
El mes pasado compre este vestido de niña en un mercadillo de segunda mano en Barcelona pero en realidad se trata de una antigua enagua transformada que le cosieron un cuerpo de niña. Si te fijas el propio ‘faldón’ tiene varios pliegues para reducir su longitud.
Tras descoser todos estos pliegues y el cuerpo, tocaba reducir la cantidad de tela en la cinturilla, así que cosí unas pequeñas lorzas en la parte anterior y fruncí el resto de la tela para la parte posterior.
Por último, saque el patrón de cinturilla haciendo una pequeña curva en la parte delantera para que visualmente enfatice más la cintura.
I hope this helps you. I did this because I was searching around the Internet trying to find how to curl a short wig for my Bilbo cosplay. But I haven’t found much so here we are :)
First of all the things needed :
a curling iron
Various pins {large amount} (Bobby pins, large hairpins and some smaller pins to pin the hair up)
A comb
Hair ties ( I always use ripped ones bc they’re easier to use on wigs)
Scissors (I cut and styled it at the same time. It’s not really necessary to do it like this but I was short on time)
A lot of patience
And that’s it.
For the wig :
I used a cheap wig I found on ebay. Since bilbo has shorter hair than the wig, i cut the wig in various places.Pay attention to your head form and always always try the wig on after you cut to see if it fits. I have the luck to have the same measurements as a wig head but still, see if it looks good.
(sadly I didn’t make a pic of the cut version sorry). Depending on what character you want to cosplay you should cut the wig the way the character has his hair.
Tipp: It’s easier to cut it before hand because then you won’t have trouble later on.
Remember you still have to curl the wig ! So don’t cut too short !!
After you cut your wig it’s important to have a reference pic to use ! On how the curls should turn out and how to style it
My reference :
It shows you what the curls are supposed to look like on my cosplay ! And since bilbo has not really curly hair I decided to not make curly curls…
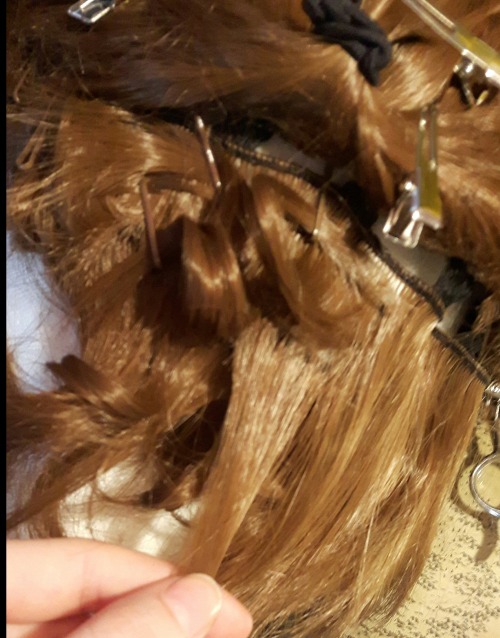
Divide the hair into small sections
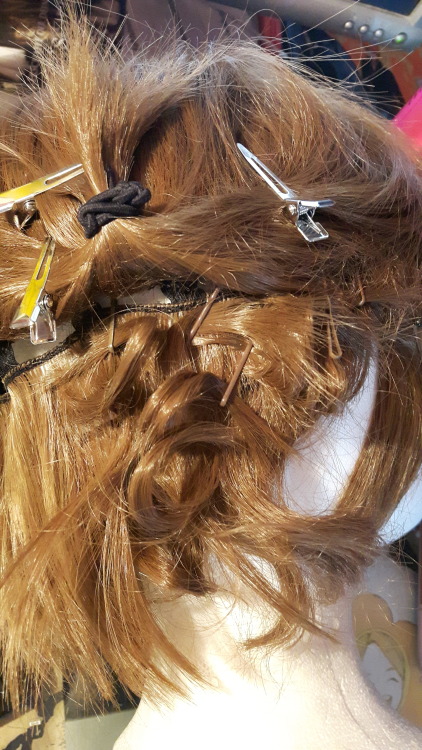
As you can see in the picture I already begun curling but that’s not important.
To begin curling you need to divide the hair otherwise you will have a mess.I used hair ties to hold the hair up and pinned up the sections that were in the way with some smaller hairpins. I always devide the parts by the beginning of the tresses as you can see in the picture.
Beginning to curl
After you did all the dividing take a small part of the hair, comb it so they all go in the same direction and heat it with the curling iron. I go over it for two times to be sure the hair is hot enough.
Curl the hair
take the curling iron and curl it gently.
After i curled the section it didn’t really produce a perfect curl but remember it’s synthetic hair it does not bend like real hair.
So for the curl to stay in…
Take the section and twist it
After the hair is hot enough you twist the hair in a curl. I always made a small loop out of the hair because I didn’t want the curls to be too large. But you can also twist it in other ways :)
Pin it up
In the next step you pin the section you curled and twisted up so it will stay in place while it cools down
You have to wait for the curls to cool down befire removing the pins so after ca.10 minutes you can take the Bobby pins out.
Tipp : I always used all Bobby pins I had until taking out the pins I already used. So I could be a 100% sure that they had enough time to cool down.
Now you only have to repeat the steps ! Until your wig is done !!
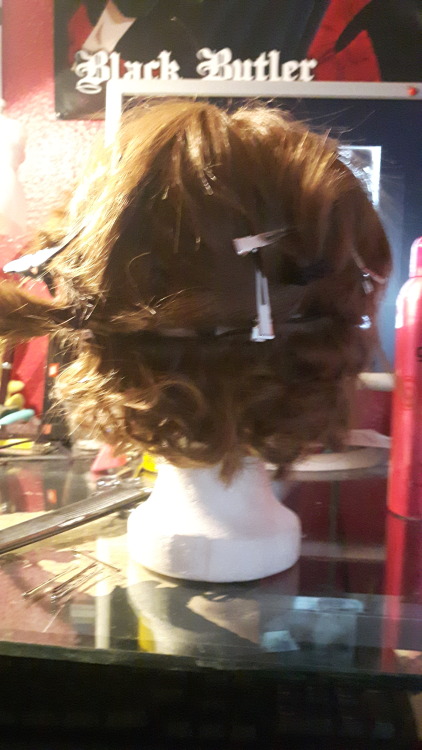
(Sorry for the quality I had to hurry)
That’s how my wig looked like after I curled the first 3 devided sections. In the end this was a bit too curly in this area so I brushed the curls out a bit. I would also recommend to brush the wig gently and once with a wide comb to make the curls look more natural
Enjoy the wig
This is how my wig turned out :
Of course the front part is styled and the whole wig got sprayed with hair spray so it will stay in place.
Hope you enjoyed the tutorial and found it helpful